This section is a fairly detailed glimpse into how I build guitars. Please follow along as I work on a Concerto model—my smallest size—that features a few Master Grade options like yellow and black purfling lines, Ebony binding, custom position markers on the finger board and a wild rosette and head plate. It’s an exciting guitar with some very select Master Grade Flamed Koa for the back and sides. There might be some other surprises along the way, so check it out.
I won’t pretend my construction method is the best or only way to put a guitar together, it’s just the process I have adapted from the impeccable foundation I received by learning from master luthier, Charles Fox. Blending this foundation with the ground-breaking work of Trevor Gore—and his modal tuning strategy—has proven to be a winning combination, as it produces guitars that are highly responsive and have consistently great sound. A big thank you has to go out to the many hippies from the late 60’s and early 70’s who started this movement of independent guitar making, and were humble enough to share their experiences and knowledge with the rest of us.
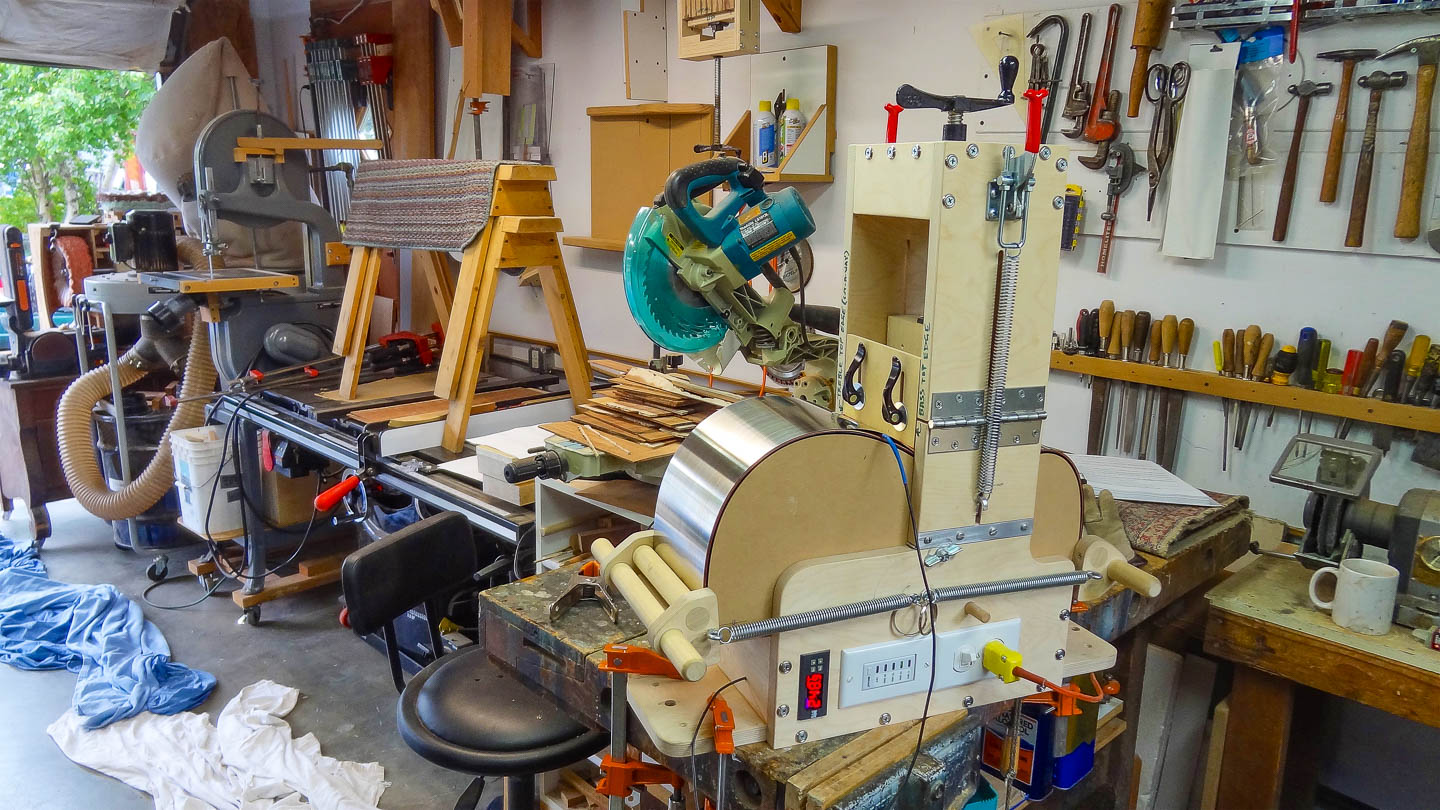
I’m lucky enough to have two building areas in my workshop. My main room is home to most of my machines and tools, and most of the construction takes place in there. I also have a room where I keep the guitar as it’s being constructed and store all the raw materials used to make guitars. Much of the finer detail work is also done in this room. I condition it to maintain a humidity level of 44%. This is very important for the guitar to enjoy a long and happy life after being sent off to its new home. A guitar will expand and contract with changes in humidity, and the 44% is a happy medium of the conditions it might experience wherever it lives. The owner, however, still needs to be vigilant and take an active roll in keeping the guitar out of temperature and humidity extremes.
This Page
HOW I BUILD GUITARS
MATERIALS
NECK & HEADSTOCK
HEADSTOCK: HEADPLATE & VOLUTE
SIDE BENDING
THE RIM
KERFED LINING
CUTTING THE RIM TO WIDTH
SIDE BRACES
TOP & BACK PLATES
ROSETTE
BRACING THE TOP
BRACING THE BACK
THE BOX
BINDING & PURFLING
FITTING THE NECK TO THE BODY
THE FRETBOARD
HEADSTOCK SHAPE, TUNER HOLES, BINDING & PURFLING
GLUING THE FRETBOARD TO THE NECK
SHAPING THE NECK
SHAPING THE HEEL
SHAPING THE VOLUTE
THE BRIDGE
FRET JOB
THE FINISH
ODDS & ENDS
SET UP & FINAL DETAILS
MATERIALS
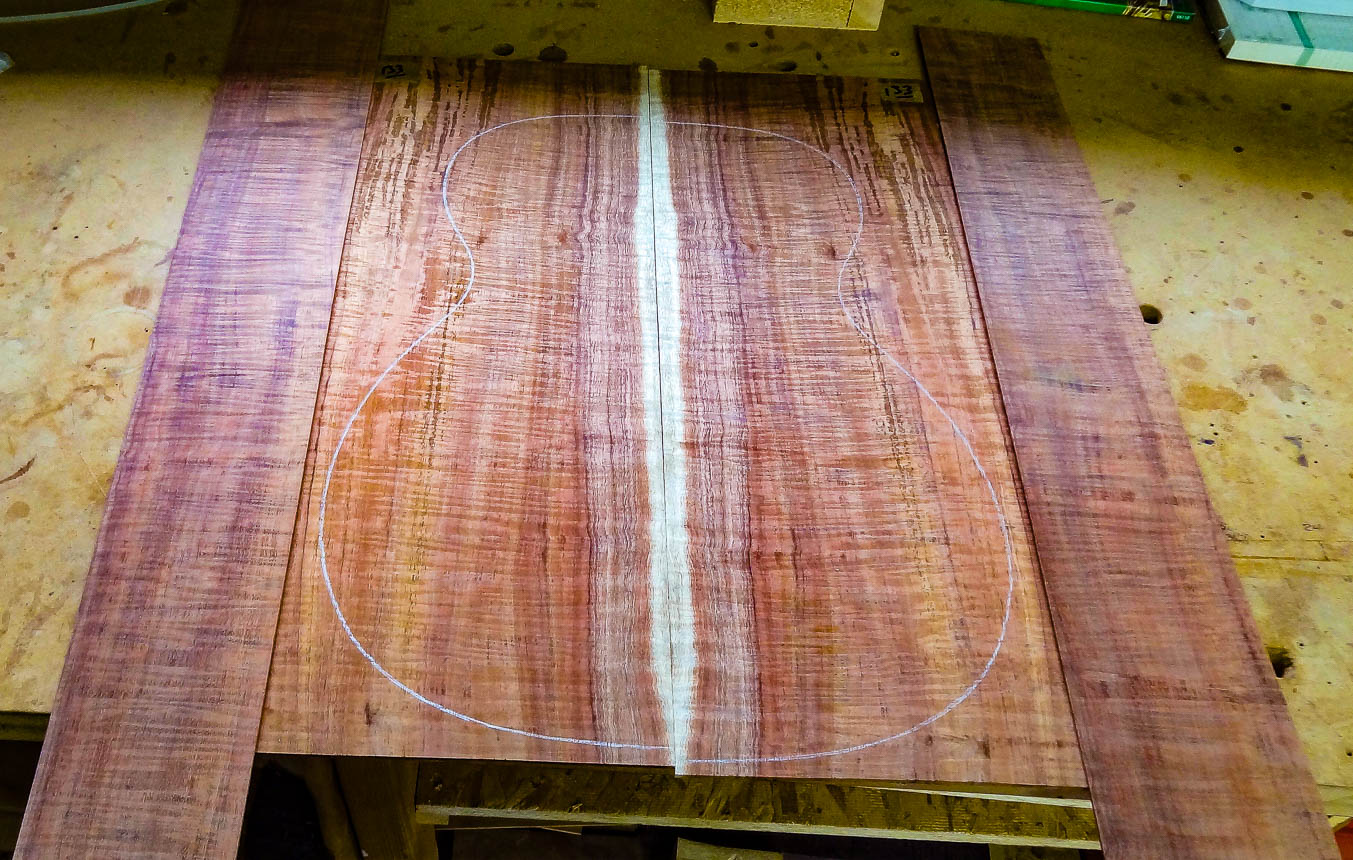
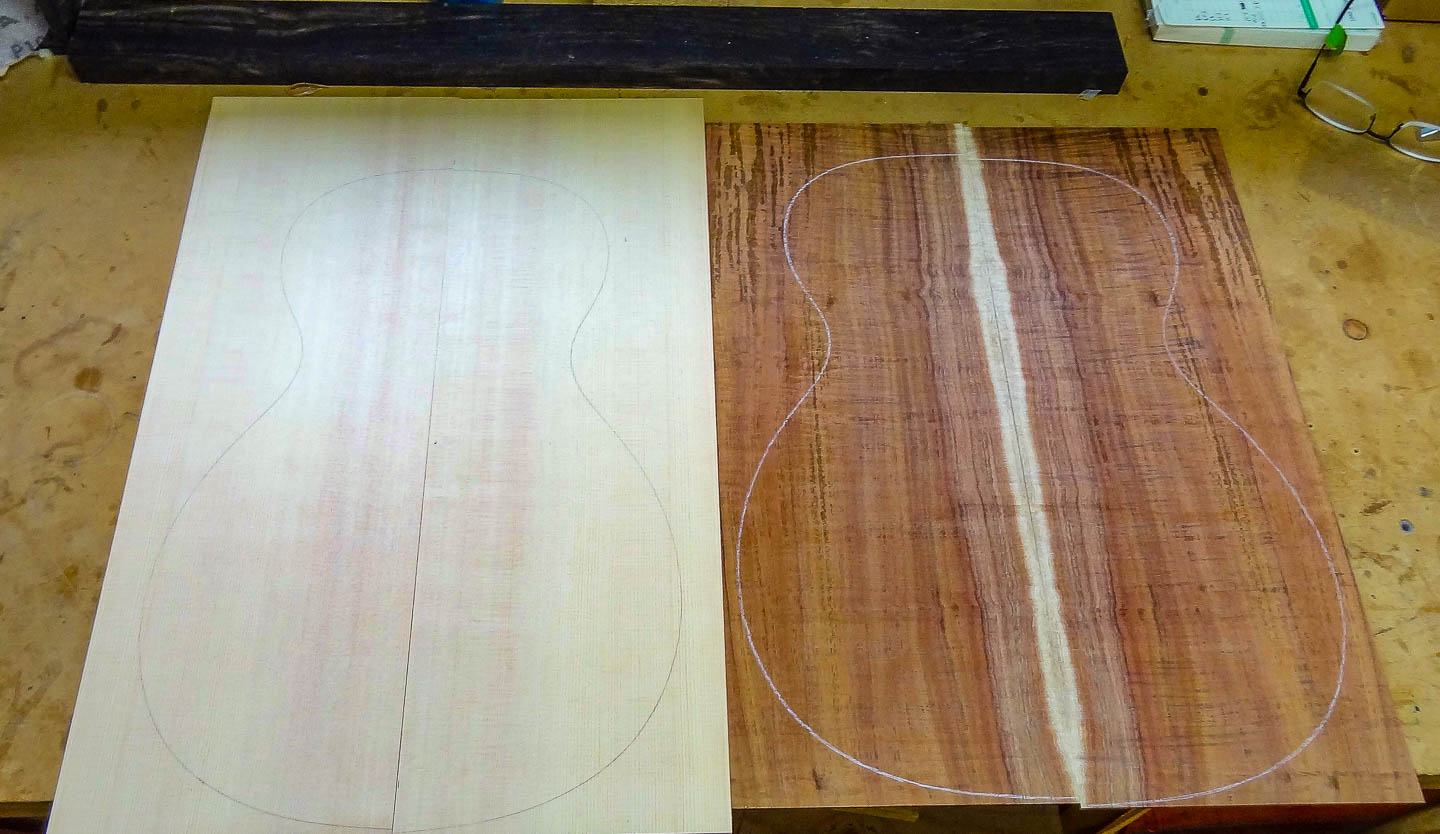
As mentioned, this is a super-special back and side set of Master Grade Hawaiian koa. It’s sustainably harvested by a very nice couple at @koatonewood. The sawyer, Josh Johansen, is committed to protecting the natural forests of Hawaii, and I feel privileged to breathe a new life into this set of guitar wood. It has lots of tight fiddle-back figure and a beautiful sapwood stripe down the middle of the back. I love to feature sapwood on my guitars when I can, it’s natures way of adding visual contrast. Finding back and side tone-wood with sapwood is often very difficult.
The soundboard (or top) is Sitka spruce with even color and some wonderful silking in the grain. It’s one of the lowest density tops I have, so it should ring out with tons of volume for a smaller guitar. It’s great to source some of my wood from a sawyer in my home state. Alaska Specialty Woods is located in South-East Alaska and also practices sustainably by only harvesting dead-fall spruce trees. All of my internal bracing material also comes from these people.
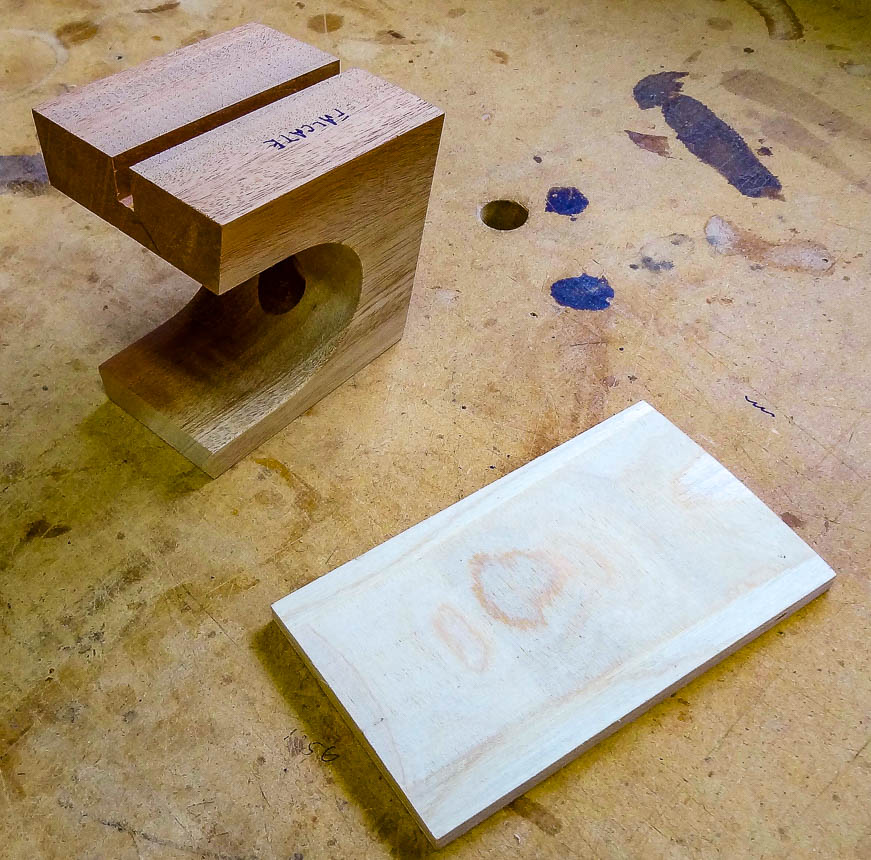
I make certain things like the neck block, tail block, kerfed lining and others in batches. These parts are more or less identical for all my guitars, and it makes sense to do many of them at once while my machinery is set up for the operation. I can either spend an hour to do one piece, or an hour and a half to make ten of them and have them on hand. When I reach a phase of the construction requiring these very involved parts, it’s so great to just keep tooling along without having to break the workflow.
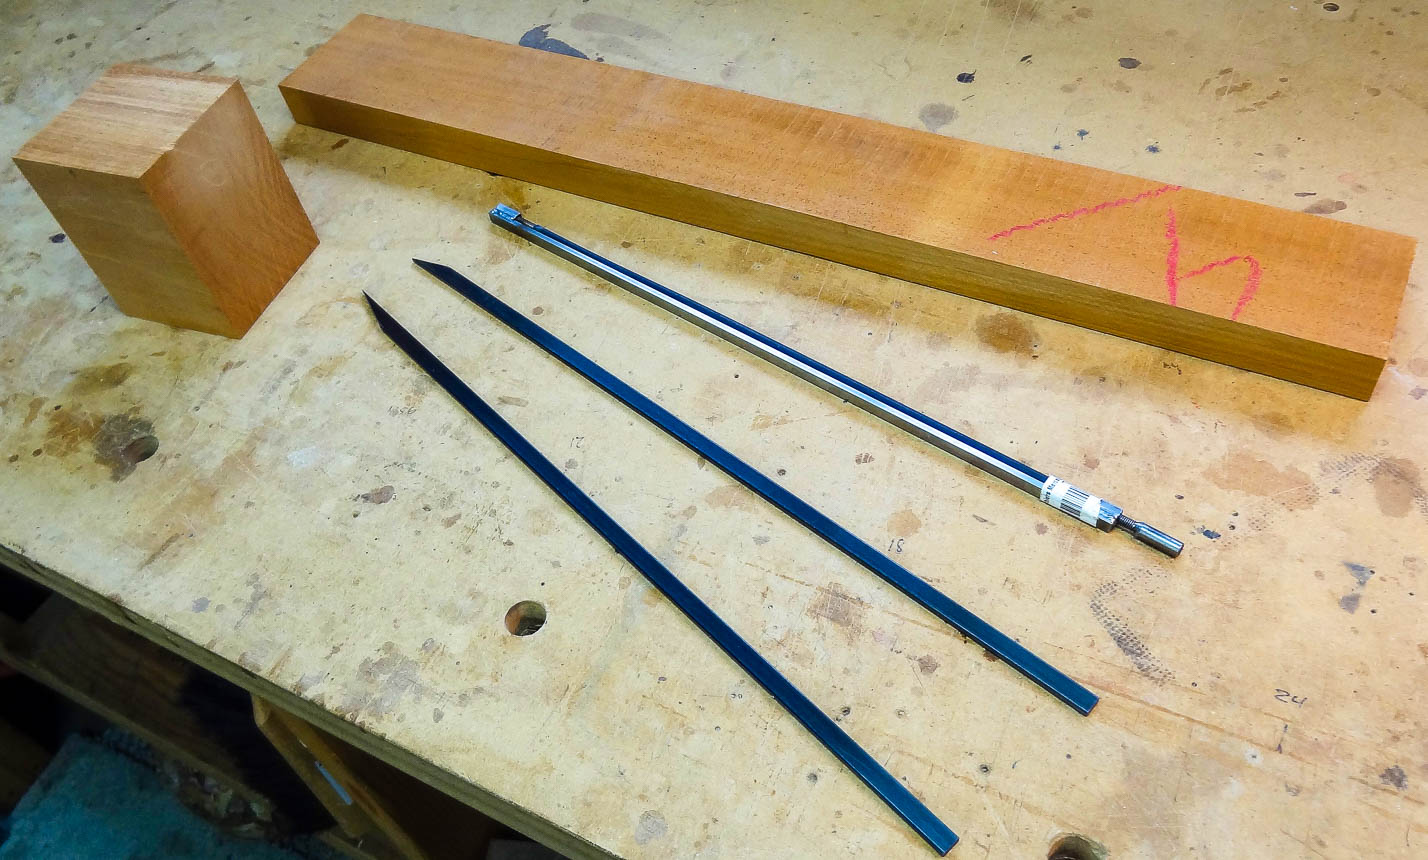
There is also fret wire, tuning machines, bone for nut and saddle, carbon fiber beams, truss rod, neck blank, binding & purfling and other odds and ends.
NECK & HEADSTOCK
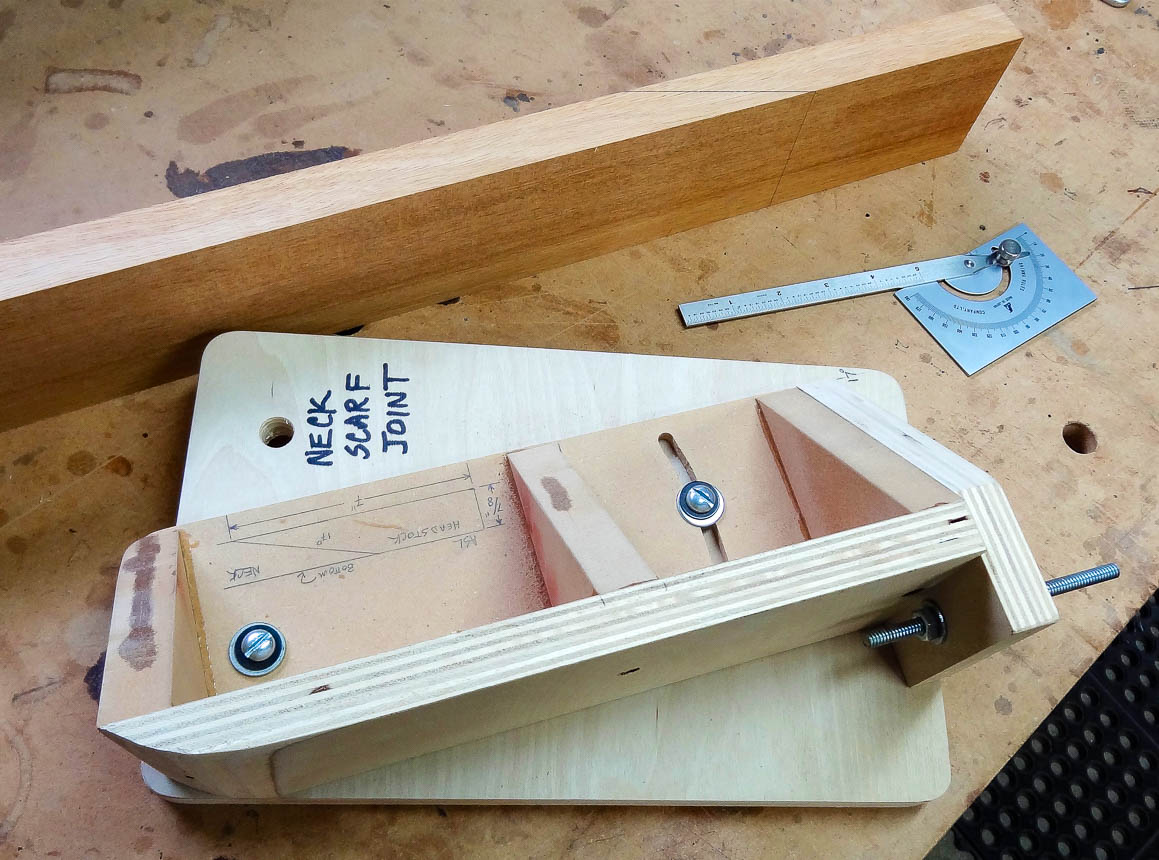
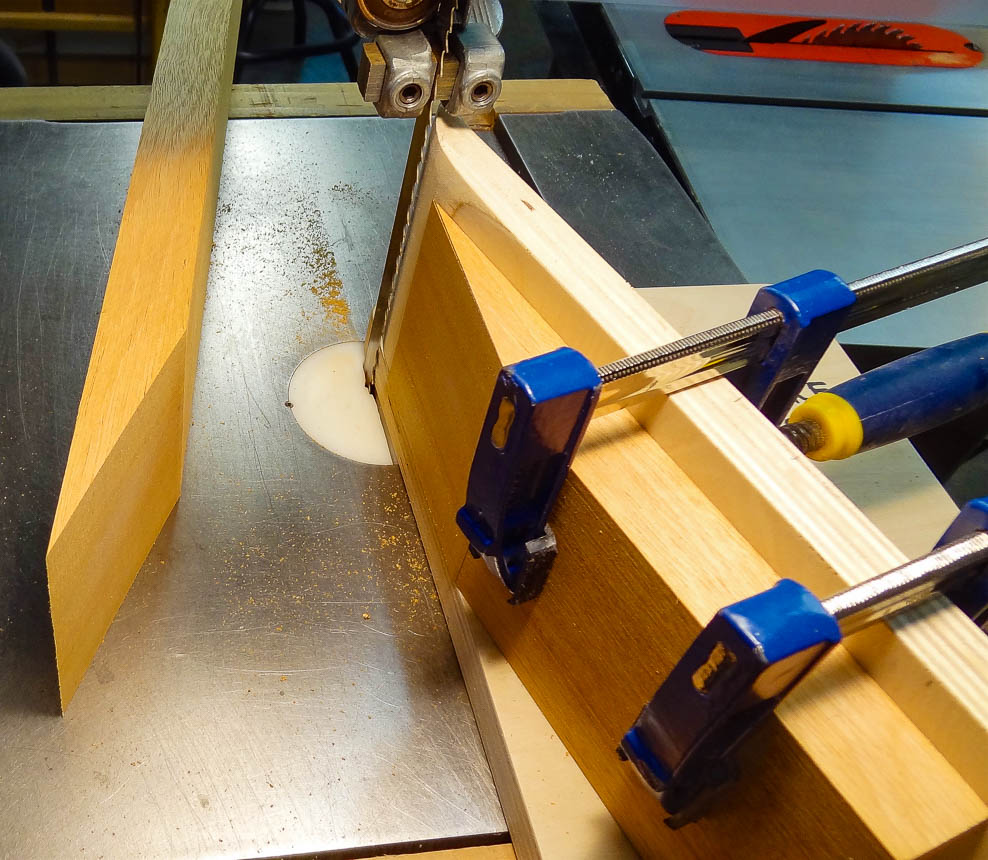
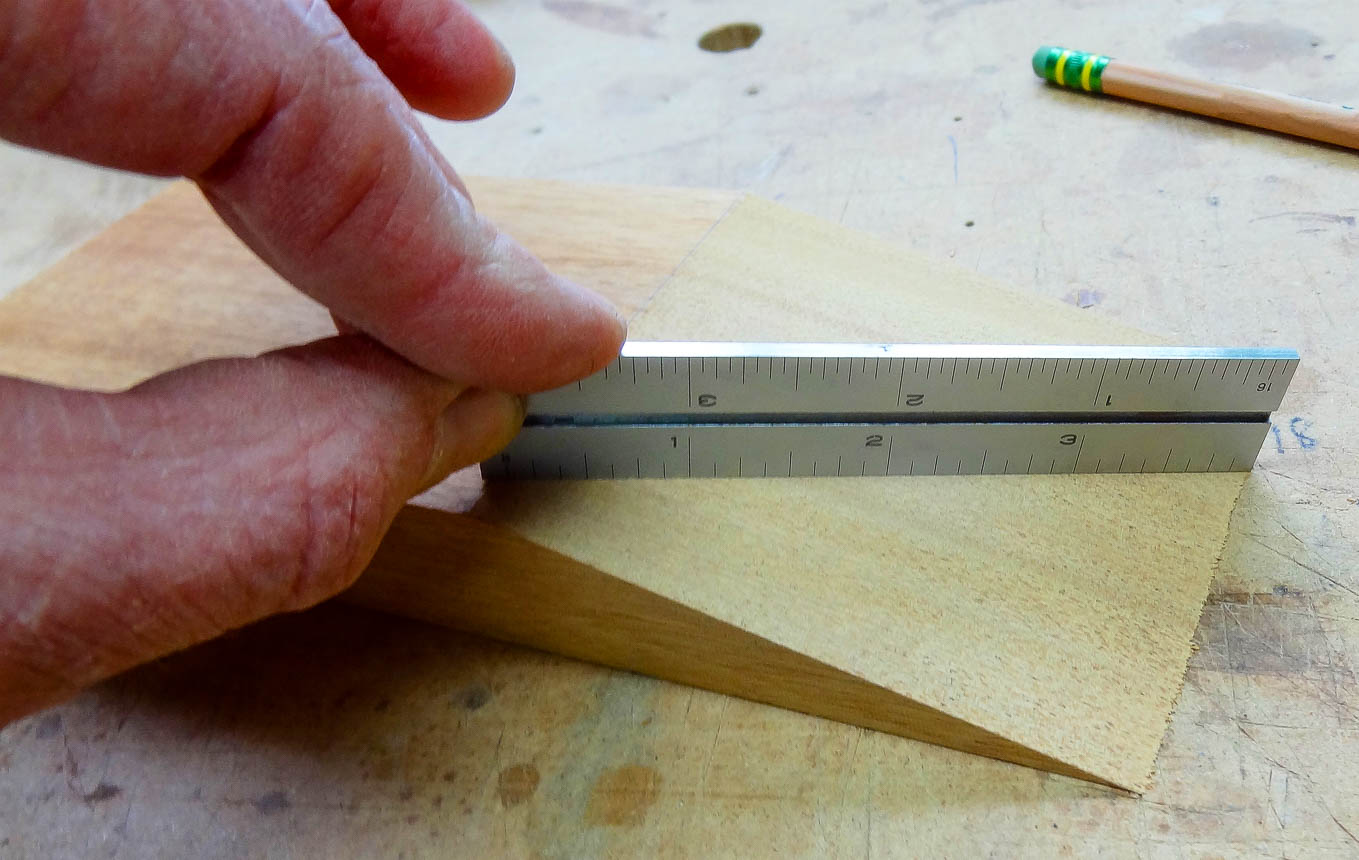
The neck and heel parts begin as over-sizes blocks of Honduras Mahogany. After squaring them up, the scarf joint that separates the neck from the headstock is laid out and cut on the end of the neck blank with my band saw and one of my many home-made guitar making jigs. I learned guitar-making from the wise master builder Charles Fox, and have adopted many of the techniques and jigs he developed. All said, I have well over 170 jigs, patterns and templates that I’ve hand-made to help me with guitar construction; many of which you’ll see along the way.
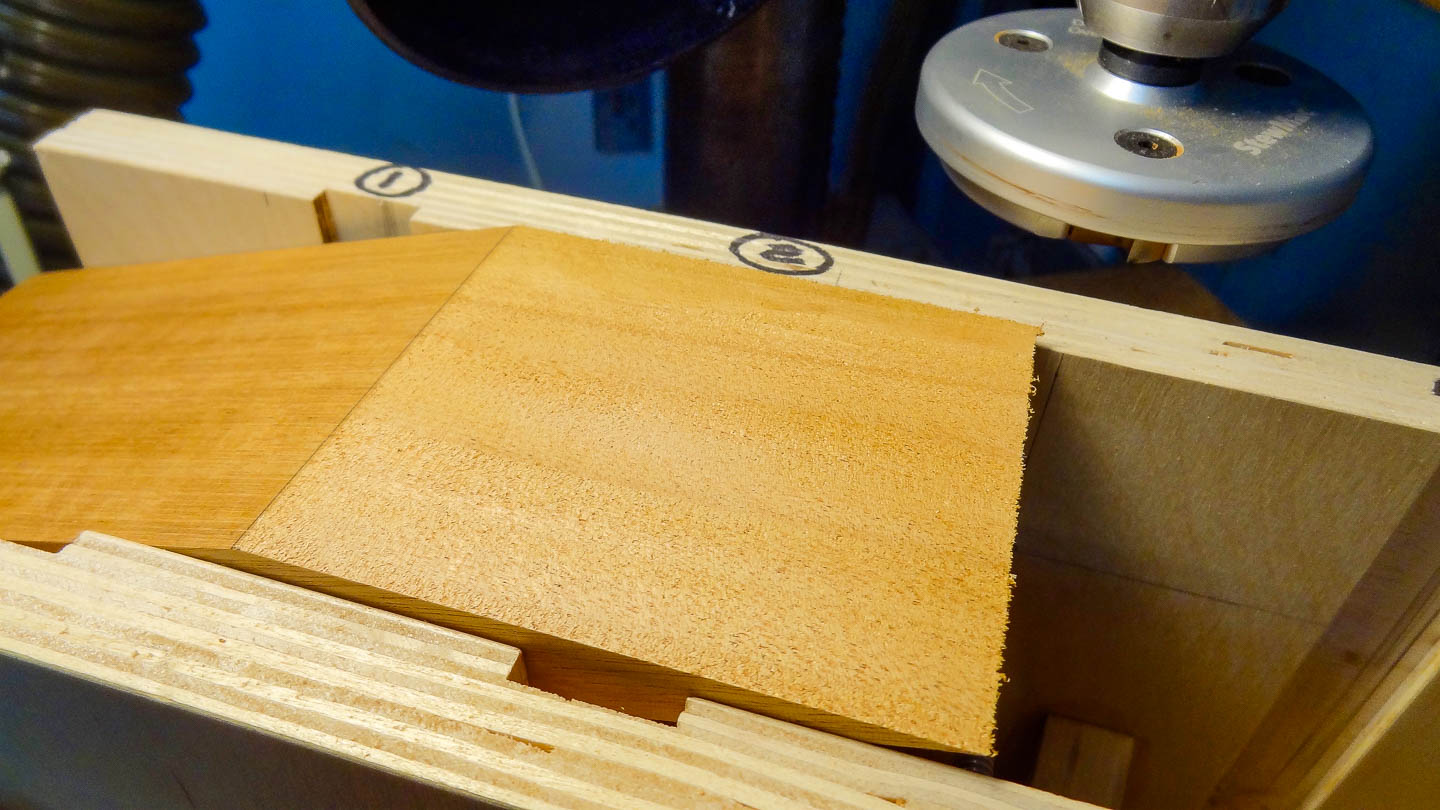
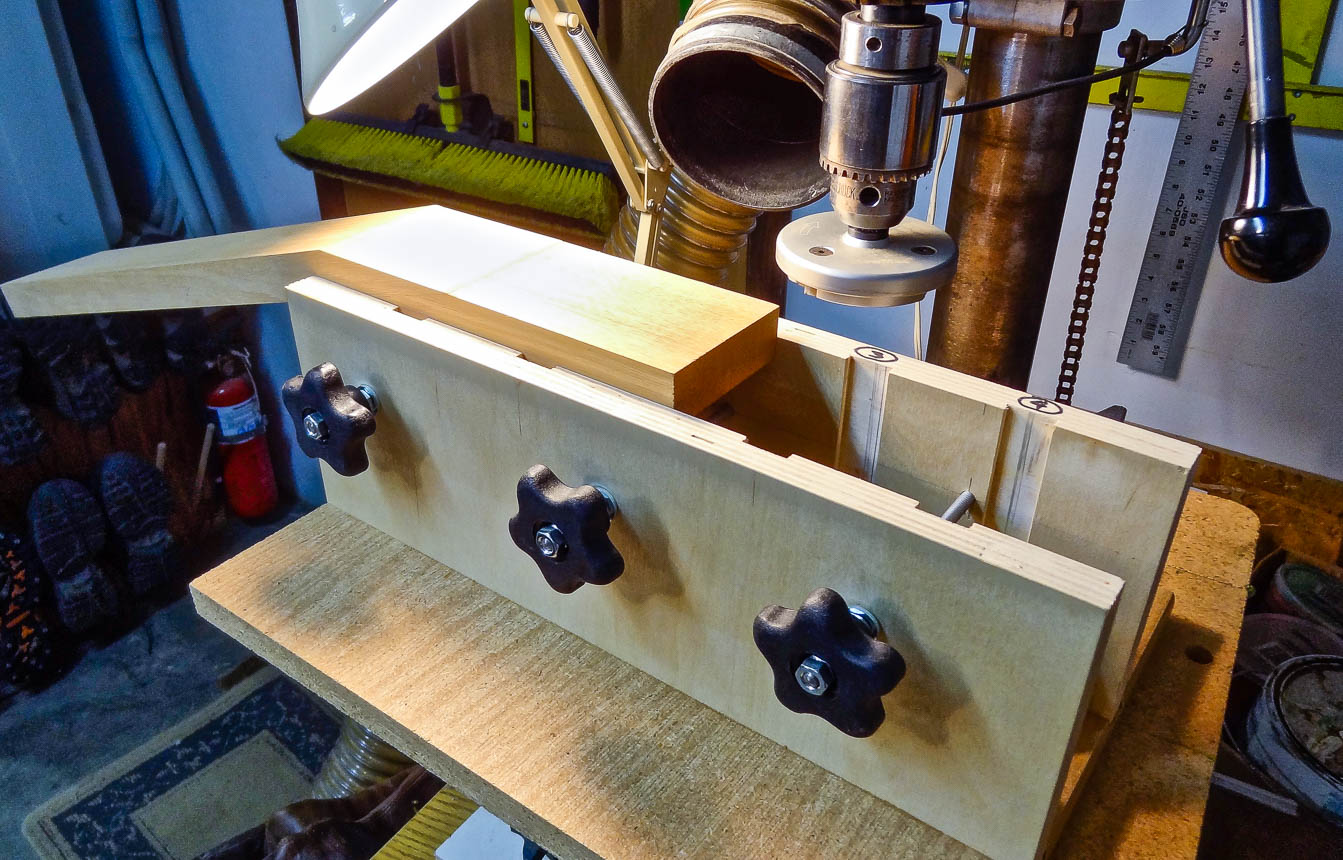
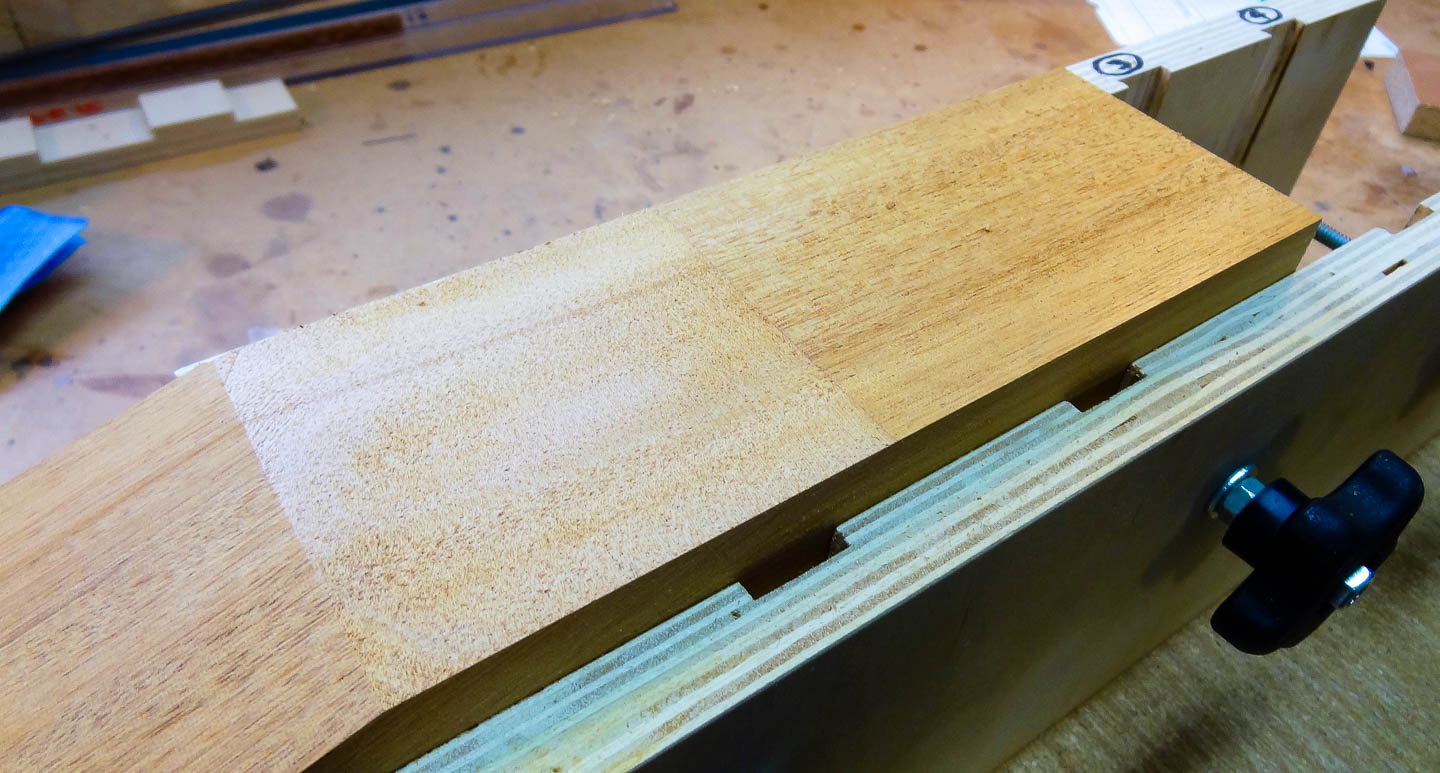
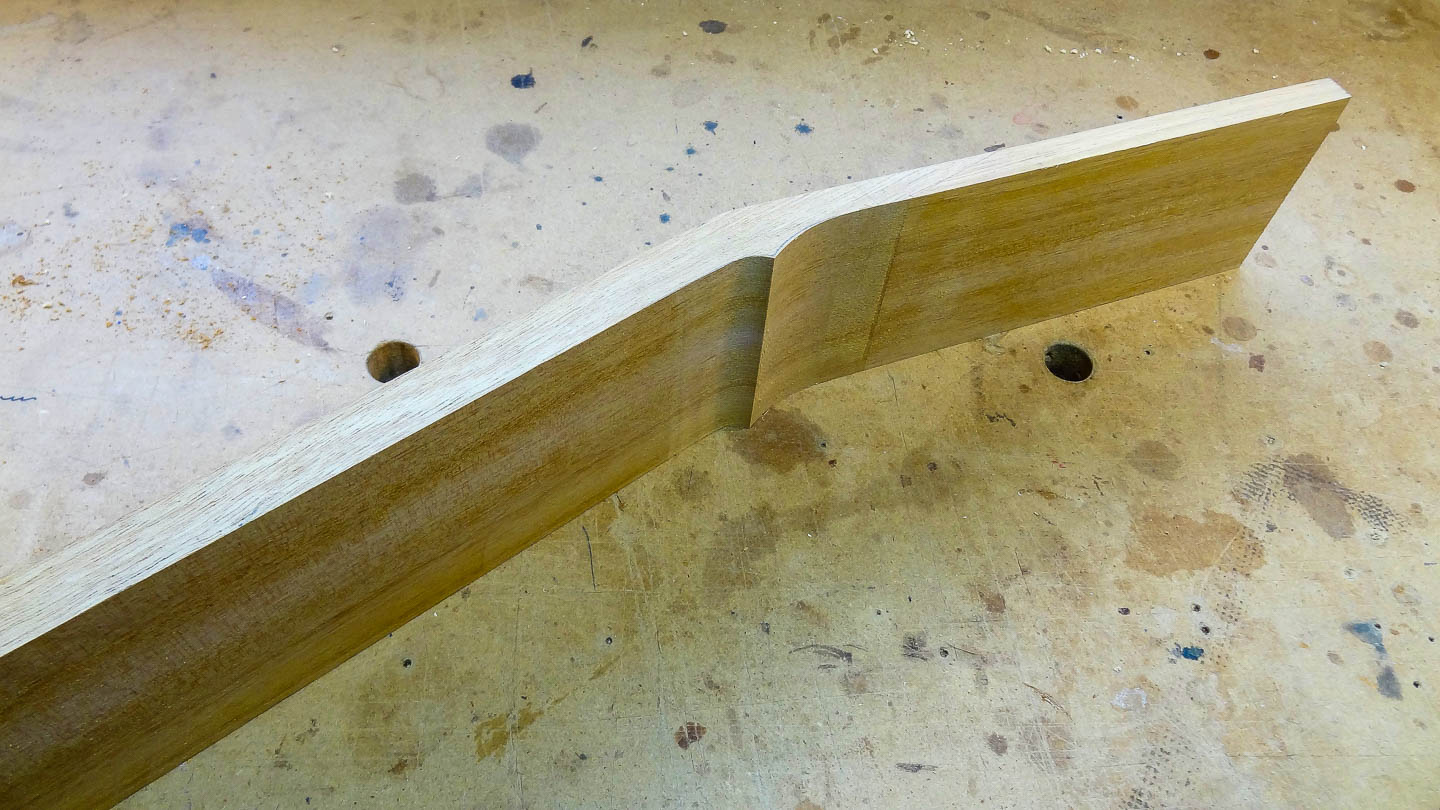
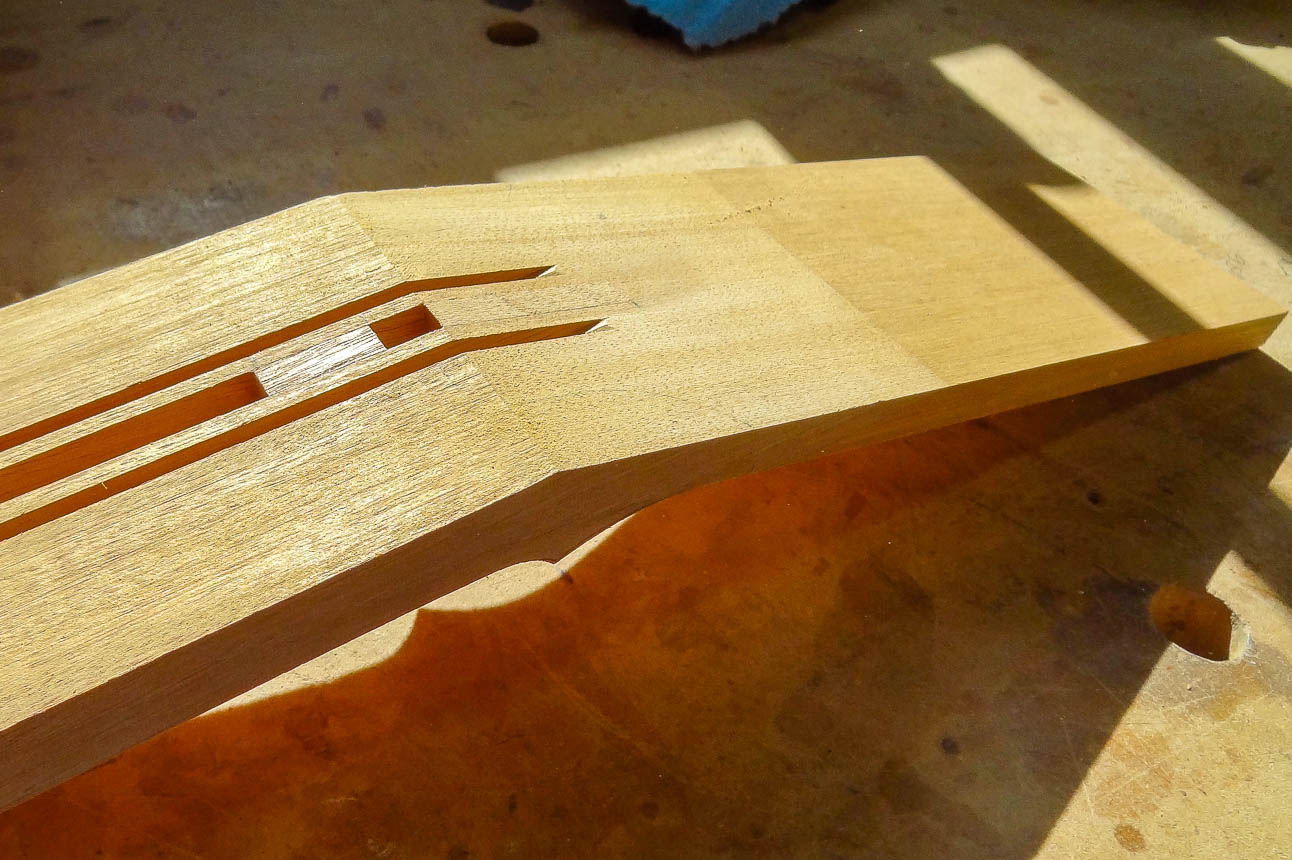
The headstock is then put in a jig to level the rough cut surface with a mini planner attachment on my drill-press. The mating headstock and neck surfaces are hand sanded even further to create perfect gluing faces, and glued together with an elaborate set-up on the bench to keep everything square and in alignment. Once the headstock is glued on, the top face is leveled with the drill press planner again. The excess thickness of the neck & headstock are cut off on the band saw and the drill press planner is used to fine-tune the rough bandsawn surfaces at the correct thickness and taper. The area of the volute is left bulky, and then shaped into a point with a spindle sander and hand tools.
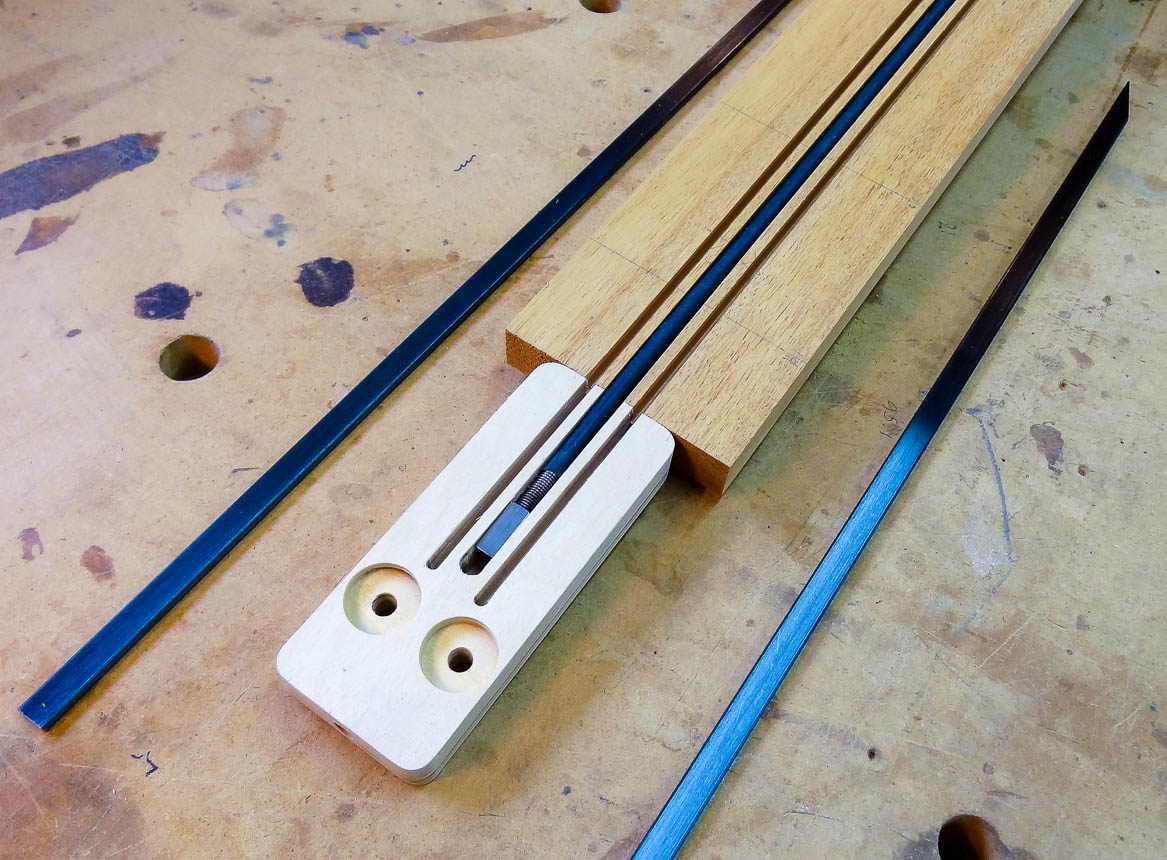
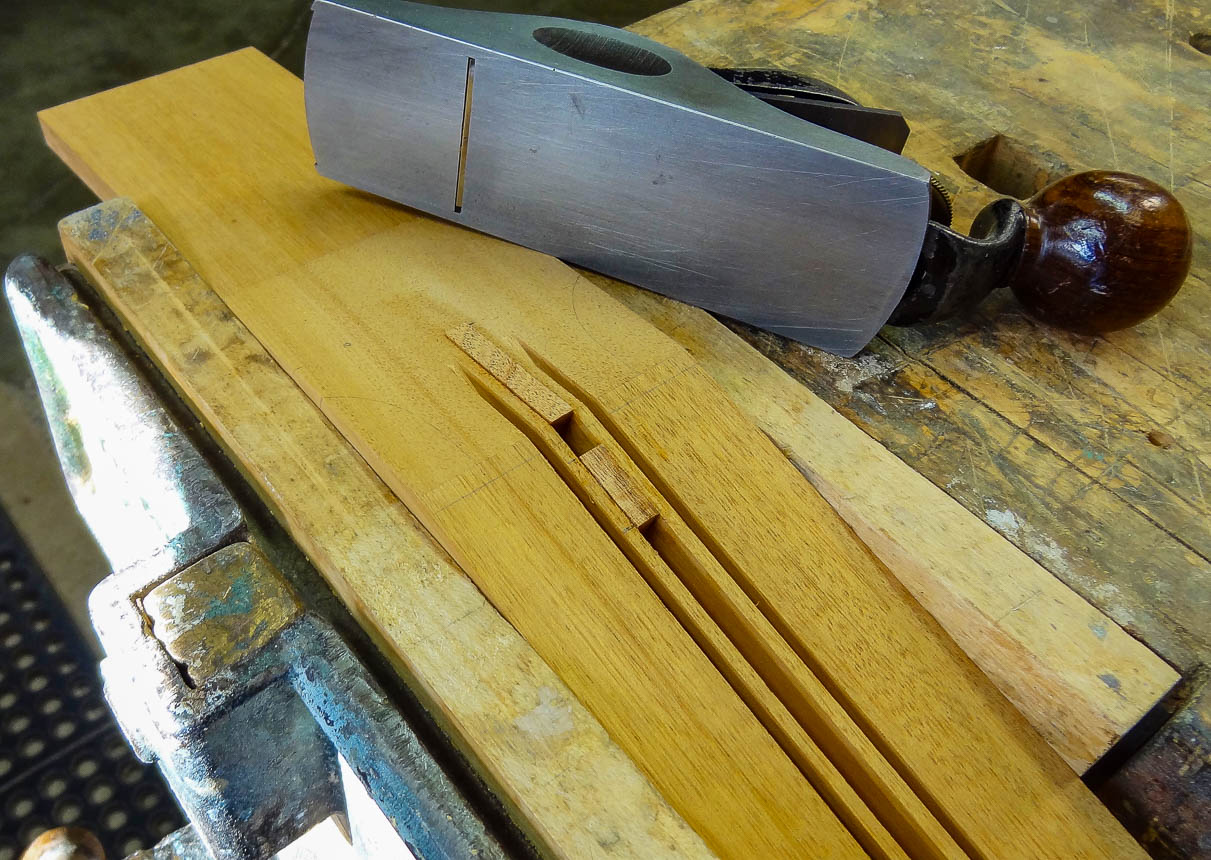
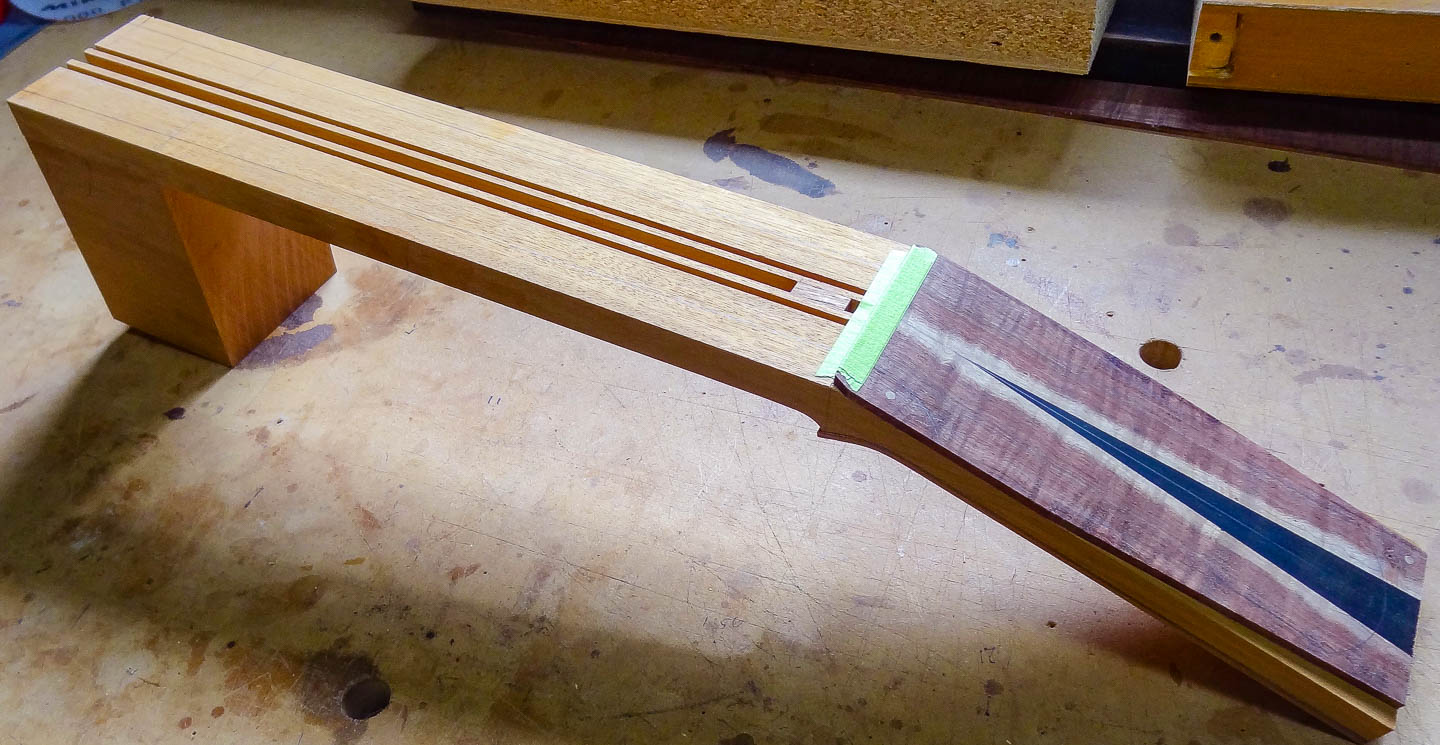
The table saw is used to cut channels down the length of the neck. These channels will accept the truss rod and carbon fiber stiffeners. You can see the internal hold down “tongue” that will be used for two of the four bolts that hold the neck to the body. It’s one of those pre-made parts I mentioned, and I use it here to get the spacing between channels perfect. The truss rod isn’t the full length of the neck, so a filler piece is glued into the channel to create it’s end stop. Filler is also added to the head stock to make it as strong as possible. Finally, the filler pieces are leveled to the top surfaces with a block plane and sanding block.
HEADSTOCK: HEADPLATE & VOLUTE
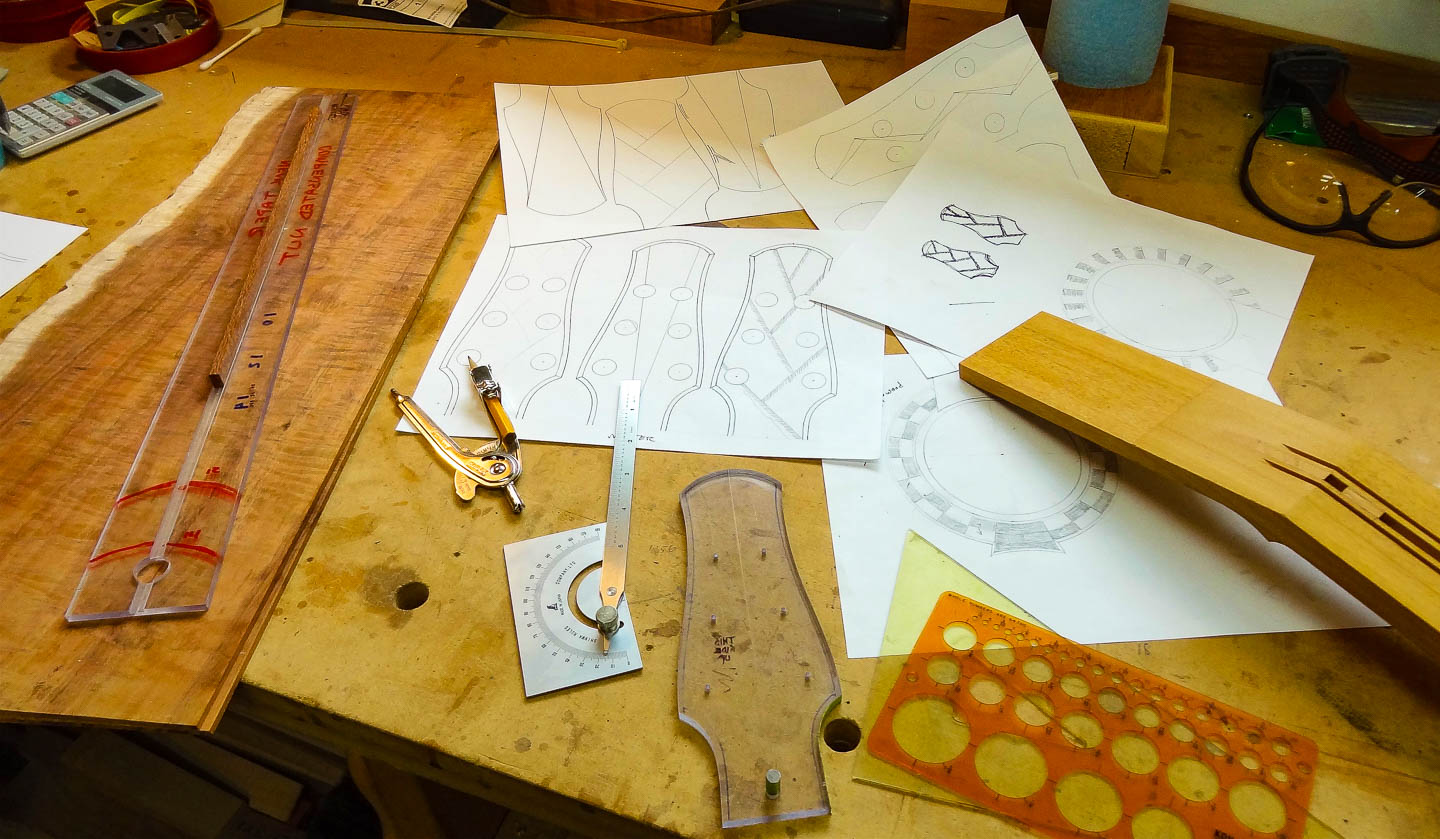
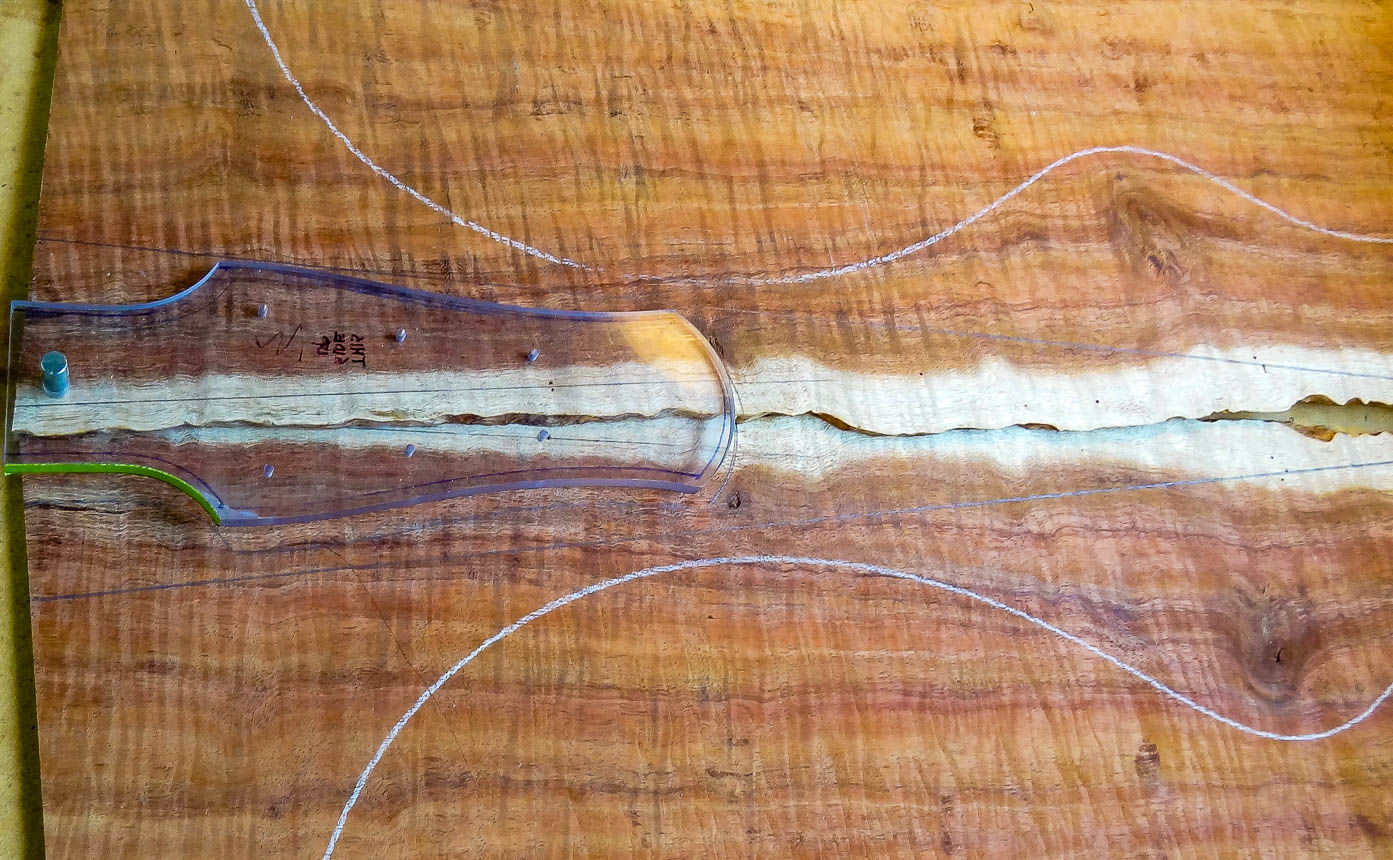
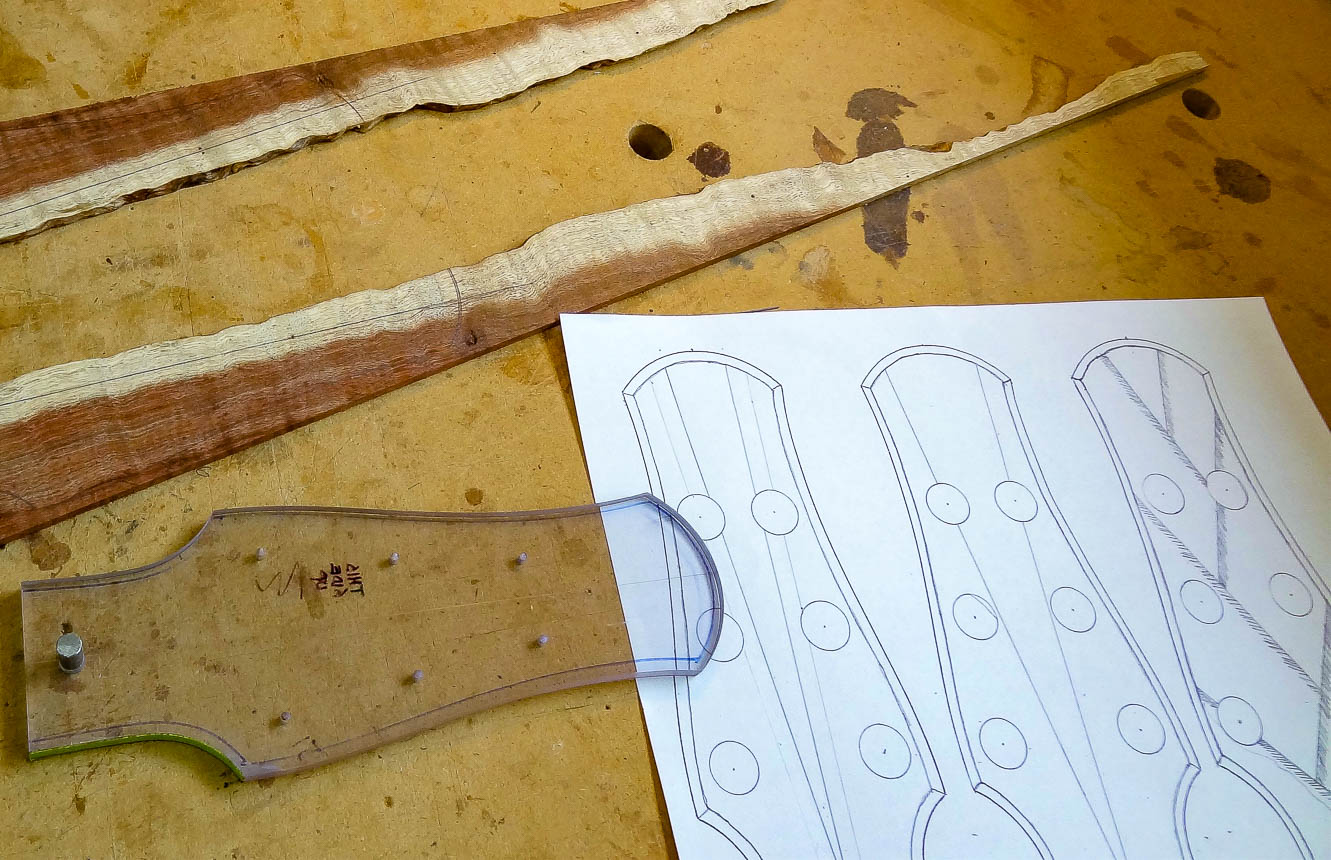
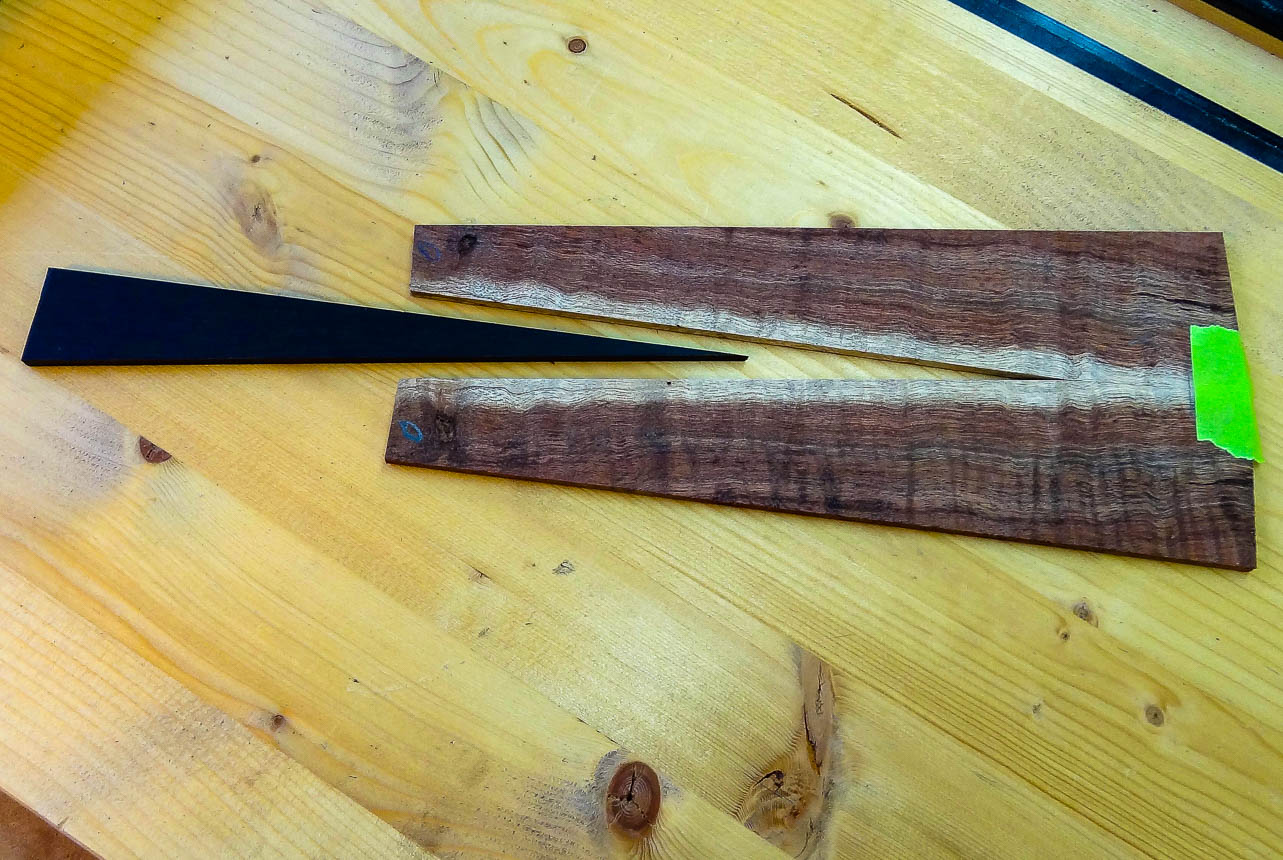
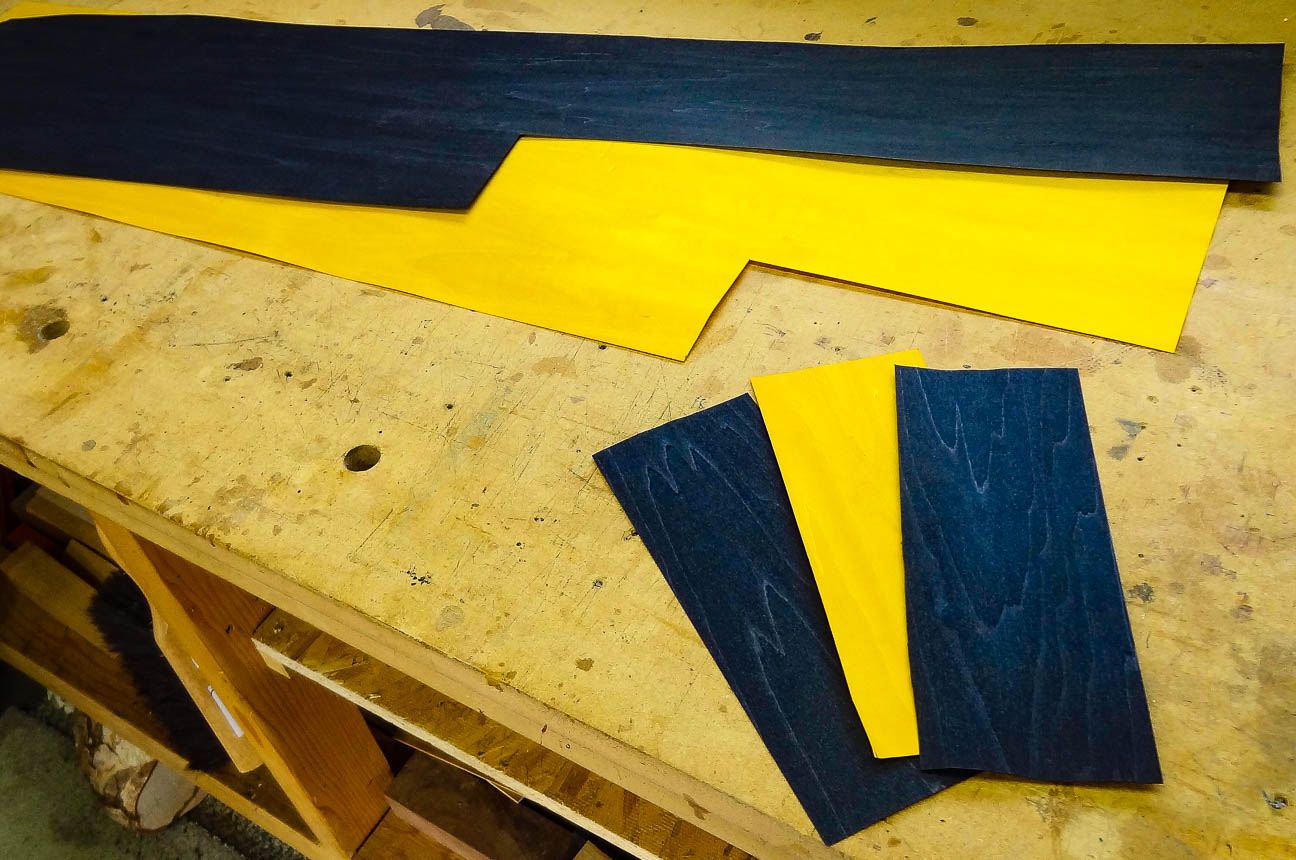
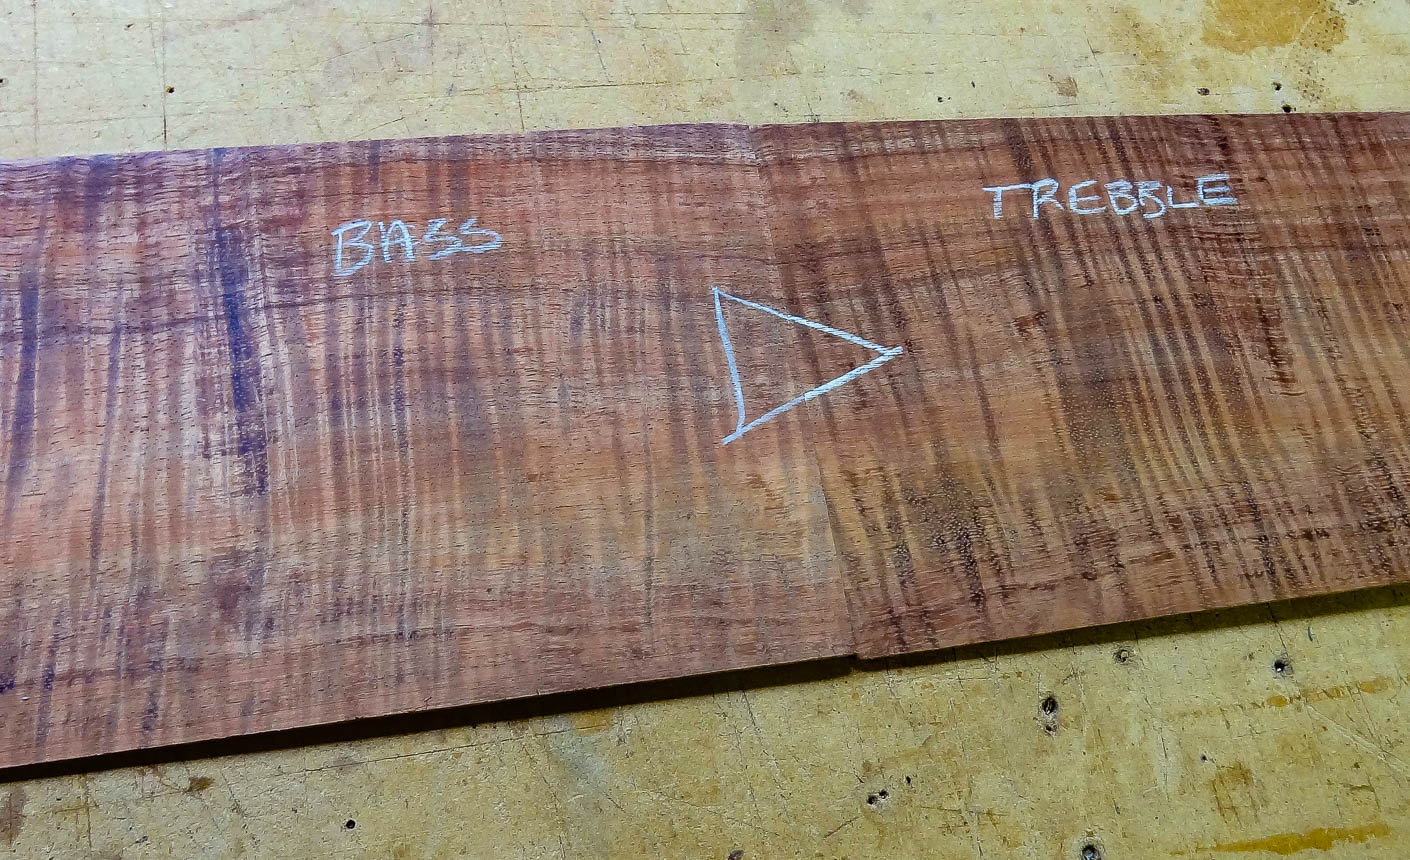
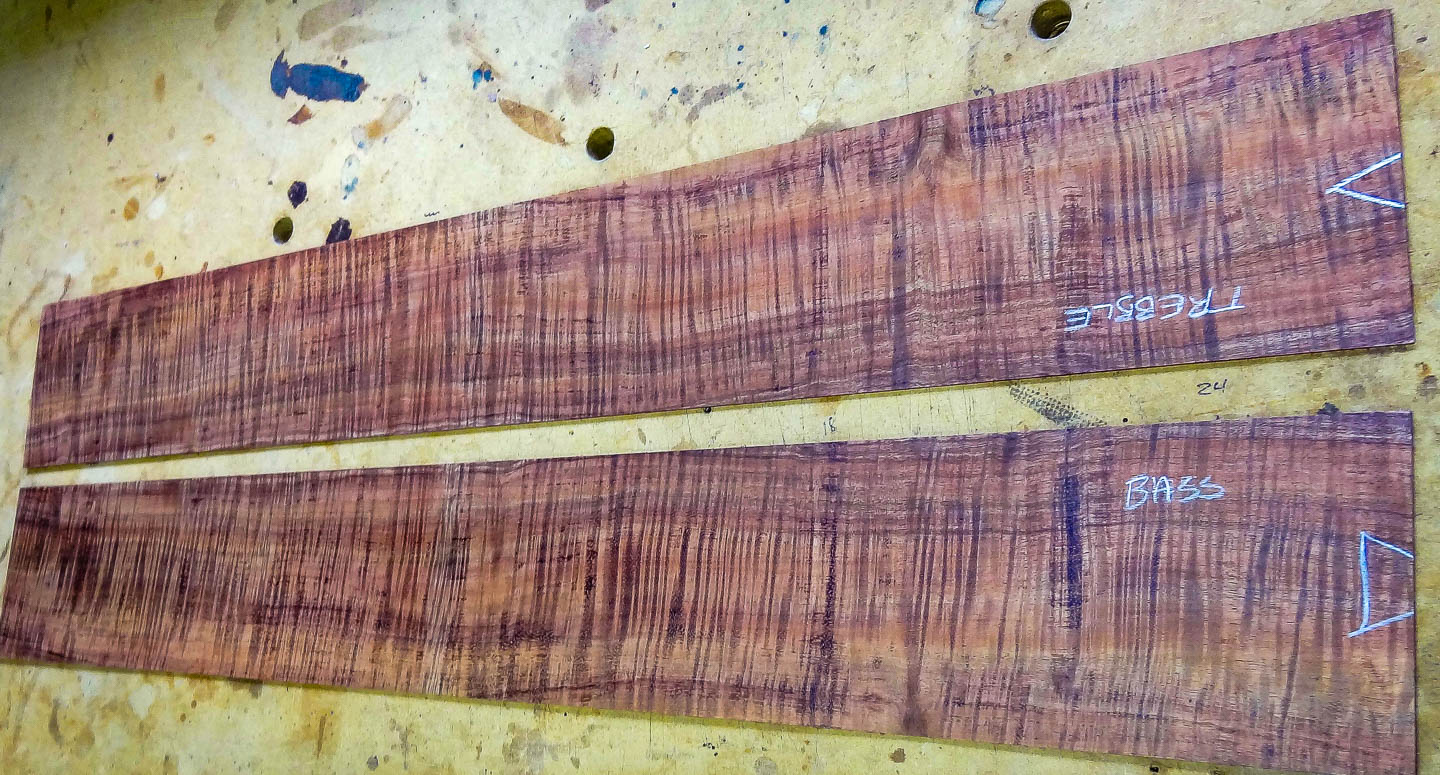
Much of the enjoyment I get from guitar making is being creative with design elements that can give the guitar a unique presence. The headplate–or overlay veneer–is one place I can do this. On this build, I’m going to link the body’s material, koa, to the headplate and rosette to tie it all together visually. I want to key off the sapwood center stripe on the back panel, and bring it into play on the other elements of the design. I messed around with a few different designs for the headplate until finding a design that was pleasing to me.
I have a different set of incredible koa with wonderful sapwood, but because of a nasty knot in an unfortunate spot, I won’t be able to incorporate the sapwood into the center of the back panel like on this current build; the center seam will have to be solid heartwood. You can see in the body outline how the knot will be outside of the waist’s position. Luckily, the panels are wide enough so I can cut off the sapwood and still meet the minimum width I need for a guitar. It’s nice to still be able to utilize the sapwood in this project though.
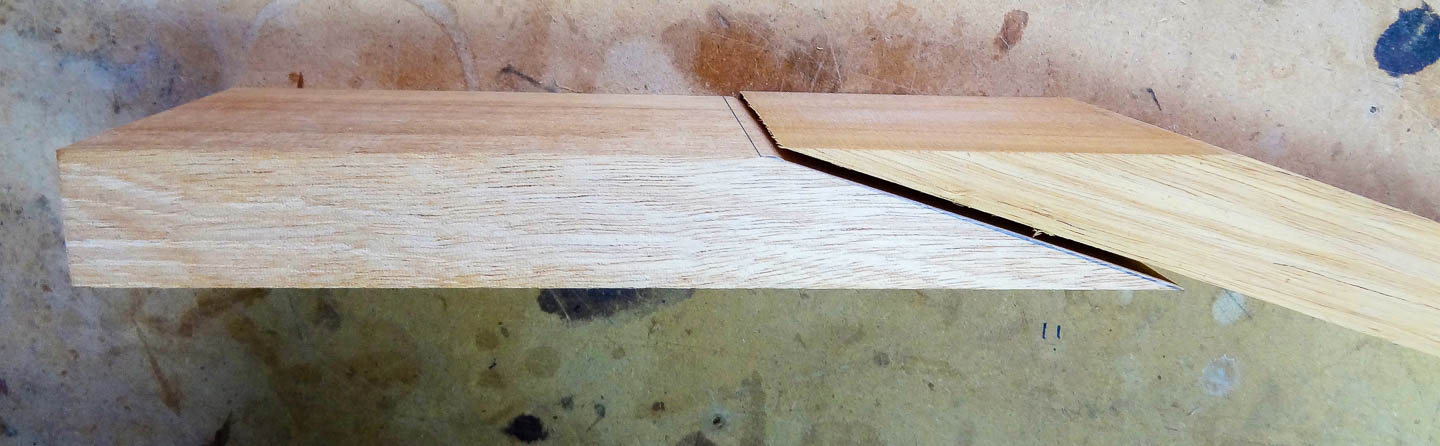
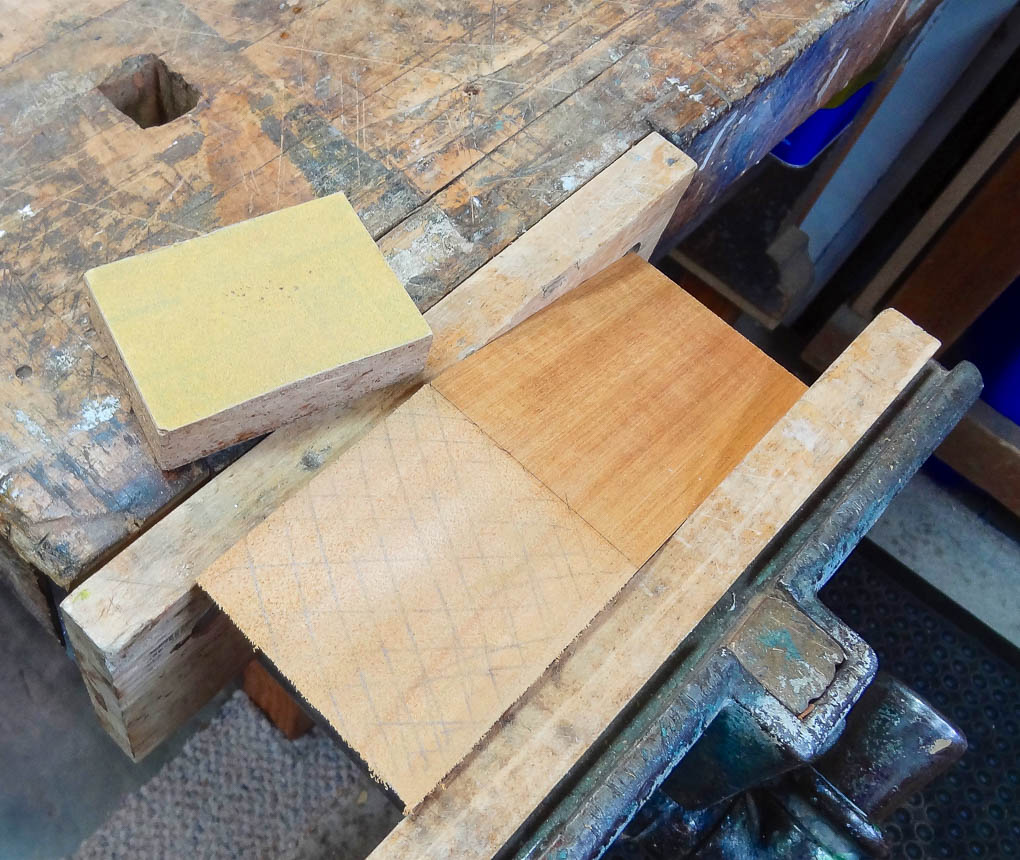
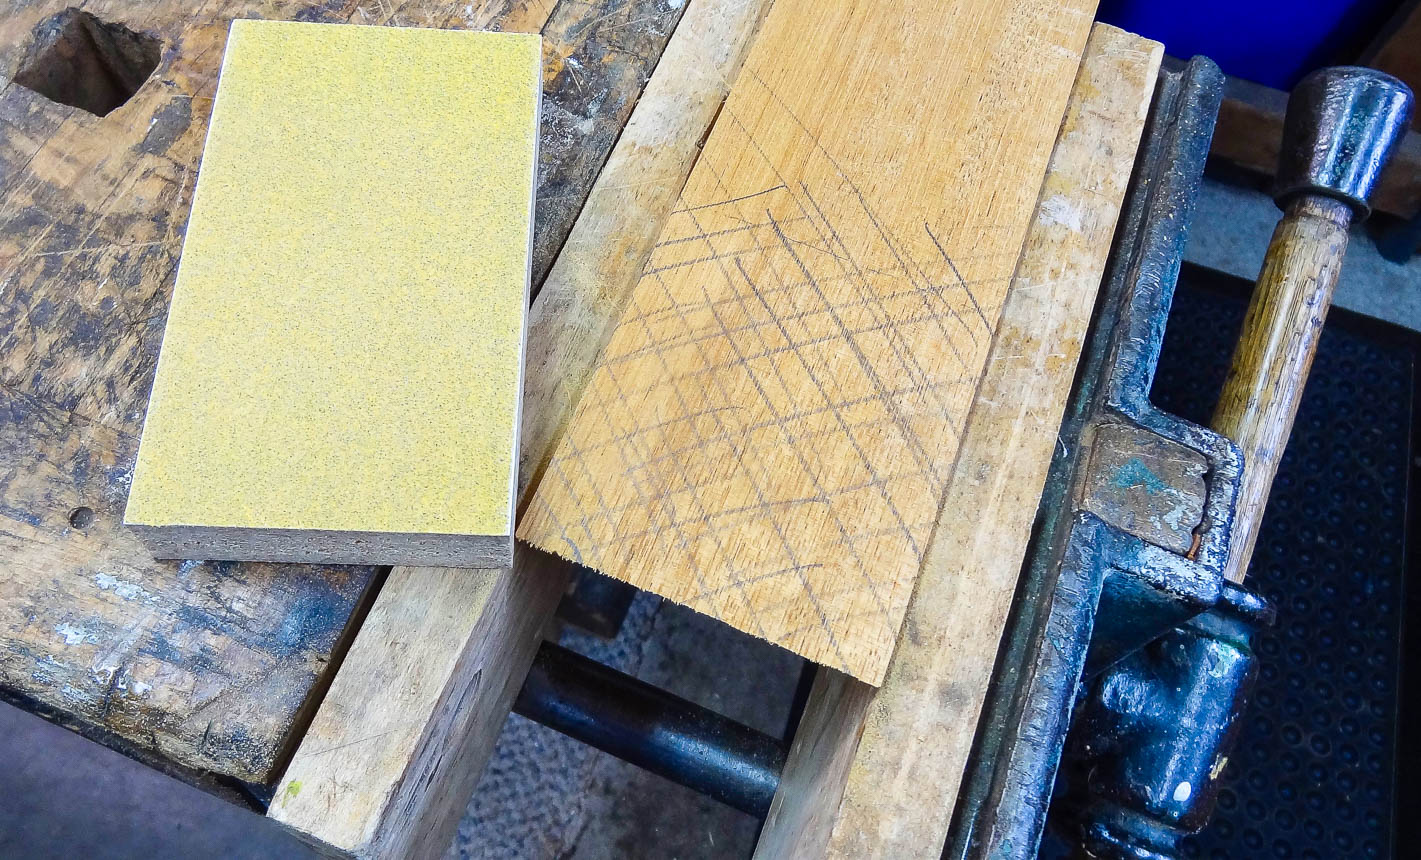
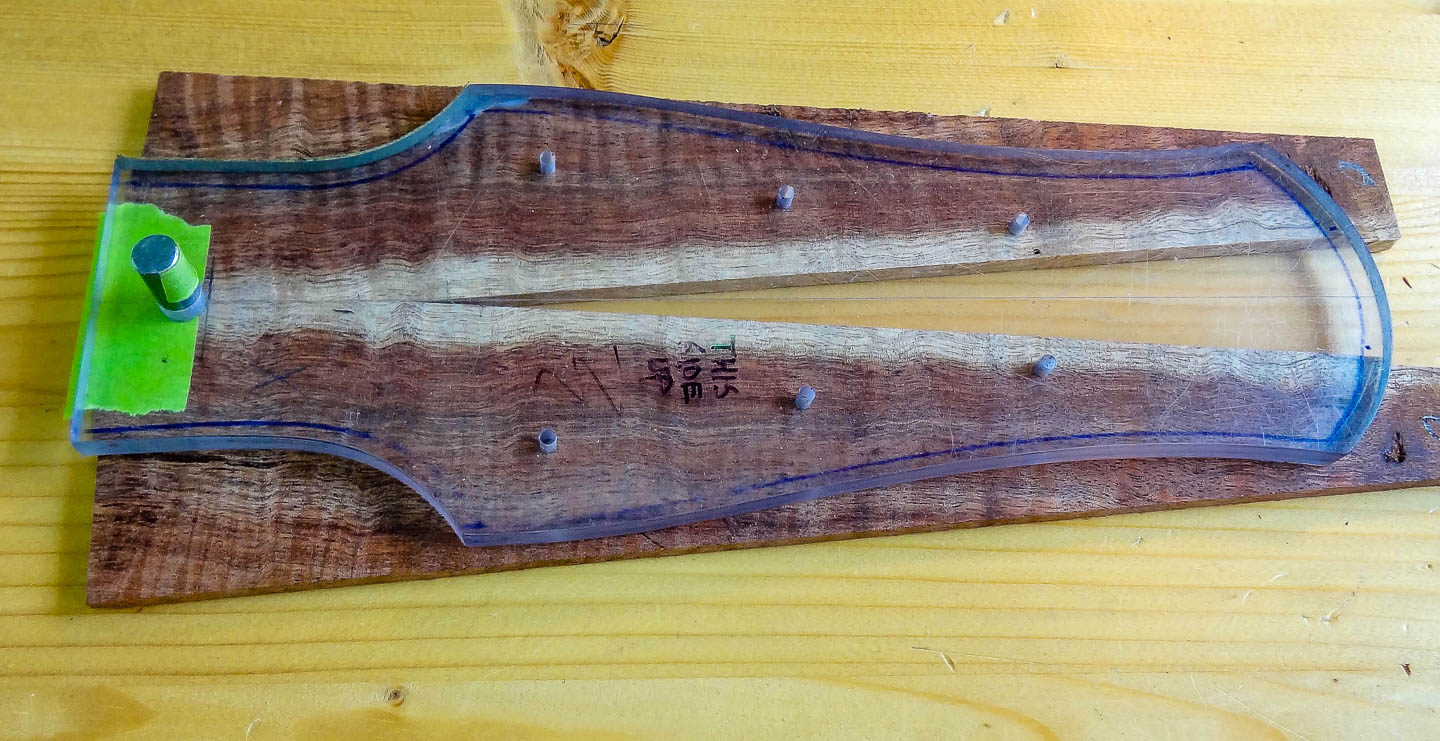
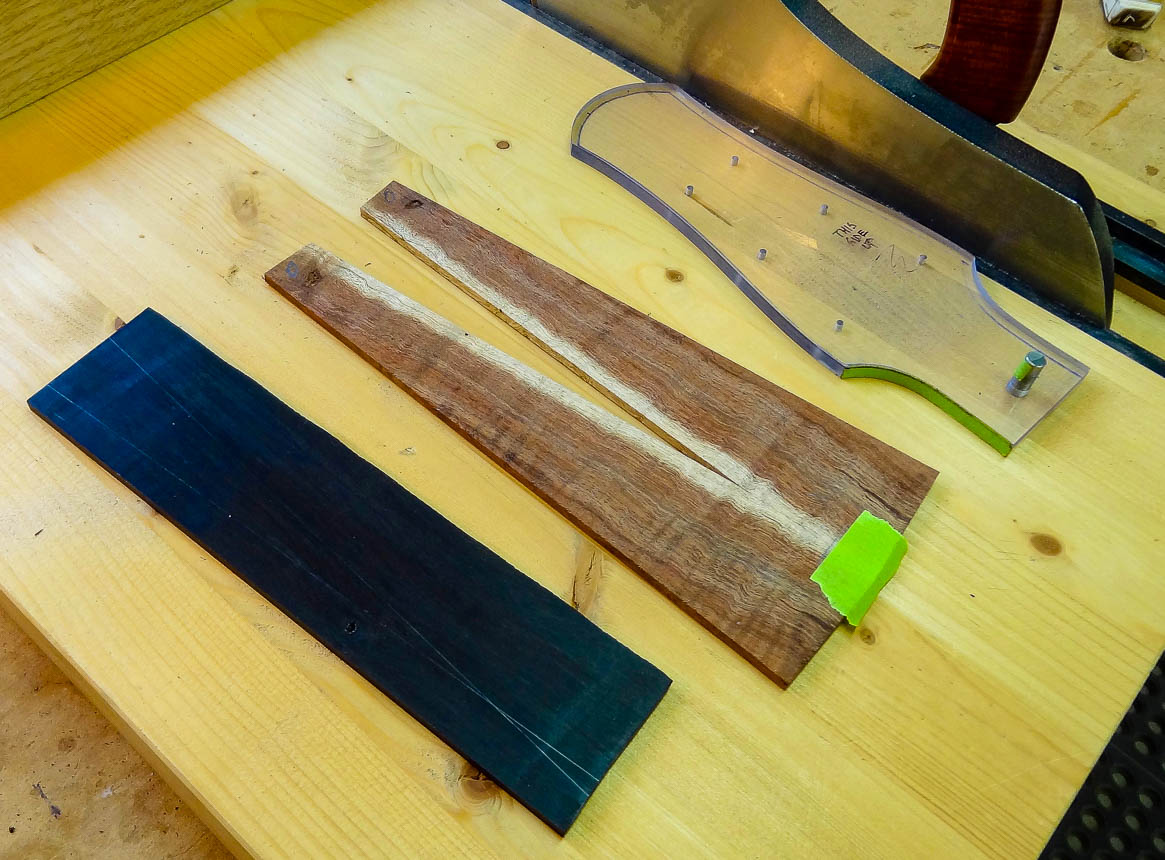
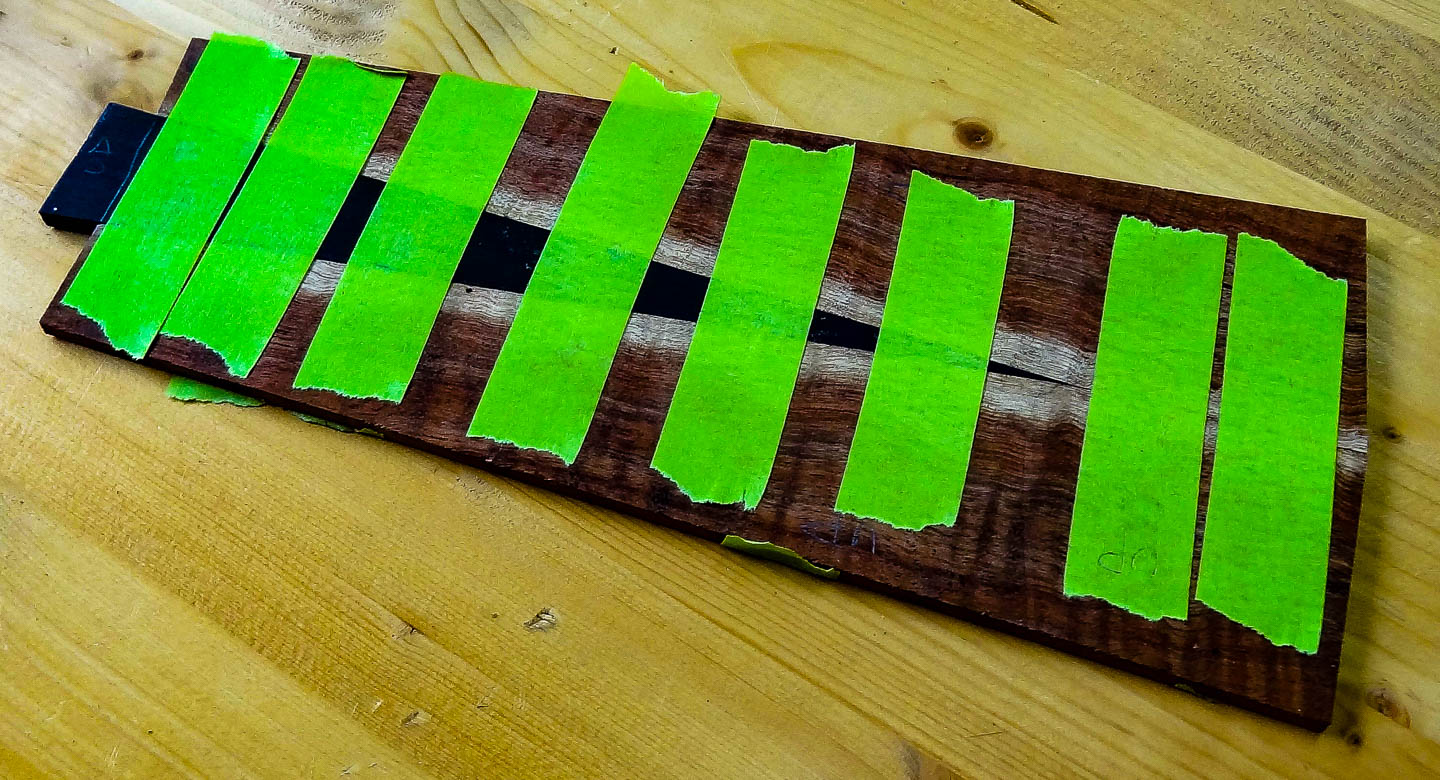
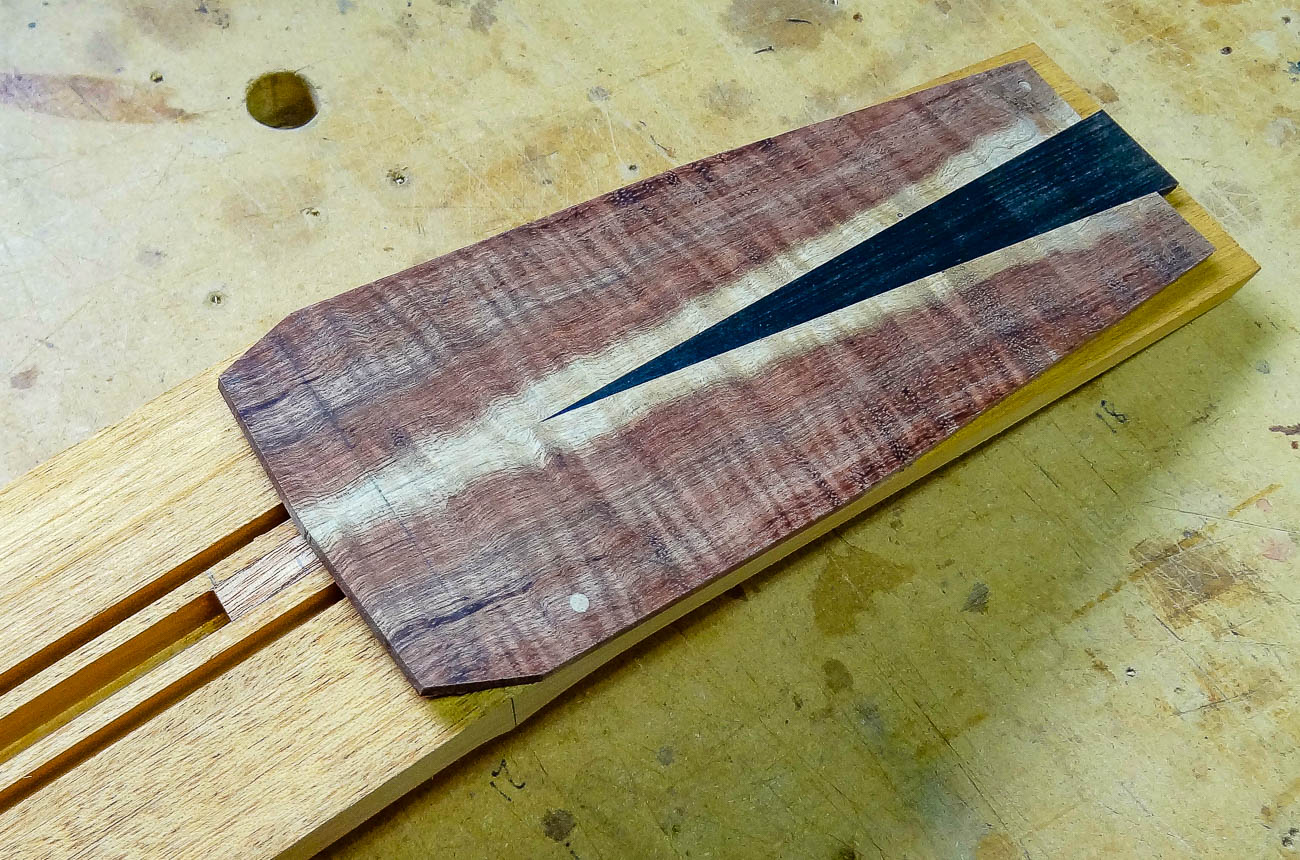
I use my headstock template and adjust the sapwood to get the rough orientation I’m looking for, and then cut off the sapwood edges of these book-matched back panels. The band saw trims the sapwood edge to width, and I use my shooting board and hand plane to make them straight and true. This handy tool also trues up the mating surfaces at the angle I want them to splay out, creating a wedge-shaped cutout. To add some contrast, I find a chunk of jet black ebony and slice off a thin piece on the band saw to make the wedge. The shooting board, again, comes into play to fit the ebony perfectly into the cutout. I use masking tape stretched across all the pieces to glue them together. It’s really cool how the two koa halves are book-matched, creating a mirror image along the center line of the headstock.
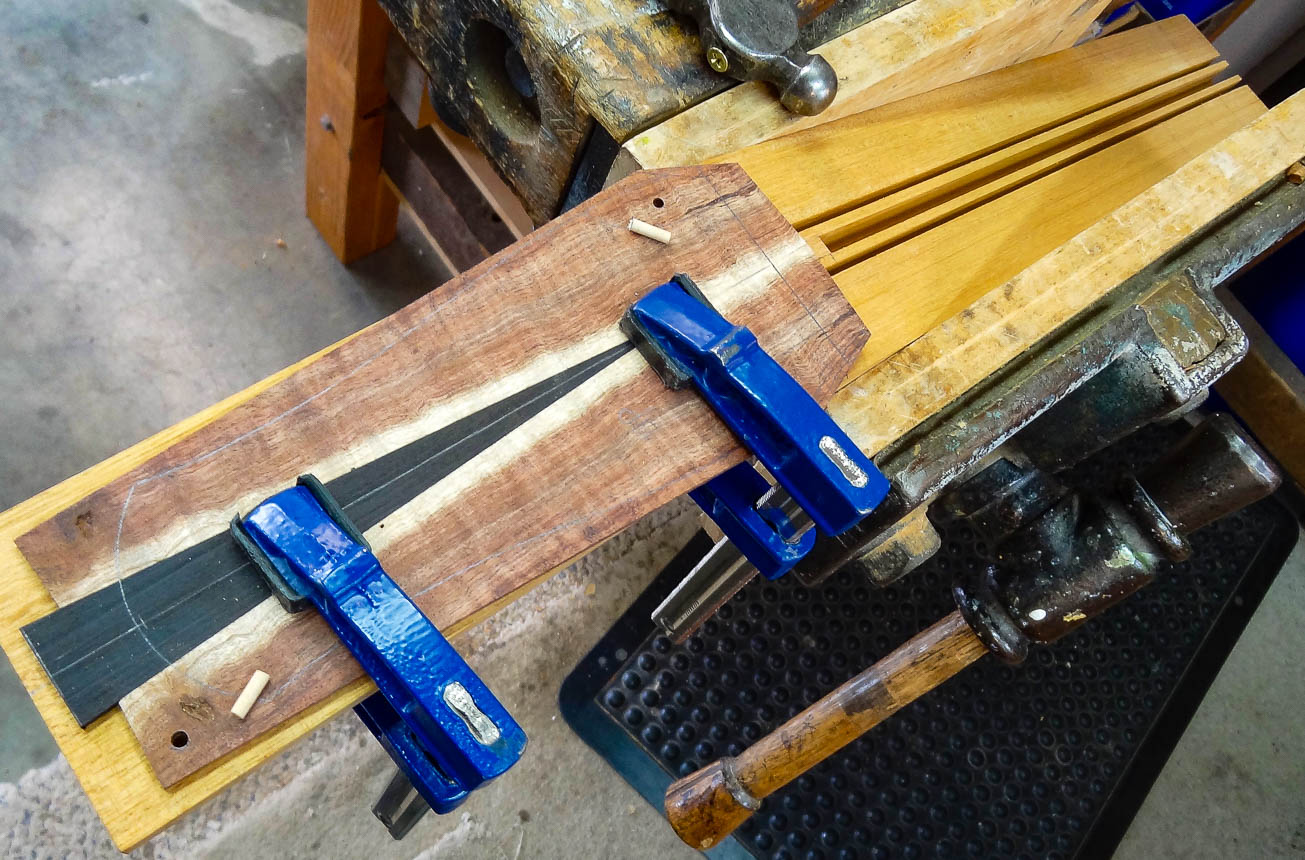
I clamp the headplate in place perfectly aligned with the center line of the headstock, and drill two indexing holes to make sure the plate doesn’t shift when gluing it down. The holes are outside of the headstock outline, and small dowels hold it in place. It’s just a matter of spreading glue and clamping it down on a flat surface.
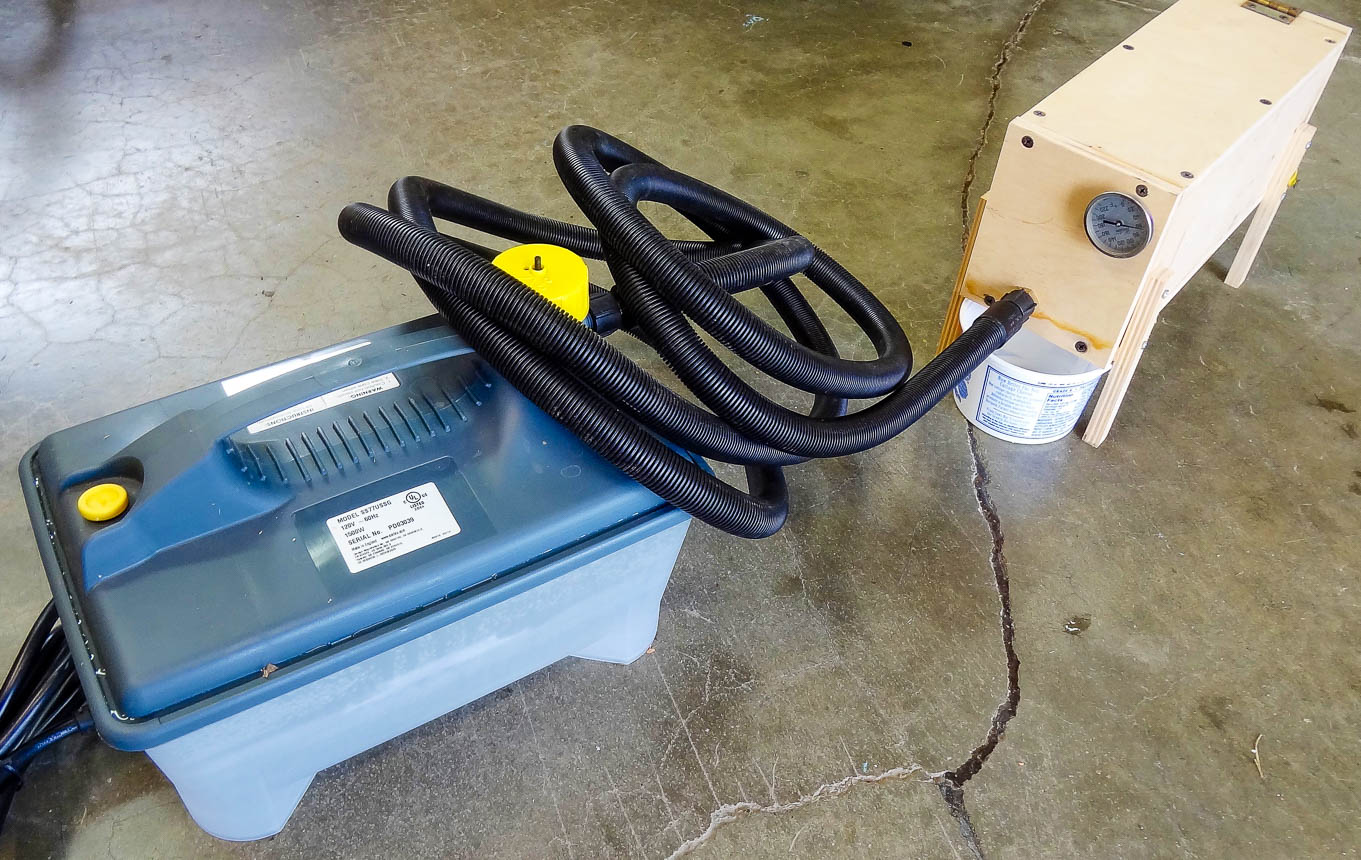
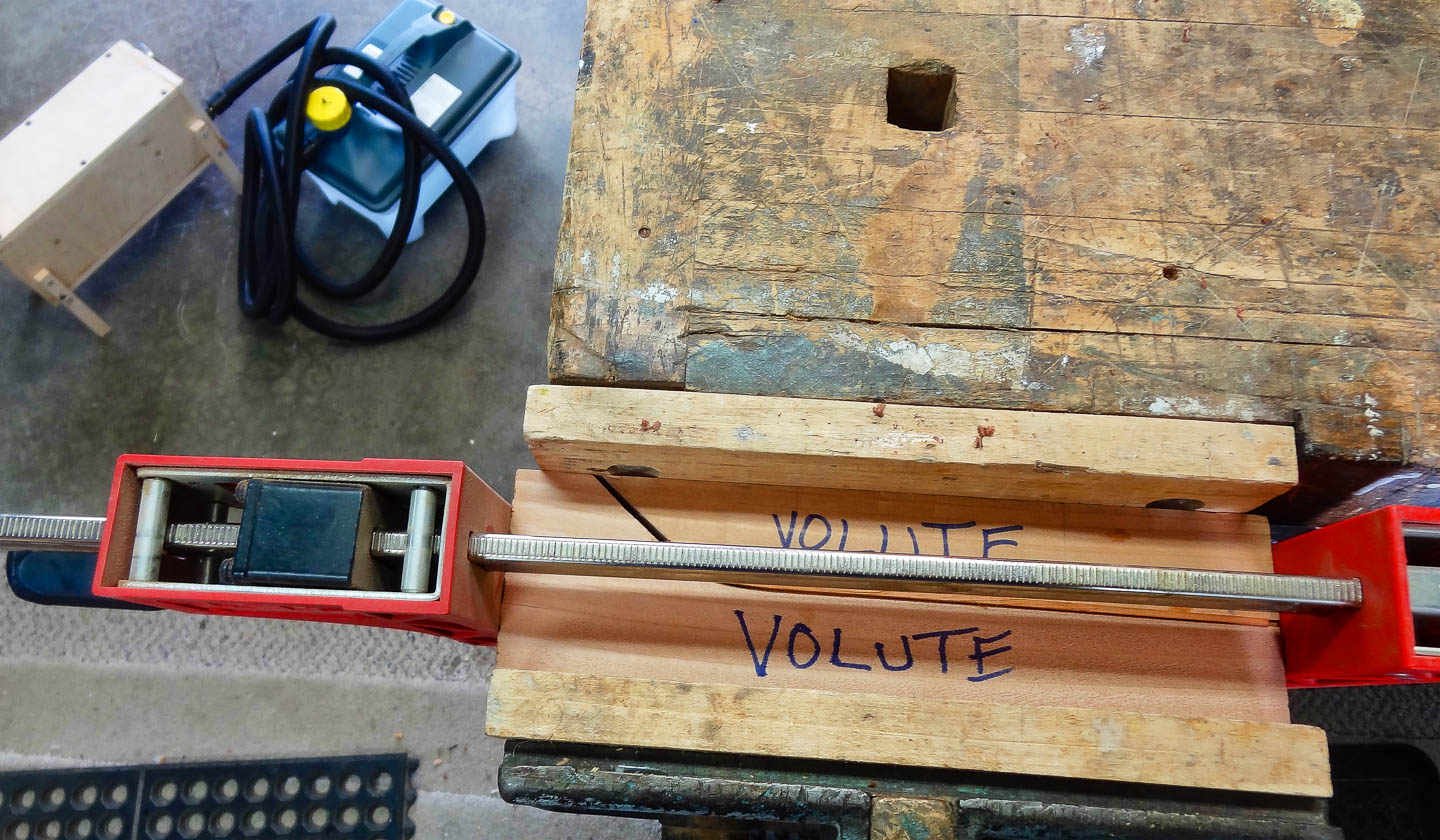
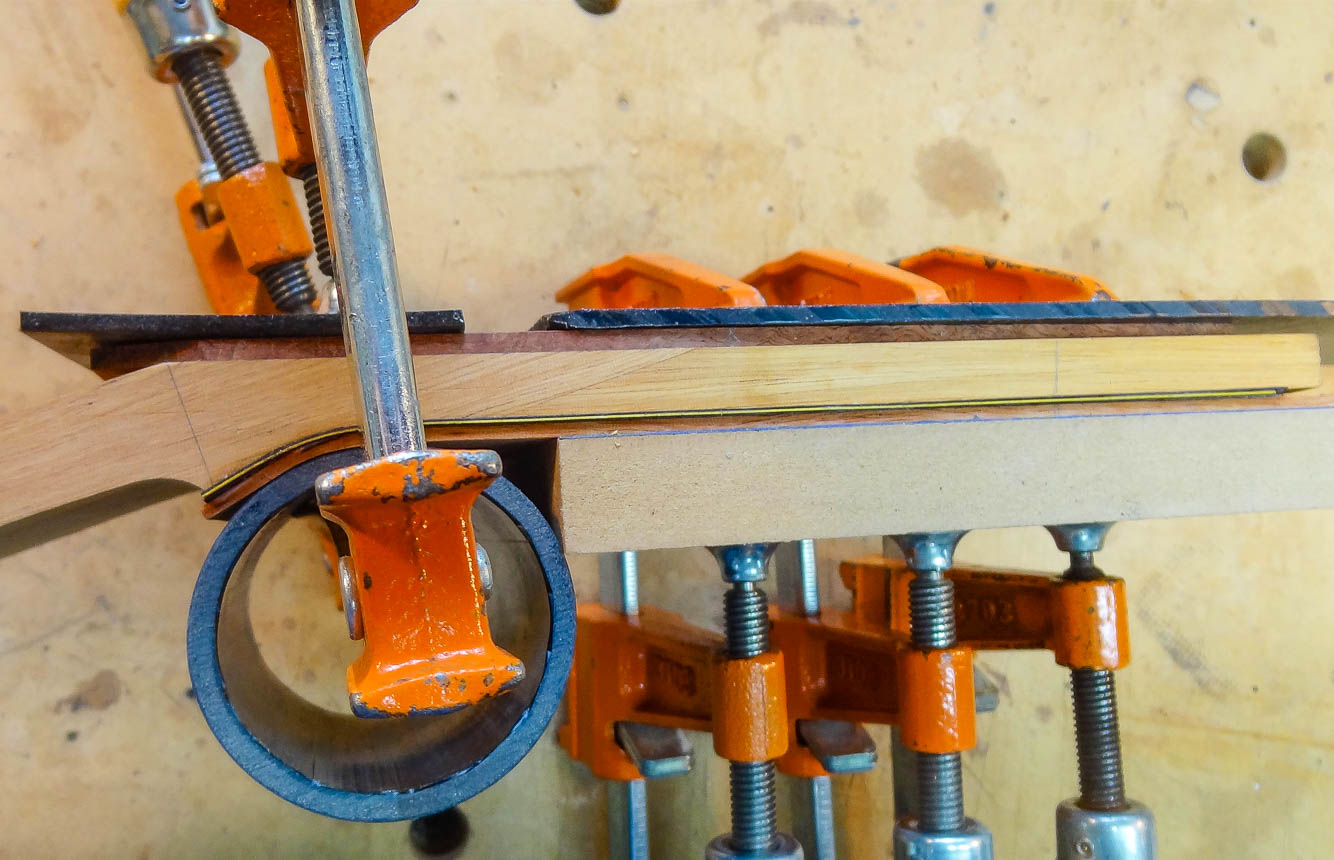
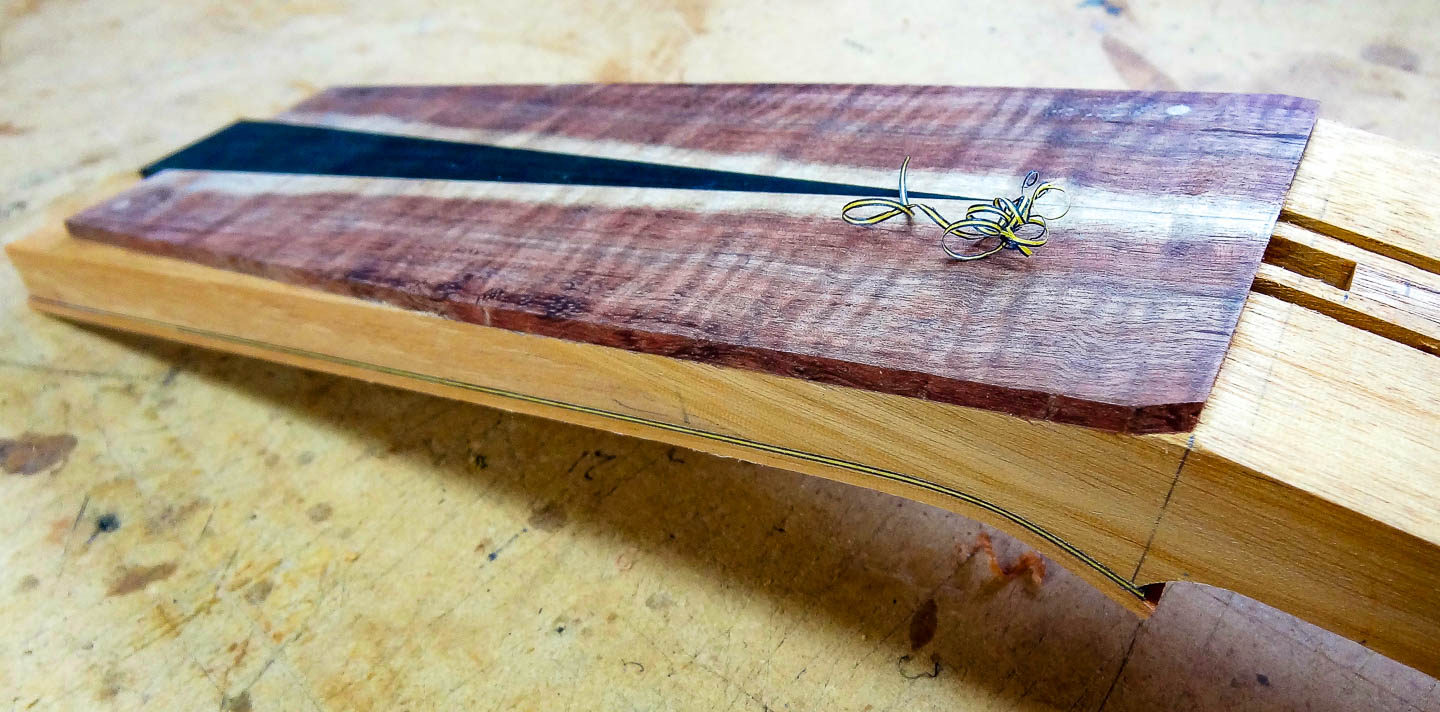
The voluteplate will be mahogany, and I am able to use the piece left over from when I cut the neck to thickness. This works well because if I flip it end for end the voluteplate will be a perfect continuation of the neck; the grain will match and look as if it is all one board. I’m also using a Master Grade option of black-yellow-black veneers to create elegant pinstripe lines which highlight the volute. To get the mahogany plate to conform to the volute’s curve, I use a tiny steam chamber to heat the wood and loosen the fibers. This allows it to bend easier in the wooden form used to bend it. Once it’s bent, I use a similar process as with the headplate to glue it to the back of the headstock with the veneers in between.
To complete the neck in it’s rough form, the headplate is trimmed to create a wall for the nut to register against and the heel block is precisely located and glued to the back of the neck. It will now sit like this until the body is completed.
SIDE BENDING
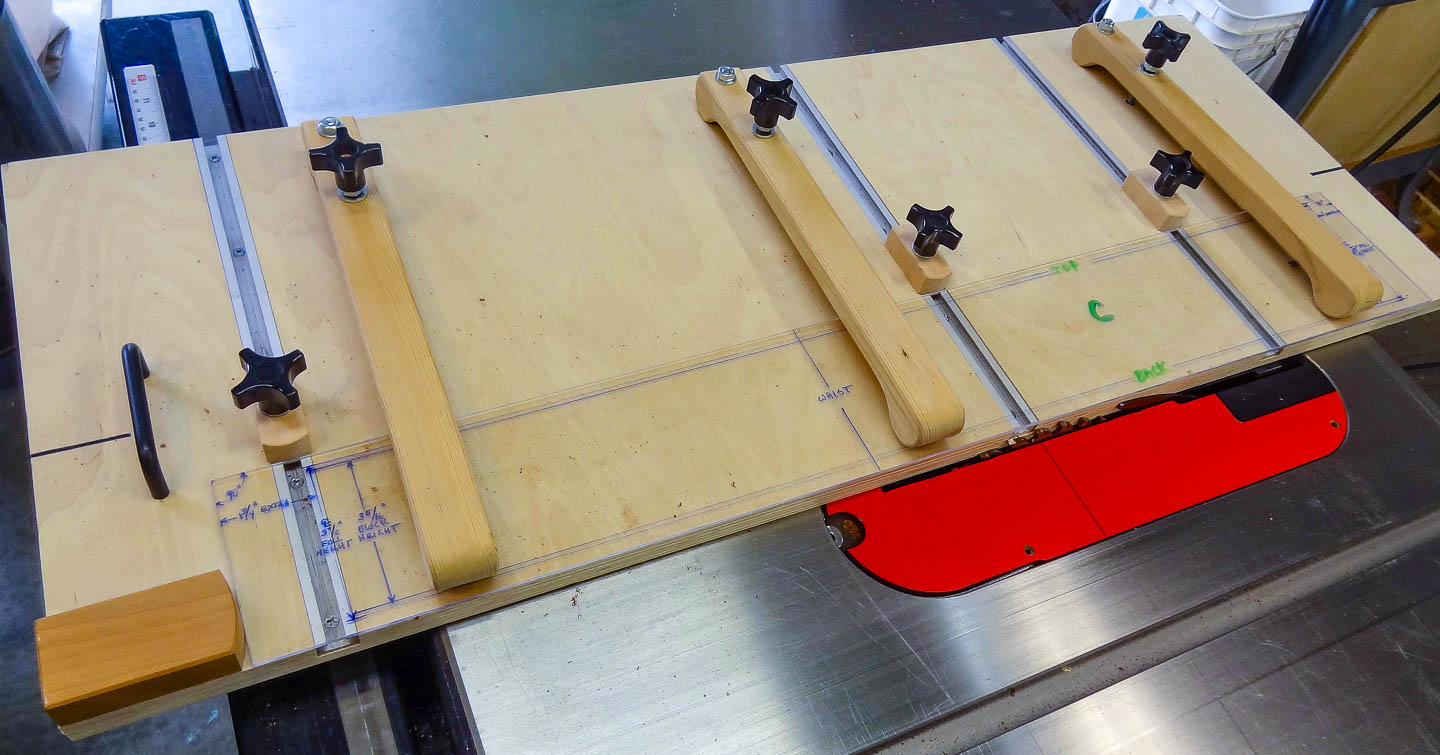
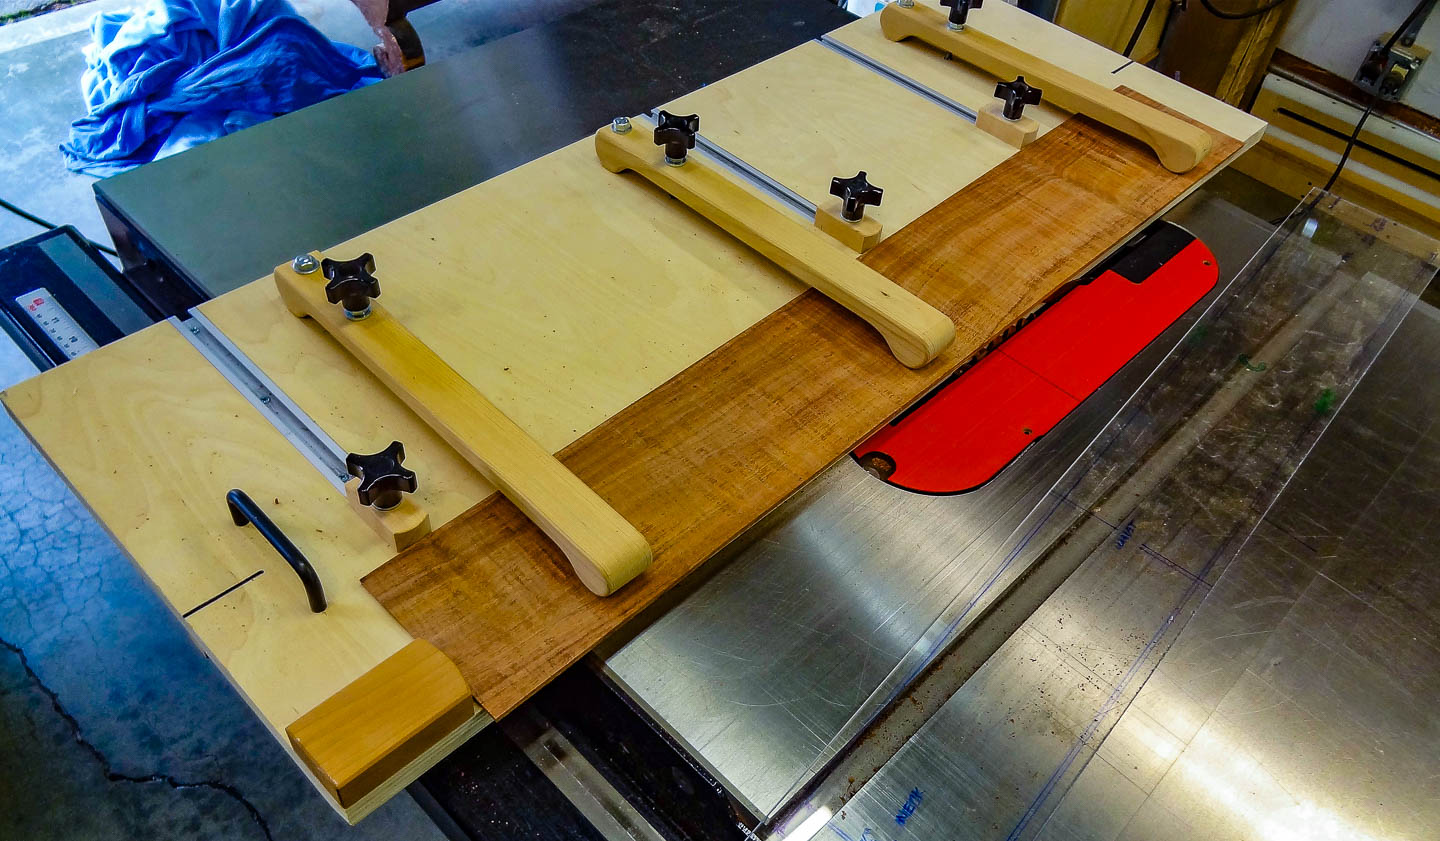
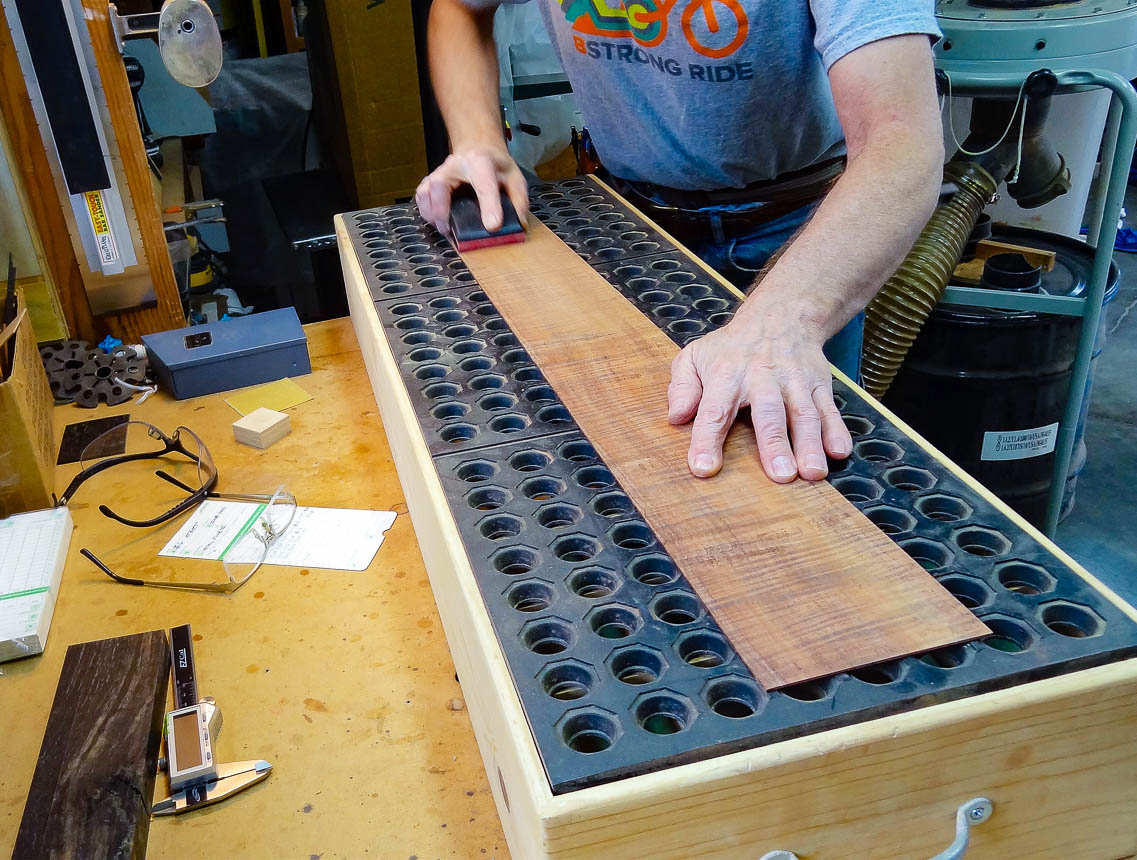
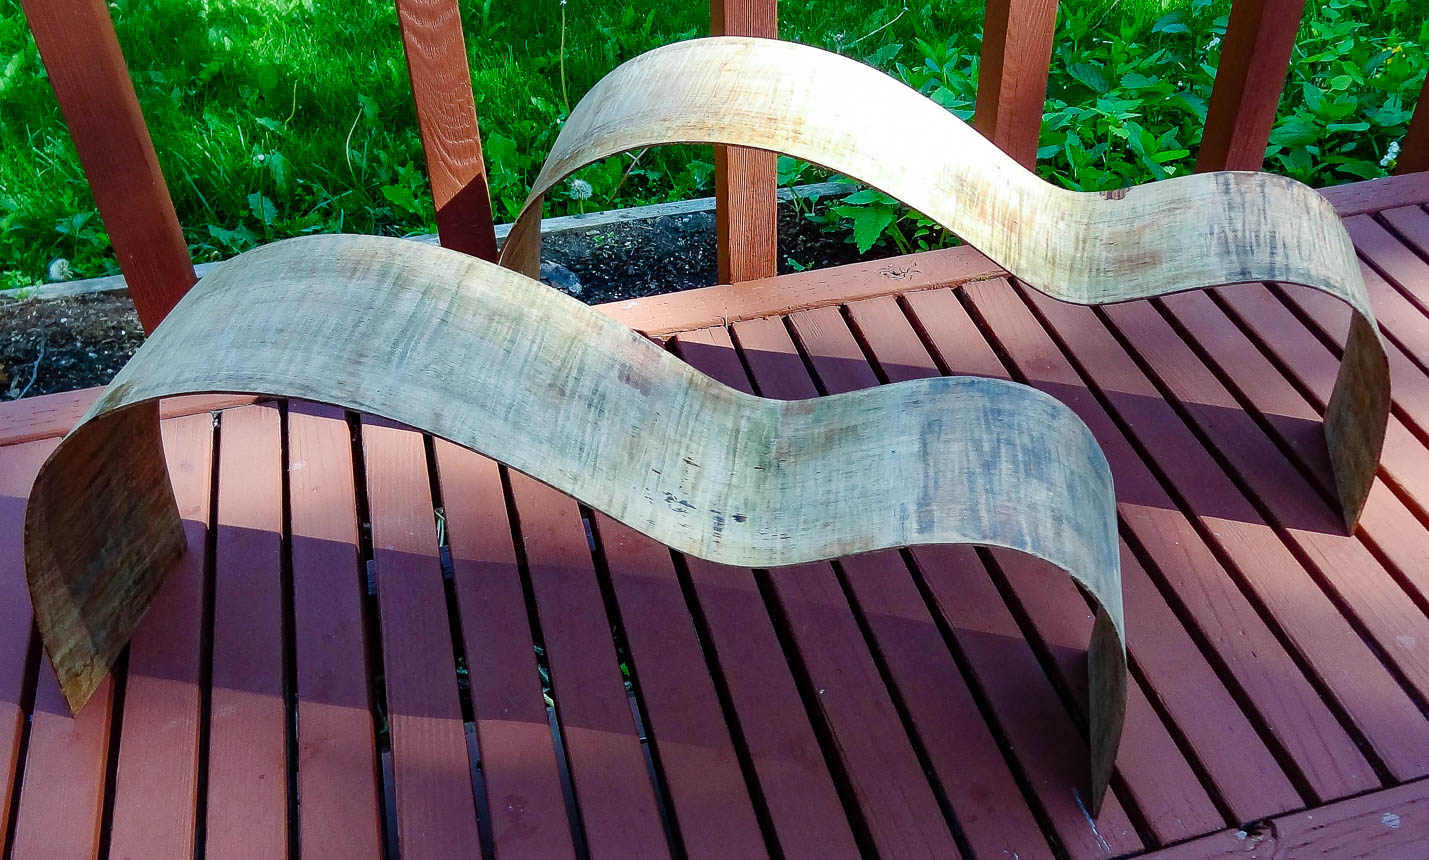
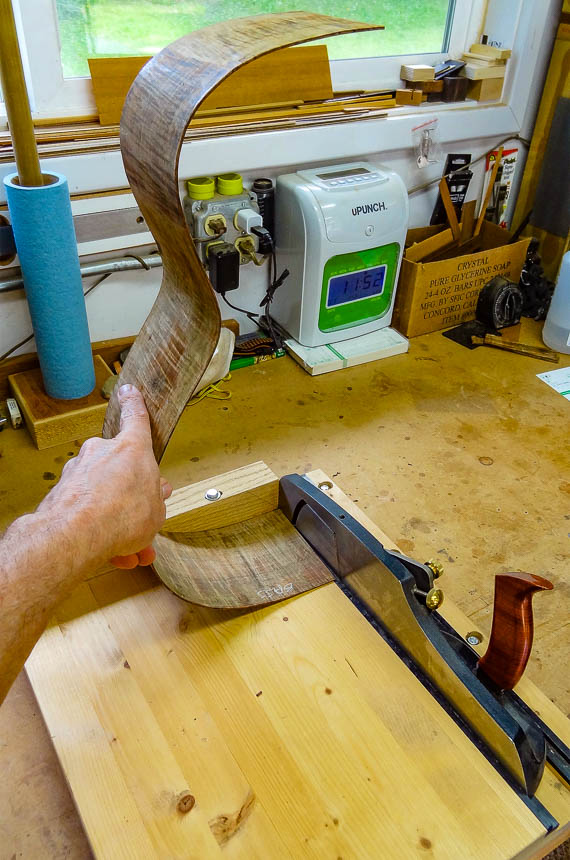
The sides of the guitar are thickness sanded to a point I think they will take the bend well. The fiddle-back figure in the grain presents a challenge for bending because grain like this is susceptible to cracking and having kinks in the tightest bends. For this reason, I make them less thick than I might with more well behaved wood. I use a side template to set my panel cutting jig and cut them to width on the table saw. The template is about 2″ longer and 1″ wider than the finished side will be. This is to accommodate the necessity to trim the length precisely to fit into the building board, and have enough excess width when trimming them to finished width.
I spend considerable time sanding the insides to a high level of refinement; I like the insides of my guitars to look nearly as nice as the outside. The outsides will get a lot of sanding later on, so they are left more or less alone for now. I also put much effort onto matching the grain lines at the tail end of the instrument where the two book-matched halves will come together. The seam will be covered with an end graft, but on either side of it, the more it looks like one continuously flowing piece of wood, the better.
I use my home-made, universal Fox side bender to bend the sides. Having bent sides on a hot pipe, I find this to be more practical, producing much more consistent results. I layer a side between spring steel slats and a silicon heating blanket, get it good and hot, and then wind down the waist caul and pull down the upper & lower bout cauls. This persuades the wood into conforming to the body shape forms.
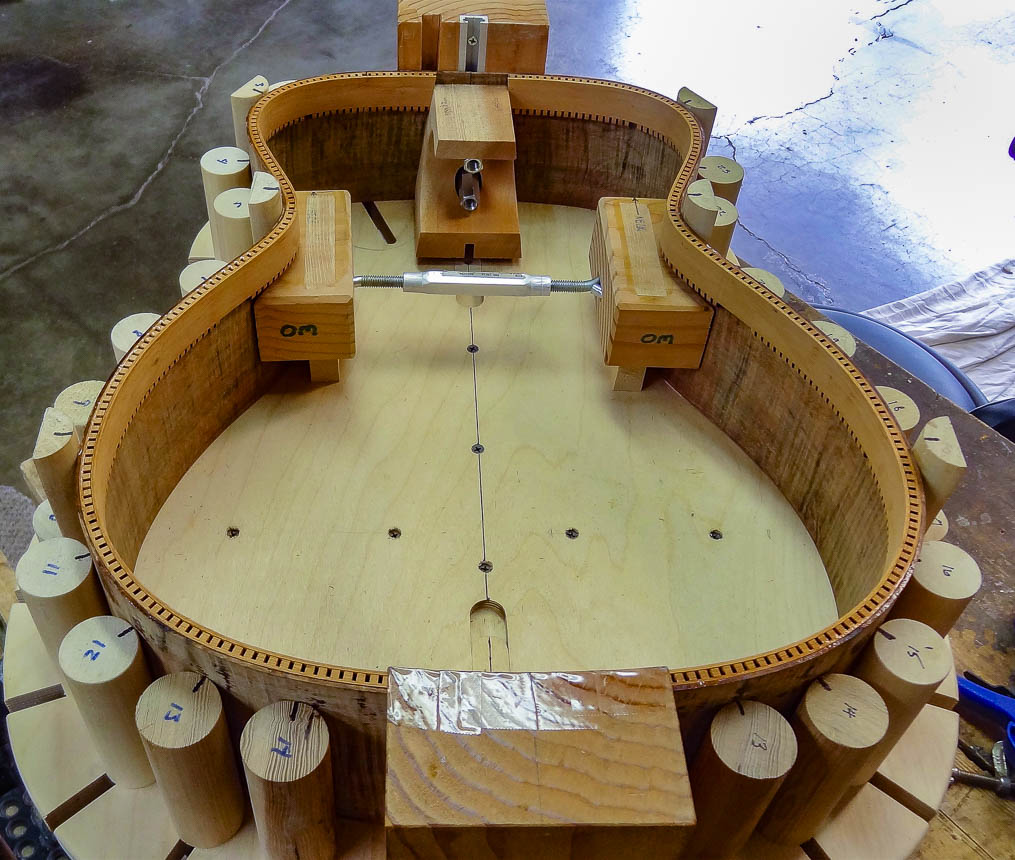
THE RIM
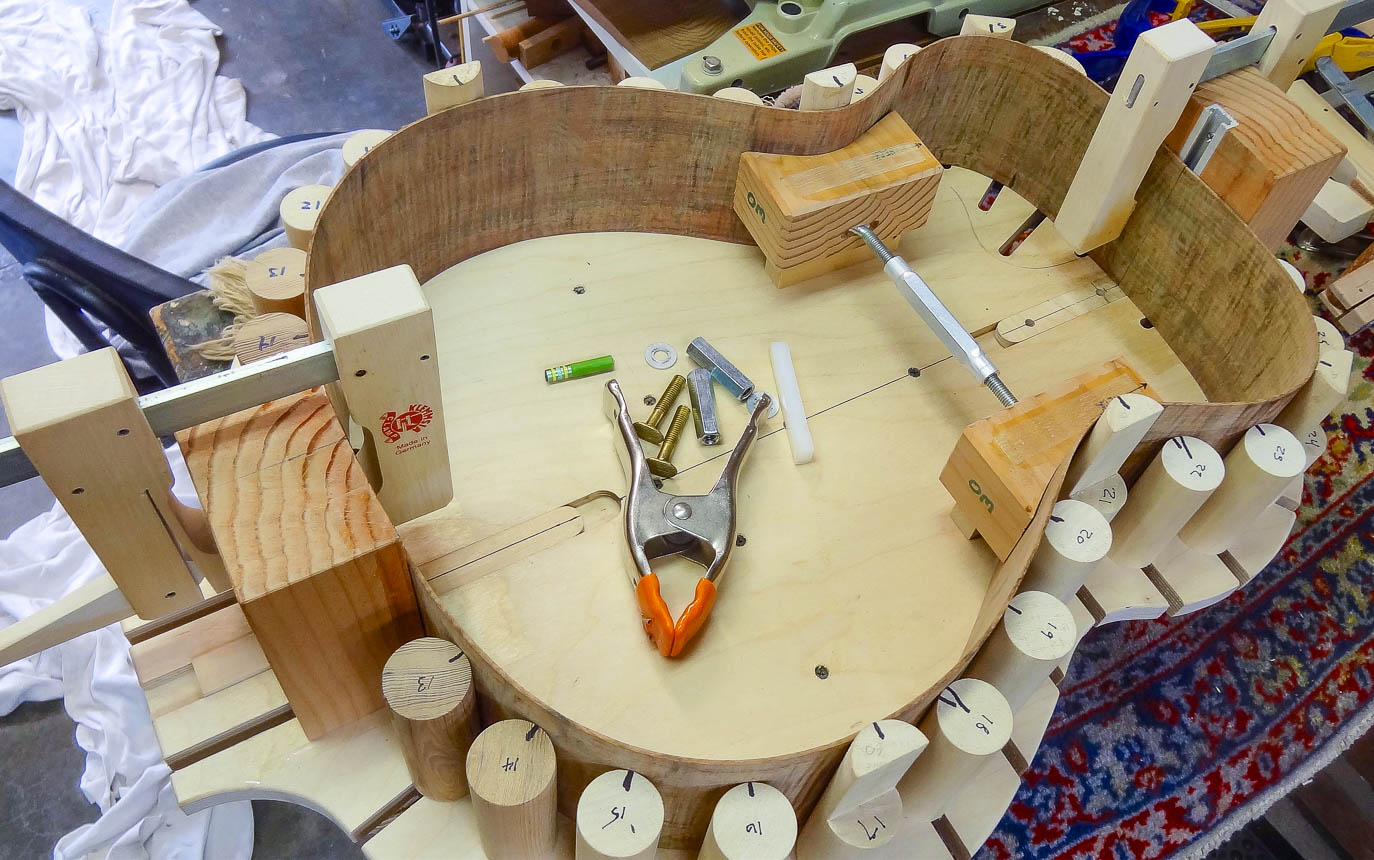
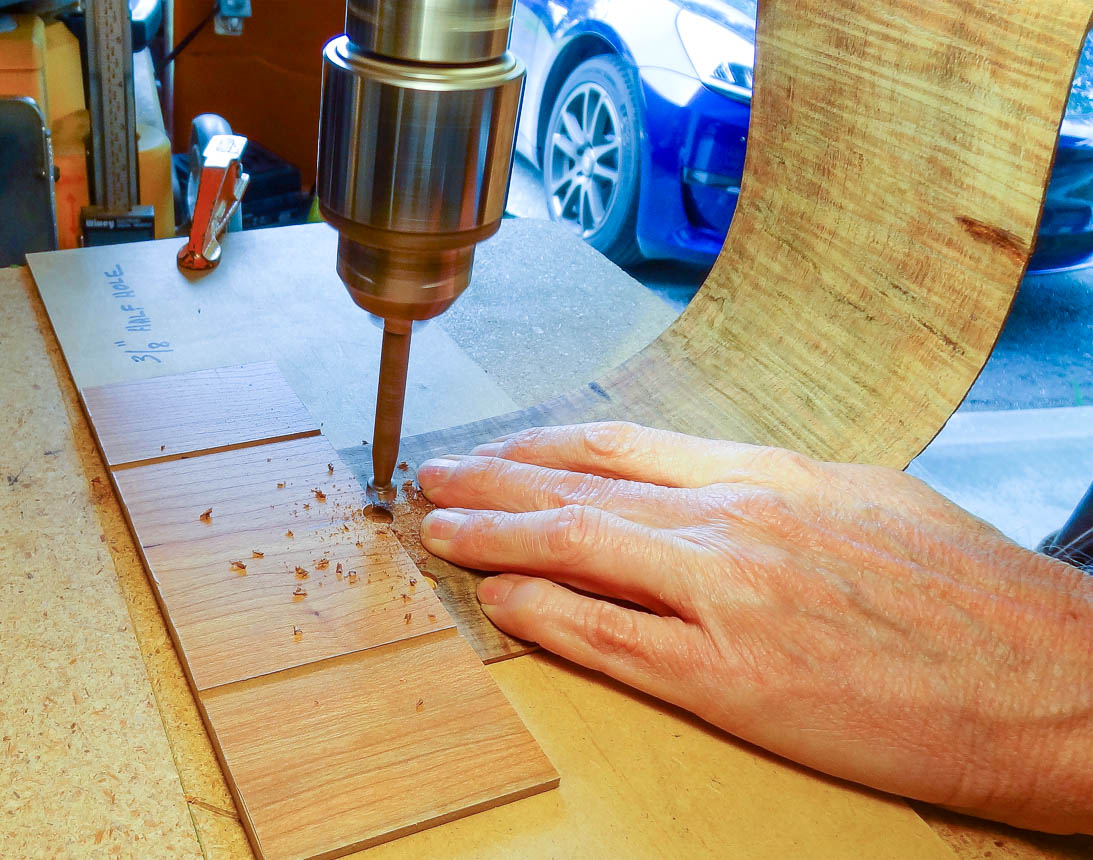
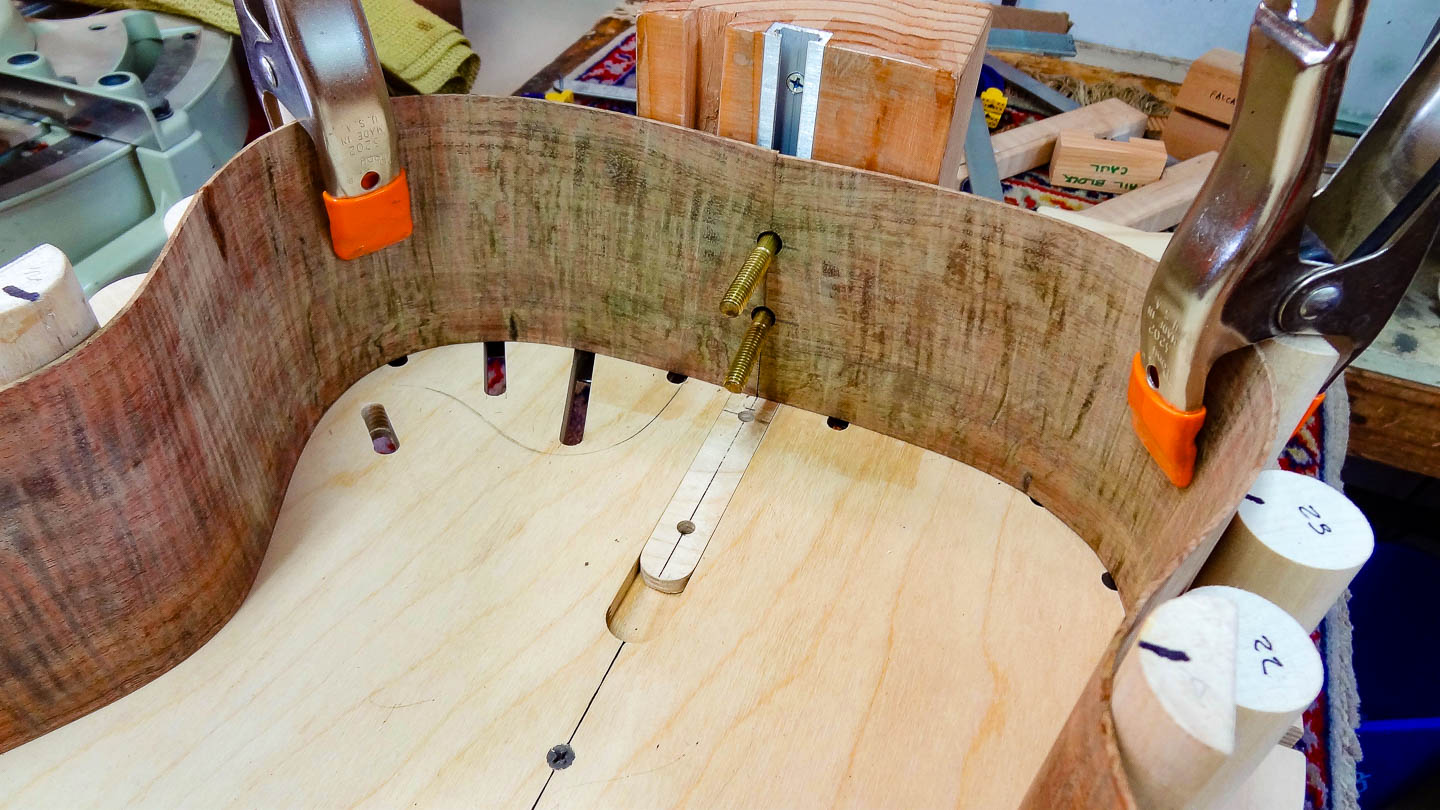
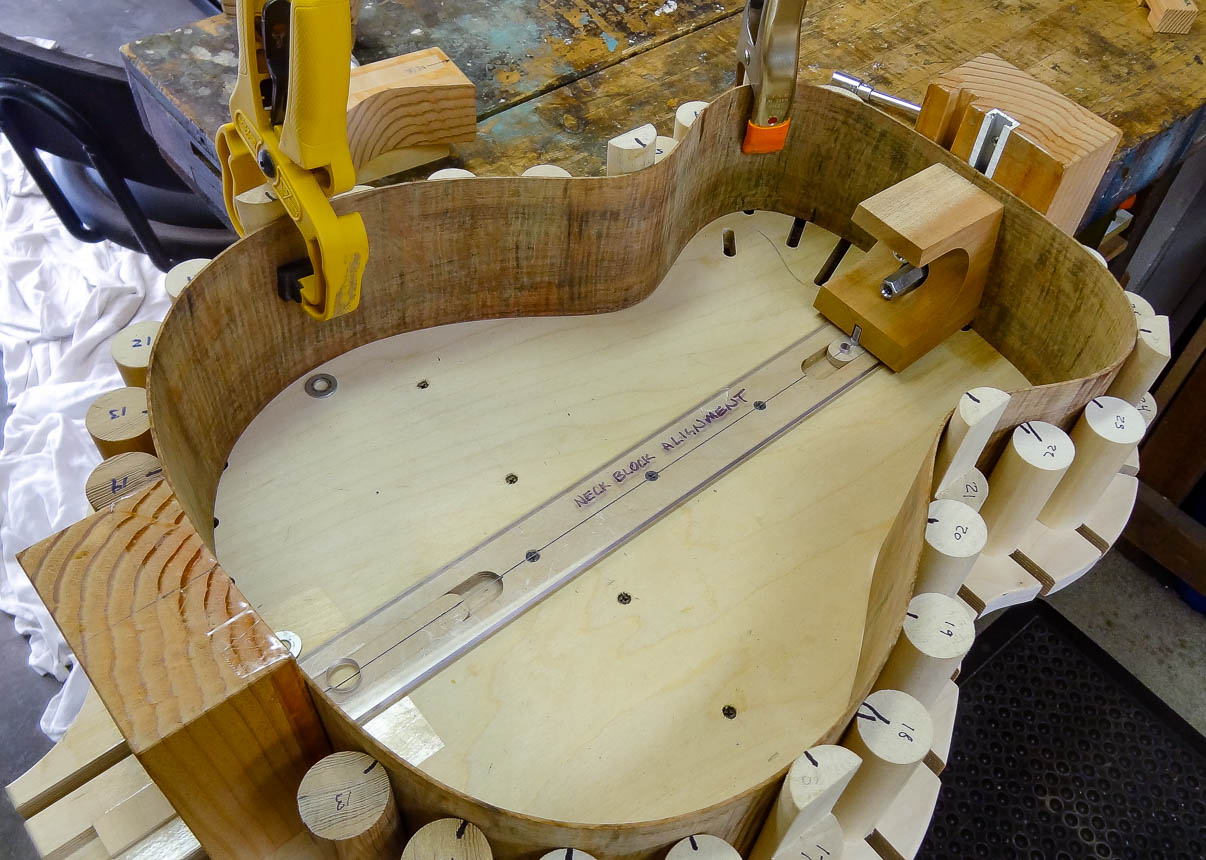
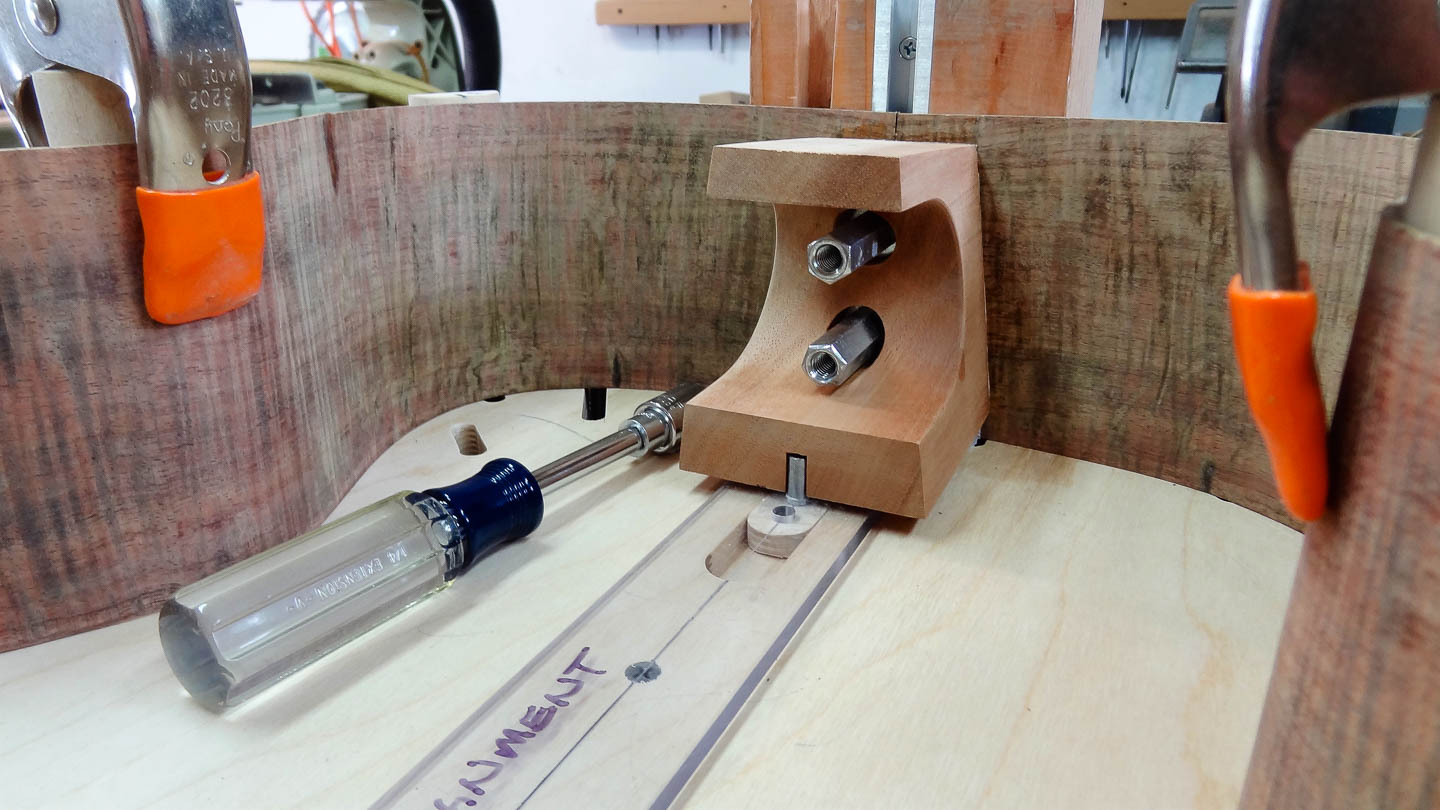
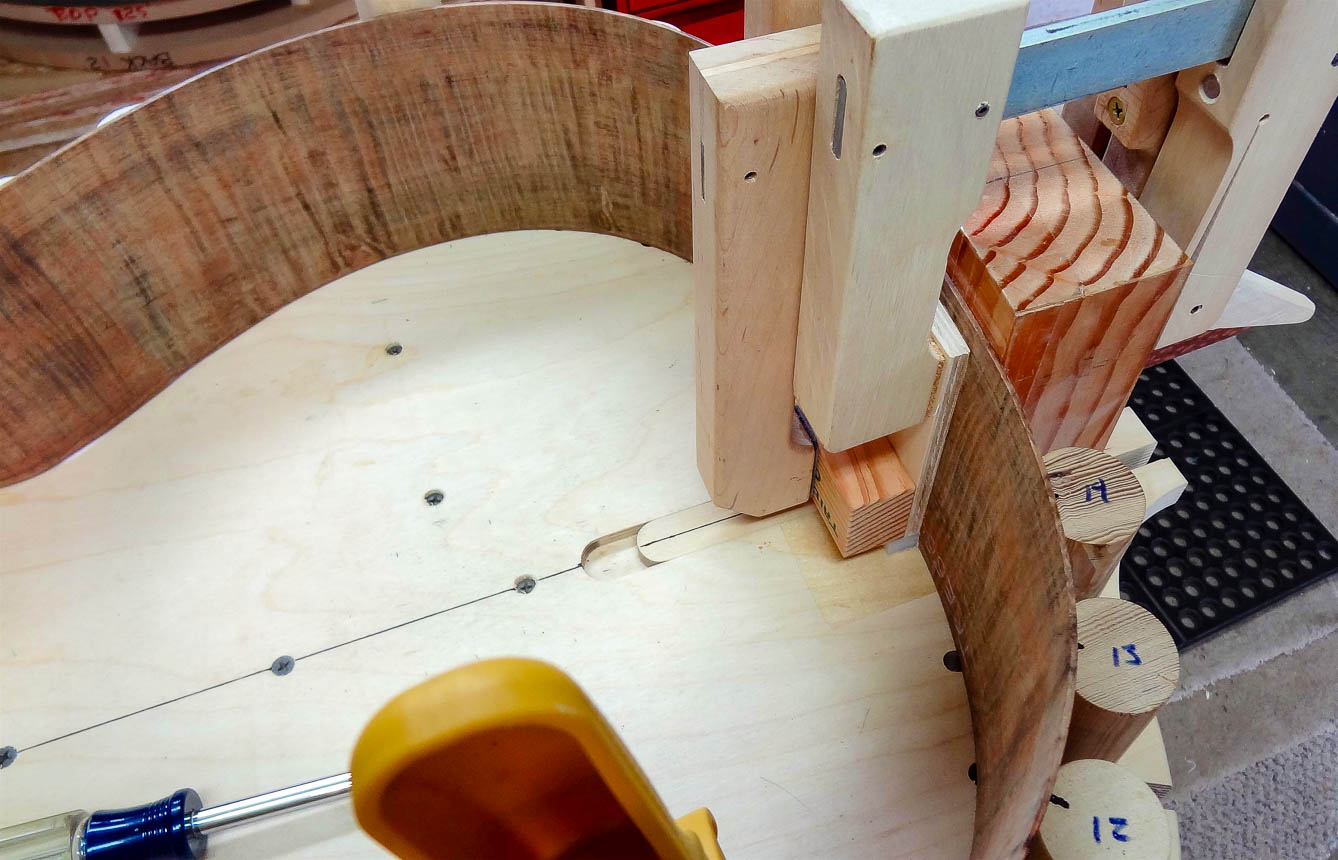
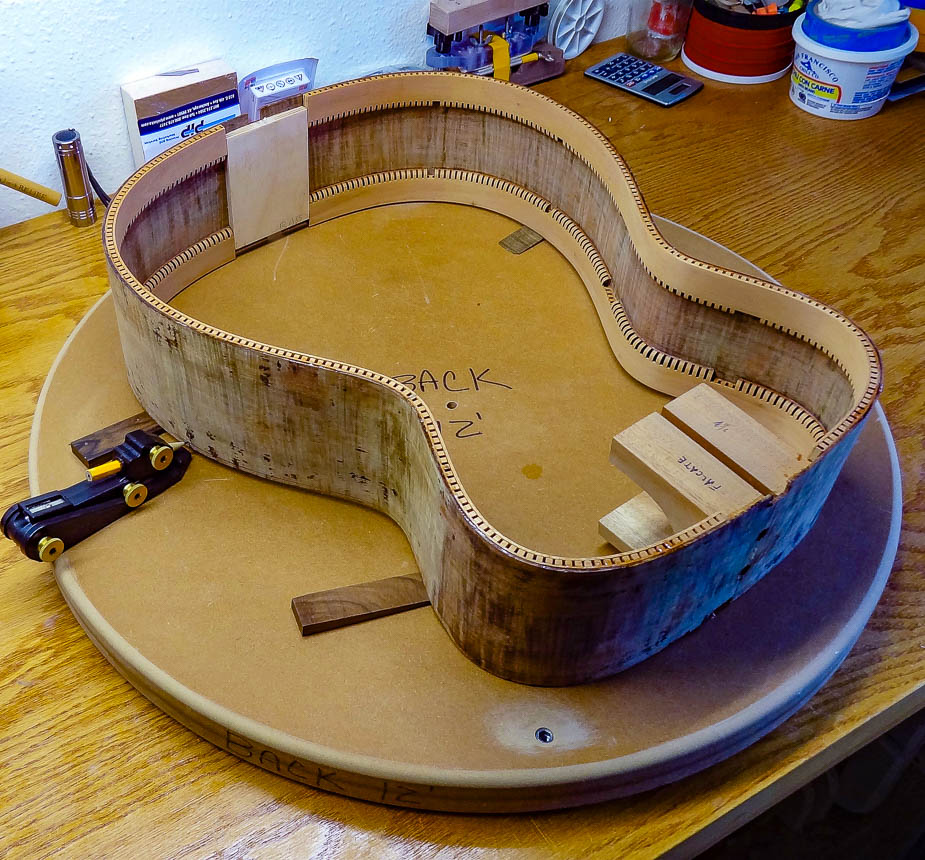
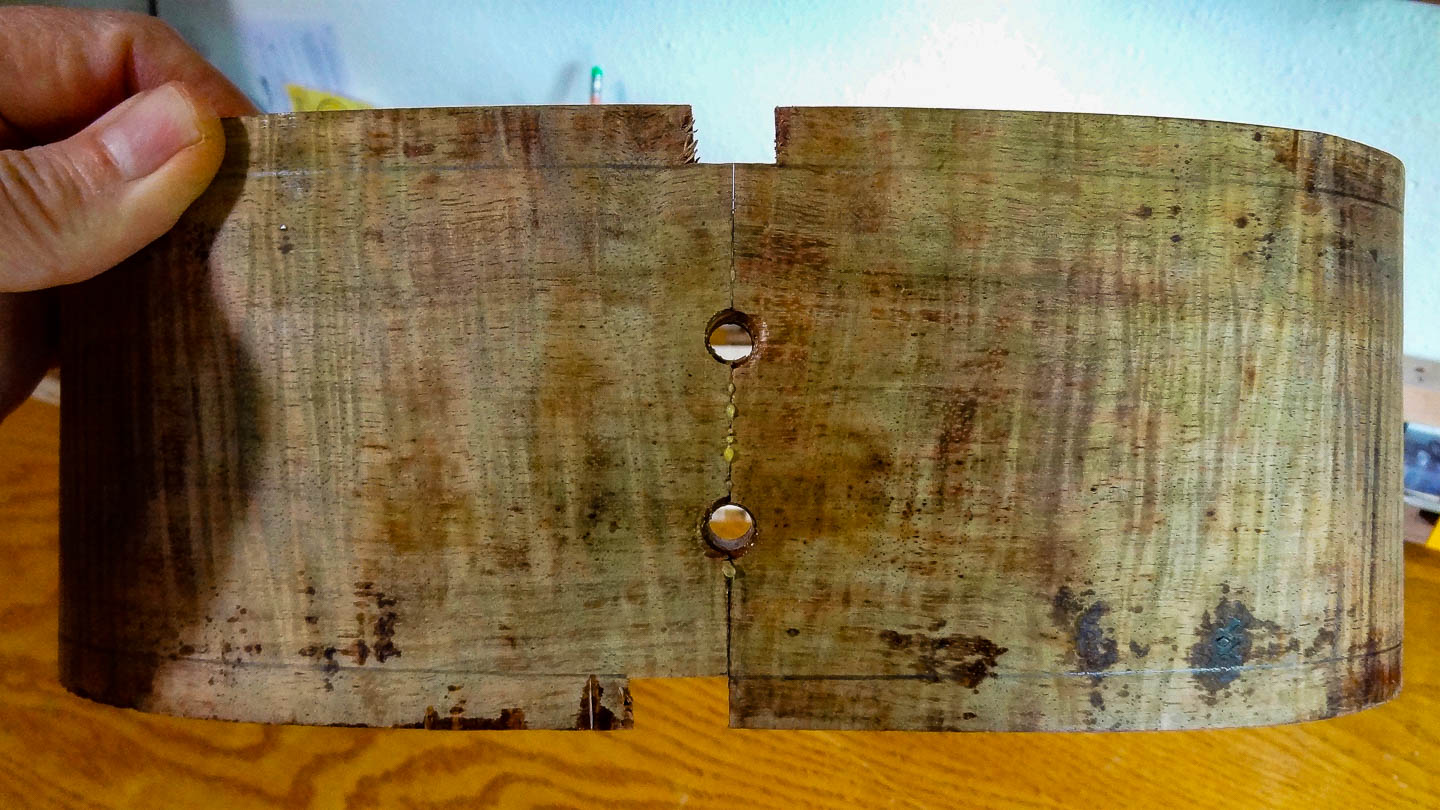
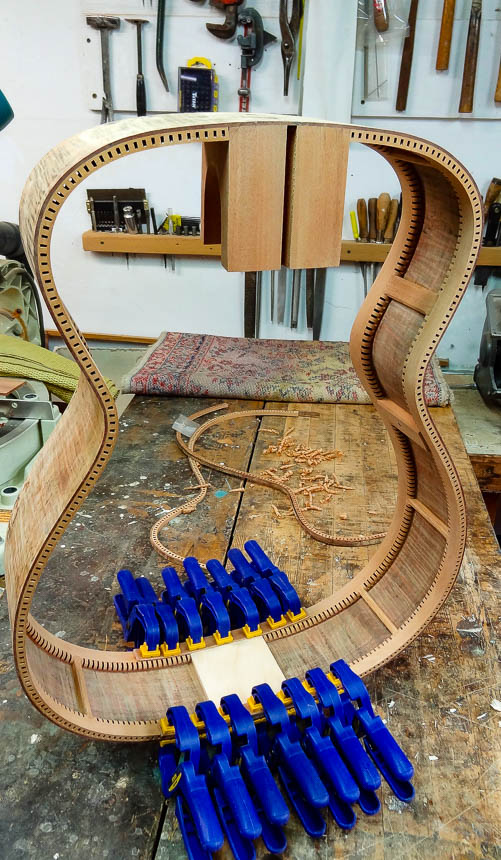
The over-sized bent sides are fitted inside my building board by marking their length and trimming the ends carefully so they butt together with no gaps. The neck and tail blocks will be glued on over these seams to hold the two halves together. I drill half-holes in both sides where they meet at the neck end. This allows bolts to be inserted that will aid in clamping the neck block to the rim while gluing.
Both of the blocks are carefully sized so they define the finished width of the rim, and will be used later to mark out where to make the cuts. The neck block is relatively massive because it carries a lot of load from string tension.
The neck block is glued on using the bolts and connector nuts, and the tail block is glued on using simple cam clamps.
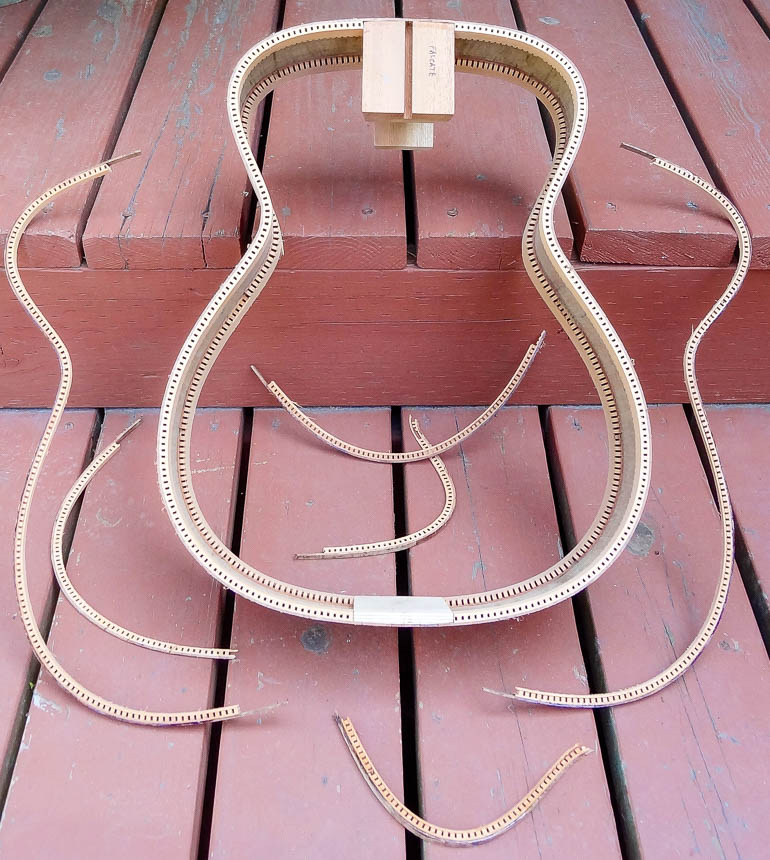
KERFED LINING
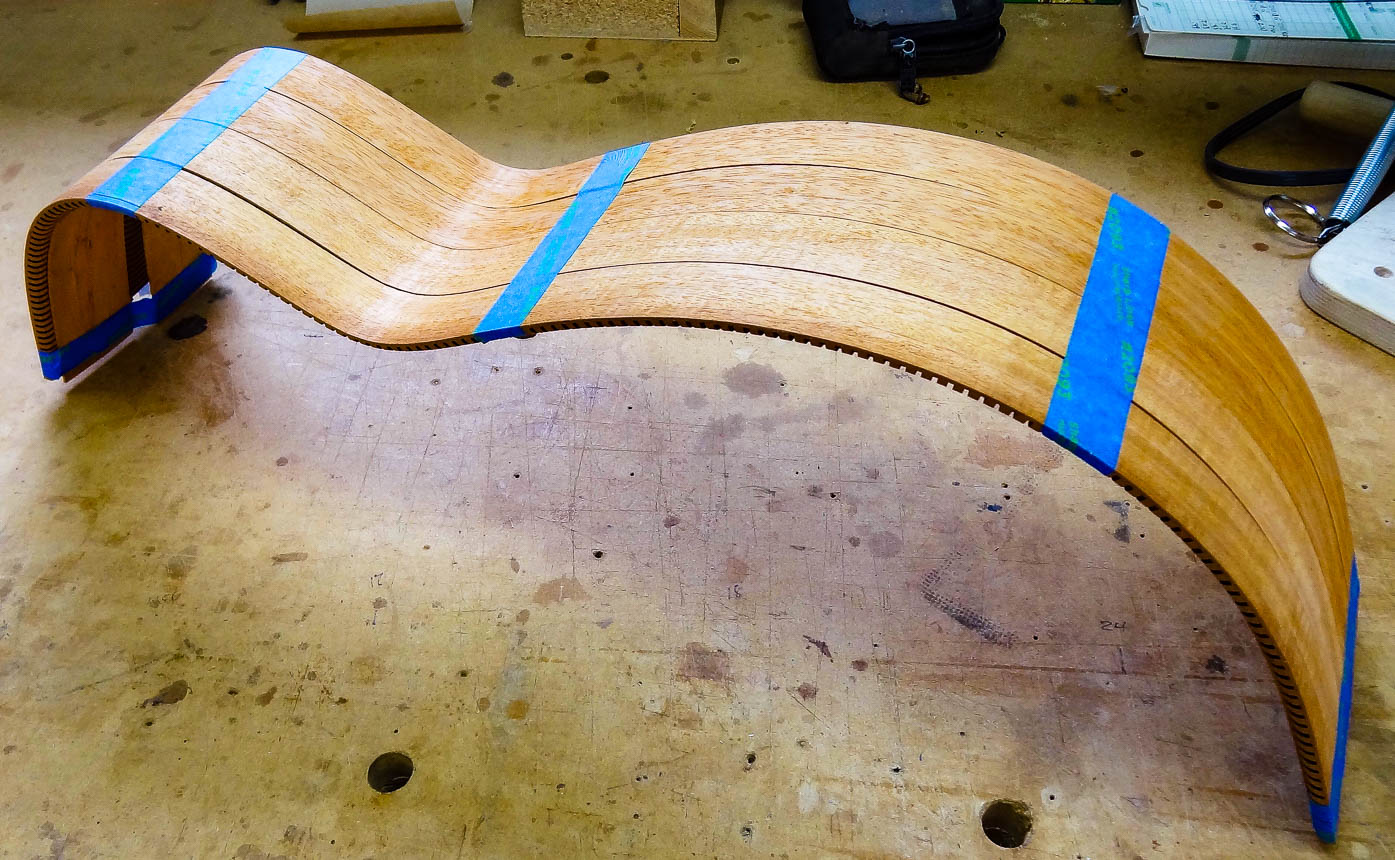
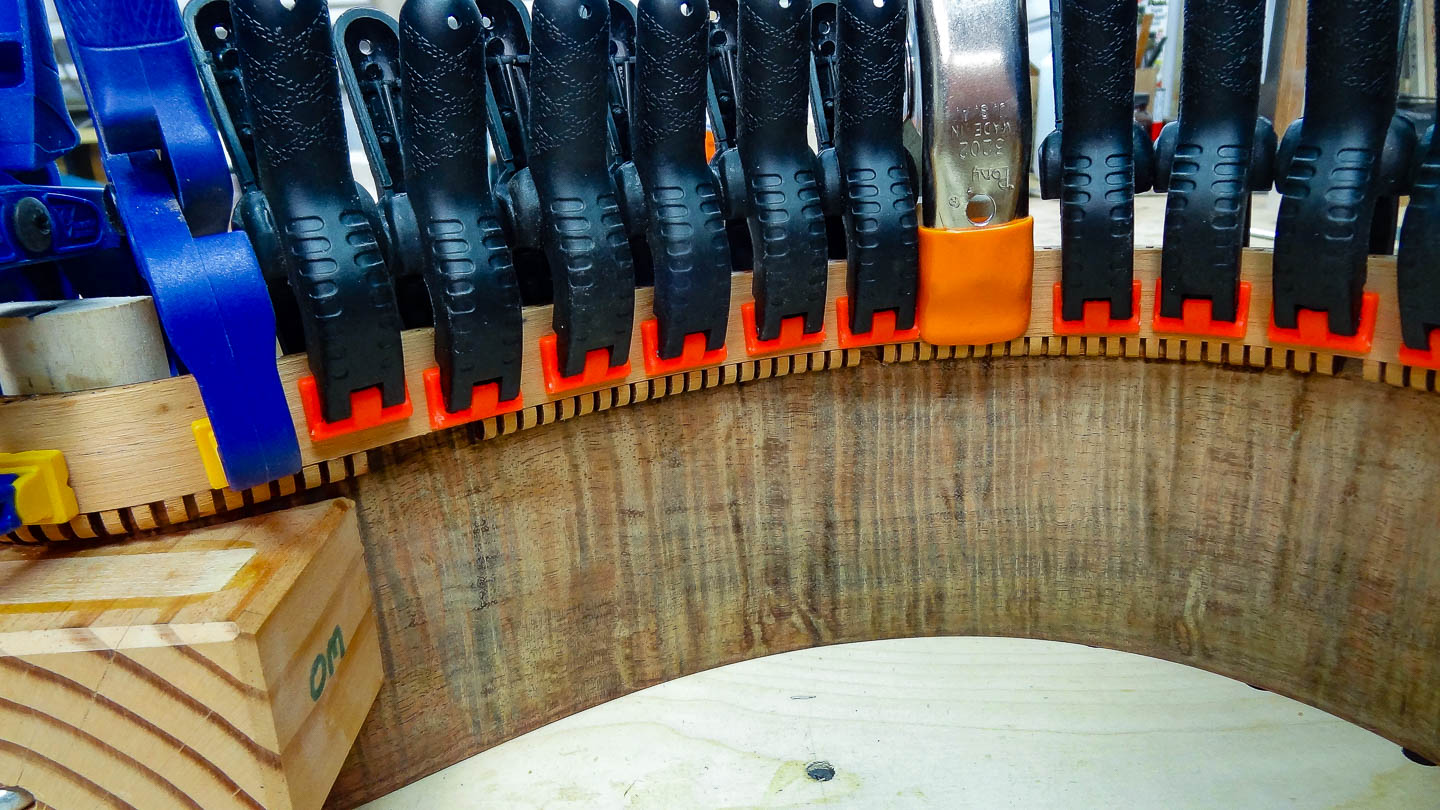
Kerfed lining (lining) is used to create a wider gluing surface for the top and back of the guitar, and to leave enough thickness to cut channels for binding and purfling. The skinny edge of the sides is simply not enough. The proprietary two-part mahogany lining dreamed up by Charles Fox functions to add stiffness to the rim. The two parts consist of a wide piece with evenly spaced saw kerfs–which make it very flexible and easily bent–and a thin strip that precisely fits a ledge milled into this wide piece. When the two parts are glued together and onto the inside of the rim, they create a torsion box-like structure that makes the rim incredibly stiff; so much so, the rim doesn’t need any support structure to hold it in the correct shape. A stiff rim is desirable because it creates a very solid periphery boundary for the top and back. The more solid this boundary, the less vibrational energy is lost into the rim, allowing the top and back to be more efficient at producing sound.
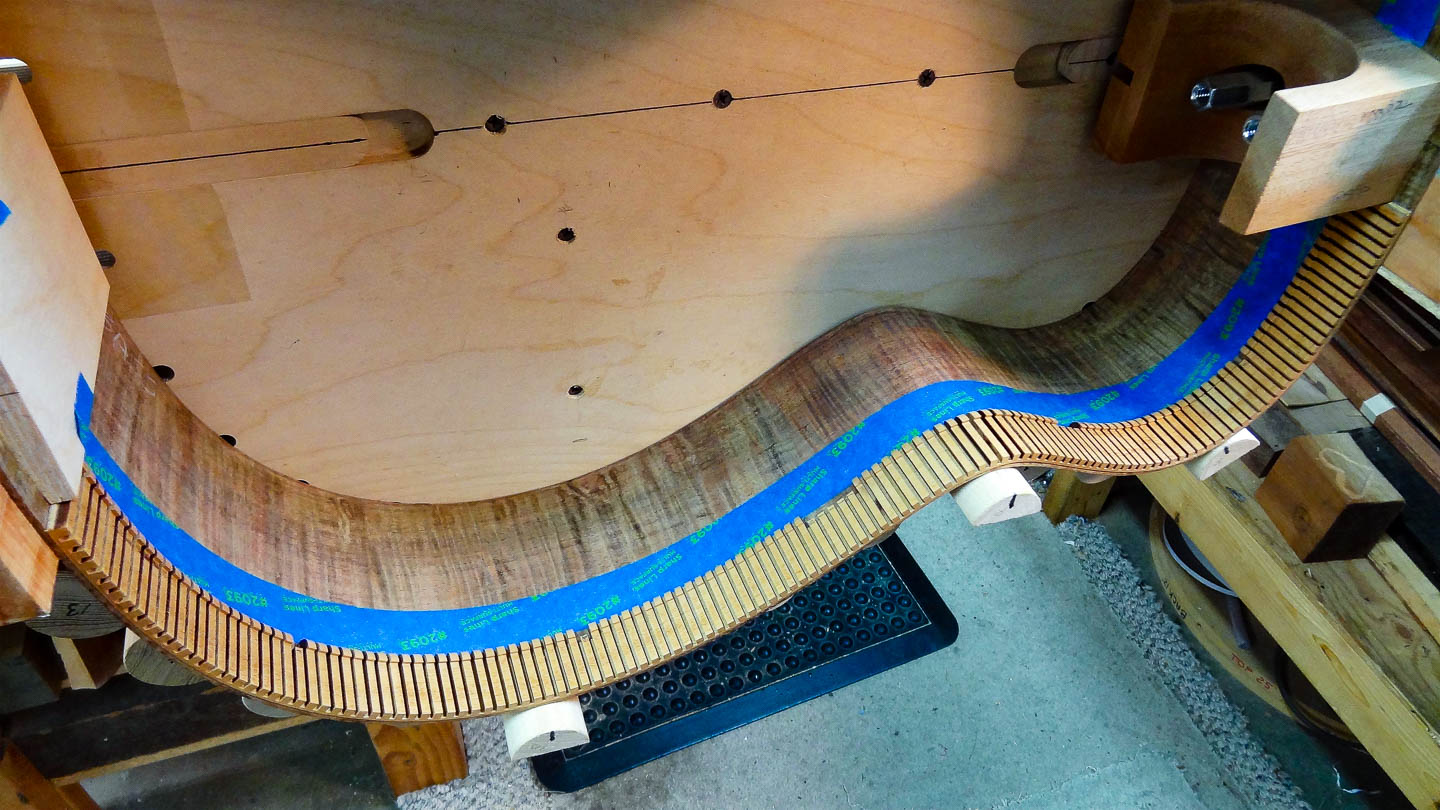
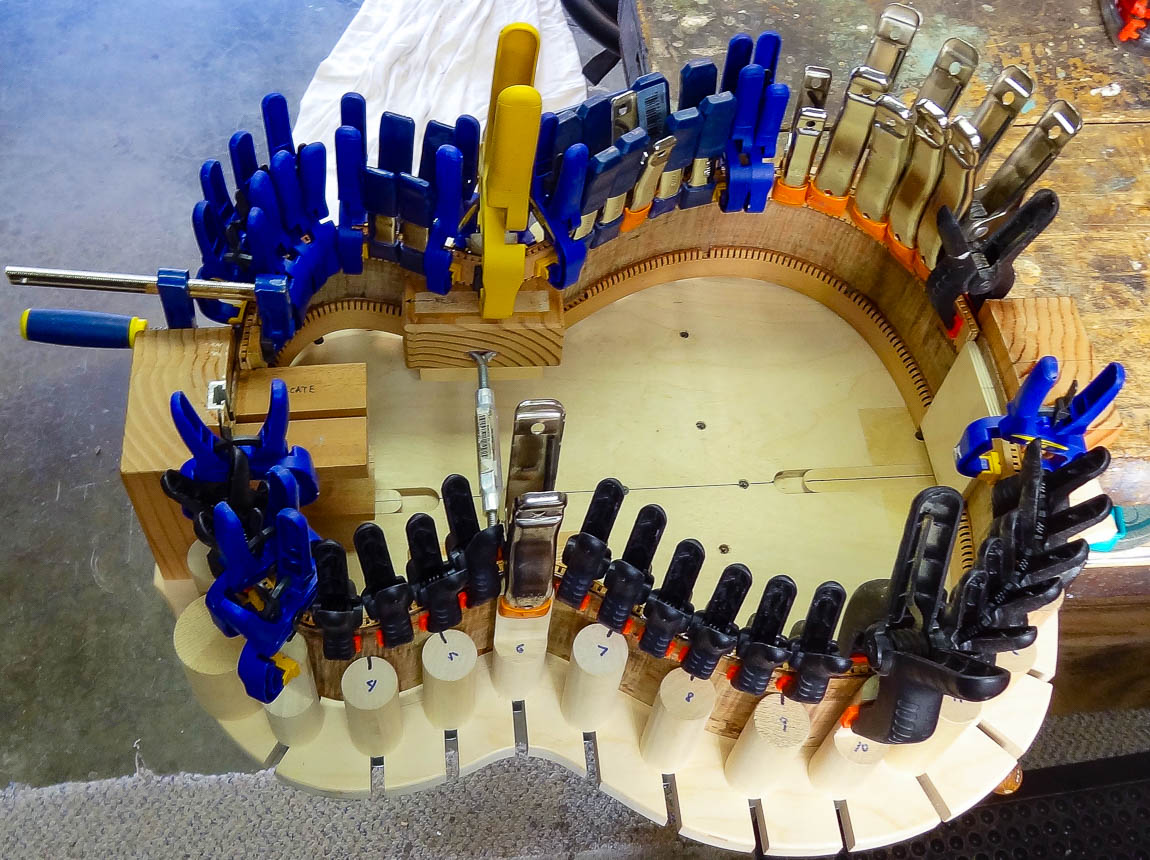
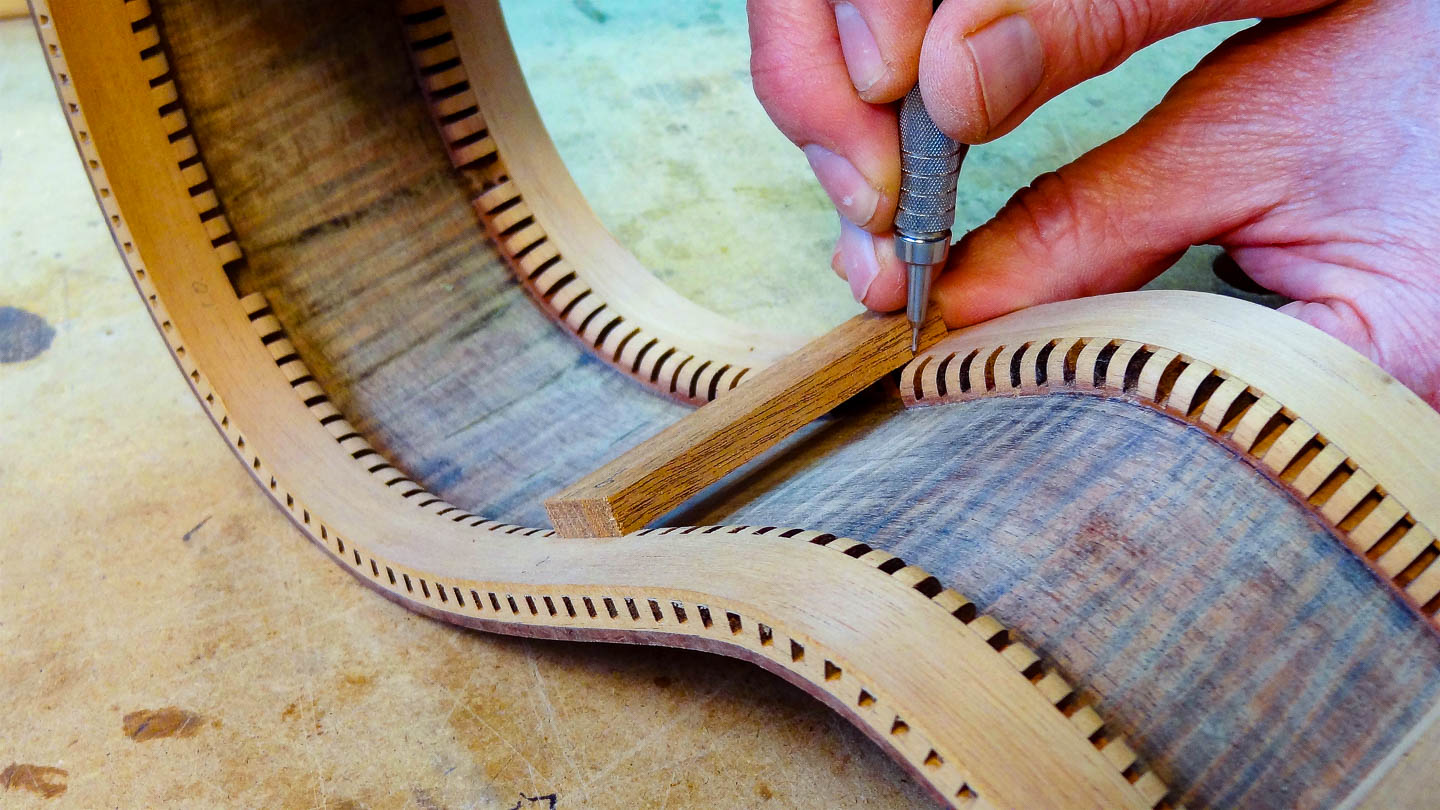
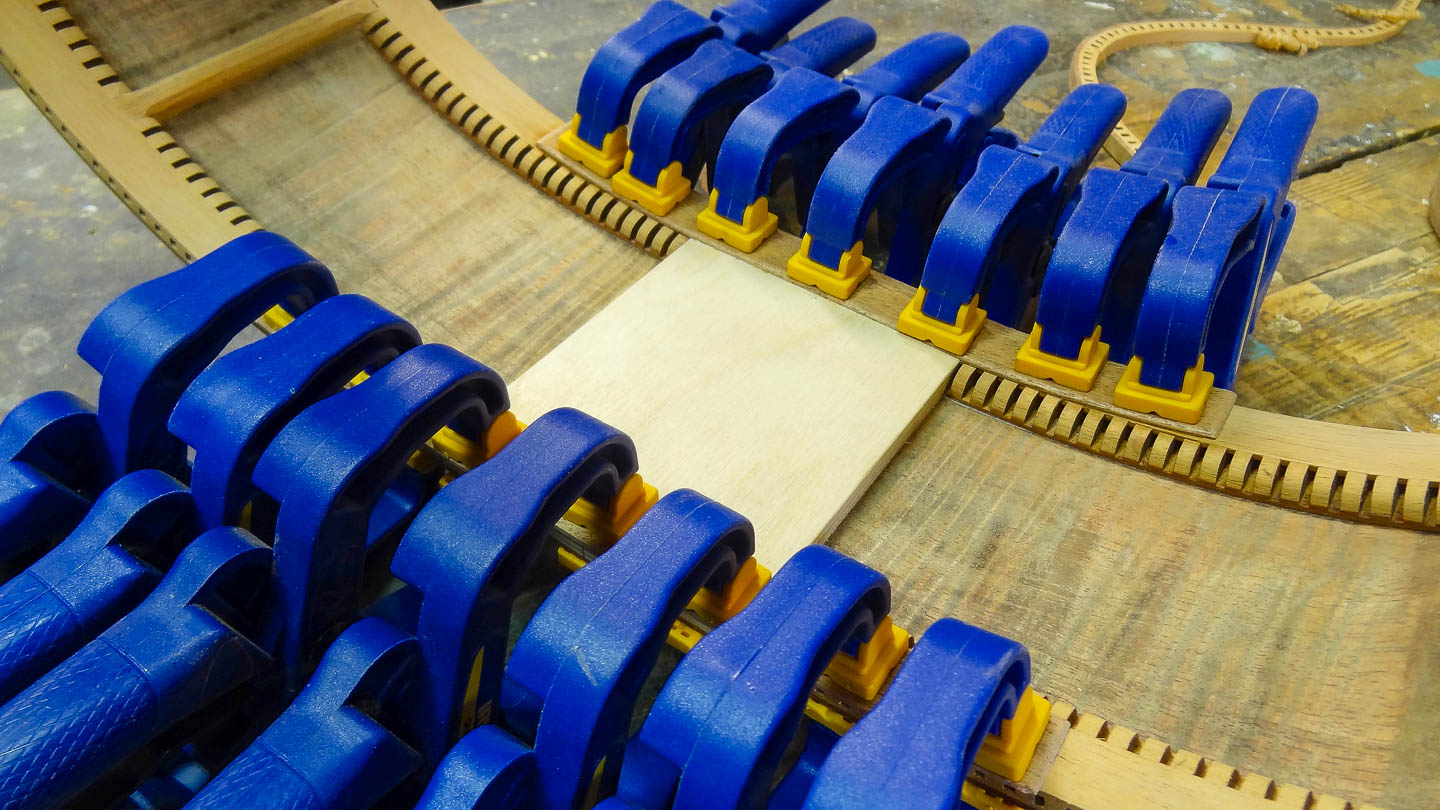
I bend the lining in my Fox side bender just like the sides. Fitting the lining inside the rim is a fiddly process of getting it to fall into it’s natural bent position against the side, and having each end butt nicely against the neck and tail blocks. Remember, I like the inside to look very clean. Before it’s glued in, I locate where all the side braces will be and relieve part of the kerfed piece to accept the braces. It’s much easier to do it now than after the lining is glued in. It does require a bit of forethought, though, because when opposite linings are glued in, the side brace notches need to line up.
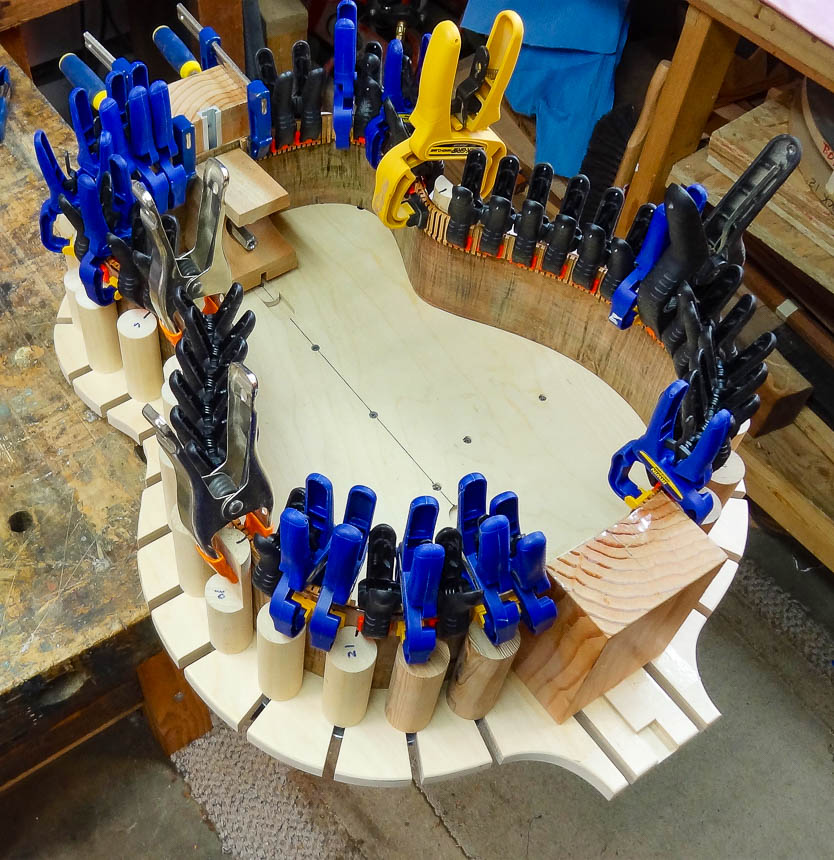
It’s possible to glue both pieces to a side at once, but it’s often easier to start with the kerfed one first, followed by the thin strip, which is what I’m doing here. I put a length of masking tape on the side to help with cleaning up glue squeeze-out, and a good number of clamps get the job done. Once the back’s edges are complete, I pull the rim out of the building board, flip it around, and repeat for the top’s edges.
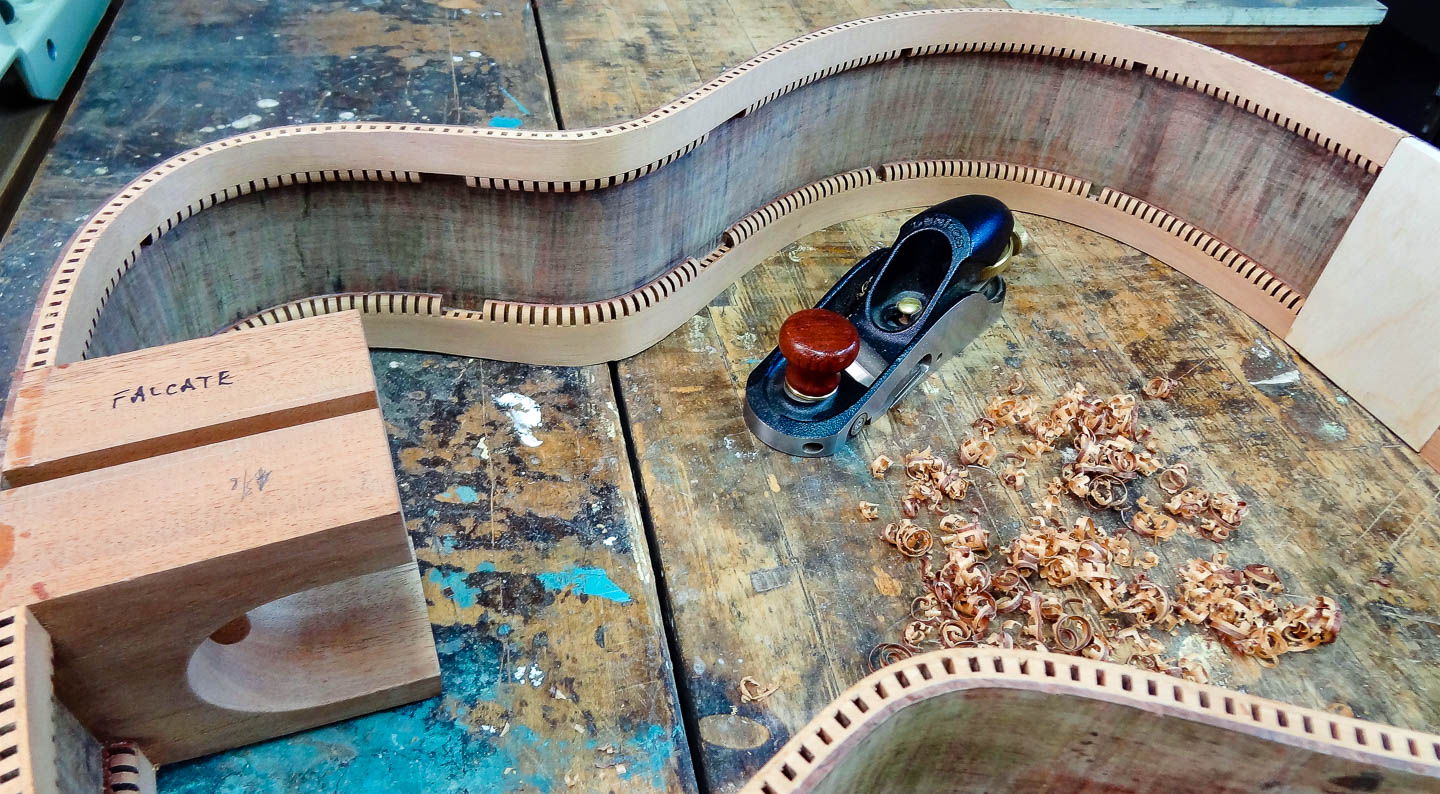
CUTTING THE RIM TO WIDTH
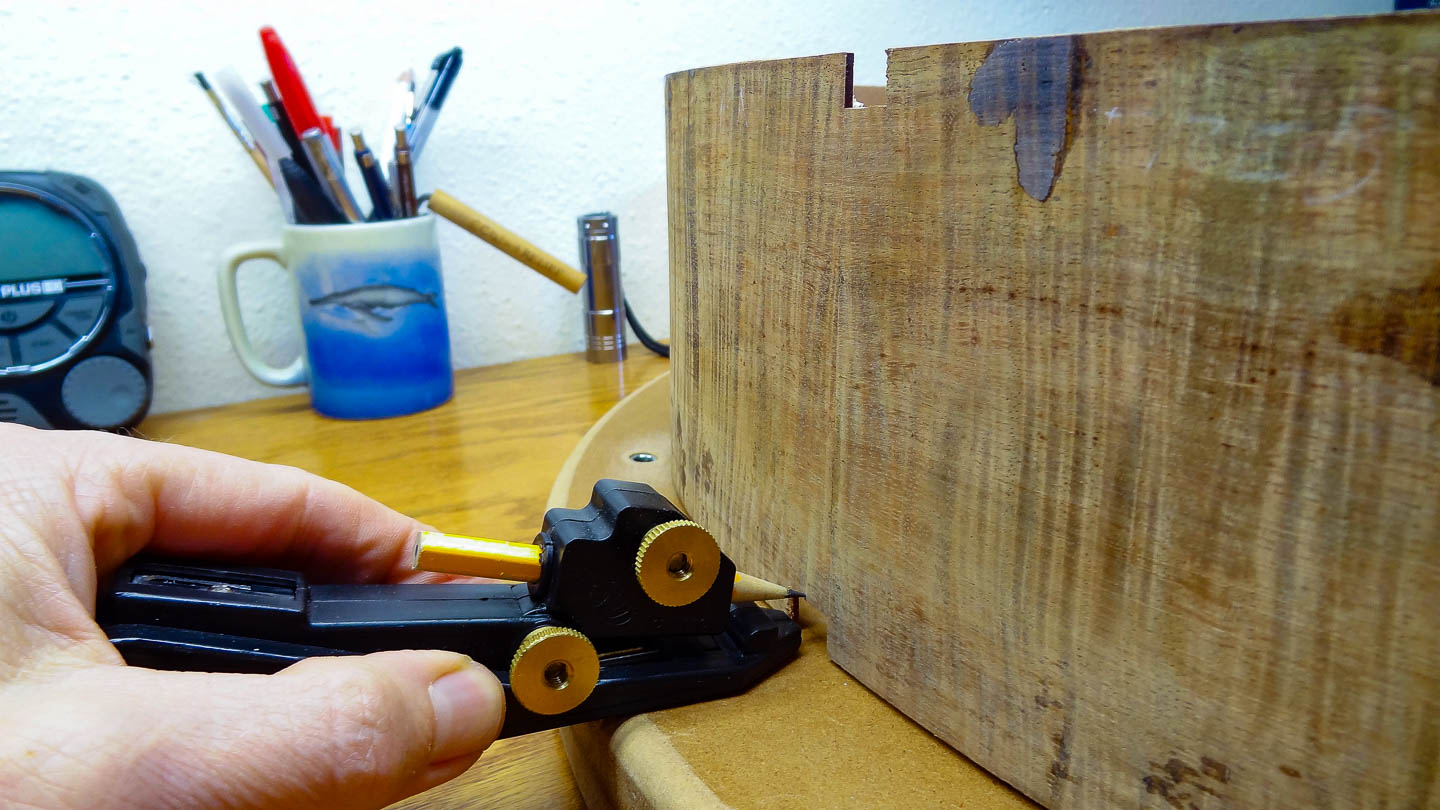
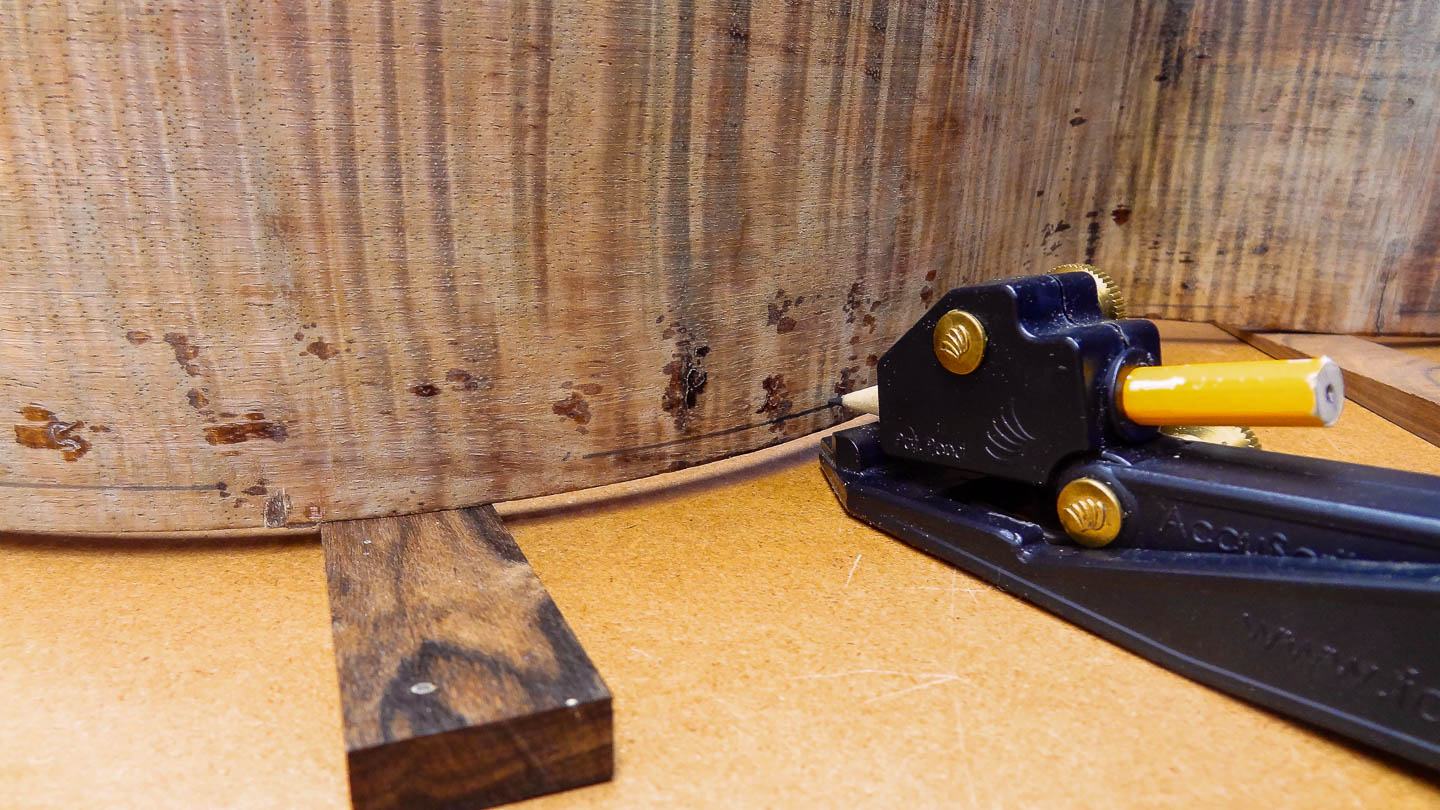
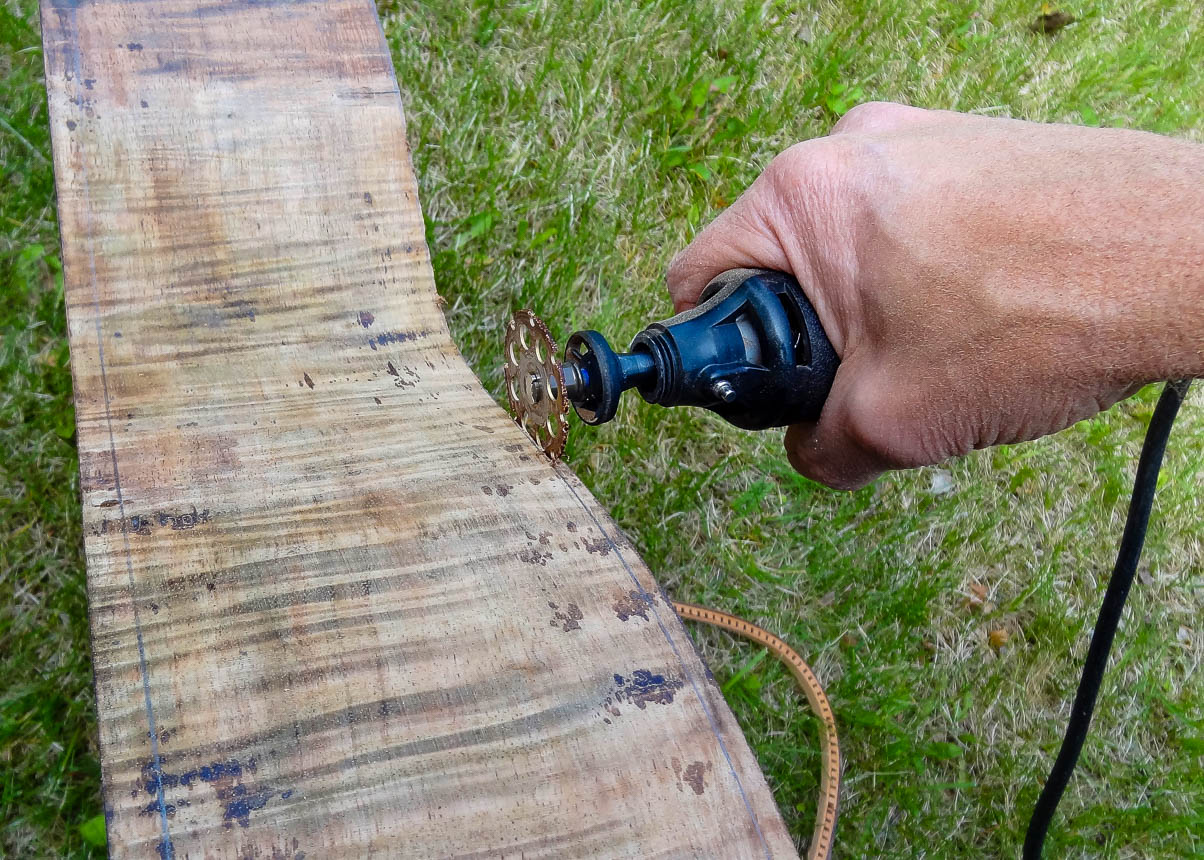
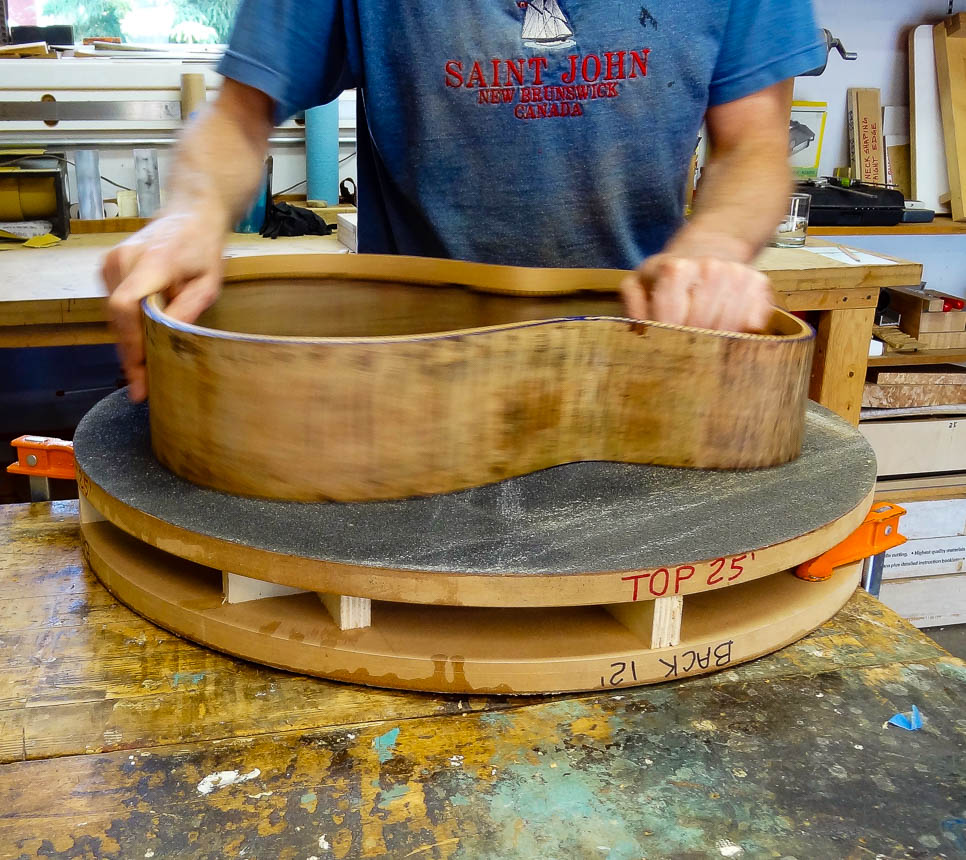
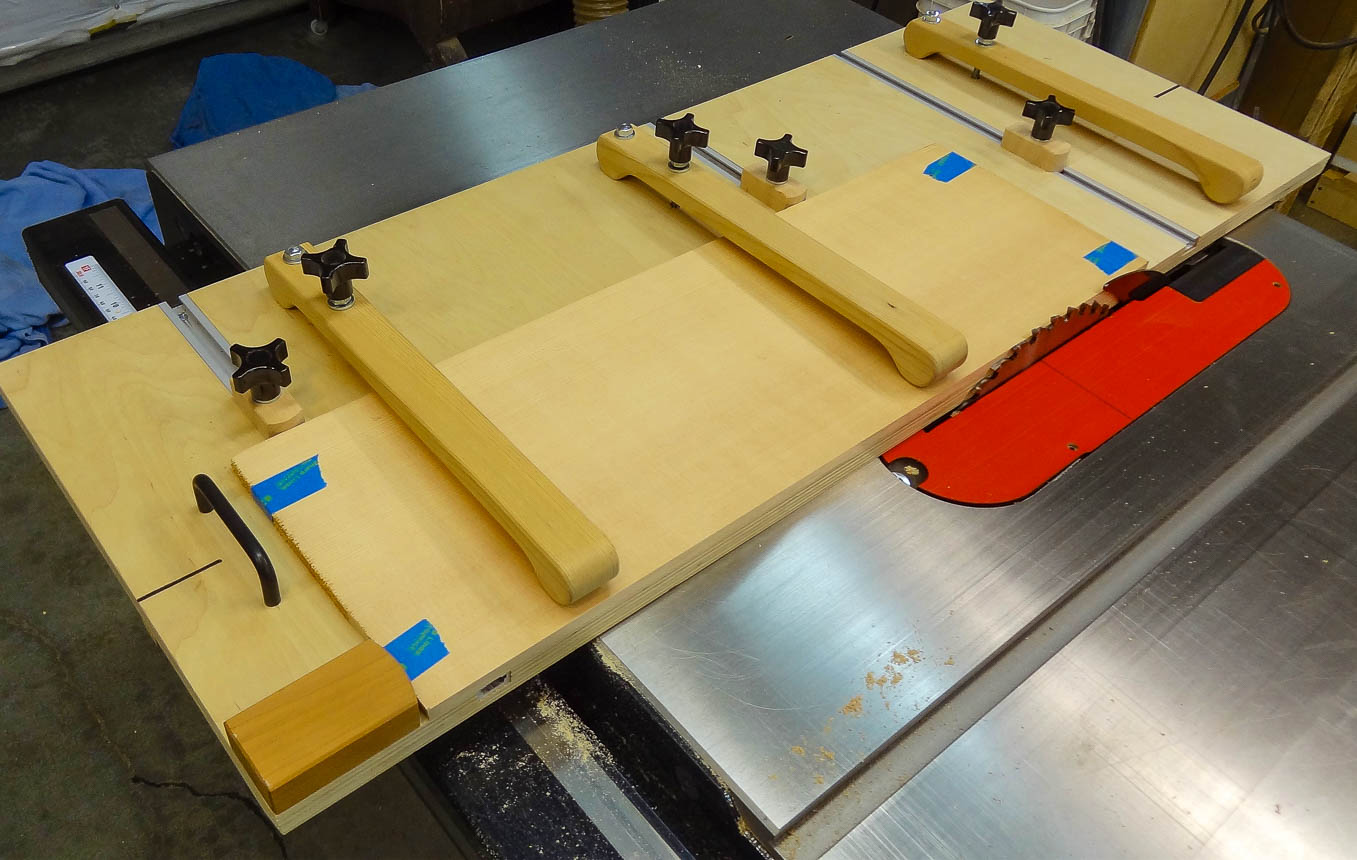
The rim is overly wide at this point, with the neck & tail blocks defining the finished width. The finished top and back of the guitar will be domed in shape–the back having a slightly smaller radius dome than the top which makes it “bulge” a bit more. I use the appropriate radius dishes and a special scribing tool to help draw a line around the entire periphery of the rim. The rim is stabilized on the dish with small wedges so both end blocks are a consistent height above the dishes surface. The scribe is set to the edge of the end blocks and then run all the way around the rim which marks the cut line. Following the dish’s surface automatically creates the perfect cut line.
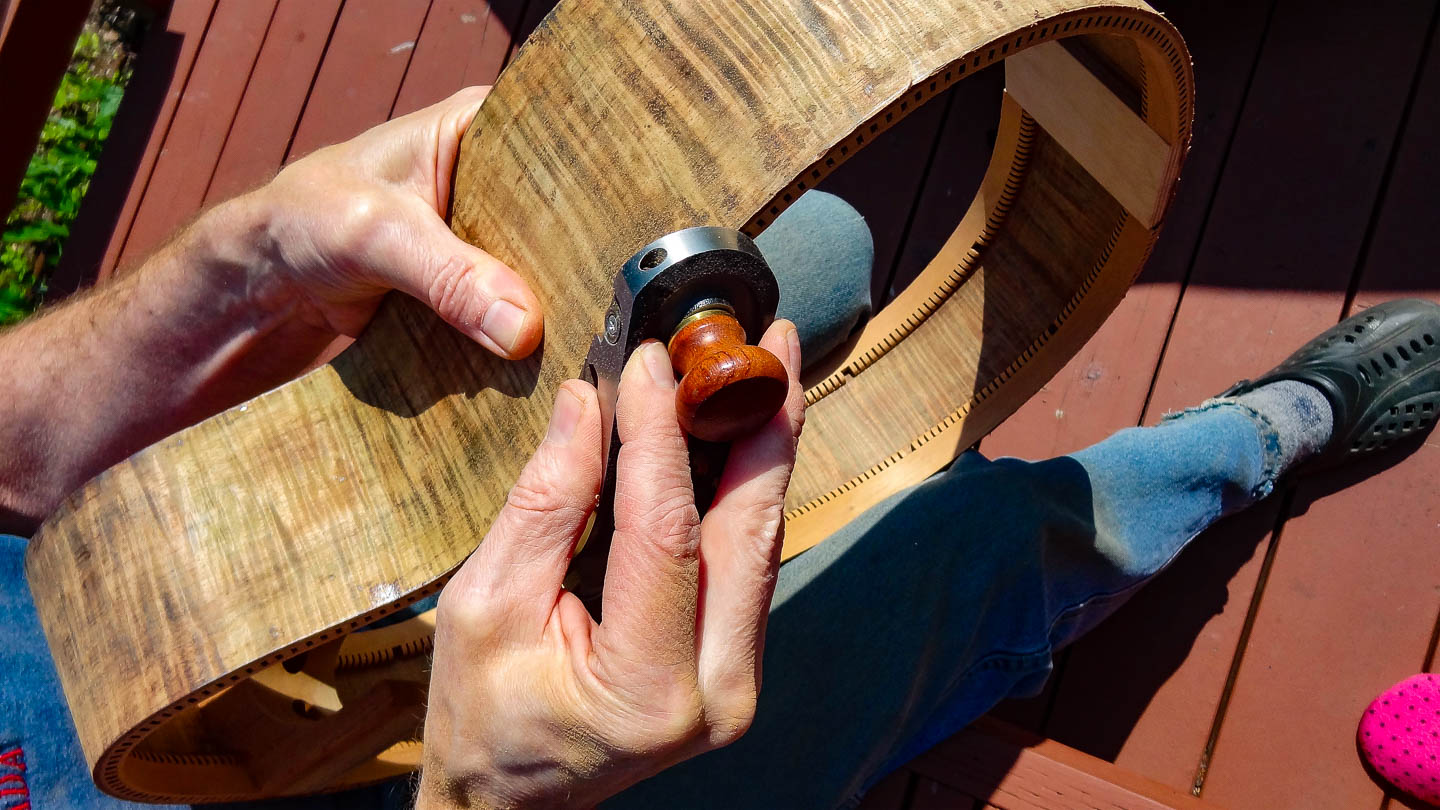
I use a Dremel tool and a cutting wheel to cut the rim to rough width, and fine tune it quite a bit with a block plane. Final finishing is done on two different radius dishes that have rough sandpaper attached. I put witness marks along the edges of the rim and rotate it on the sand paper until all the marks are removed.
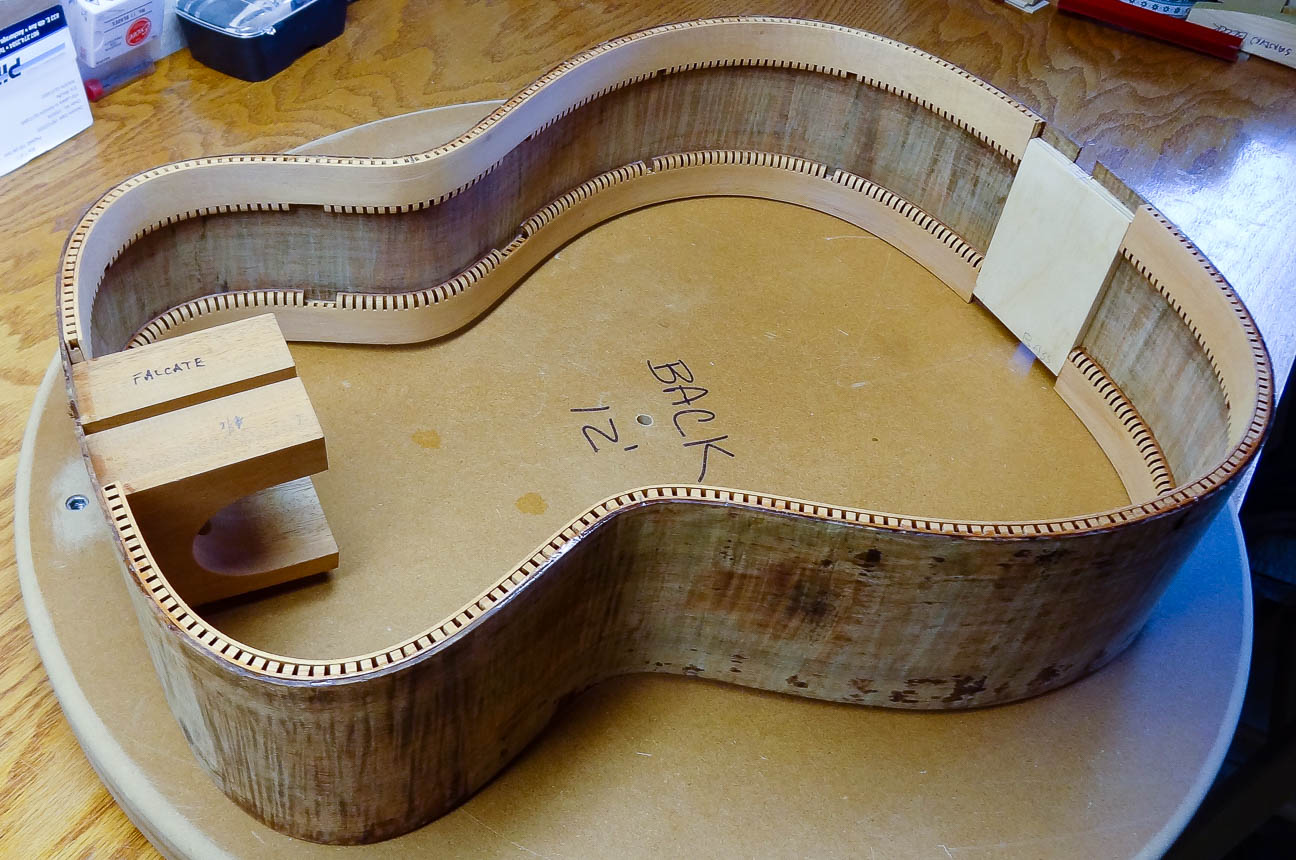
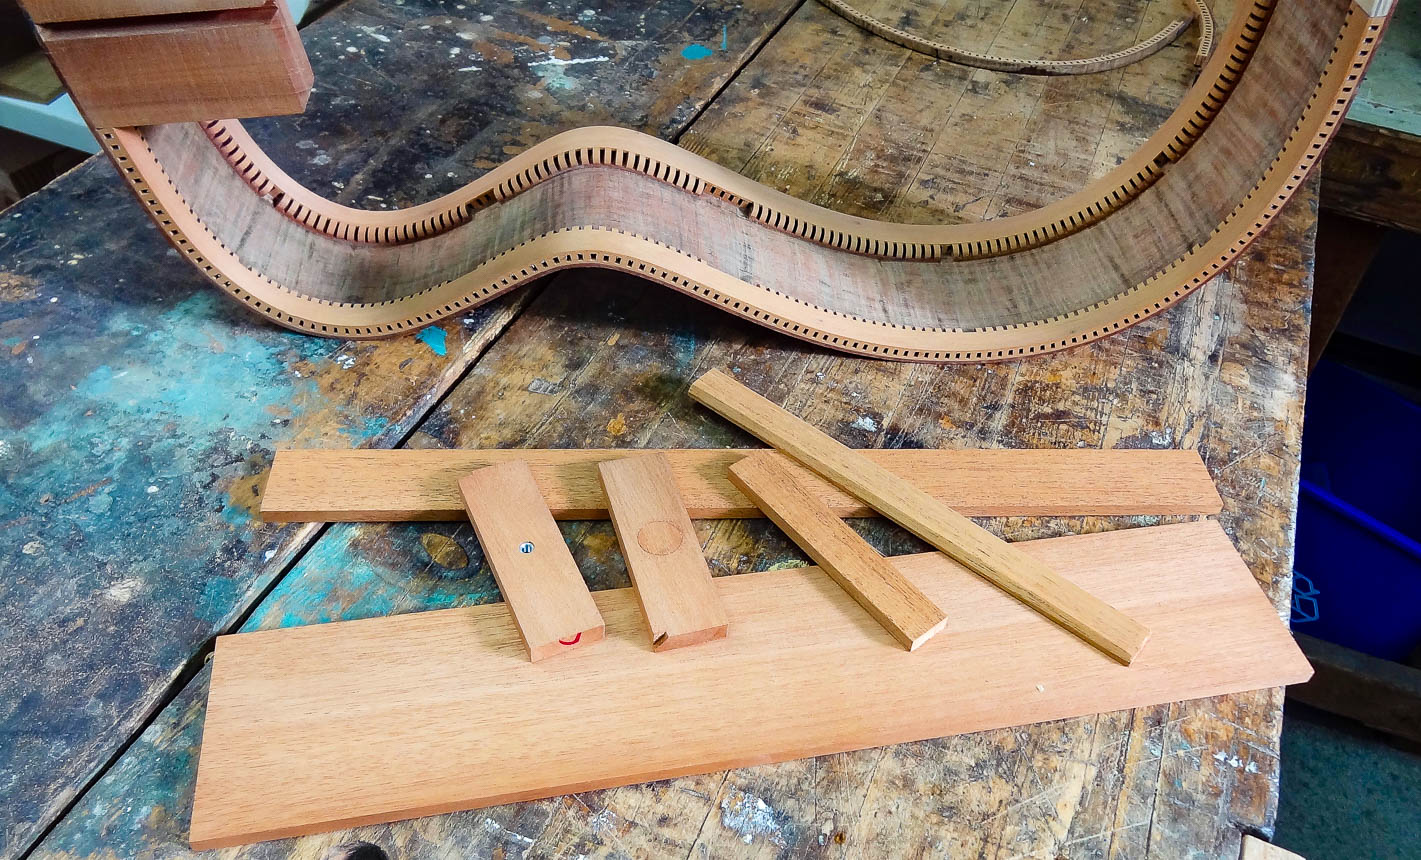
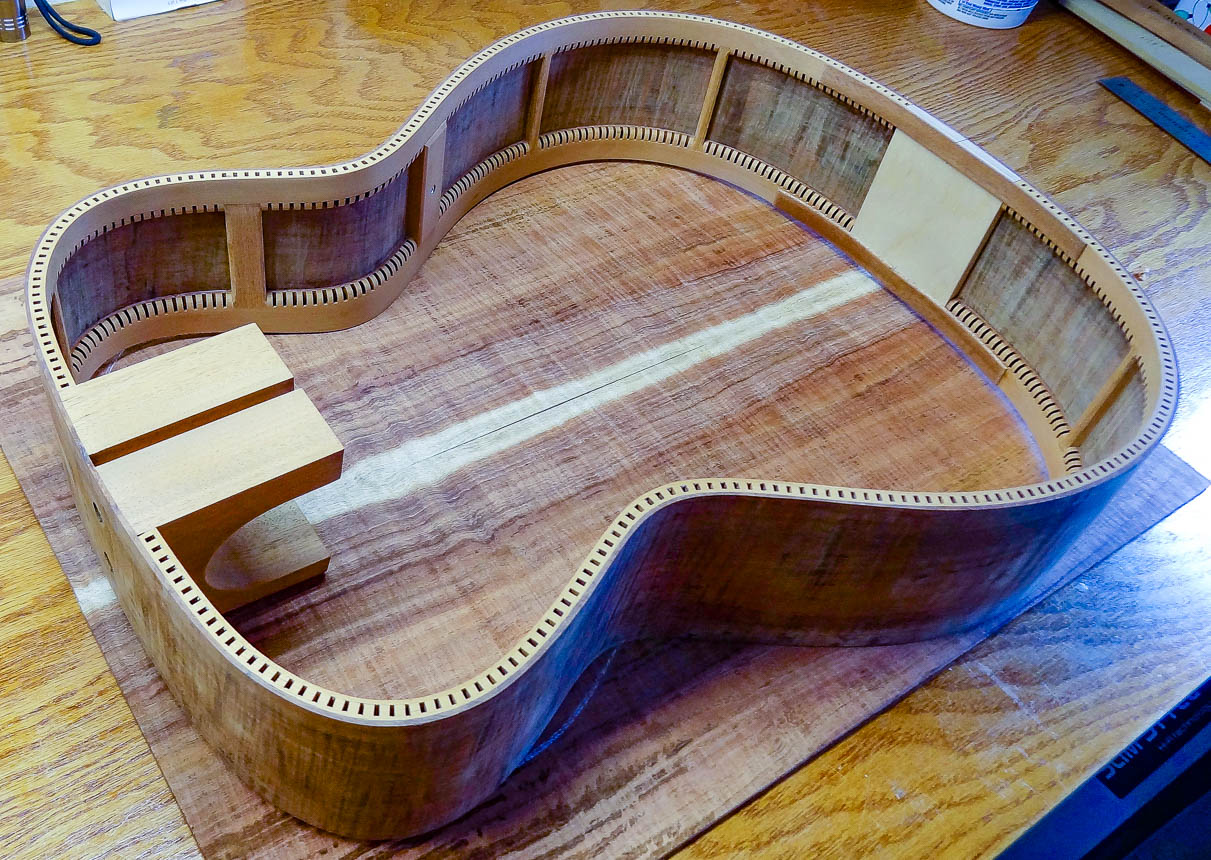
SIDE BRACES
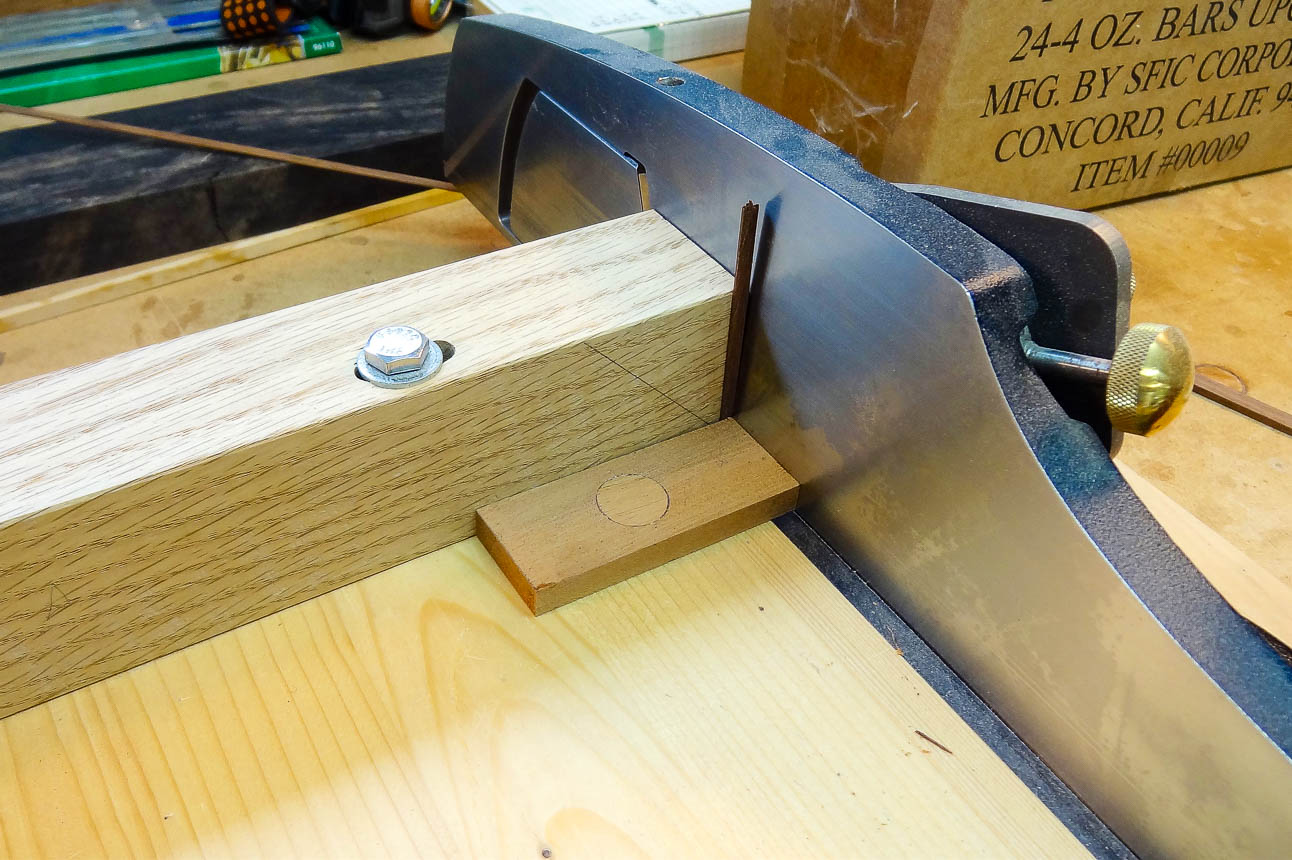
Side braces help stabilize the sides, reduce cupping of the sides across the width, and help prevent cracks along the sides grain. I use mahogany for my side braces, and a couple are specialty ones with a small nut embedded. These could possibly be used to bolt on side mass weights to the finished instrument. If I need to fine-tune the resonant frequencies, adding side mass is one of the ways to accomplish that.
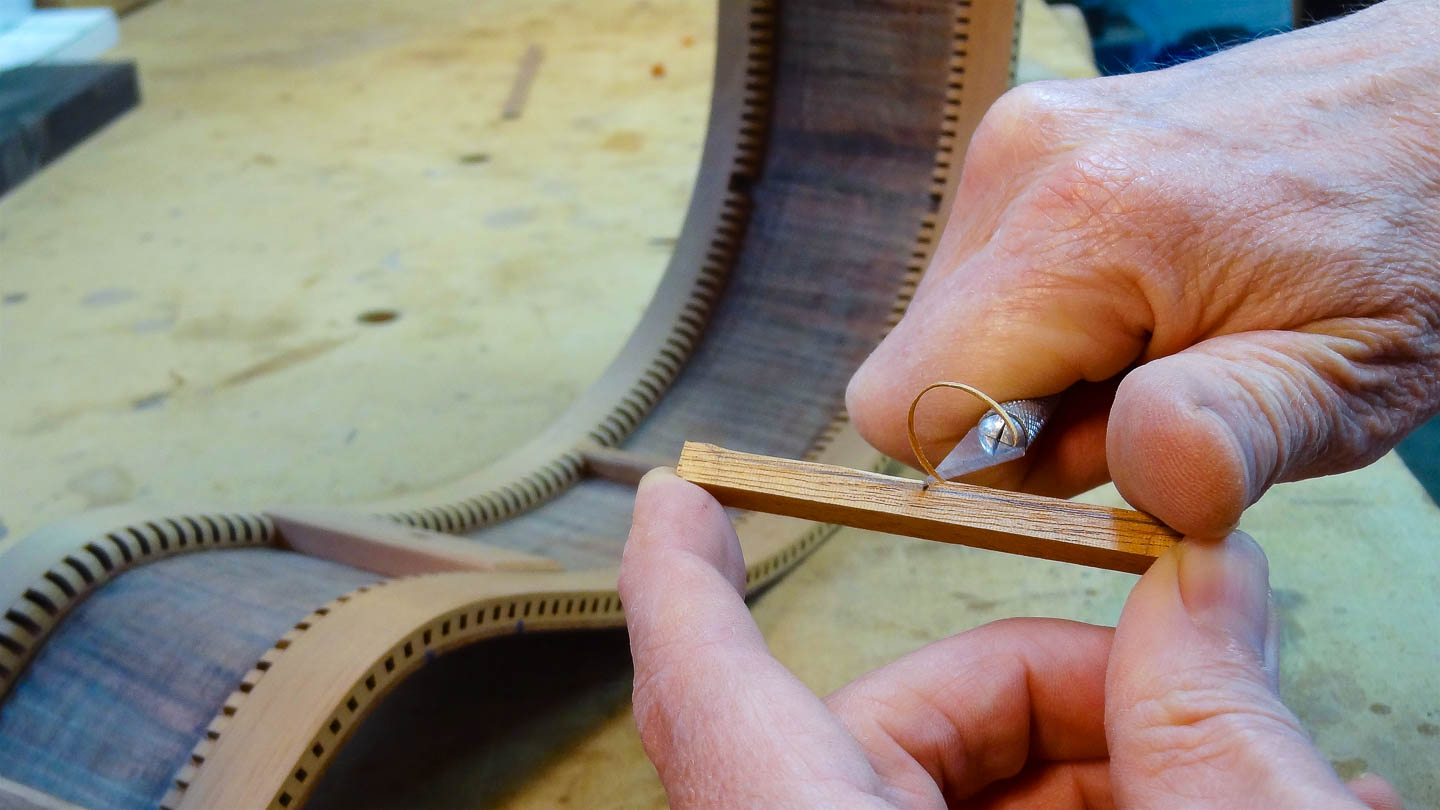
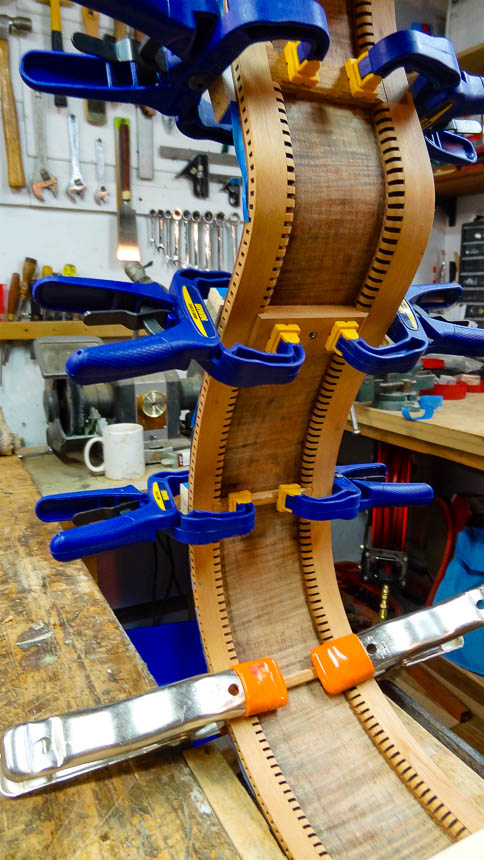
Each brace is fitted individually with a little saw for the length and a hand plane for the width. I fine tune things with the hand plane and shooting board. Once they’re fit, I chamfer all the outer edges with a knife and small sanding block. I use flat cauls and clamps to glue them on.
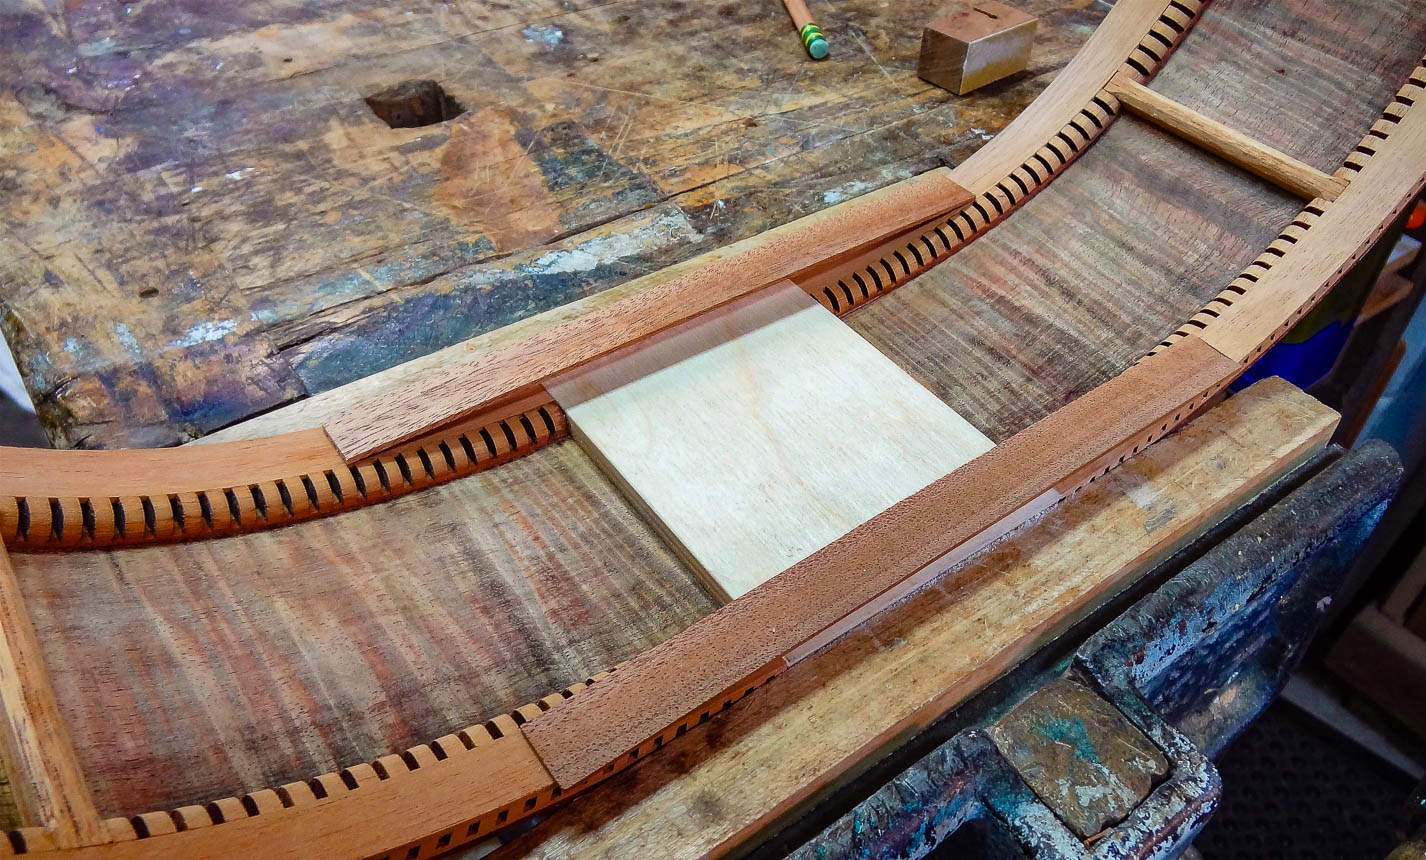
The last step to complete the rim is to add tail block straps. They’re used to tie the tail block and lining together which makes the bottom of the guitar super strong. The strap is a thin strip of mahogany and simply spans the area over the tail block and on to the lining.
TOP & BACK PLATES
The top and back of the guitar are composed of plate halves that have been sawn out of the log and kept in sequential order. This creates what is called a book-match. If you spread open the halves (like opening a book) the grain on opposite sides of the “spine” is a mirror image of itself—which is very attractive. Like I did with the guitar sides at the tail end, I put what will become the “show” faces together and adjust them so each plates end-grain lines up. Taping them together in this orientation, I cut the plates to finished size and the mirror image ends up as perfect as it can be.
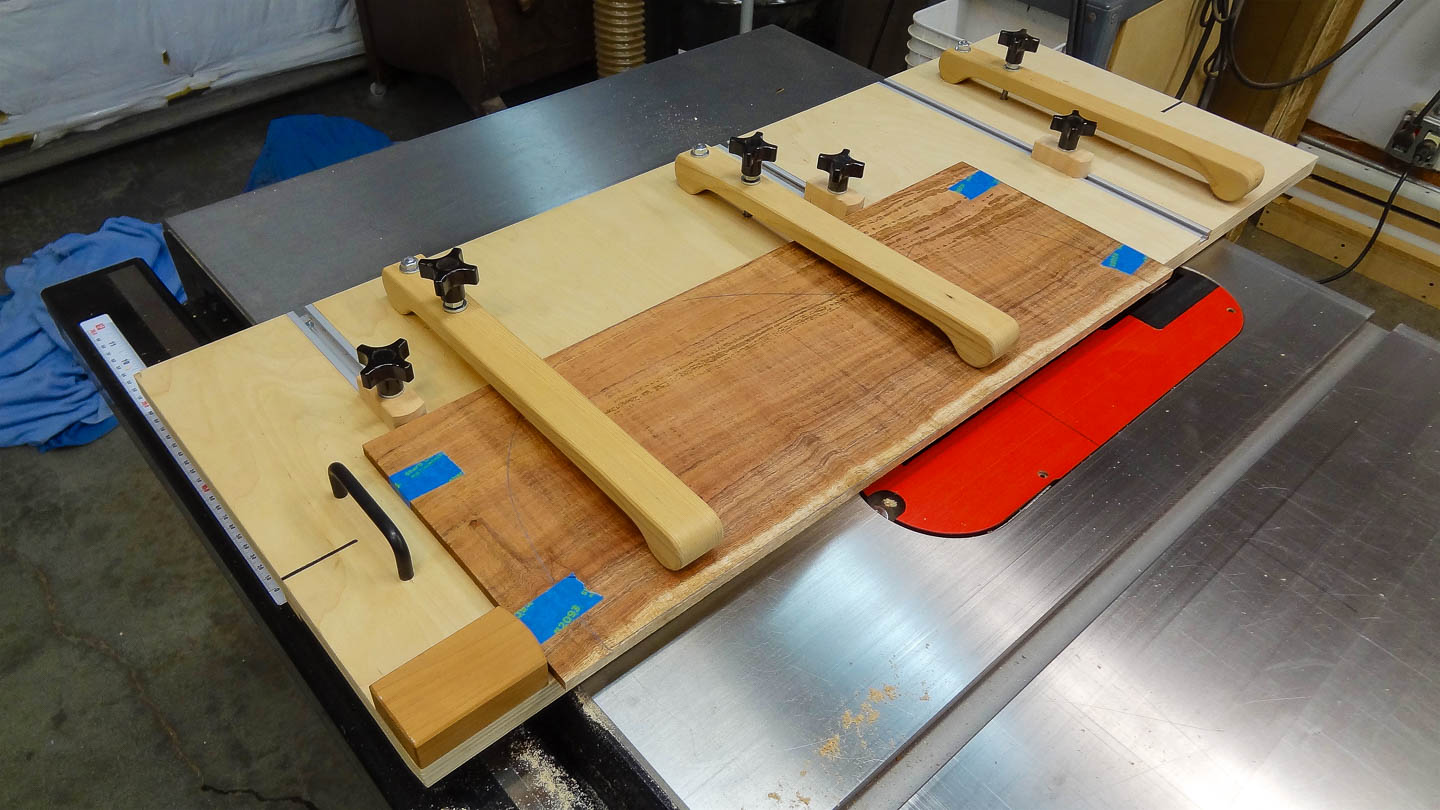
The next step is one of the most important of the whole building process: Determining three of the natural resonant frequencies of the wood we have chosen for the top and back of the guitar. In order to get good results recording these frequencies with the spectrum analysis software, the plates must be perfectly rectangular and of consistent thickness. I take the readings before gluing the plates together for more accurate results. It’s a matter holding the plate in very specific locations for each different frequency, tapping it ten times per recording, repeating this ten times and averaging the results.
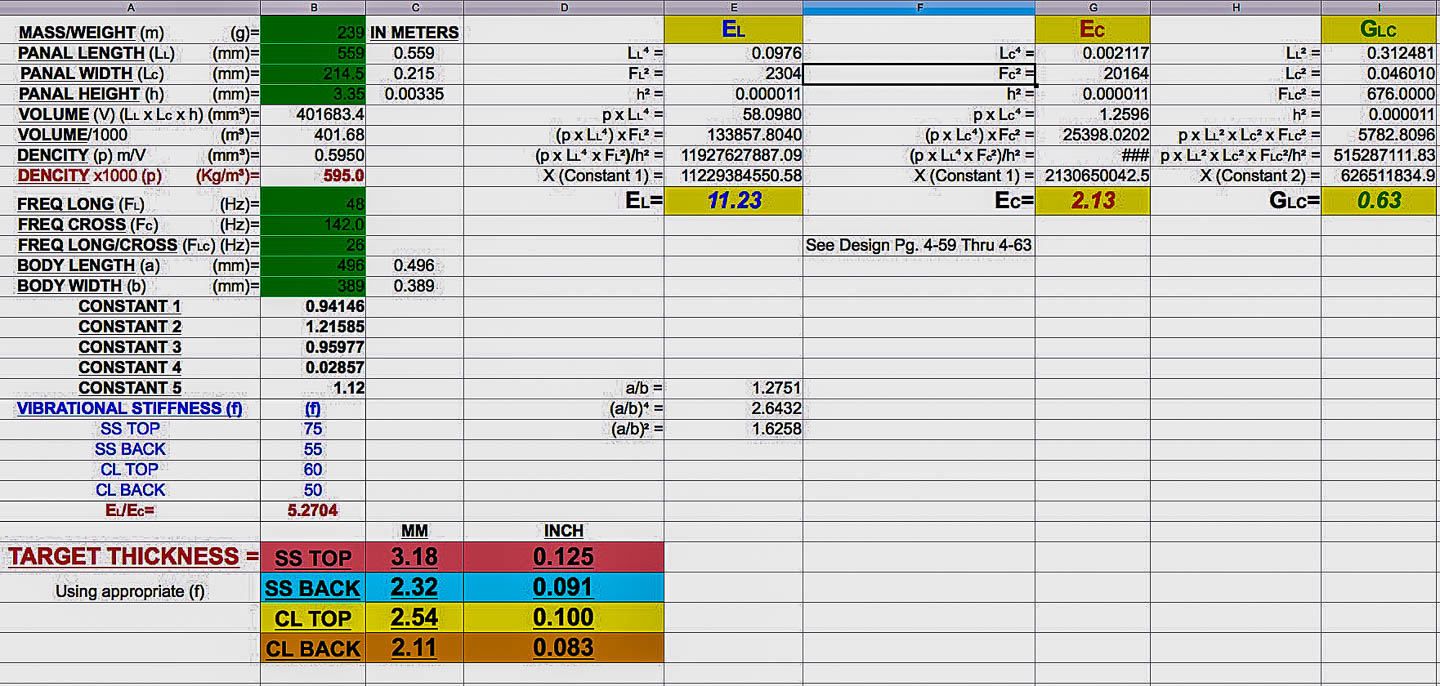
These results, plus a bunch of other data, are then fed into a very involved spreadsheet which spits out the ideal thickness for each finished top and back panel.
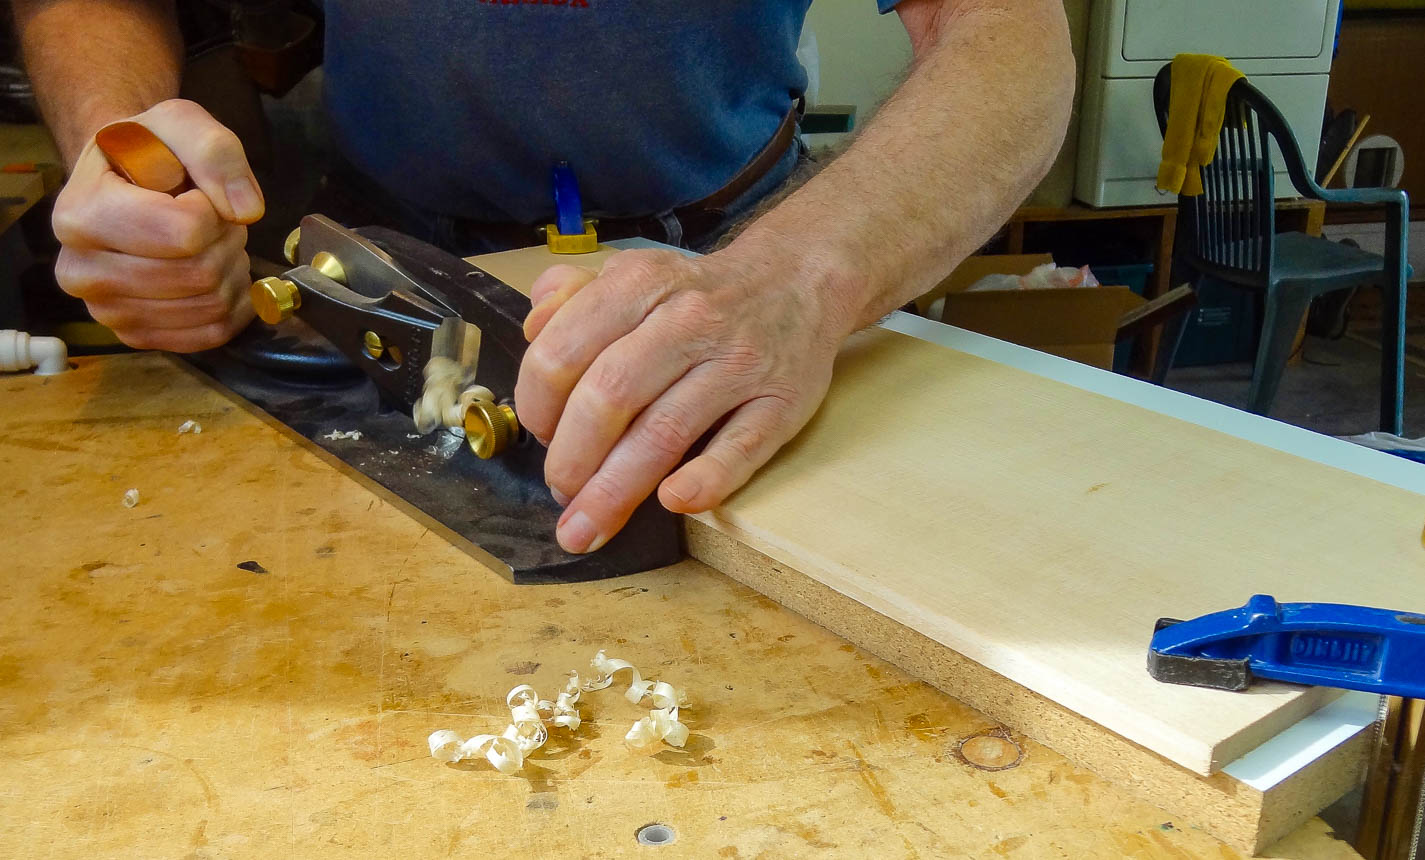
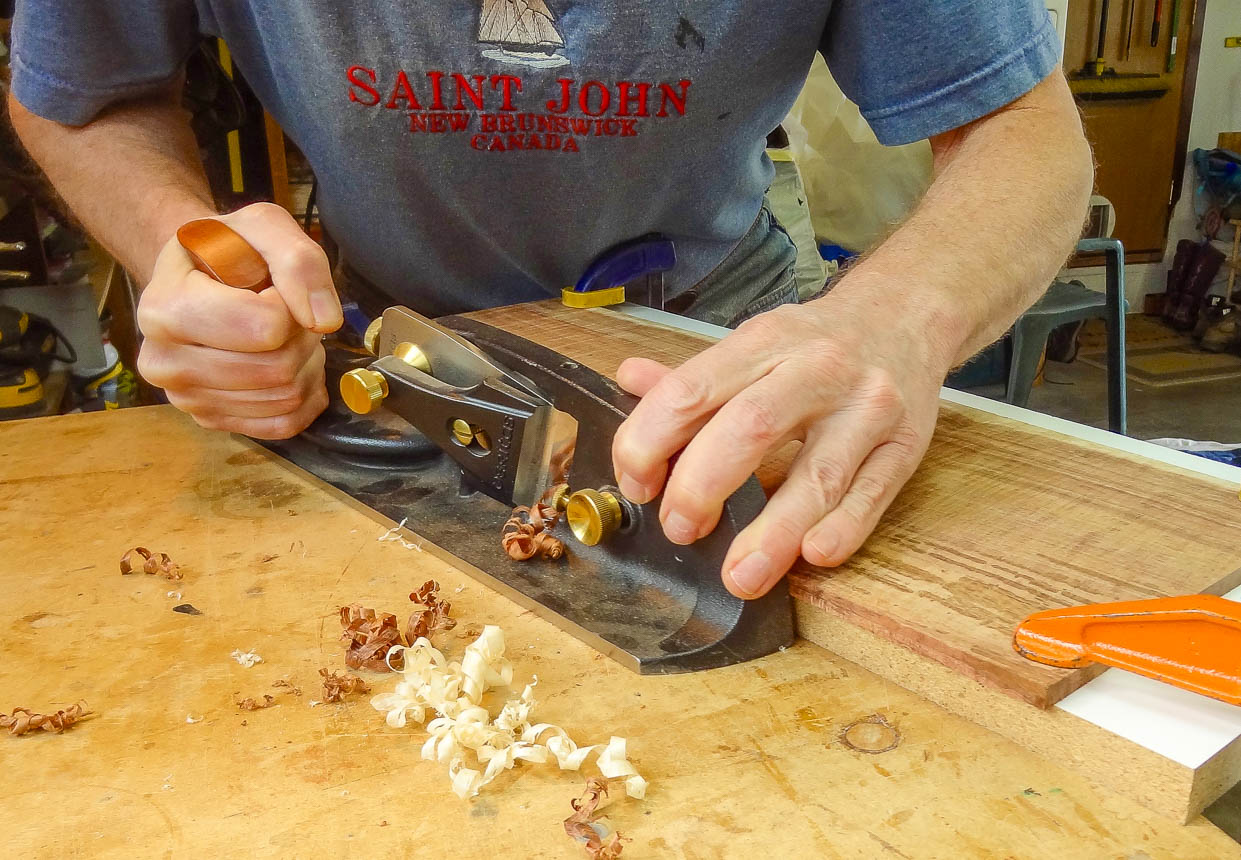
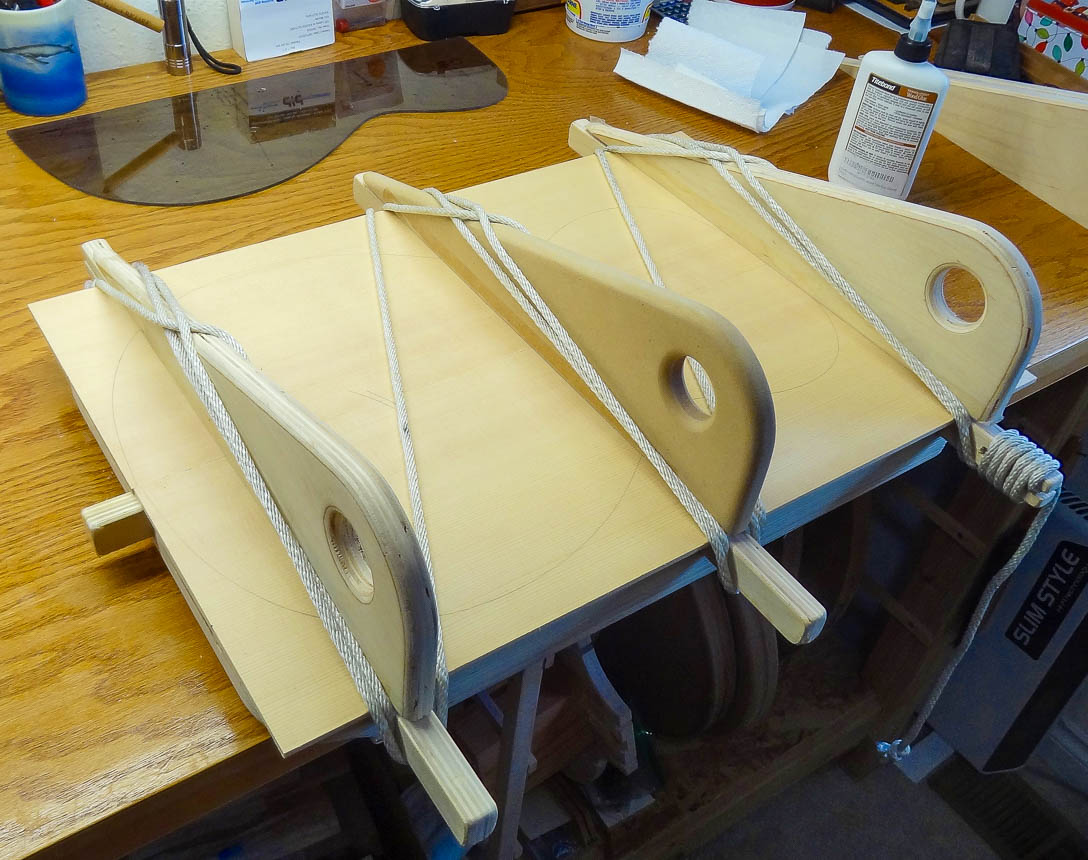
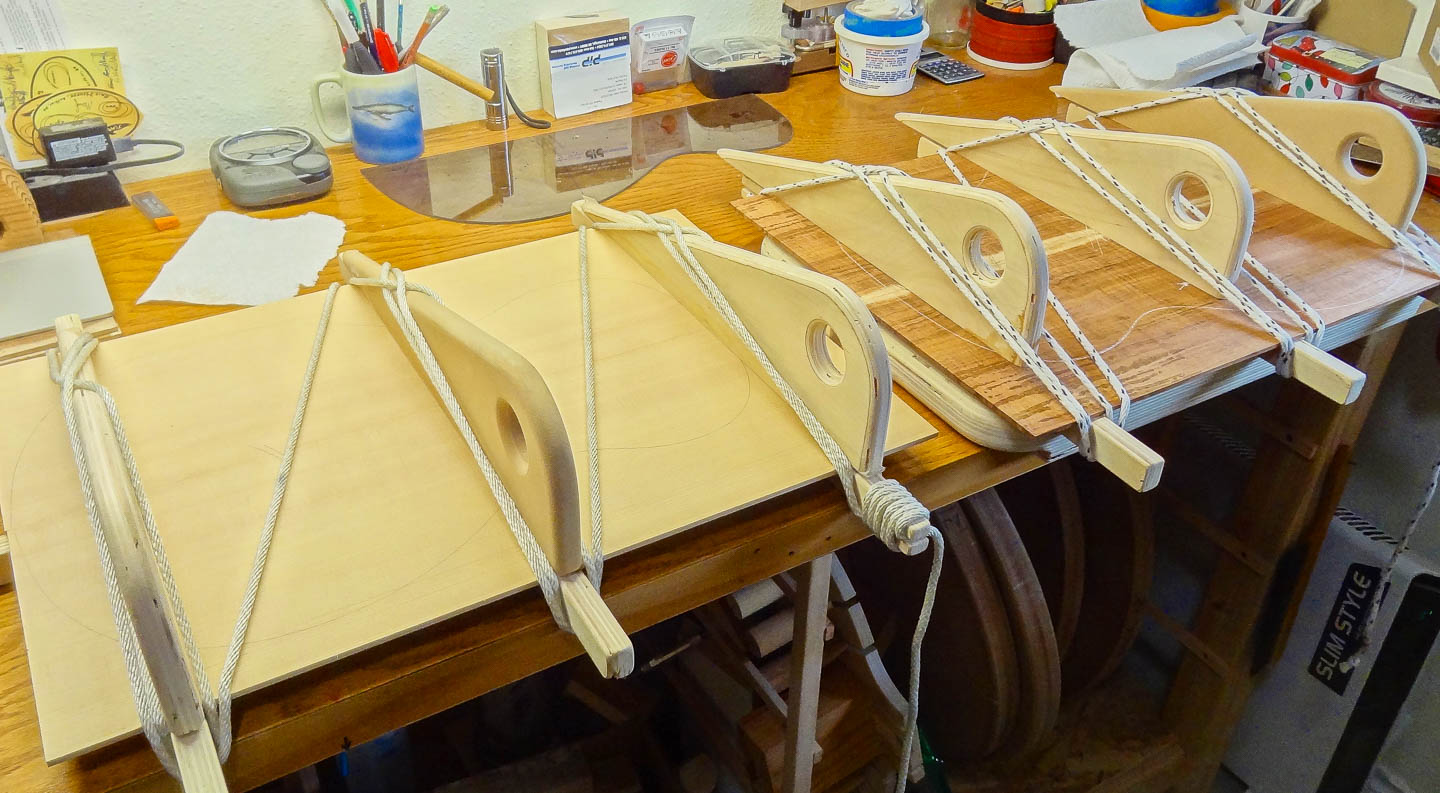
The gluing edges of the plates must have very good surfaces for a strong glue bond, so I use a hand plane and fine tune both edges at once. To glue the plates together and create the panels, I use a simple fixture invented long ago. It uses wedges and a rope to simultaneously hold the plates down flat, and pull them together tightly along the gluing edge. After they are glued together, I send them though my thickness sander to level the glue seam. I leave the top as thick as possible for now to work on the rosette, but get the back panel to near finished thickness, leaving just a little bit for finish sanding.
This Page
HOW I BUILD GUITARS
MATERIALS
NECK & HEADSTOCK
HEADSTOCK: HEADPLATE & VOLUTE
SIDE BENDING
THE RIM
KERFED LINING
CUTTING THE RIM TO WIDTH
SIDE BRACES
TOP & BACK PLATES
ROSETTE
BRACING THE TOP
BRACING THE BACK
THE BOX
BINDING & PURFLING
FITTING THE NECK TO THE BODY
THE FRETBOARD
HEADSTOCK SHAPE, TUNER HOLES, BINDING & PURFLING
GLUING THE FRETBOARD TO THE NECK
SHAPING THE NECK
SHAPING THE HEEL
SHAPING THE VOLUTE
THE BRIDGE
FRET JOB
THE FINISH
ODDS & ENDS
SET UP & FINAL DETAILS