HOW I BUILD GUITARS
MATERIALS
NECK & HEADSTOCK
HEADSTOCK: HEADPLATE & VOLUTE
SIDE BENDING
THE RIM
KERFED LINING
CUTTING THE RIM TO WIDTH
SIDE BRACES
TOP & BACK PLATES
ROSETTE
BRACING THE TOP
BRACING THE BACK
THE BOX
BINDING & PURFLING
FITTING THE NECK TO THE BODY
THE FRETBOARD
HEADSTOCK SHAPE, TUNER HOLES, BINDING & PURFLING
GLUING THE FRETBOARD TO THE NECK
This Page
SHAPING THE NECK
SHAPING THE HEEL
SHAPING THE VOLUTE
THE BRIDGE
FRET JOB
THE FINISH
ODDS & ENDS
SET UP & FINAL DETAILS
SHAPING THE NECK
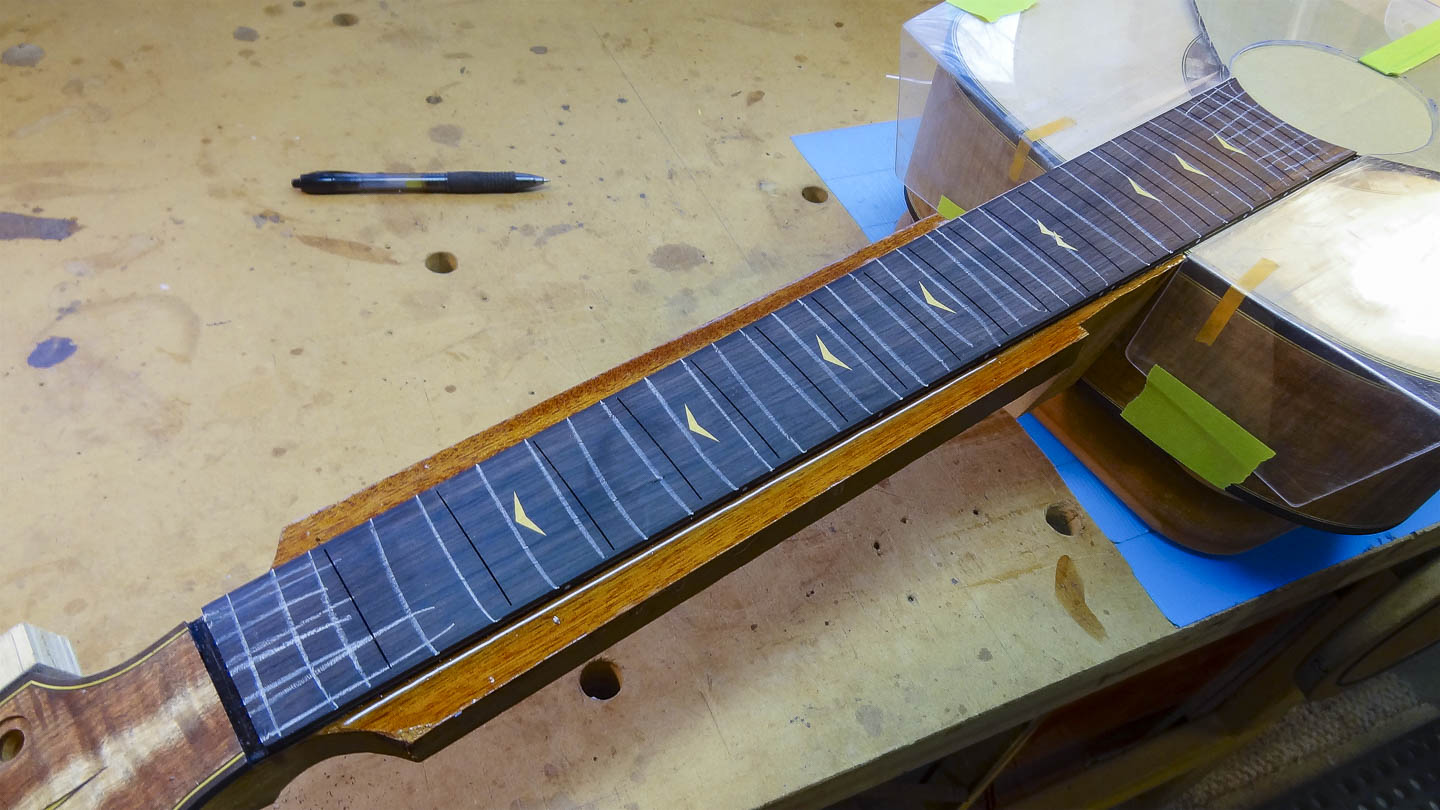
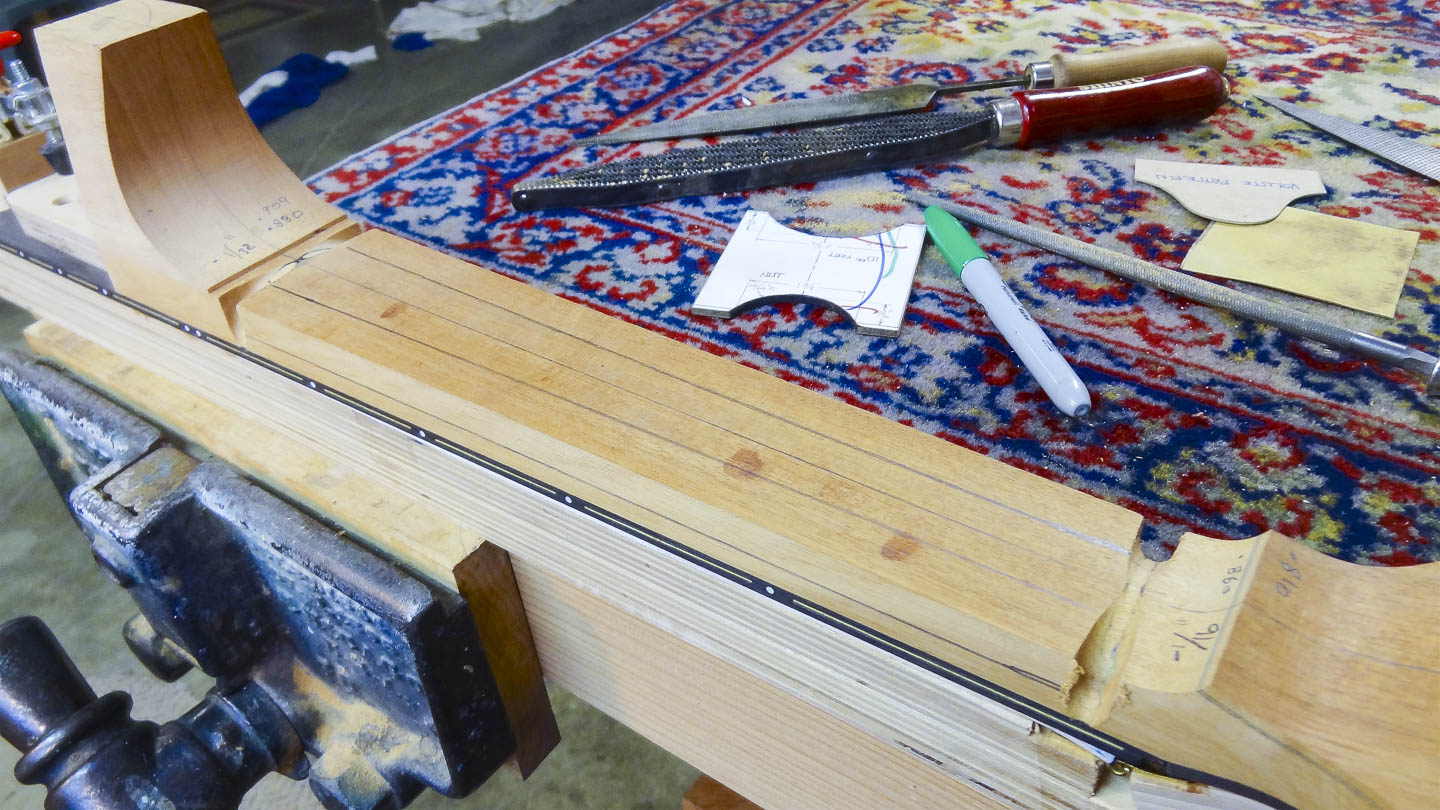
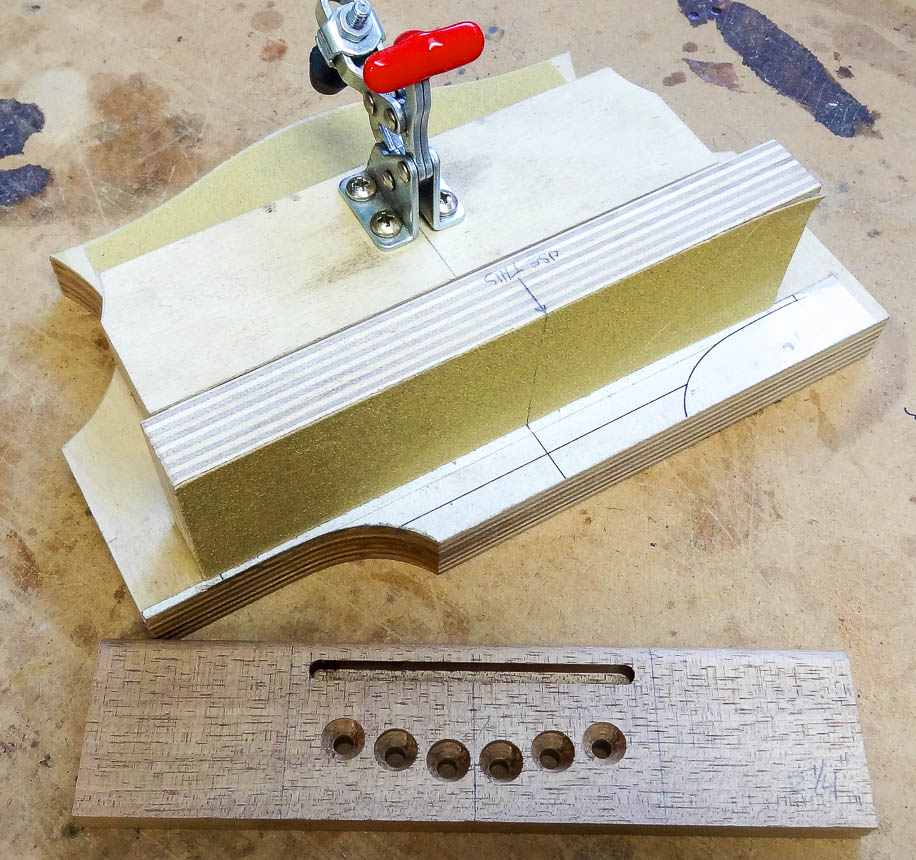
The first step in shaping the neck is to level the fret board so I can get a good reading on the neck thickness. This also sets me up for a good fret job. It’s done with sand paper on a steel beam I’ve sanded perfectly flat. To not compromise the compound radius of the fret board, I sand with a combination side to side and back and forth motion.
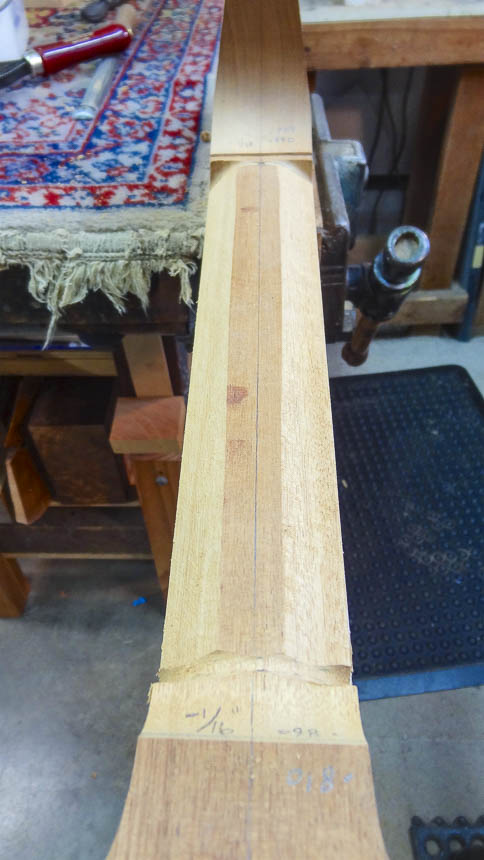
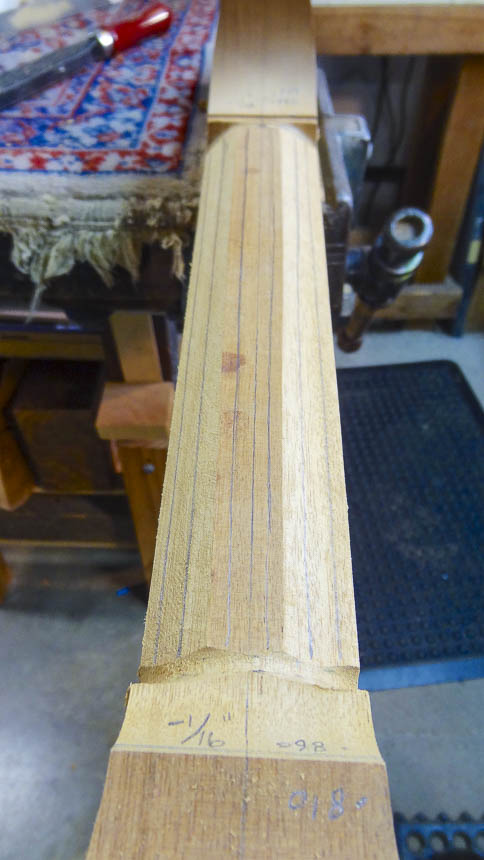
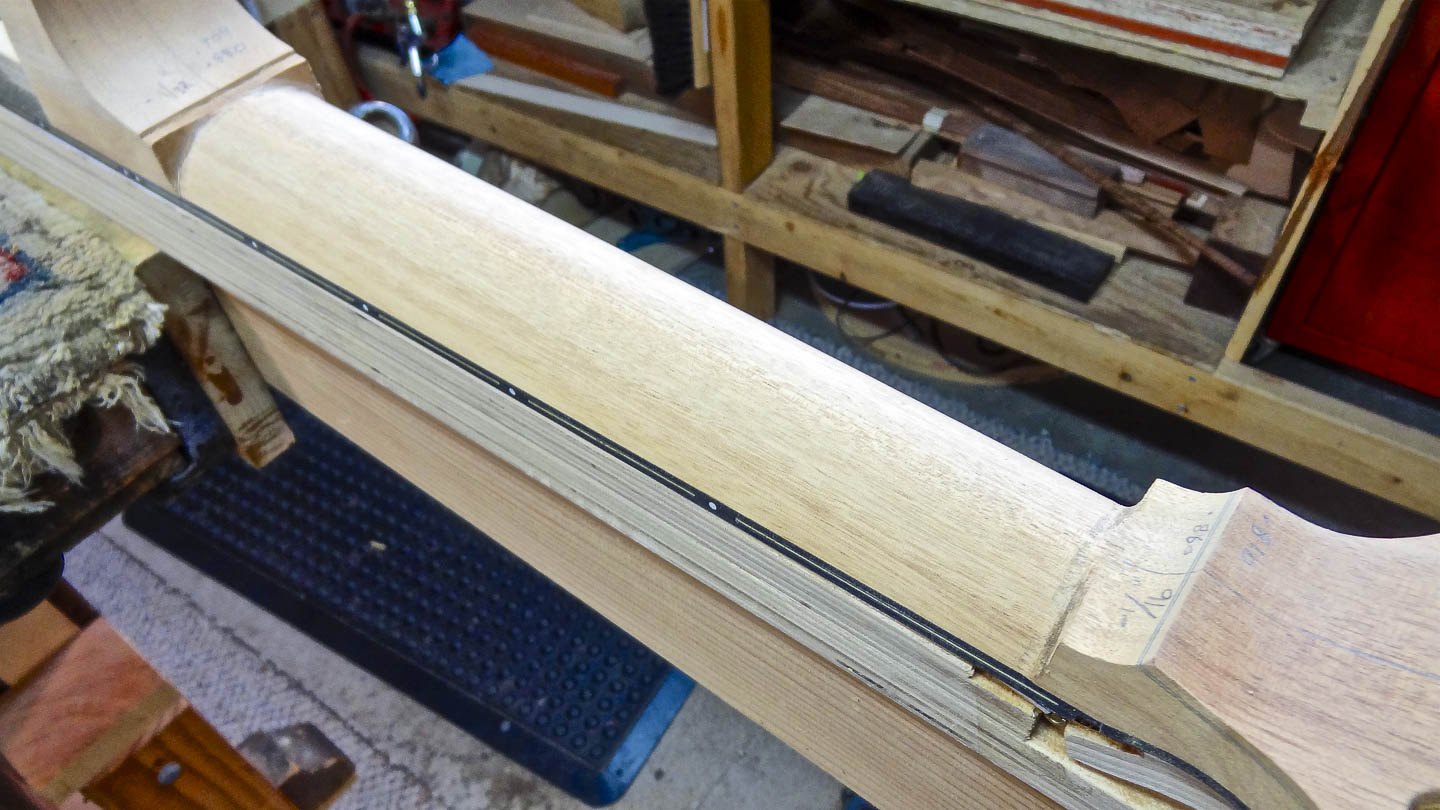
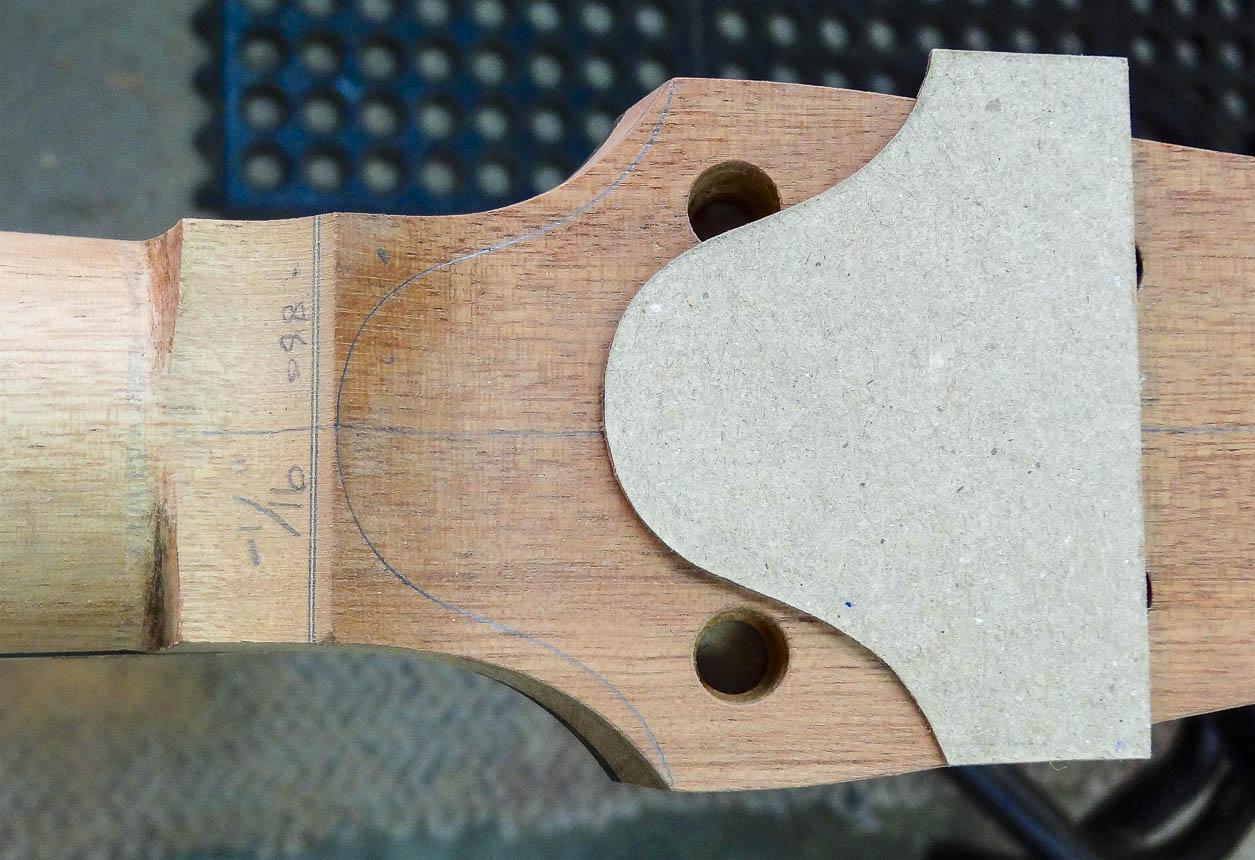
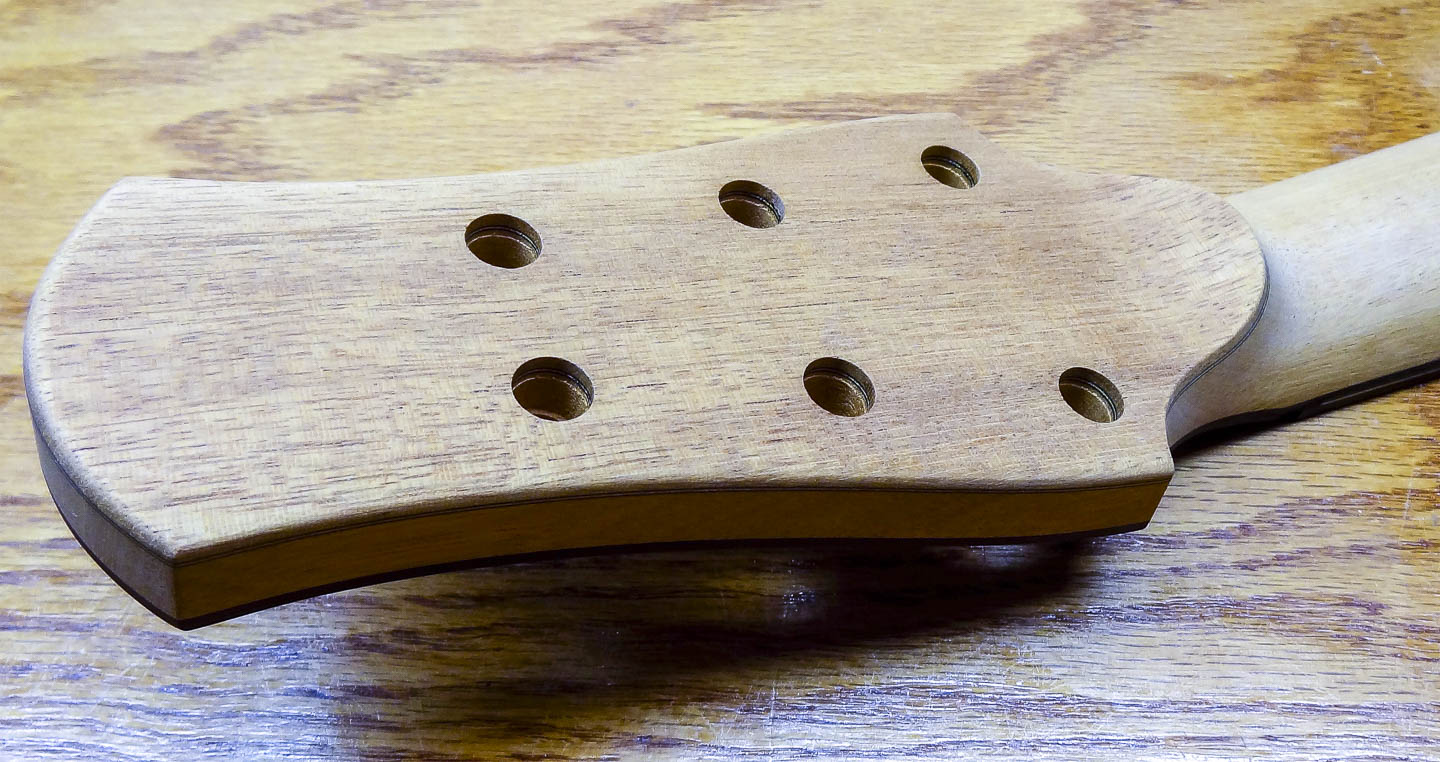
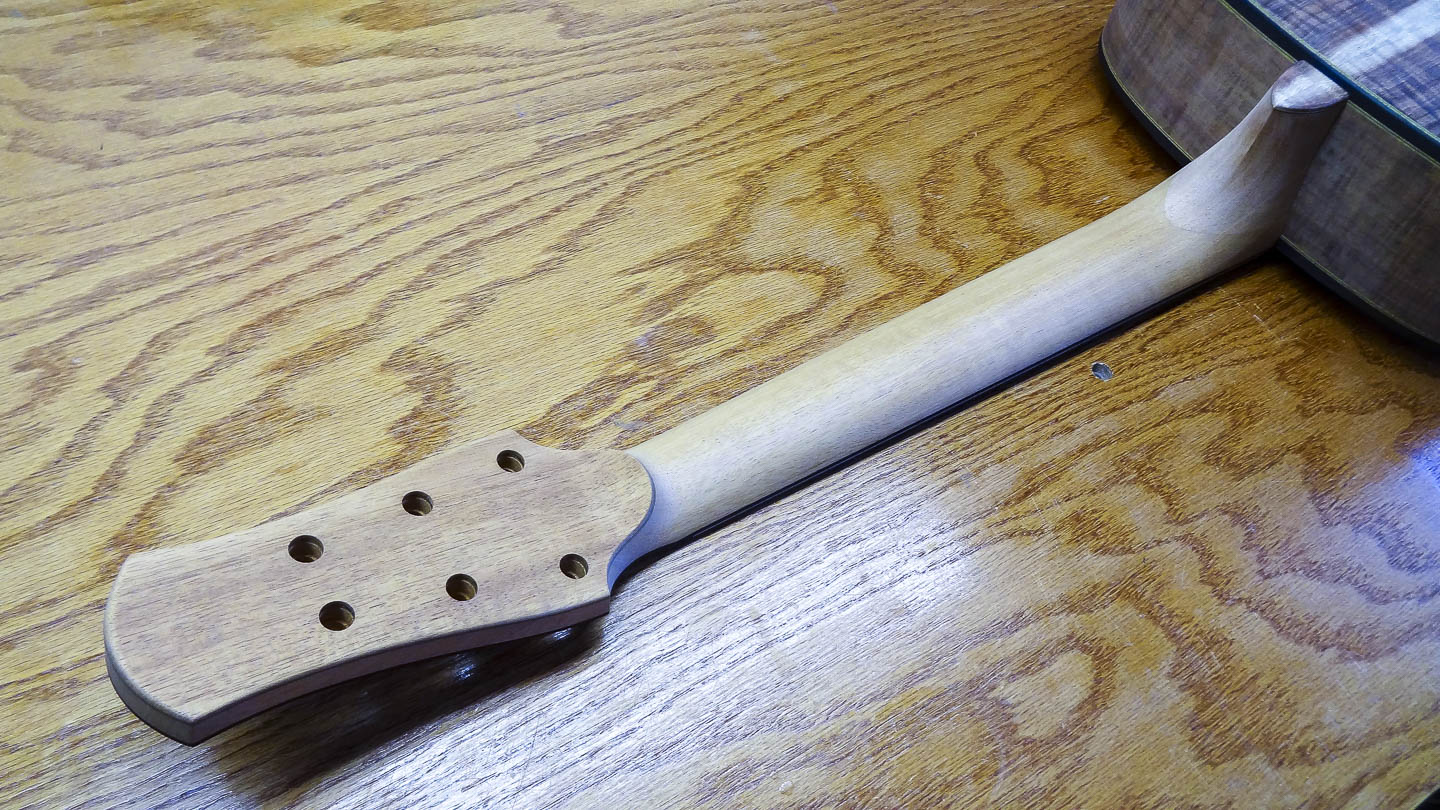
Neck shape can be a very personal thing to players, that’s why I shape my necks by hand. The two main considerations are the cross sectional shape and the thickness from front to back. I use a template for a shape that most people find pleasing. Creating a template from an existing neck also works well if you have something you’re particularly fond of. For the thickness, it’s relatively easy to get the desired dimensions to within a few thousandth of an inch; that’s the thickness of a piece of copy paper. During my initial preparation of the neck, I milled it with a slight taper from the heel end to the nut end, and a small amount thicker than what will be the finished thickness. The extra thickness leaves me with enough to work with, but not so much that it becomes a pain to remove so much material.
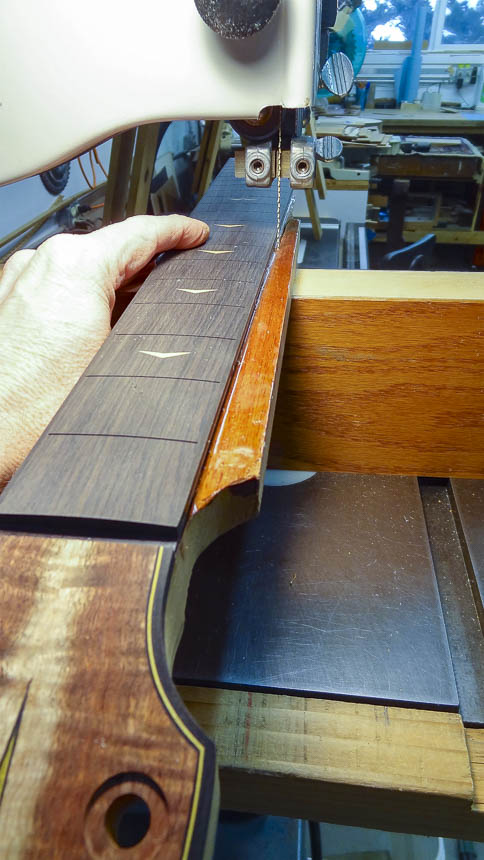
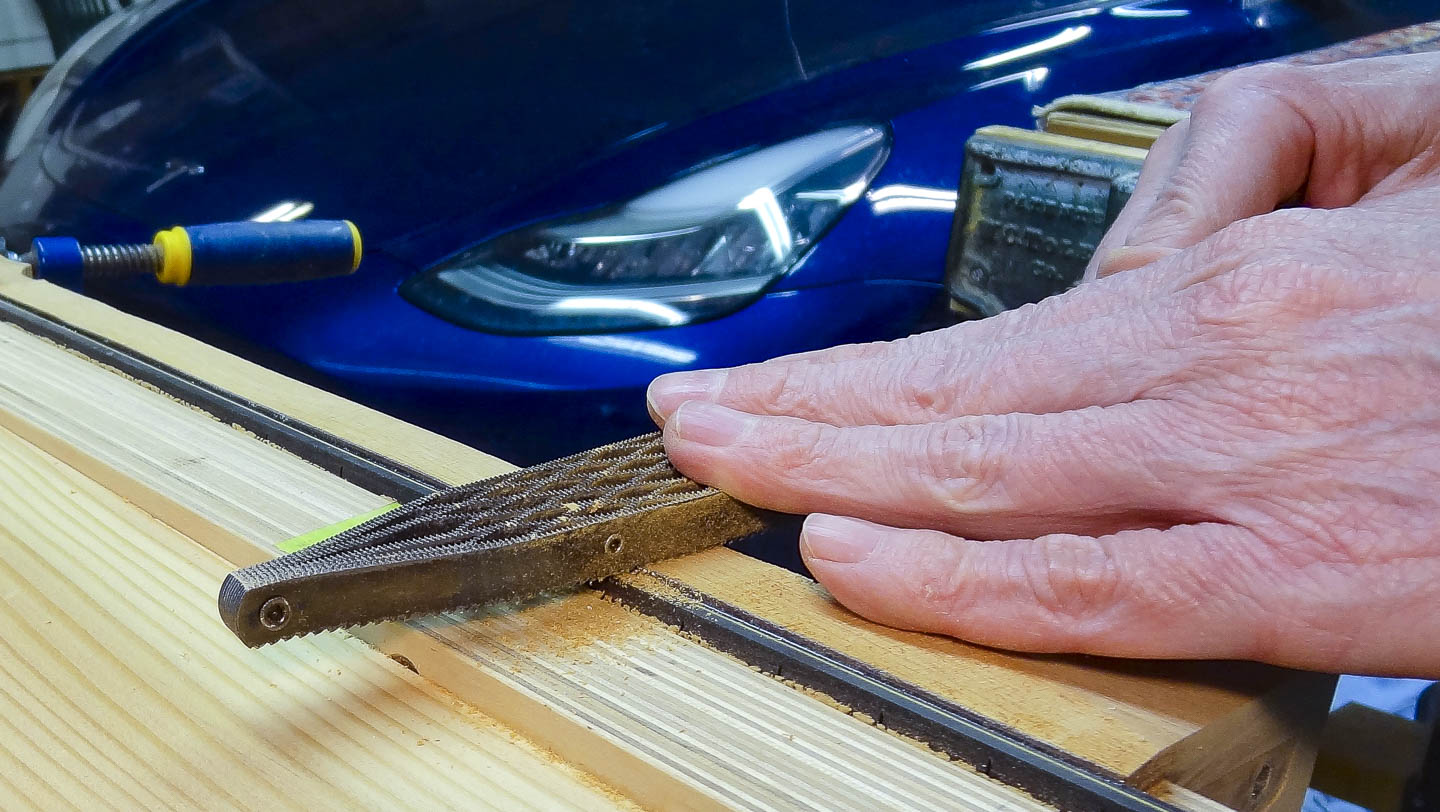
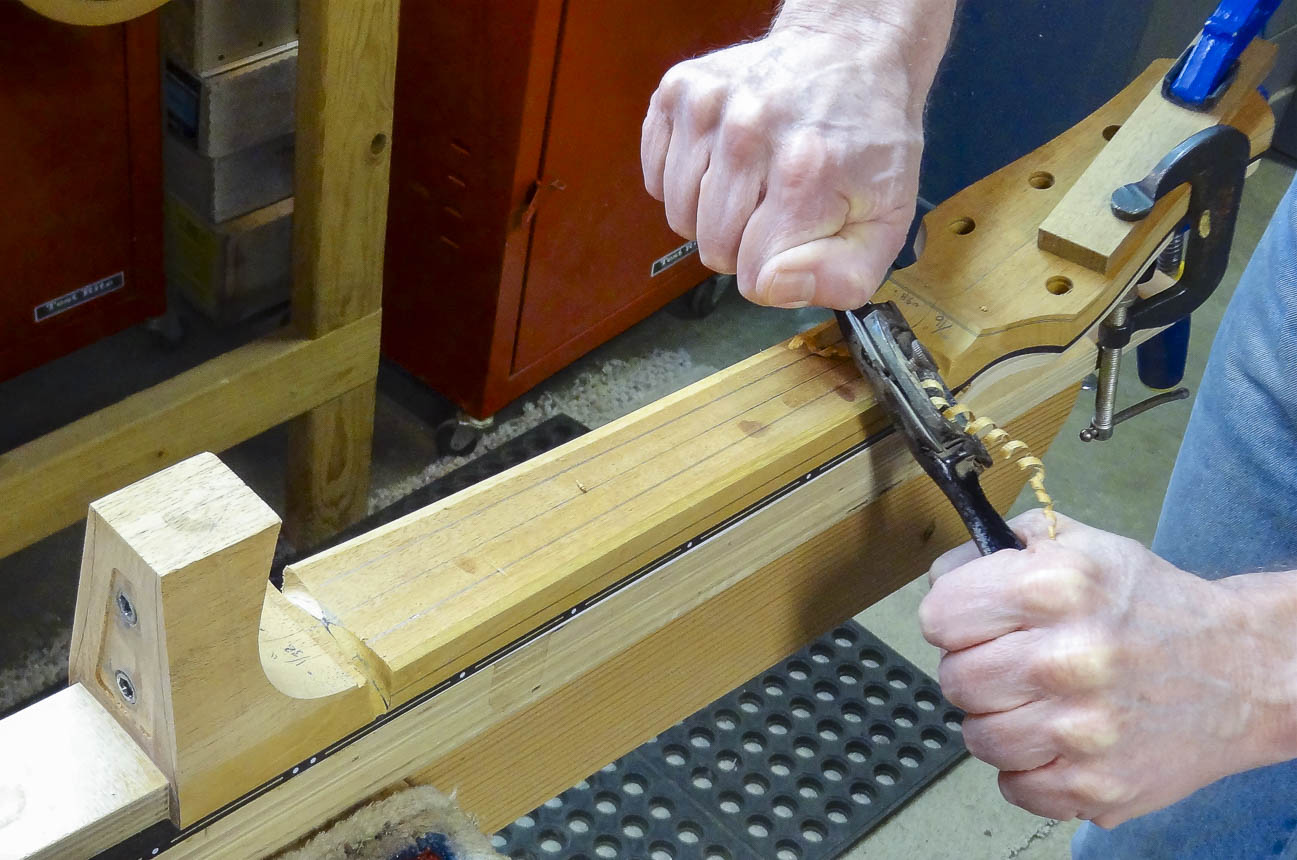
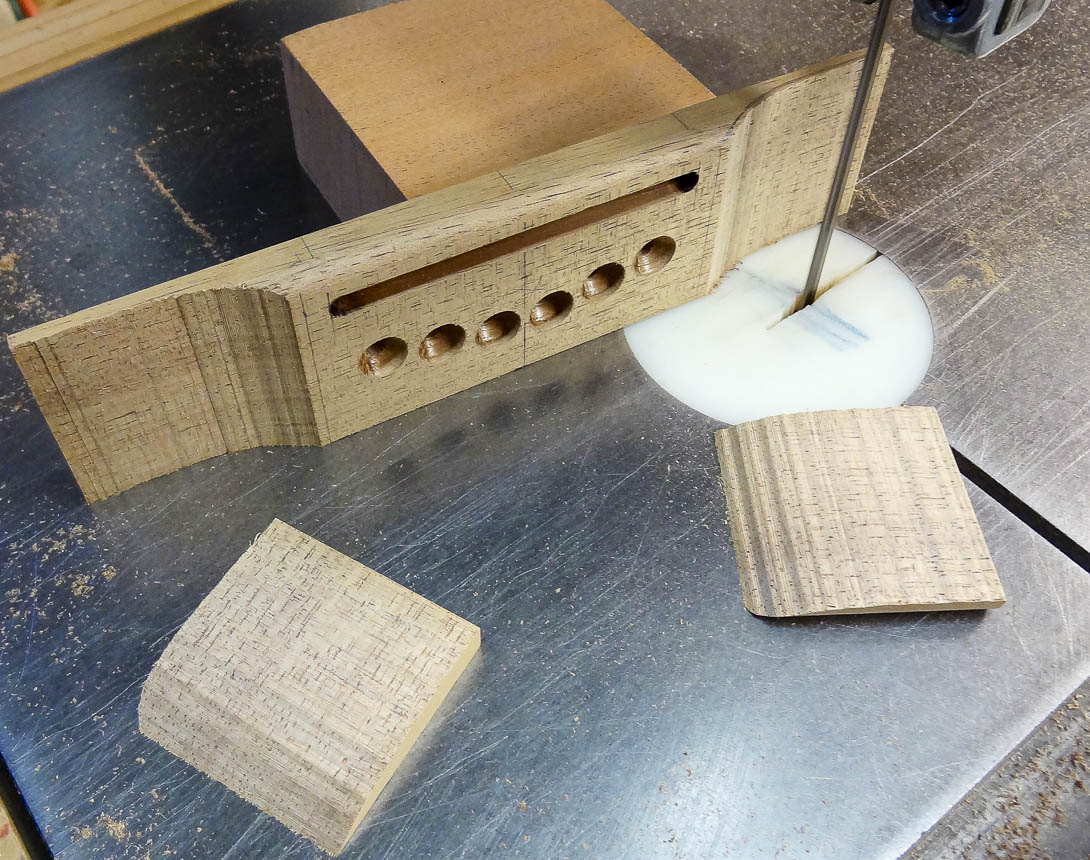
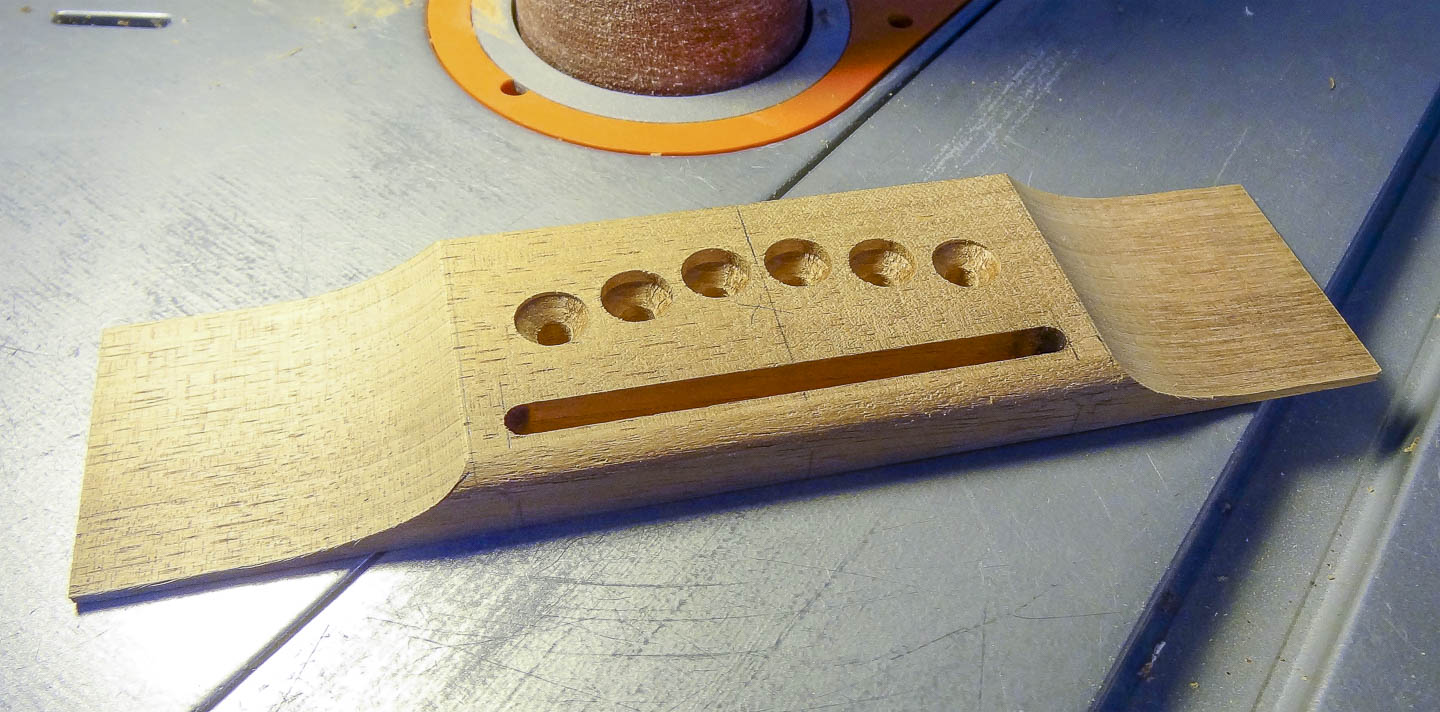
I use a band saw to rough trim the neck to width along the glued on fret board and then a Shinto rasp to flush it to both edges of the fret board. For the cross sectional shape I use two different patterns, one at the nut and the other at the 10th fret position. It’s a matter of establishing a narrow band of the finished shape at opposite ends of the neck and then removing the material between them. A round rasp creates the guide cuts and as I get closer to the finished shape I mark the area I’m working on by coloring the pattern with a Sharpie and rubbing it on the wood. This leaves ink on the high points that still need to be removed in order to match the pattern. The colored areas get a swipe or two with the rasp to knock down the high spots, I rub the pattern again to reveal new high spots and repeat over and over until the channel exactly matches the pattern. This whole process is repeated at the other end of the neck.
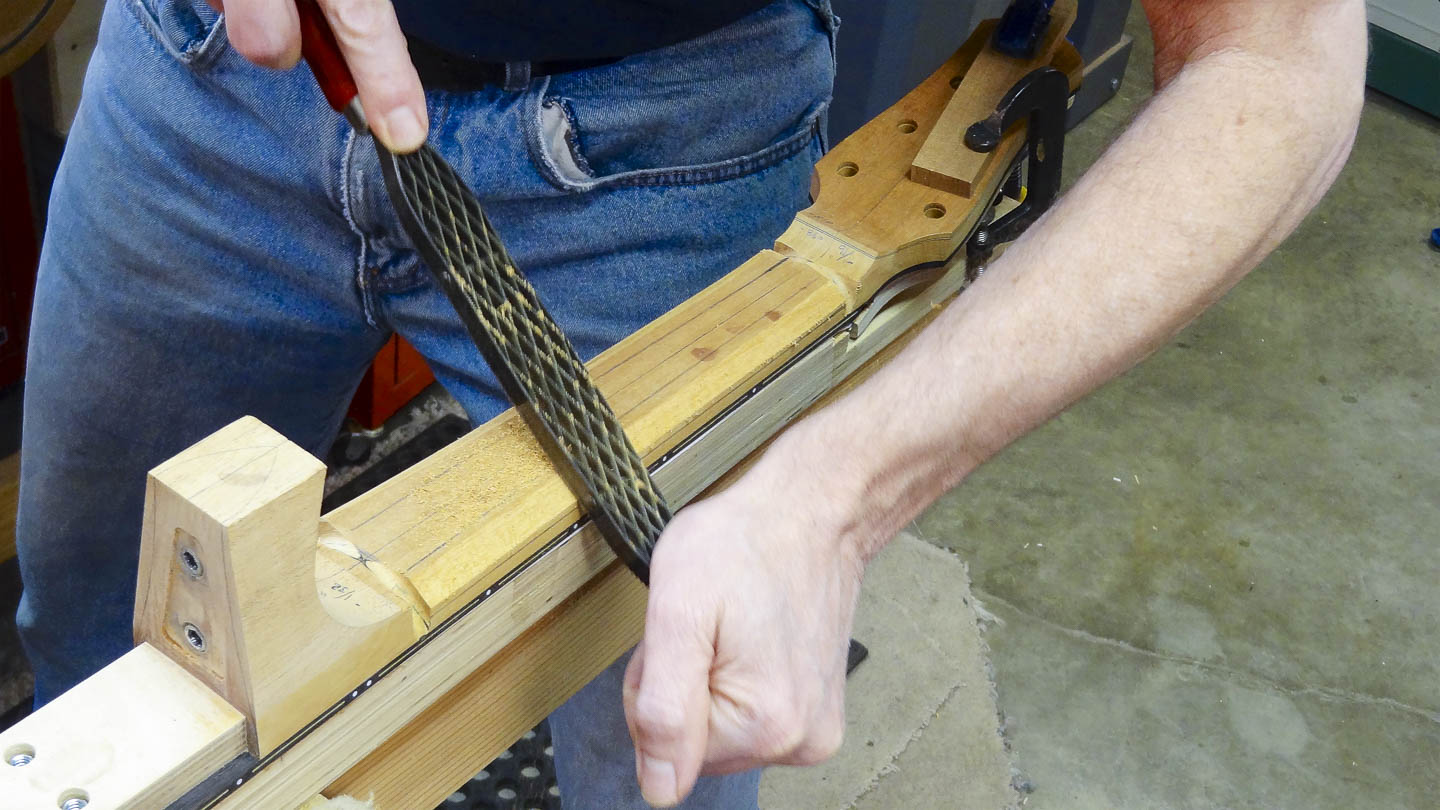
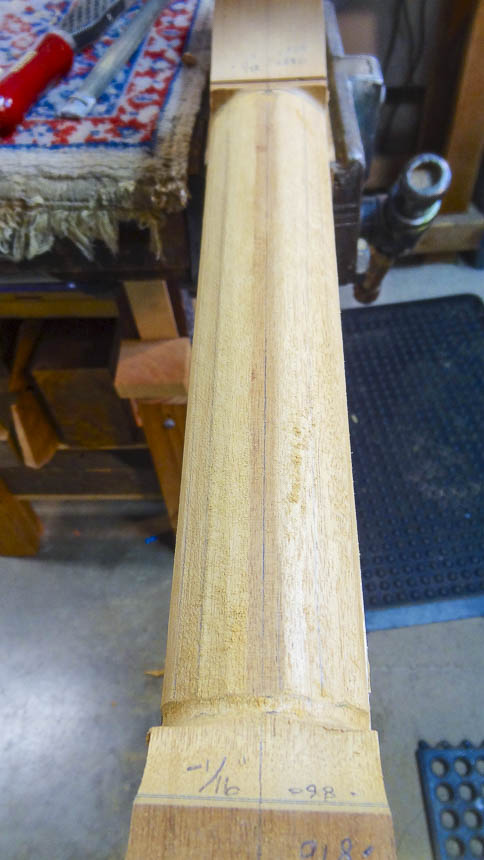
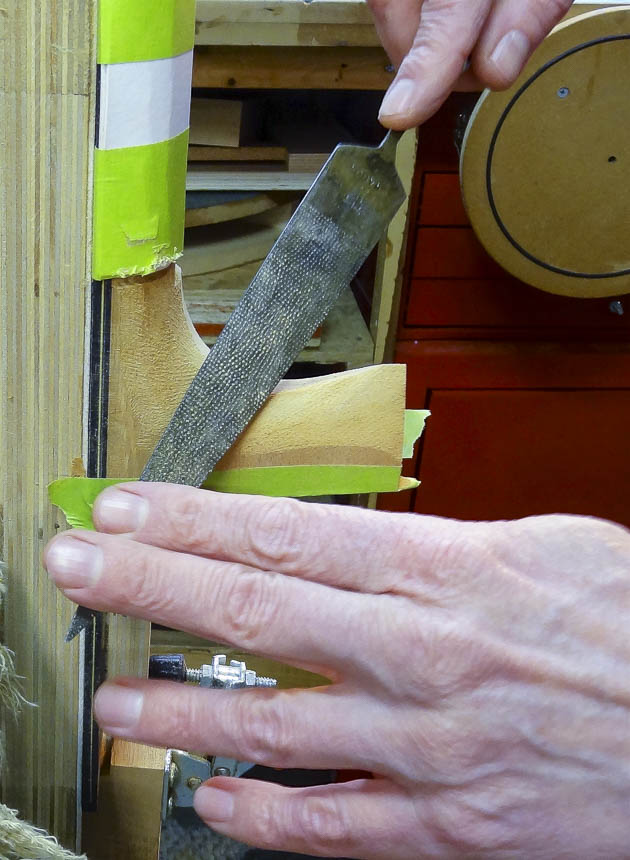
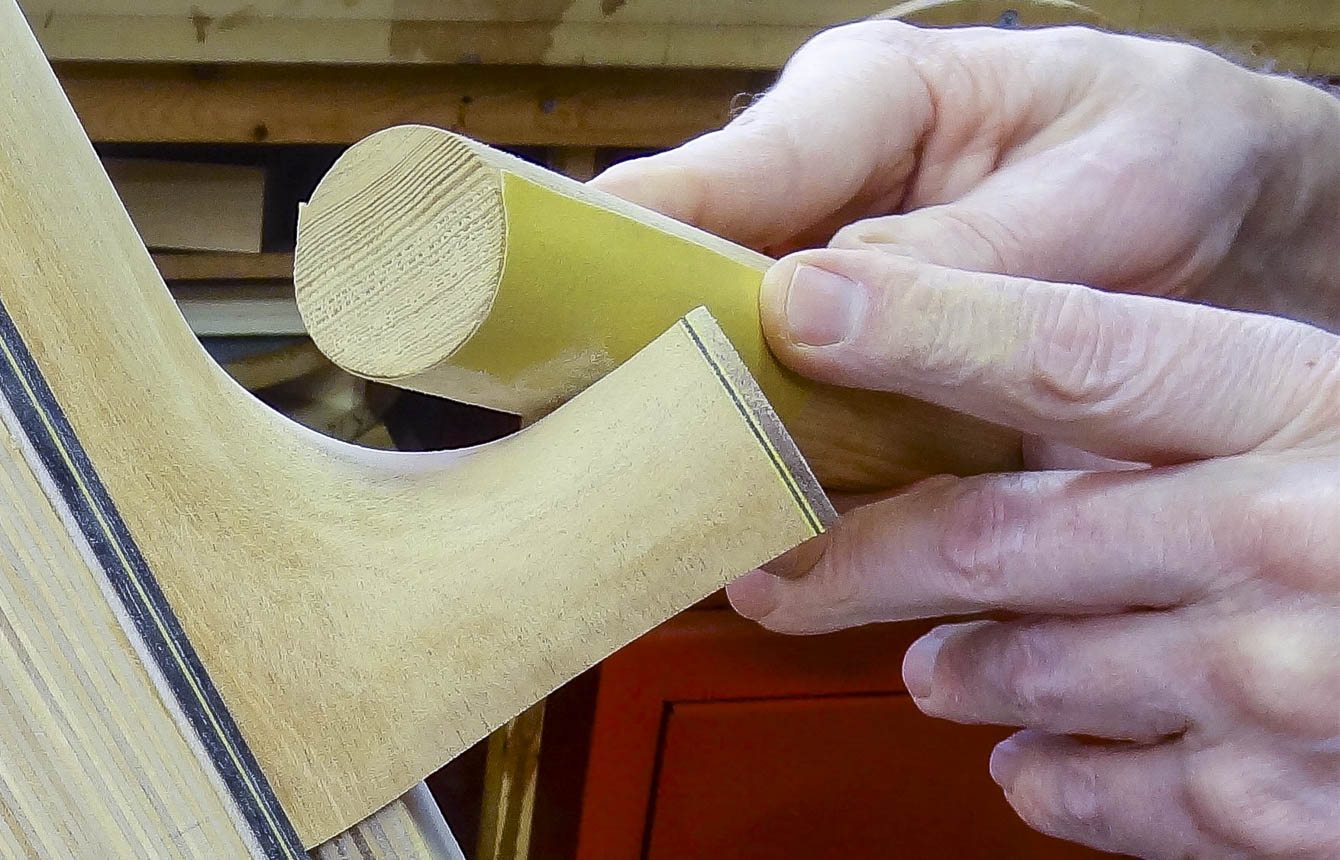
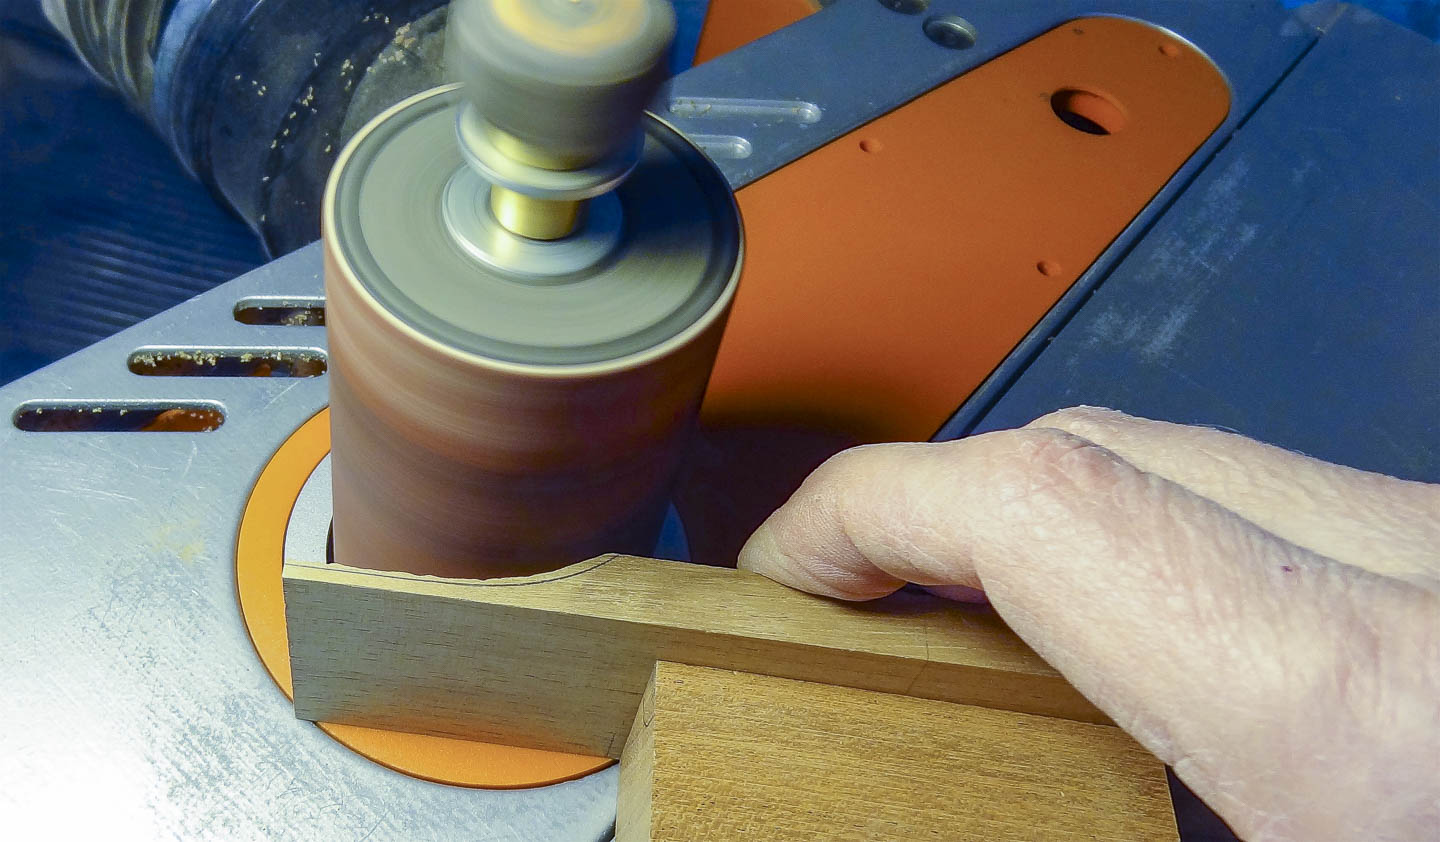
To remove the waste material between the two guide channels I start with a spoke shave to quickly shave wood away, but most of it is removed with a coarse Shinto rasp. I draw guide lines the full length of the neck and start by creating two big facets on the corners. Then I bisect the first facets which creates smaller ones, and repeat this, making narrower and narrower facets. When filing the facets I make sure not to remove material below the level of the guide channels, staying slightly above the bottom of the channel. At this point, with multiple facets created, the neck is very close to the finished shape.
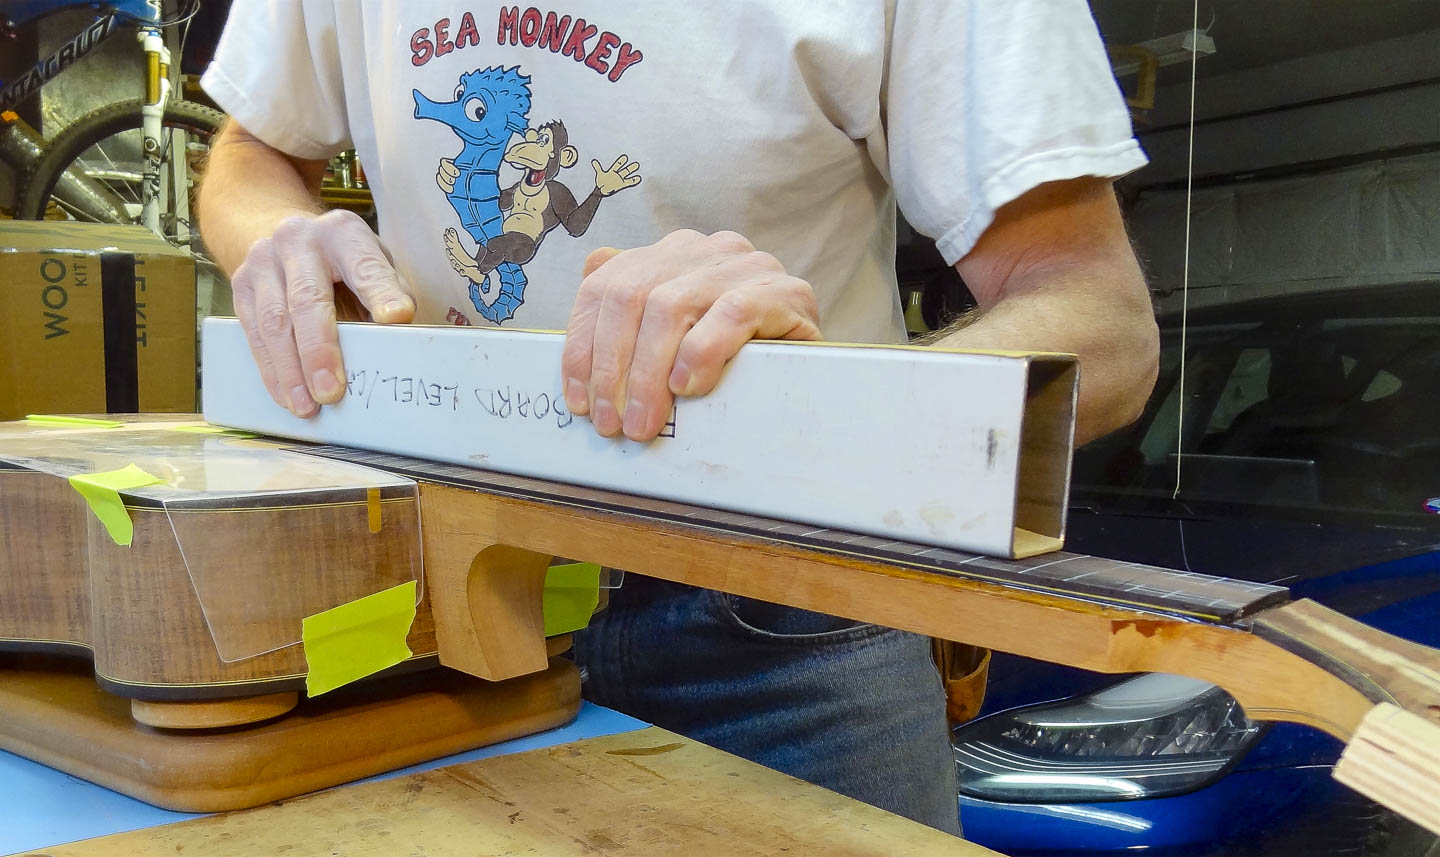
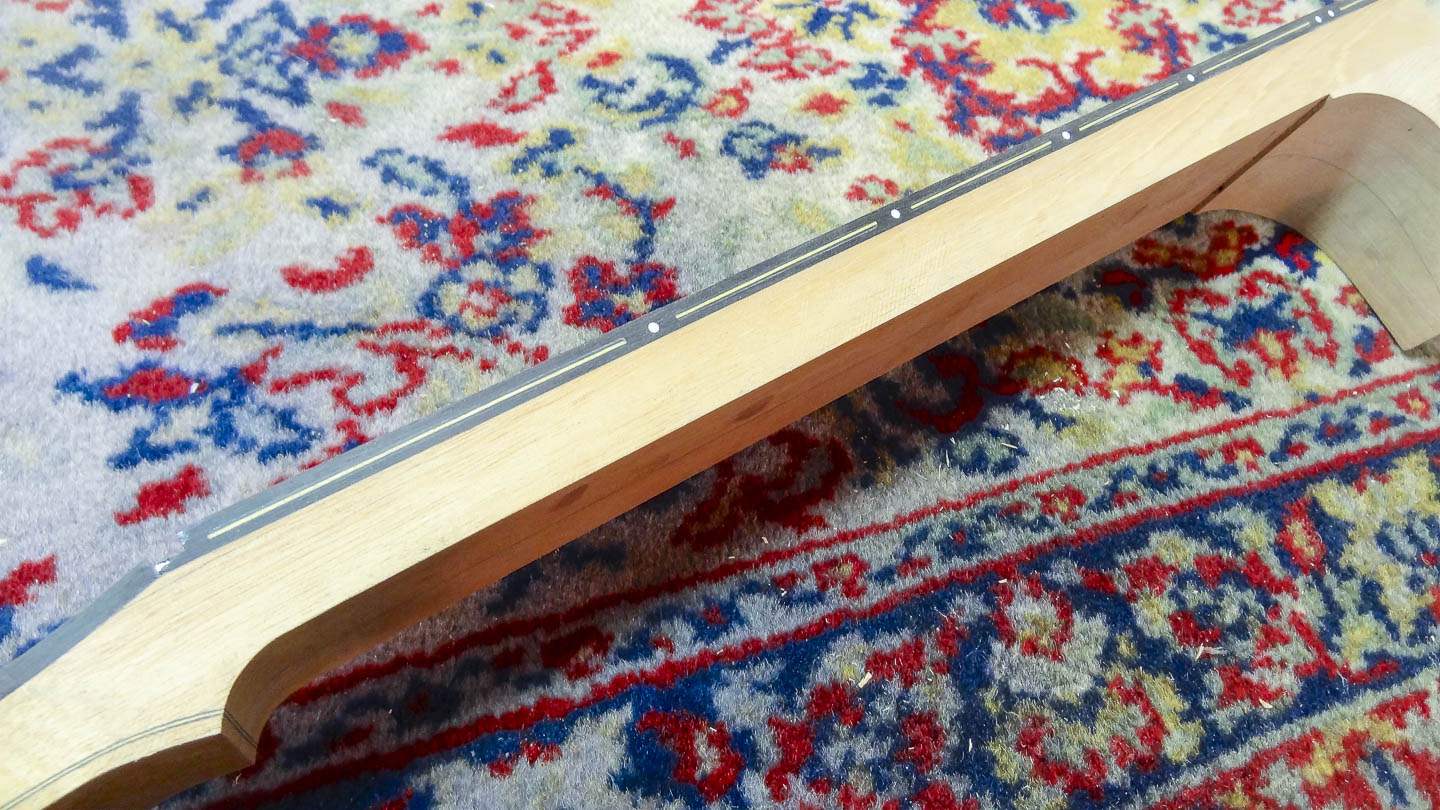
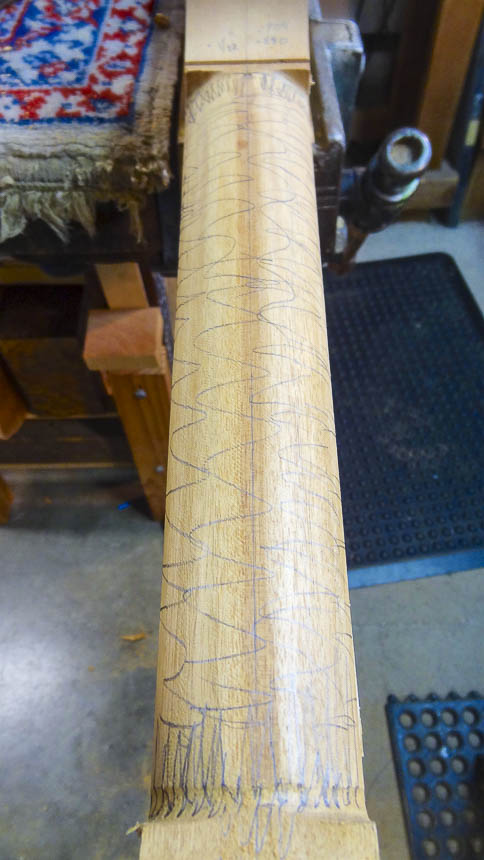
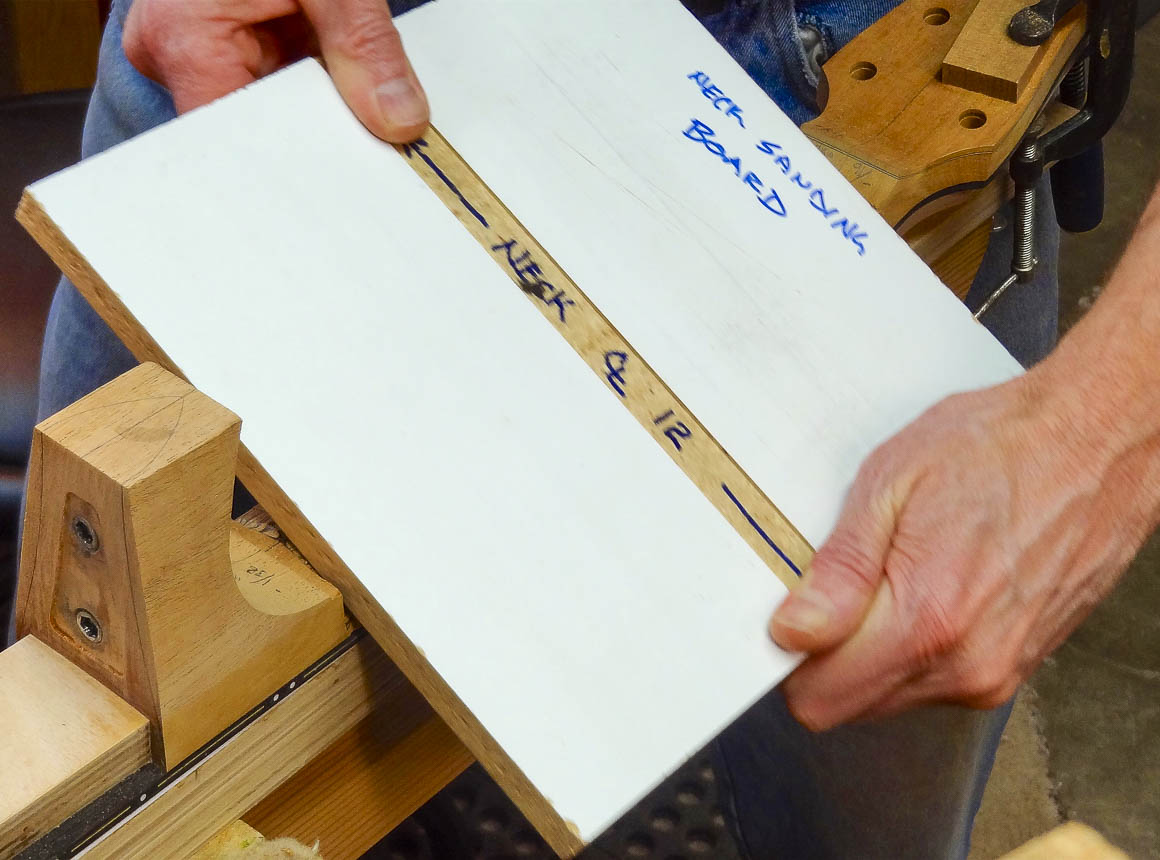
I mark the neck with pencil to gauge the removal of material and use a long, flat sanding board to finish shaping the length of the neck. This guarantees that the neck is straight and consistently shaped along its length. It’s a tiny bit too thick at this point because I didn’t reach the very bottom of the guide channels, but I take care of this when I work on the transitions into the heel and head stock.
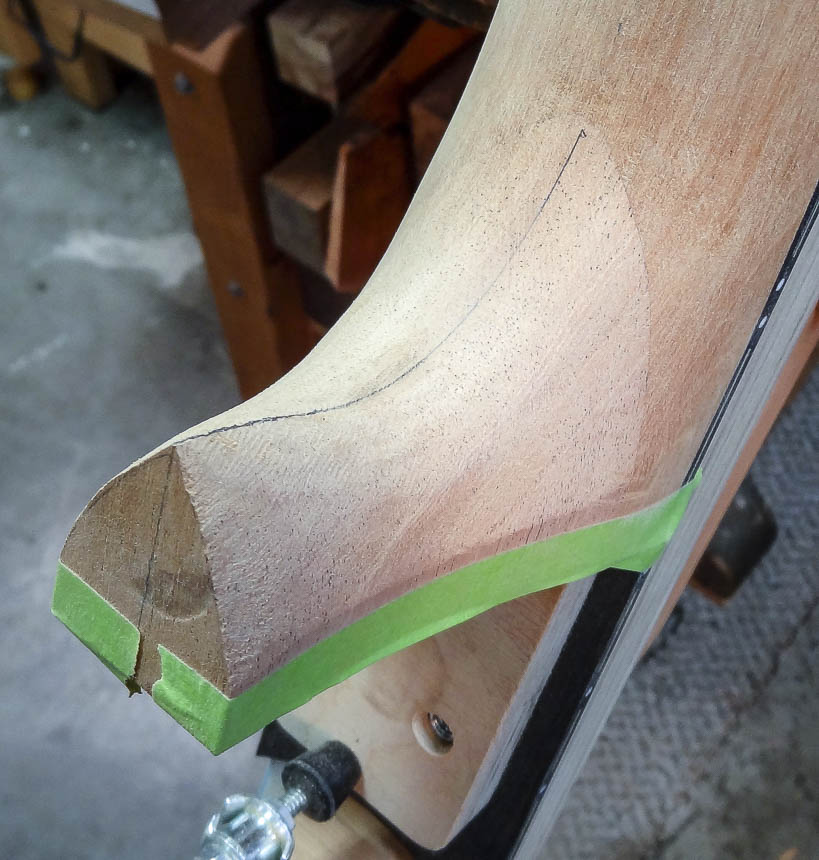
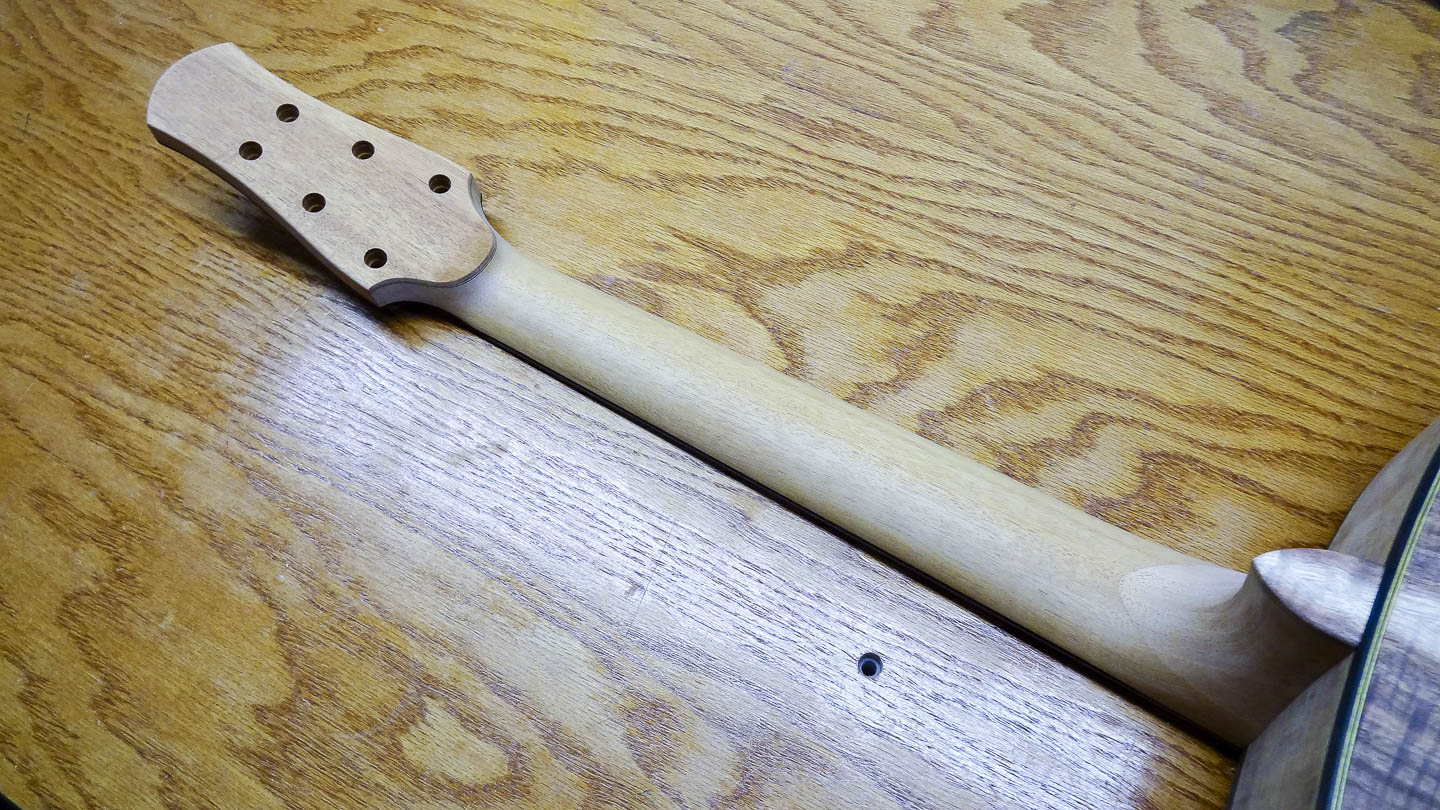
SHAPING THE HEEL
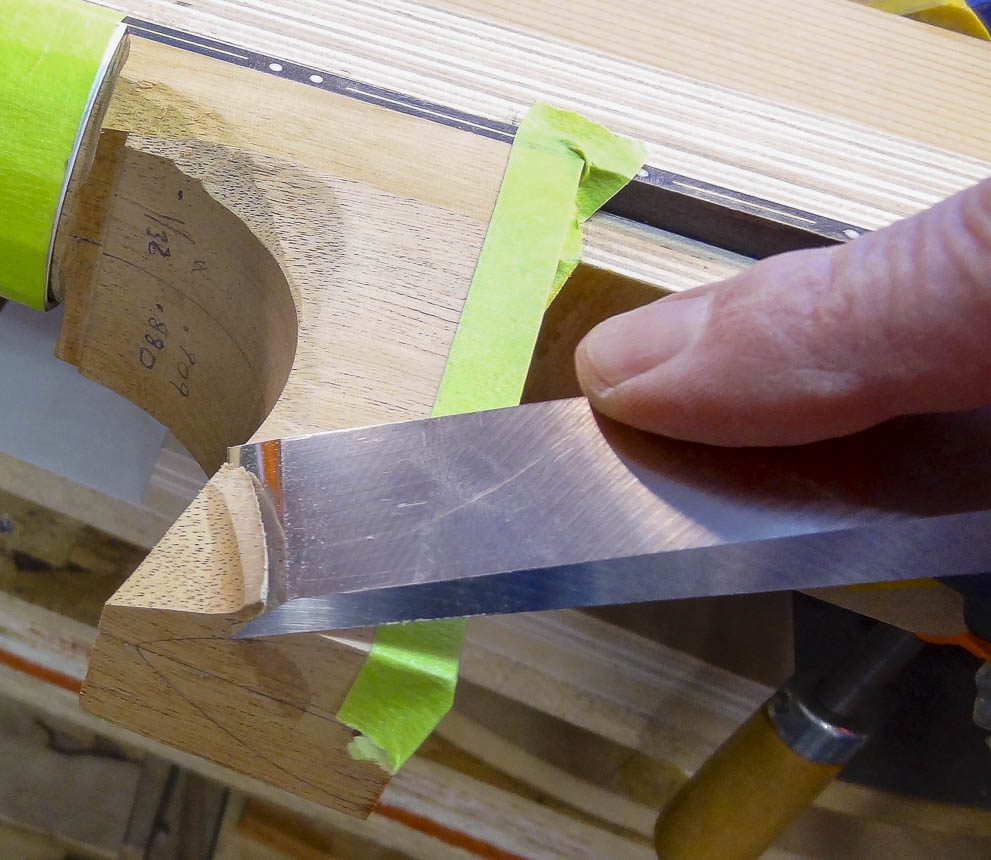
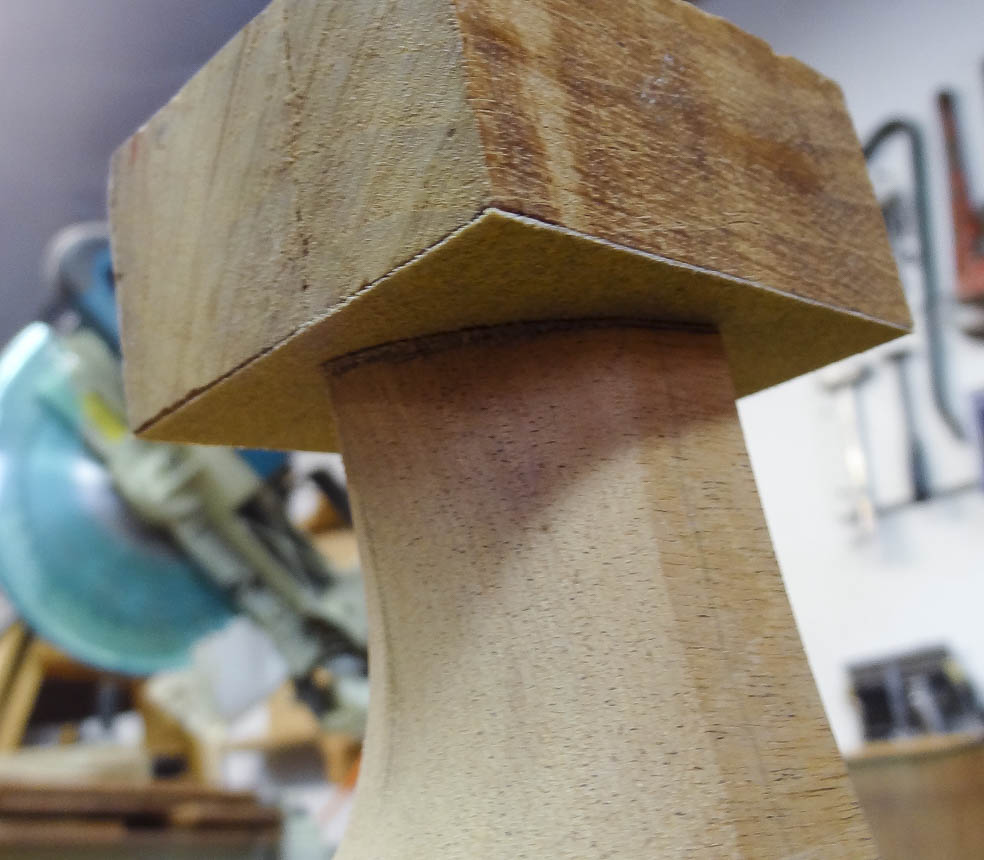
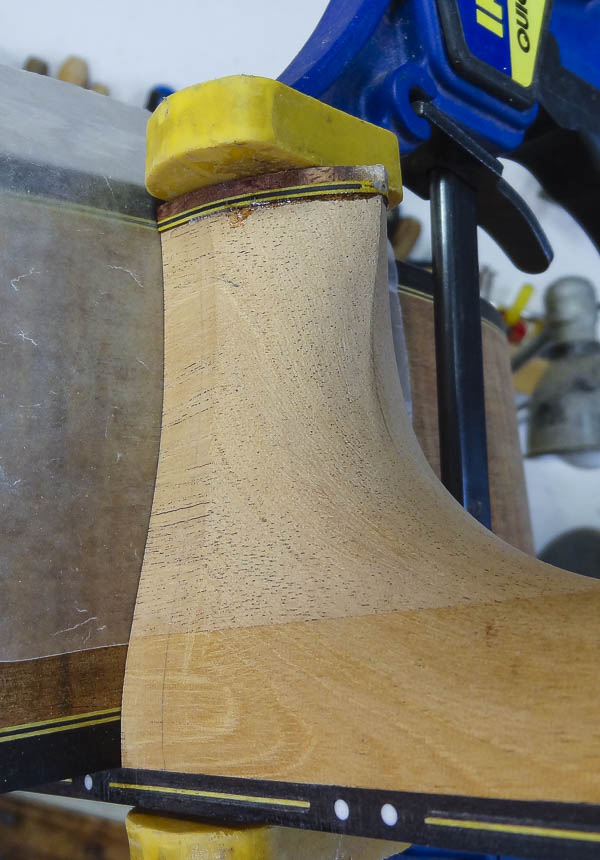
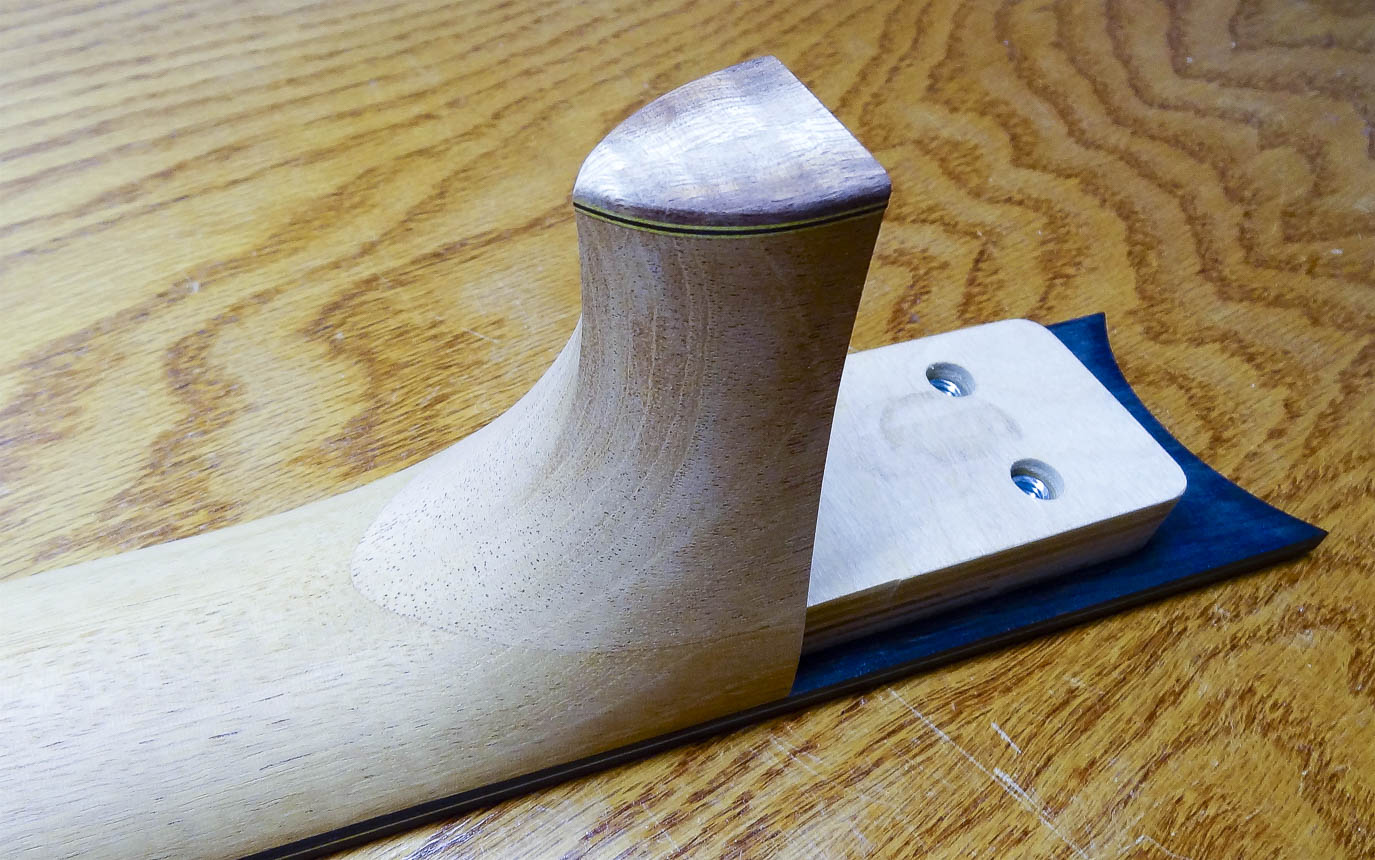
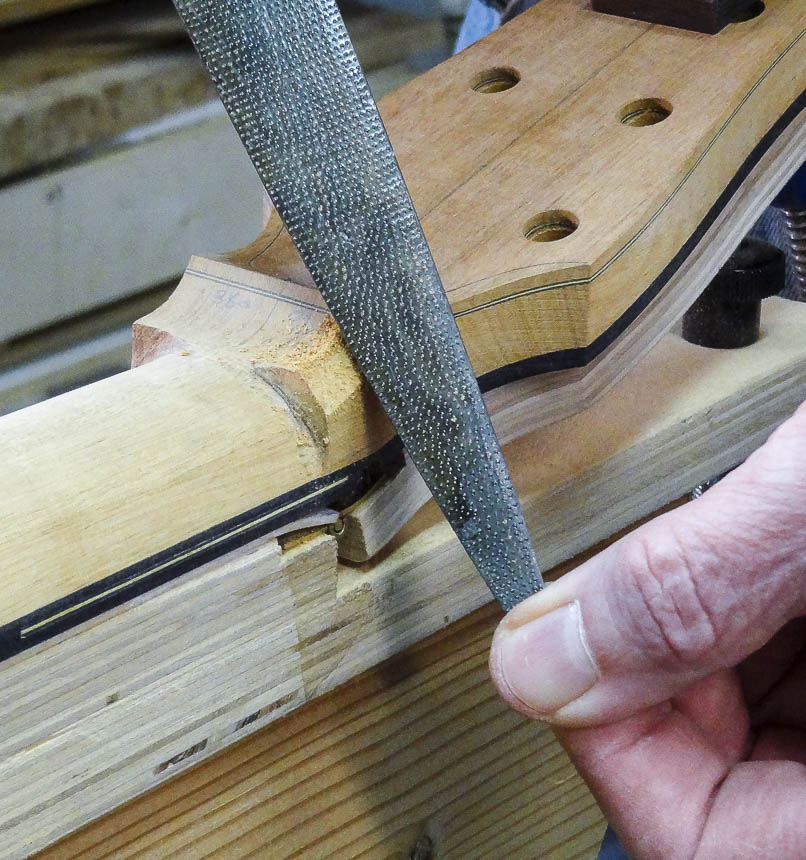
I start by laying out guidelines that define the shape of the heel and then removing wood between them until it looks and feels right. Some of the guidelines are already established, like the neck profile I just finished, the edge of the fret board and the inside curve of the heel I rough shaped long ago. The last two guidelines are drawn on the end of the heel and the shape of the heel cap. Having it look and feel right is subjective, I just want all the curves to be fair with everything flowing smoothly together with no lumps and bumps. Defining it in words is difficult, but you know your done when you feel it.
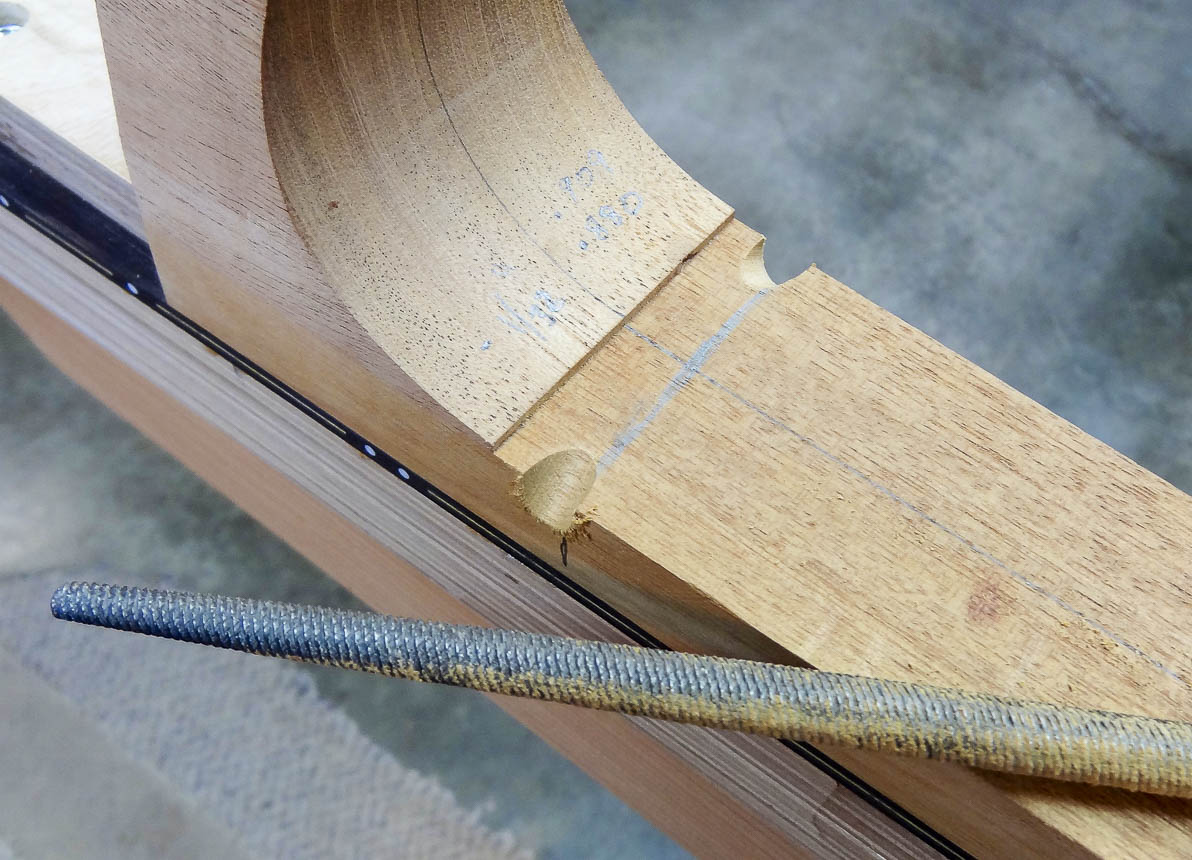
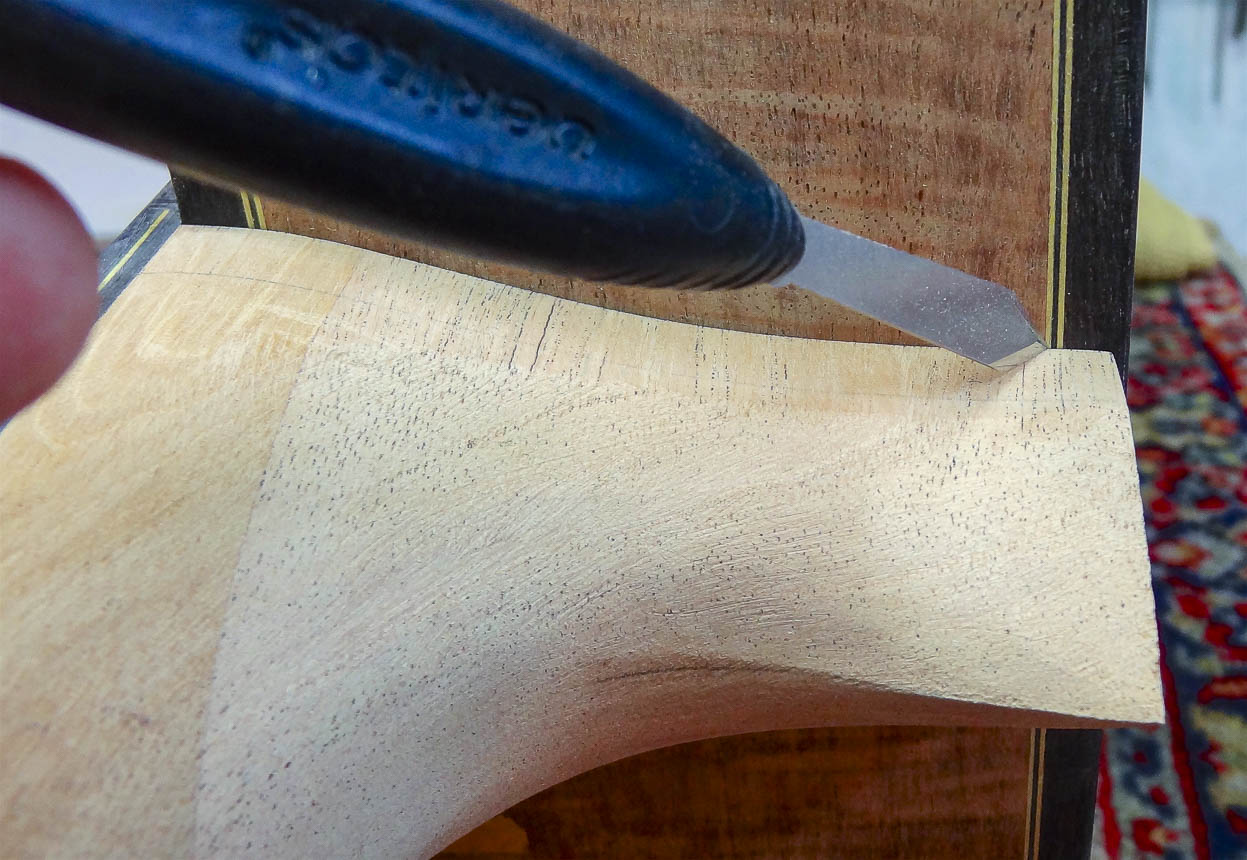
I use chisels, rasps, files, sandpaper on curved blocks and hand sanding to remove wood. It’s important to proceed with care and not remove to much wood in any area. If a hollow is created where I don’t want it, the overall shape might have to be redefined; in extreme cased, it might be impossible to recover from. An important area is the back edge of the heel that butts to the body, and that’s where I start. On a finished guitar, it’s a junction your eye is drawn to and needs to be gap-free and have a pleasing curve. The bulk of wood is removed with a wide chisel and refined with a curved sanding block. The chisel also hogs away lots of wood on the inside corners and defines the heel cap shape.
Once the chisel roughs out the primary shape I switch to a coarse rasp and fine tune it quite a bit. The transition from the heel into the neck is very important, and easy to mess up by going too deep. Switching to a finer file helps, but care is taken to go slowly and not create a dip in the wood at the transition point.
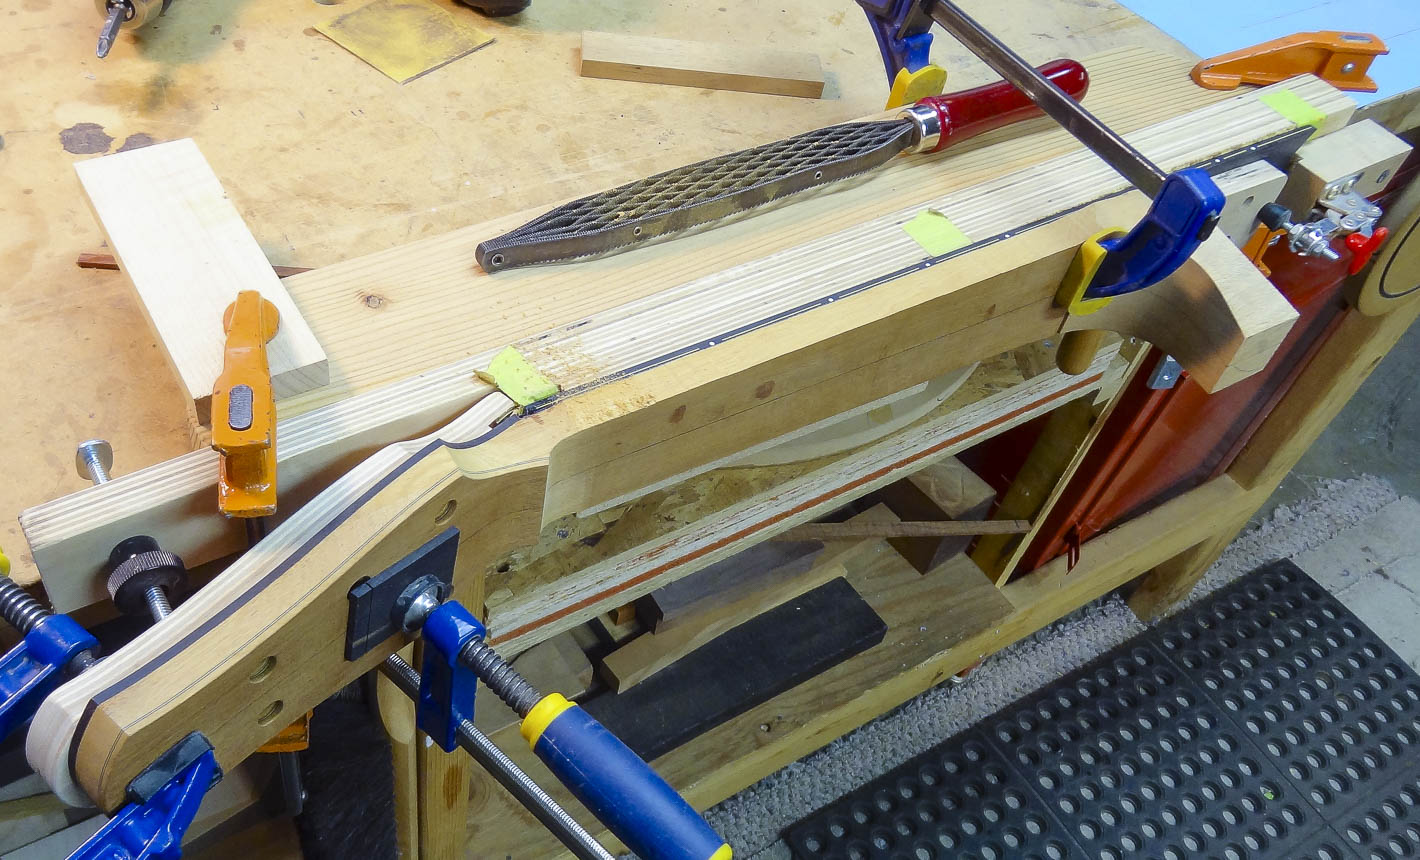
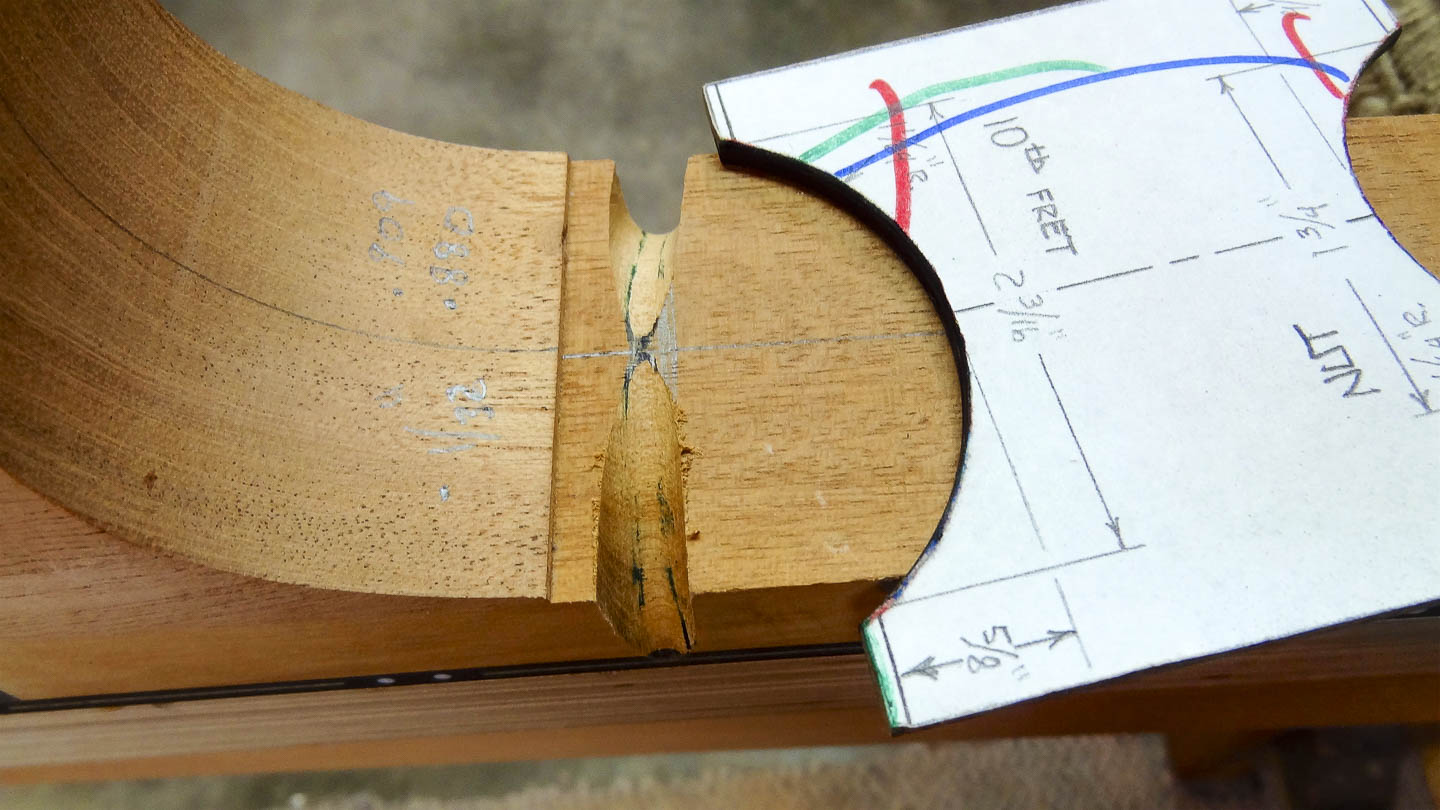
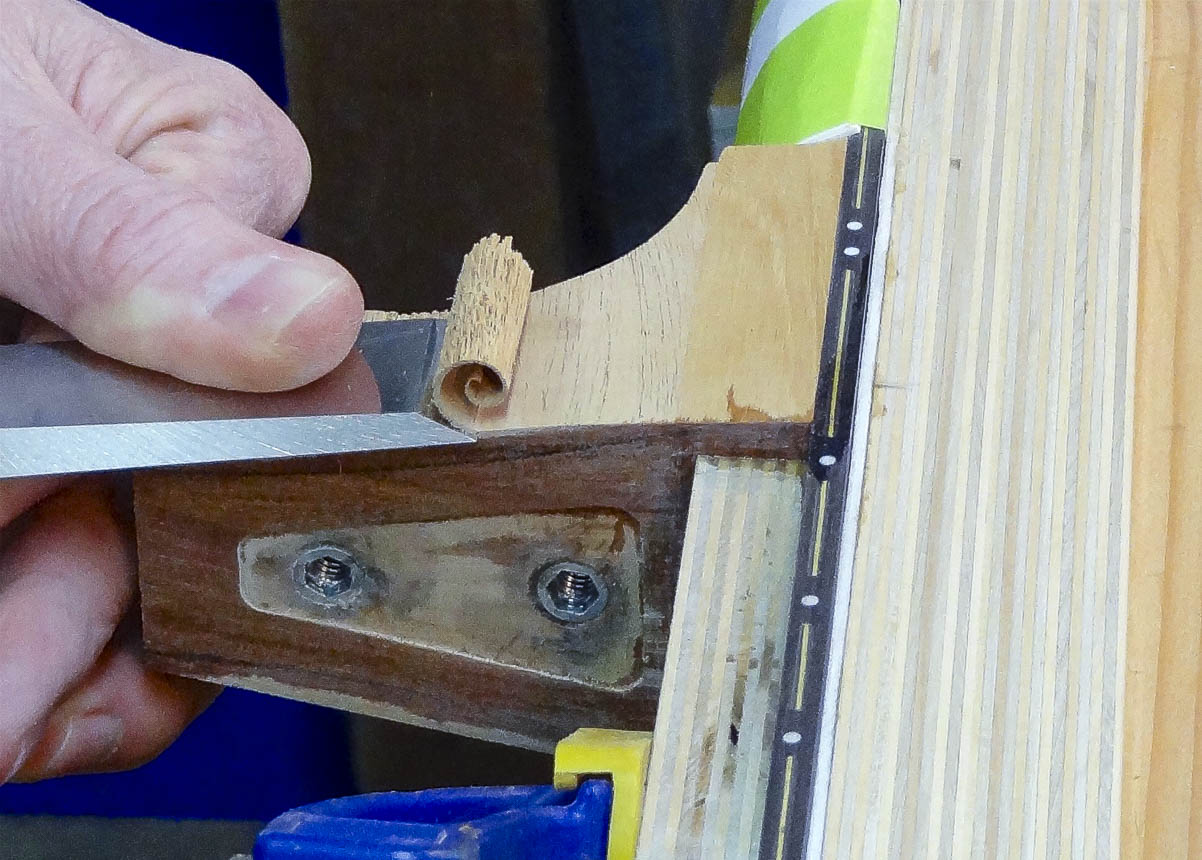
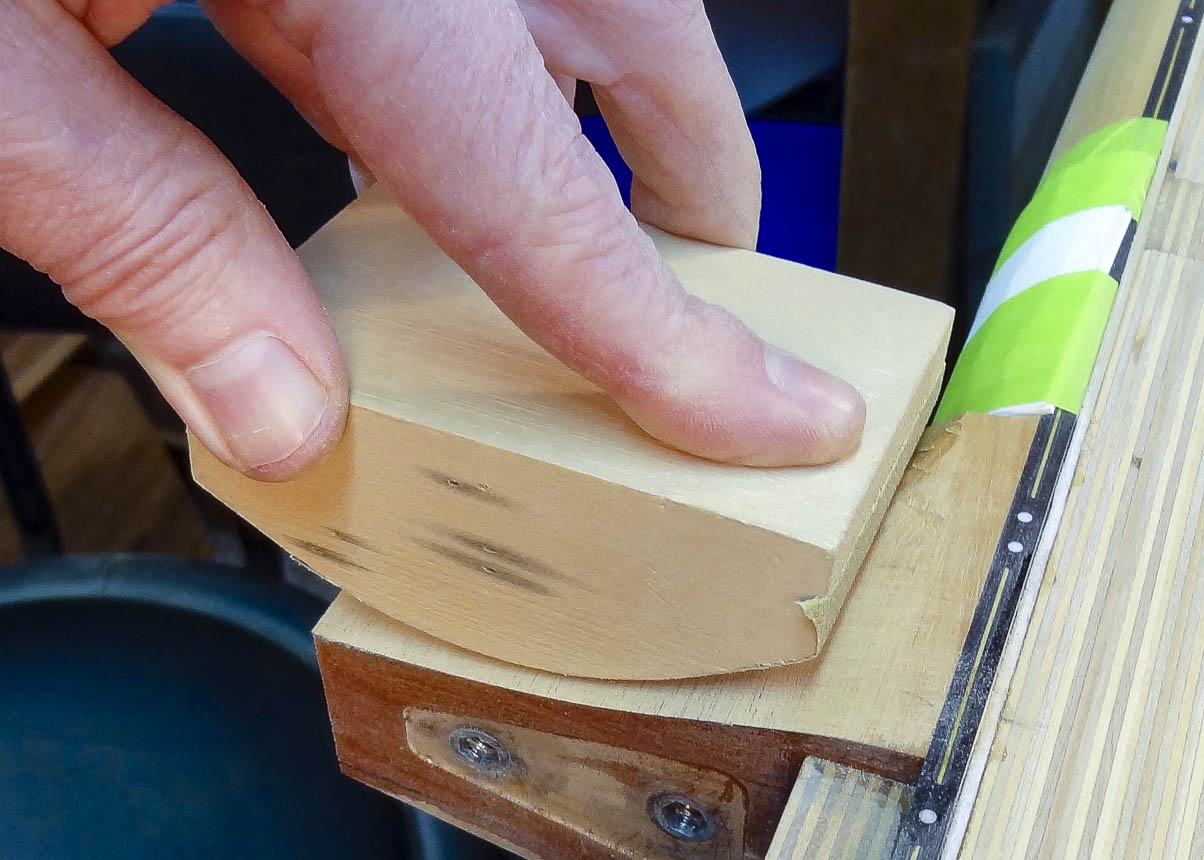
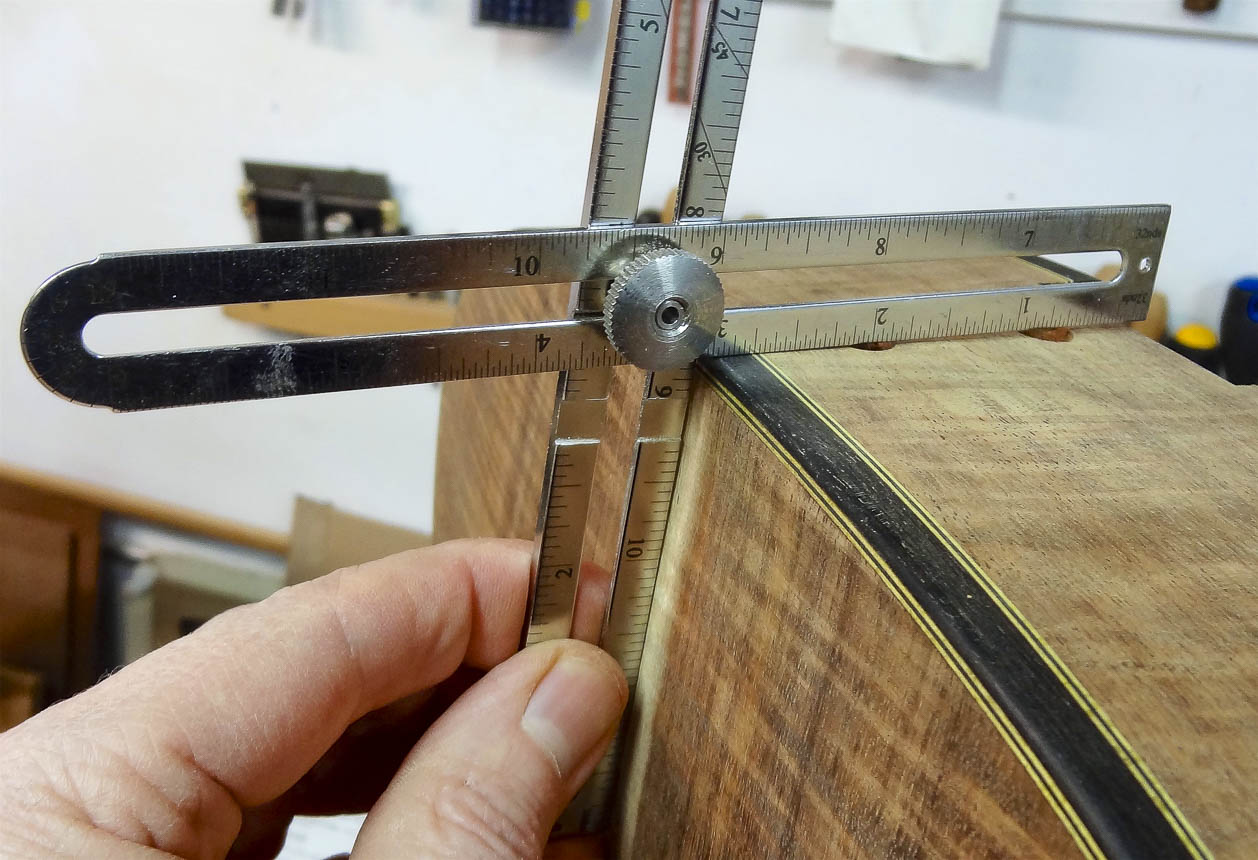
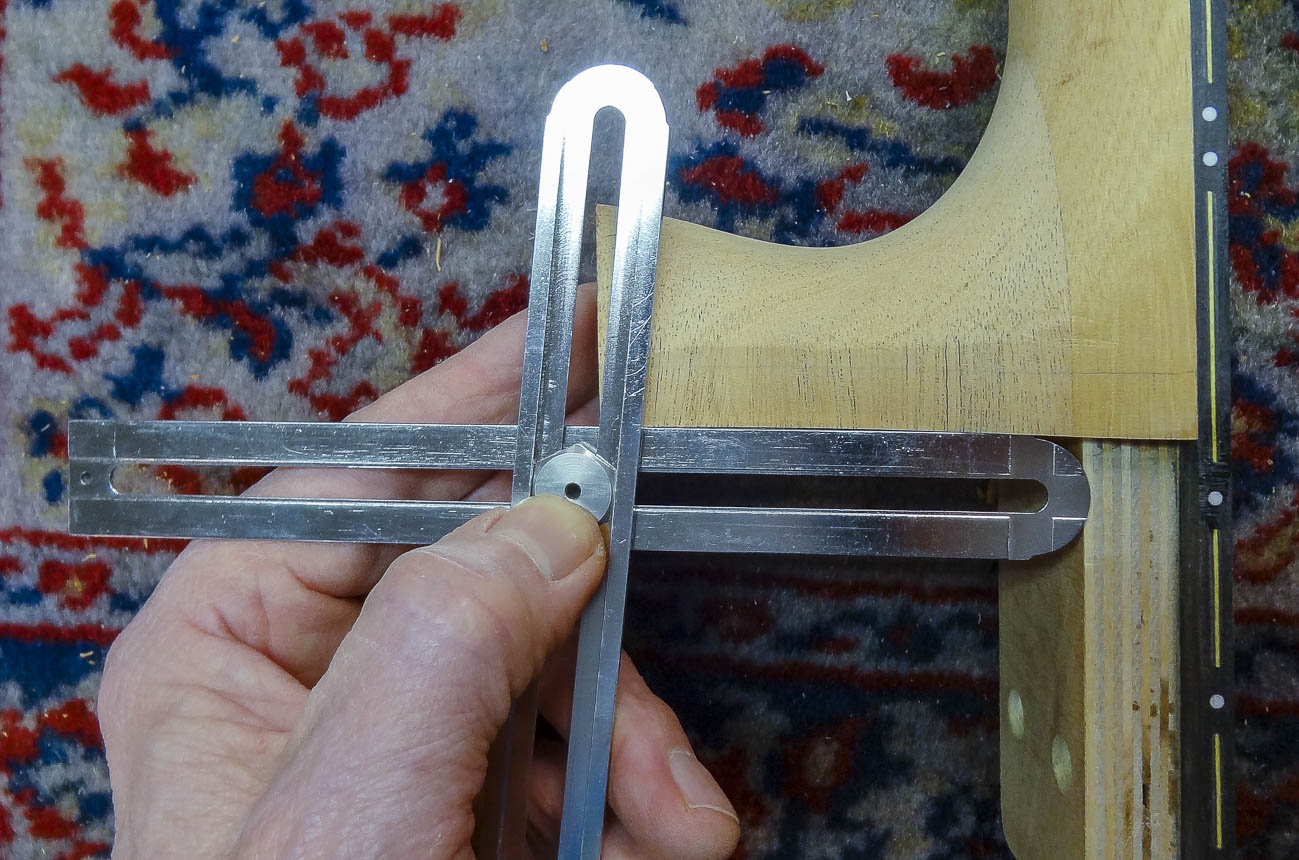
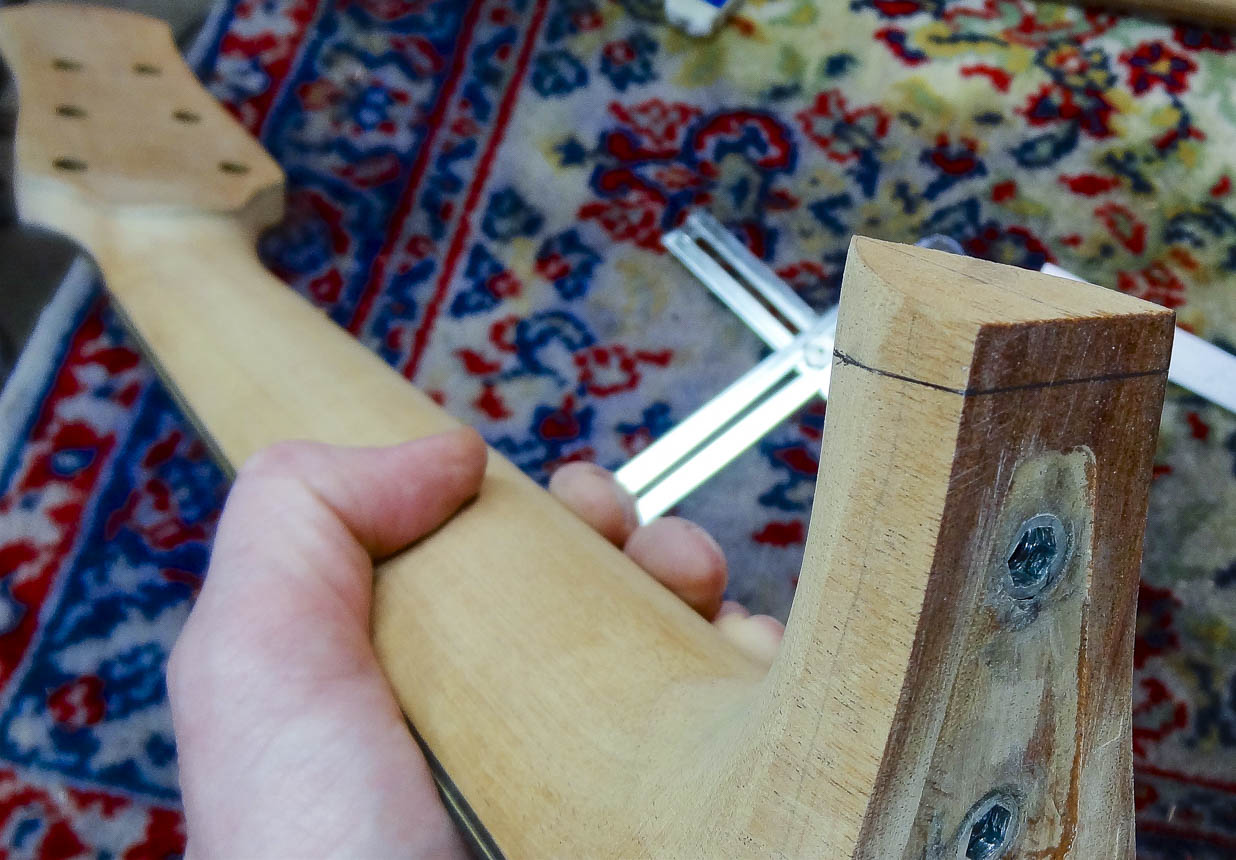
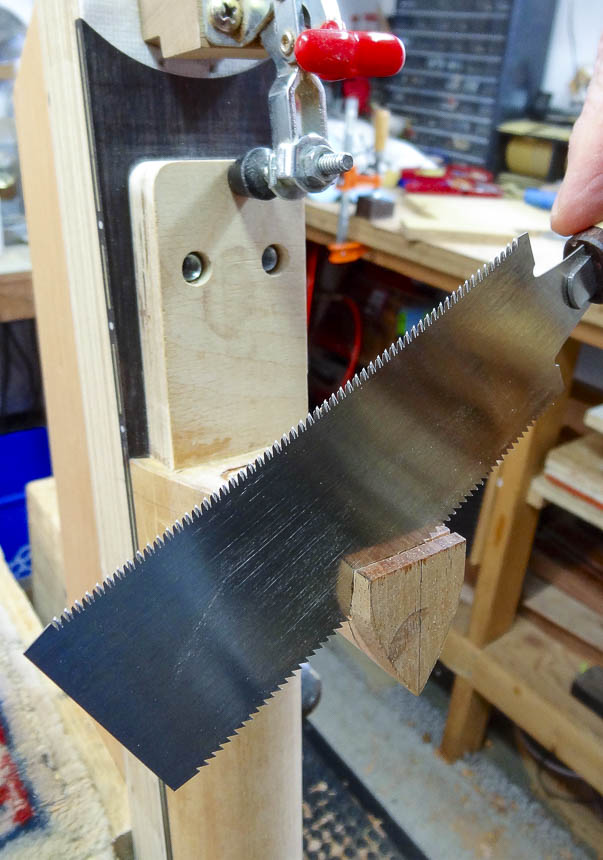
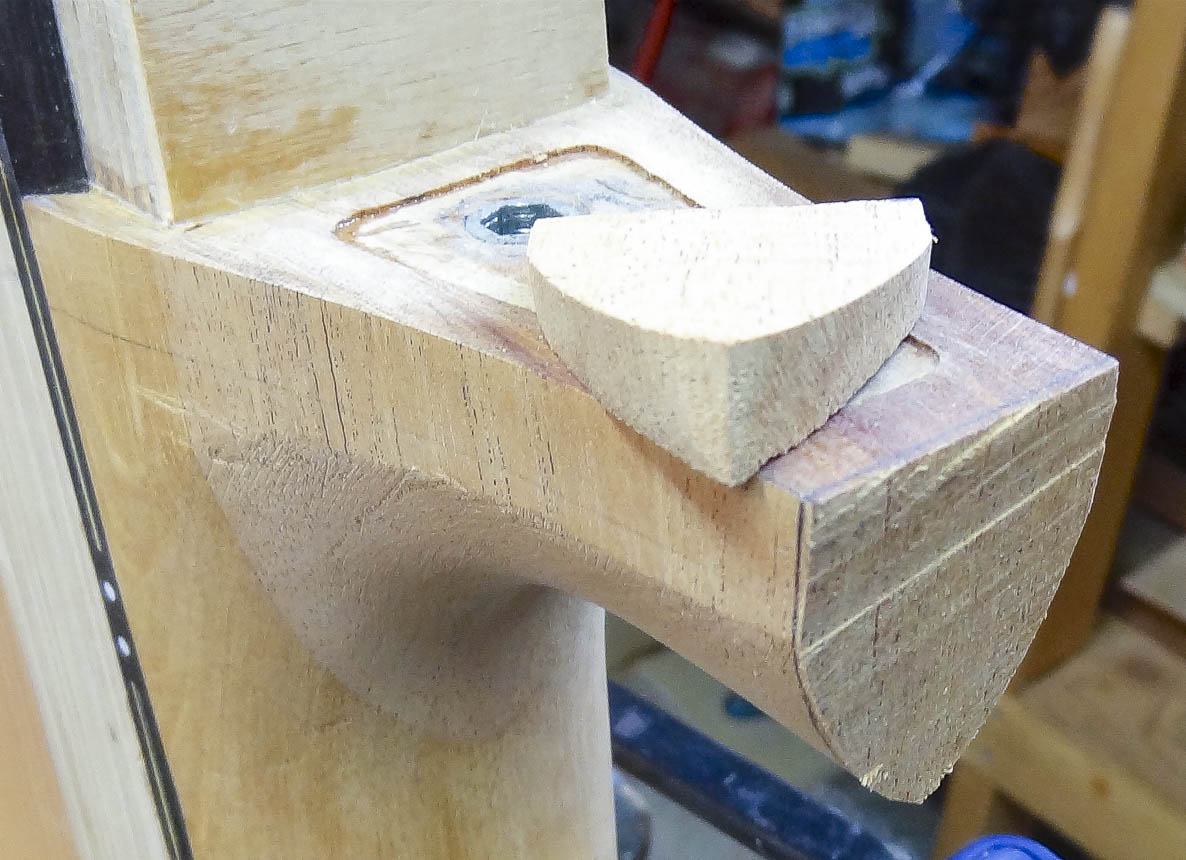
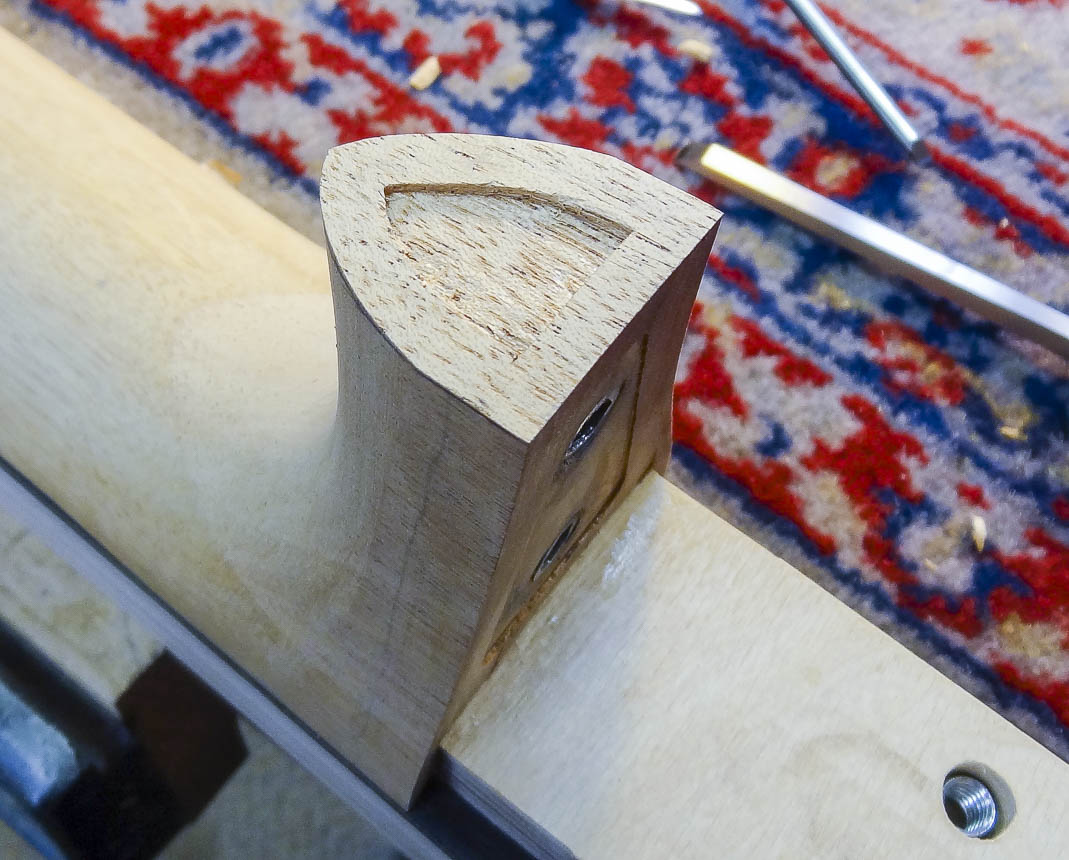
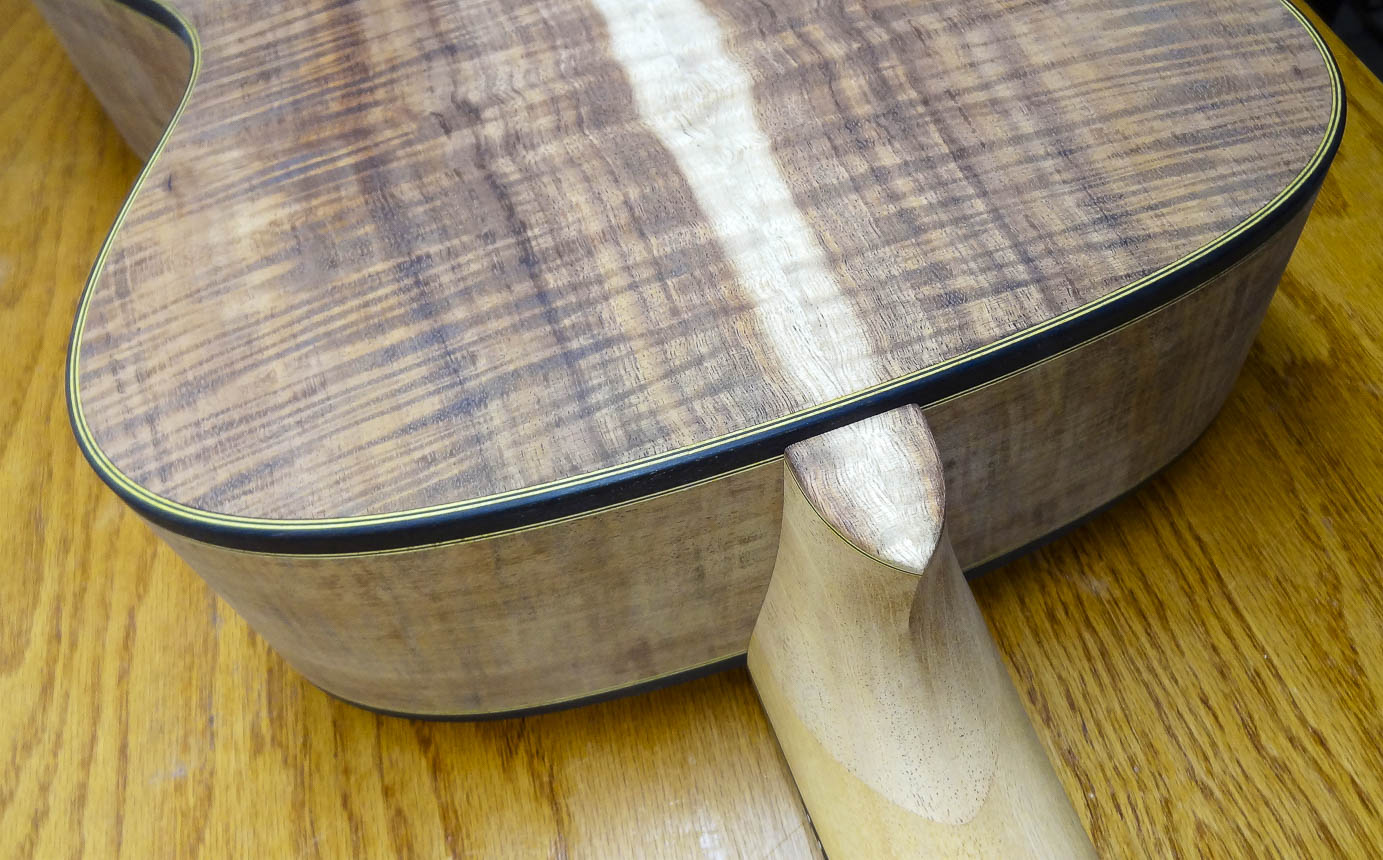
Once the shape is very close to what I want, I work on the heel cap. This is a decorative feature glued to the bottom of the heel. To cut the end of the heel to length, I bolt the neck to the body and use a knife to mark the heel exactly at the side purfling line. I use an angle tool to transfer the backs angle to the side of the heel and cut it off a little proud. A hollow is made on the bottom of the heel to make fine tuning the cut line easier and a sanding block carefully sands down to the line.
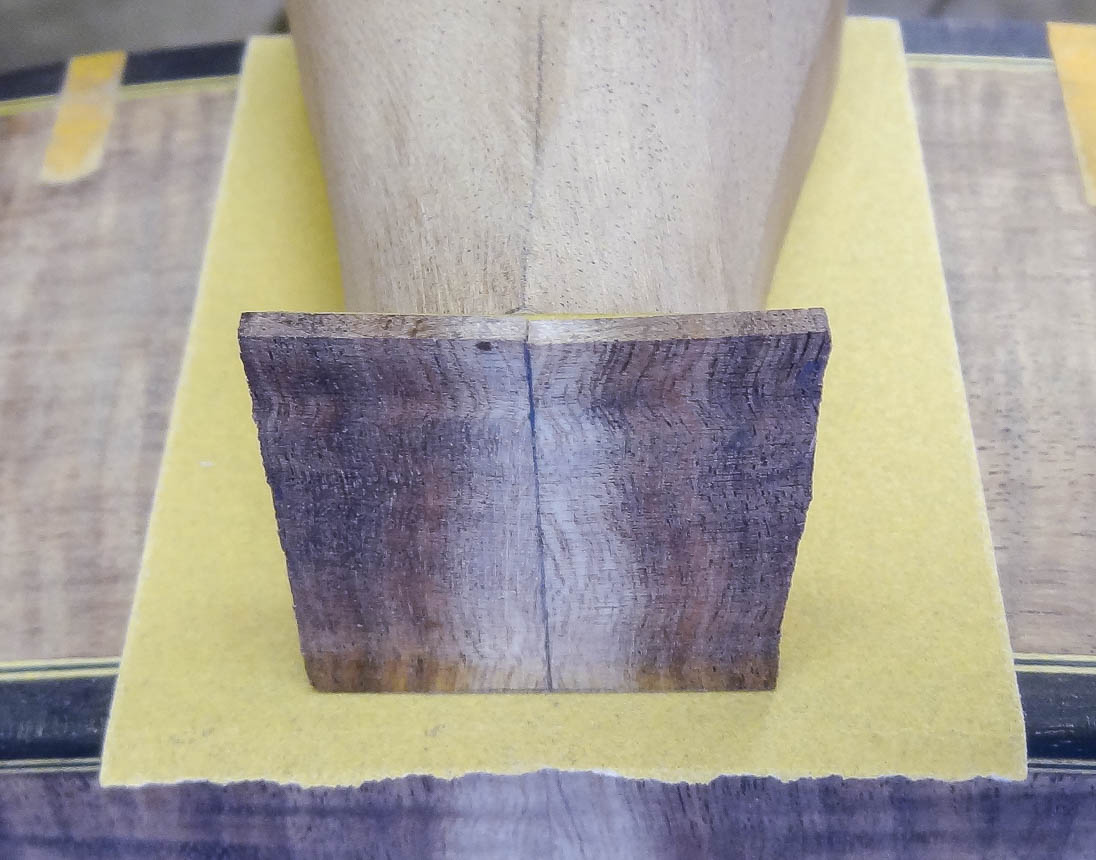
For the cap, my preference is to use a cut-off from the back panel so the grain flows continuously from the back of the guitar and on to the cap; I’ve been saving this small piece of wood from when I cut the back panel to shape. I’ll also be using purfling lines under the heel cap to match the side purfling on the body. I glue the layers of purfling veneer and cap together on the edge of the bench. For a nice joint where the cap butts to the body I stick sand paper to the body and bolt the neck on over it. This allows me to sand the edge of the cap so it perfectly matches the curve of the body. I glue the cap on with the neck bolted to the body and wax paper between them.
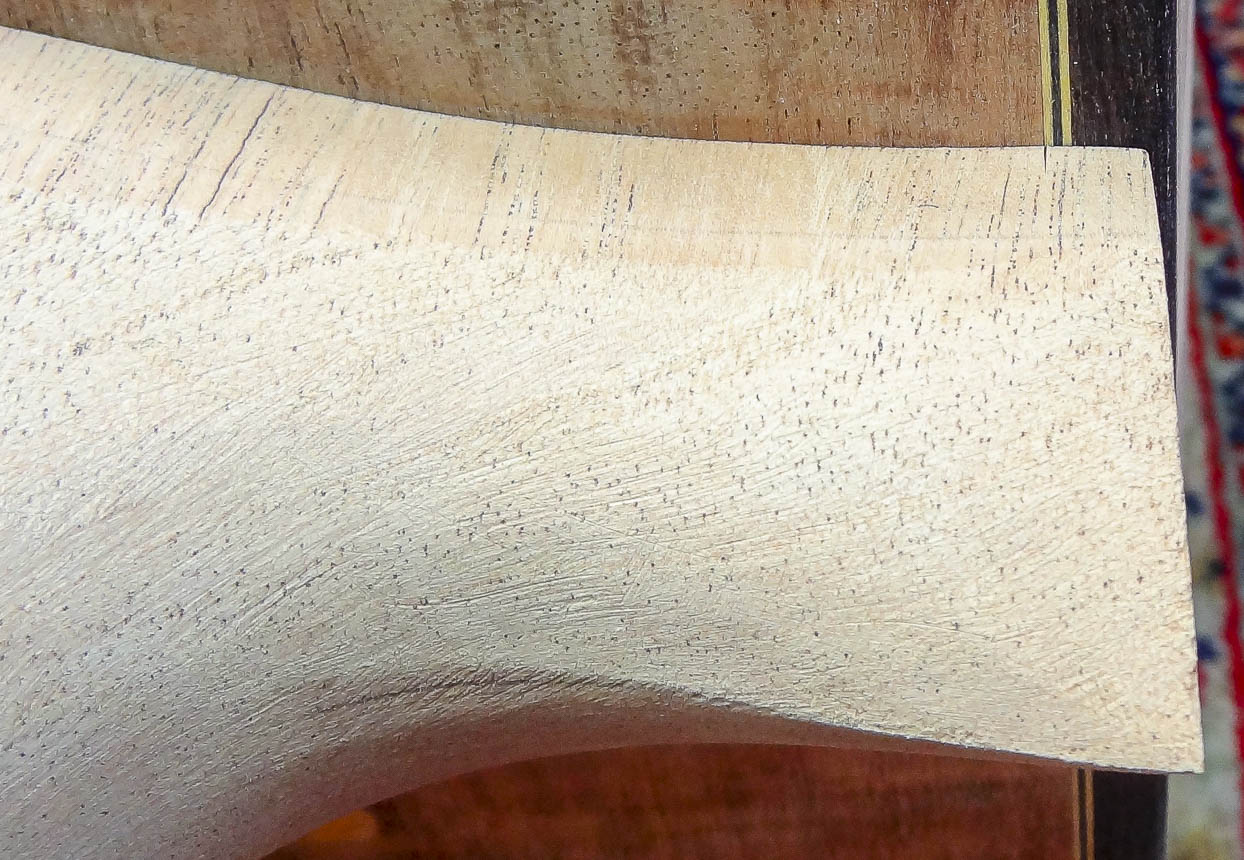
The final shaping of the heel is now done with files and sand paper.
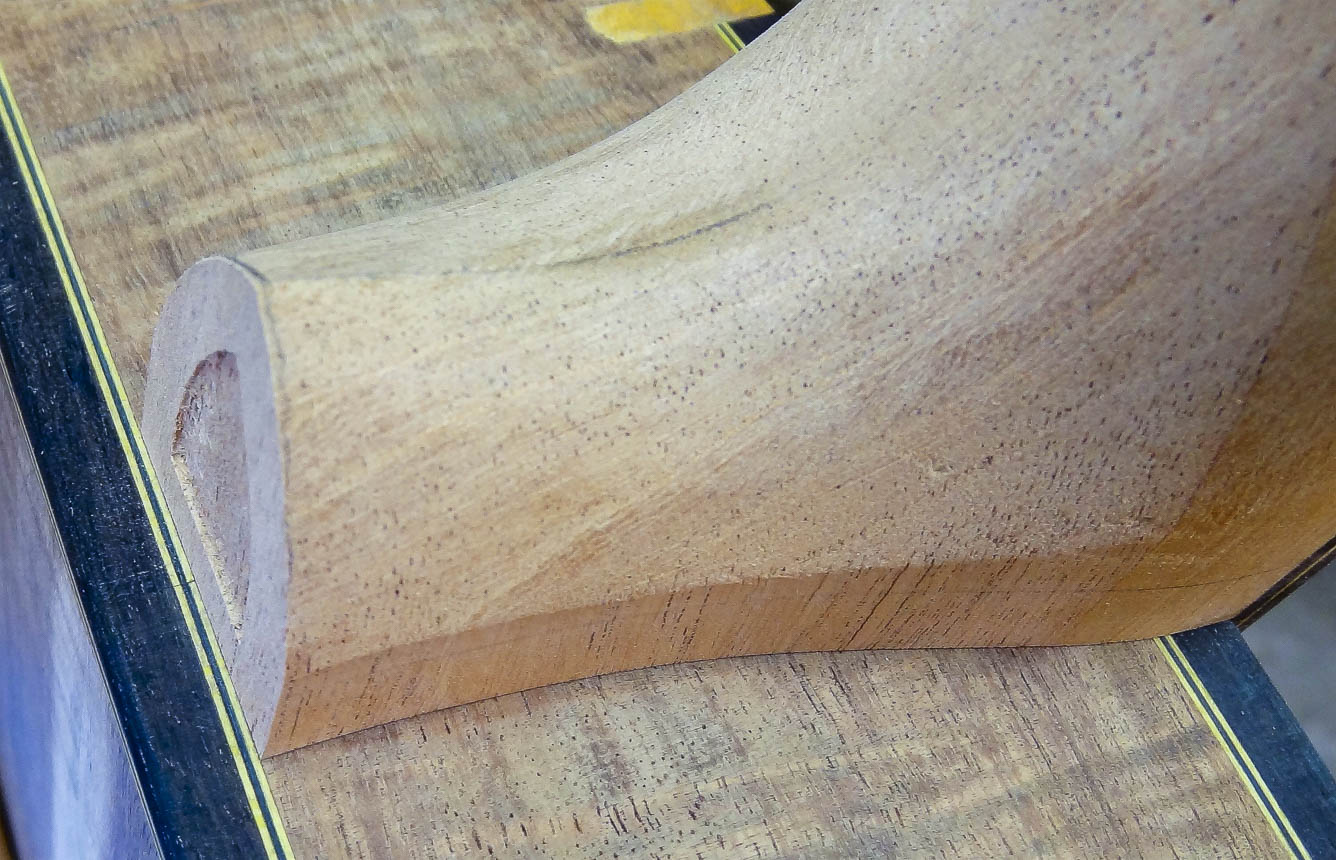
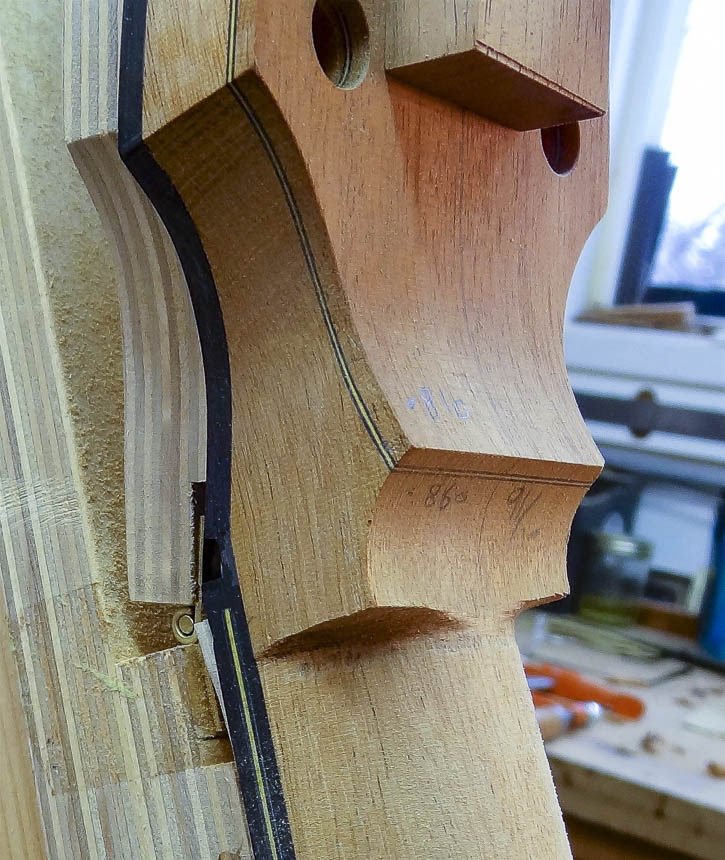
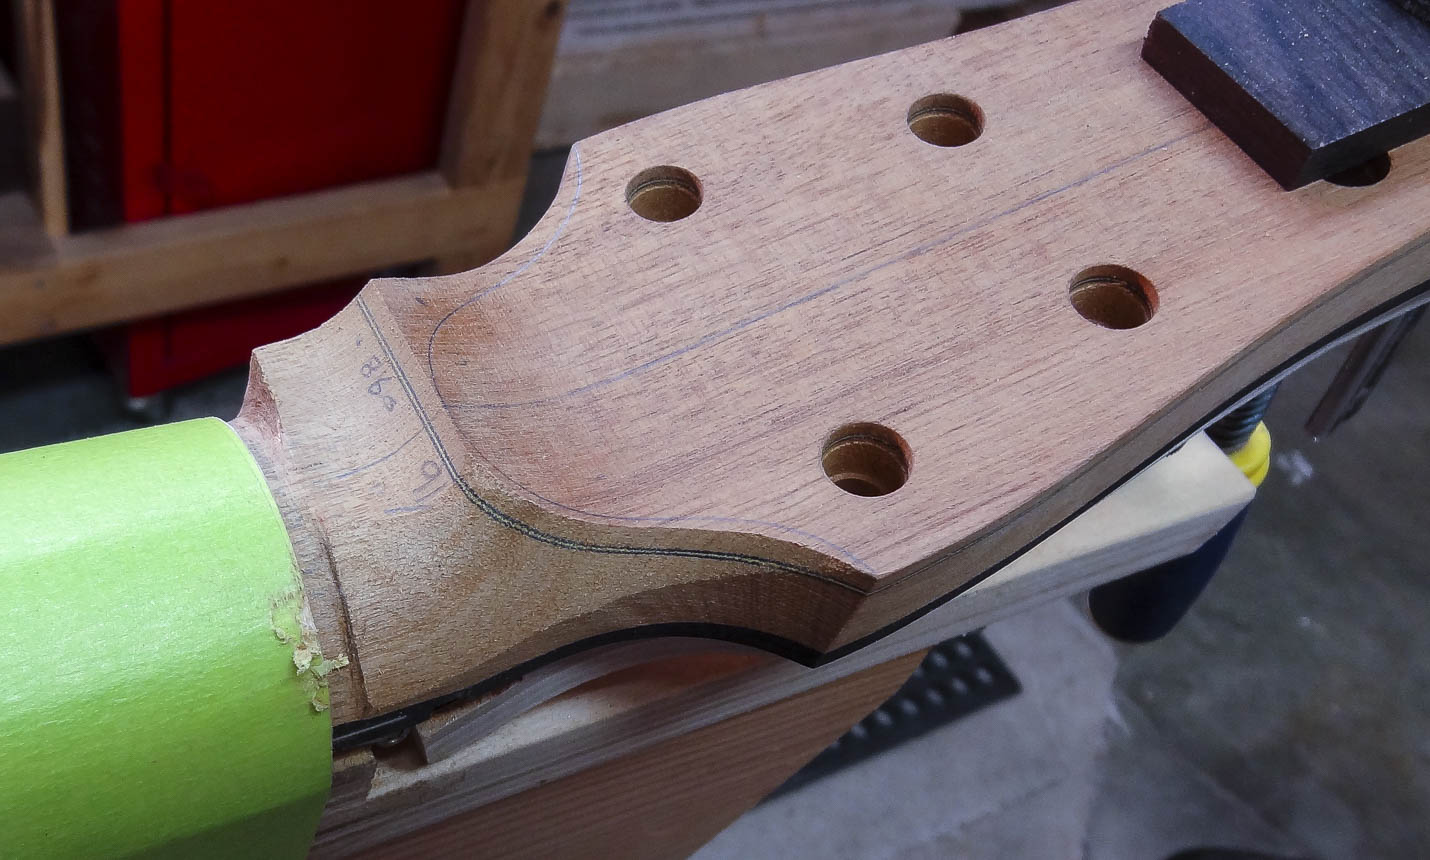
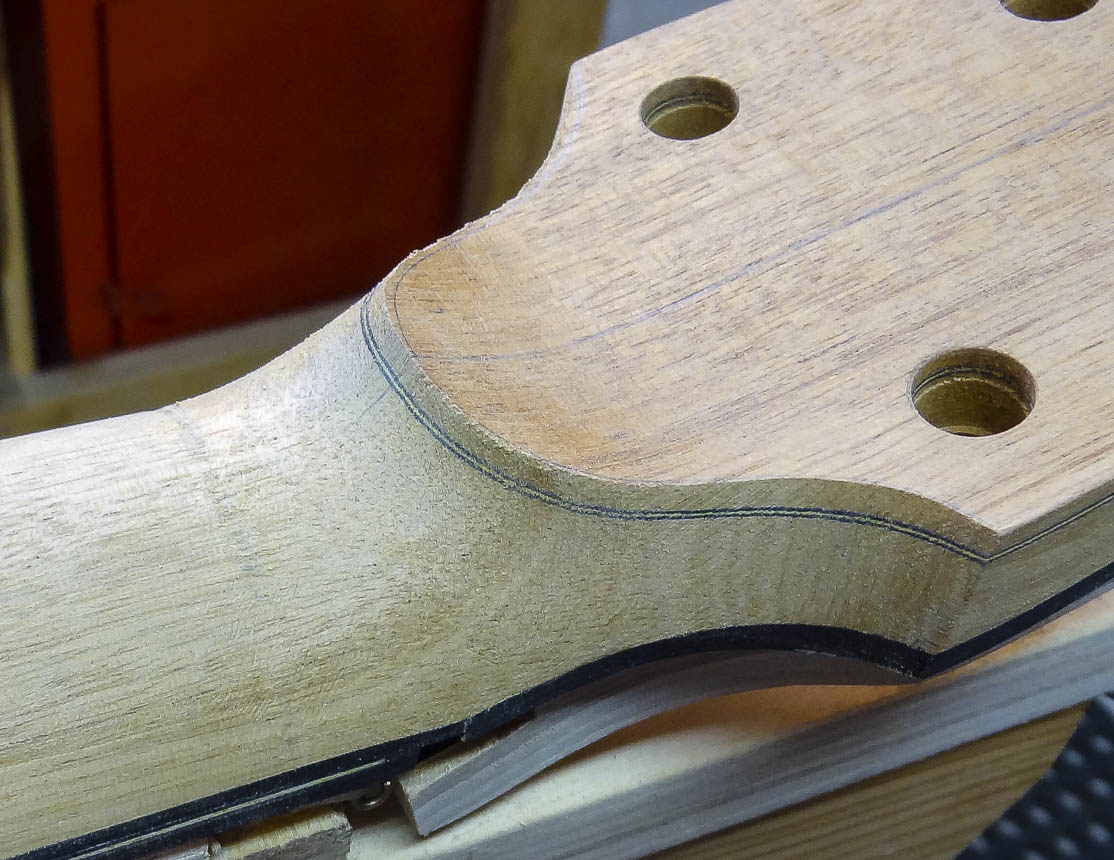
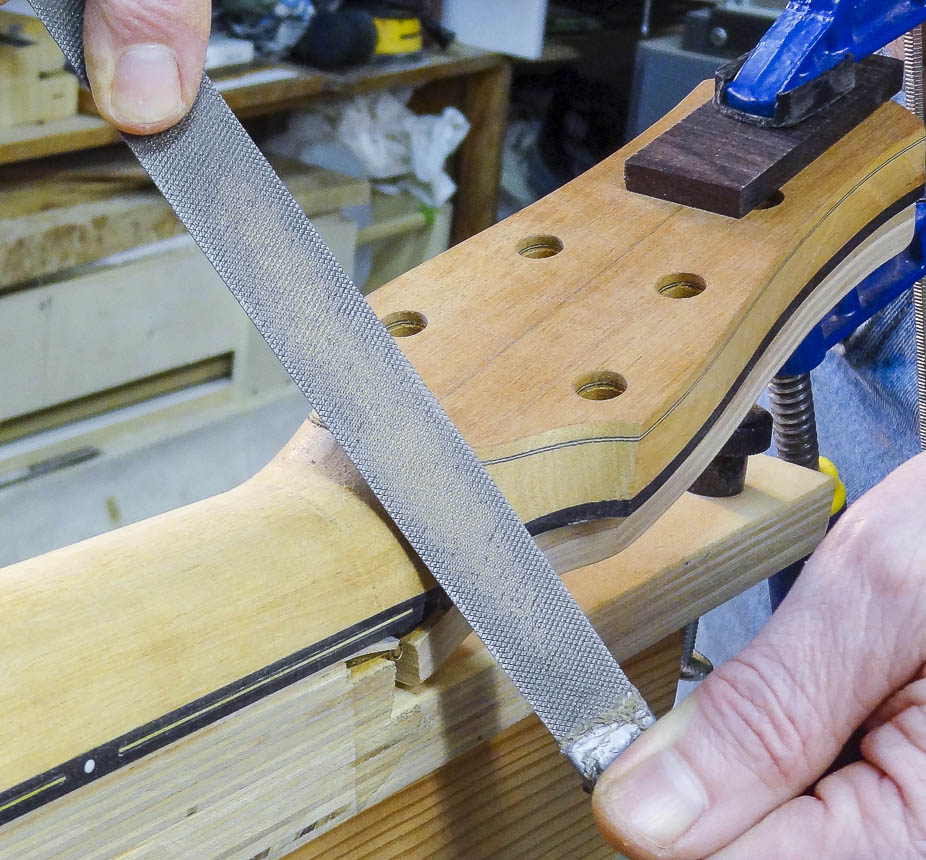
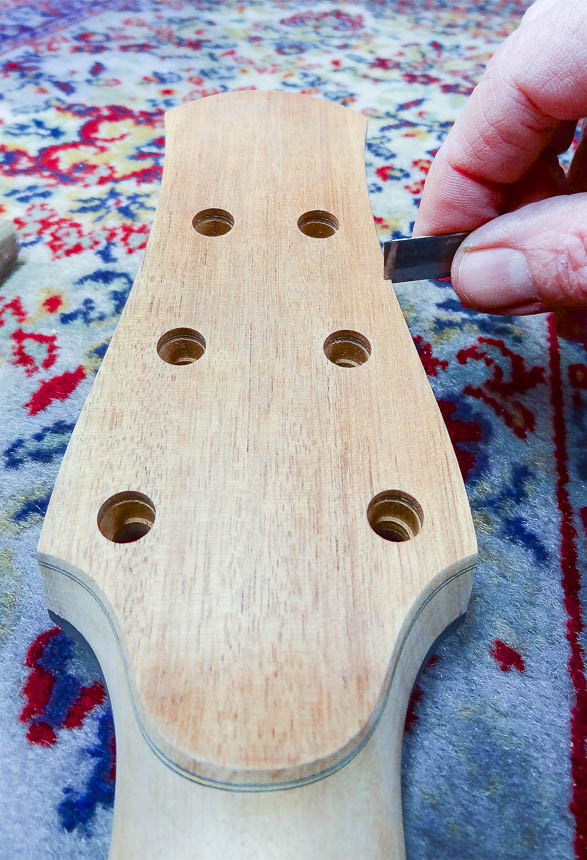
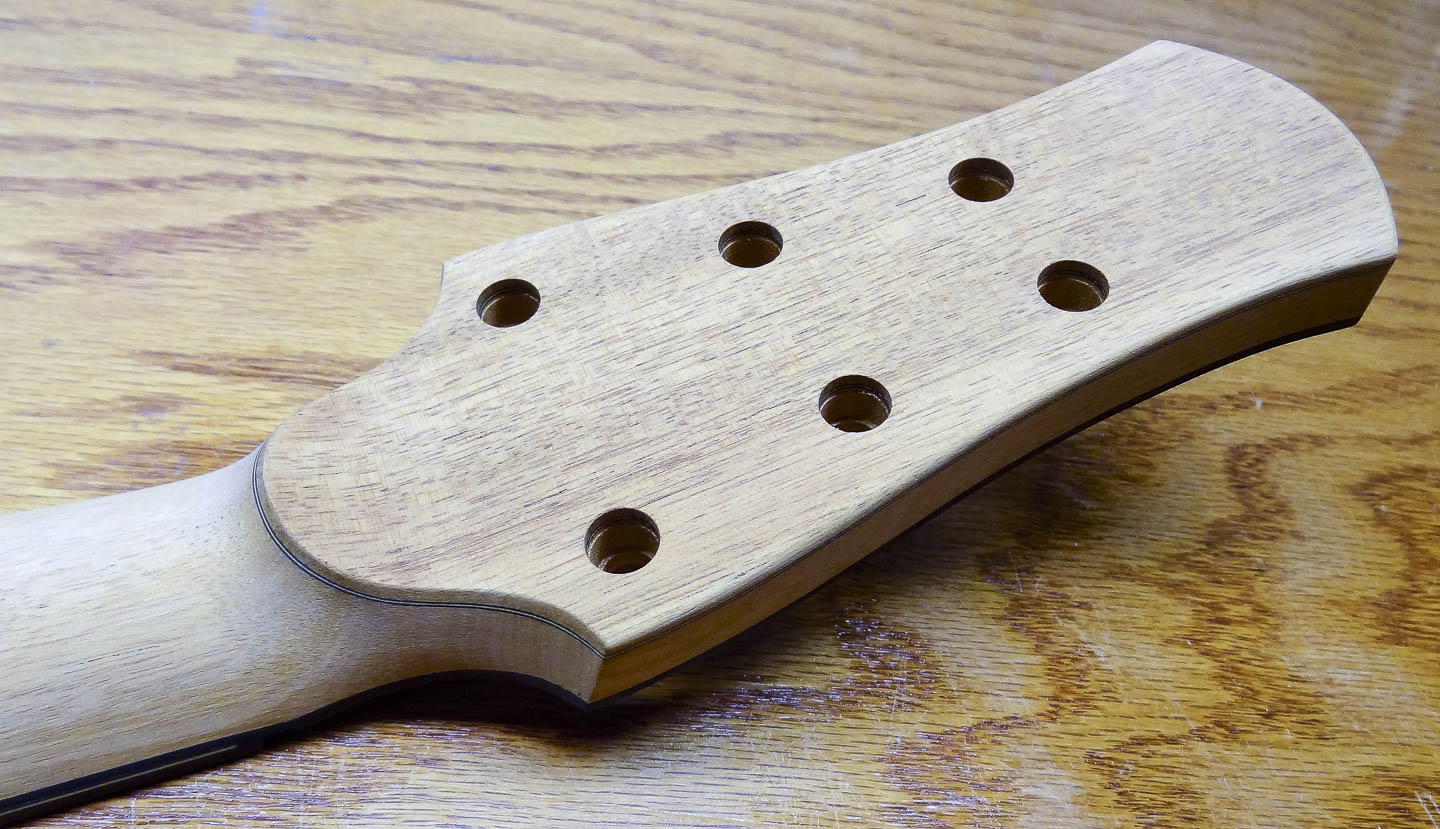
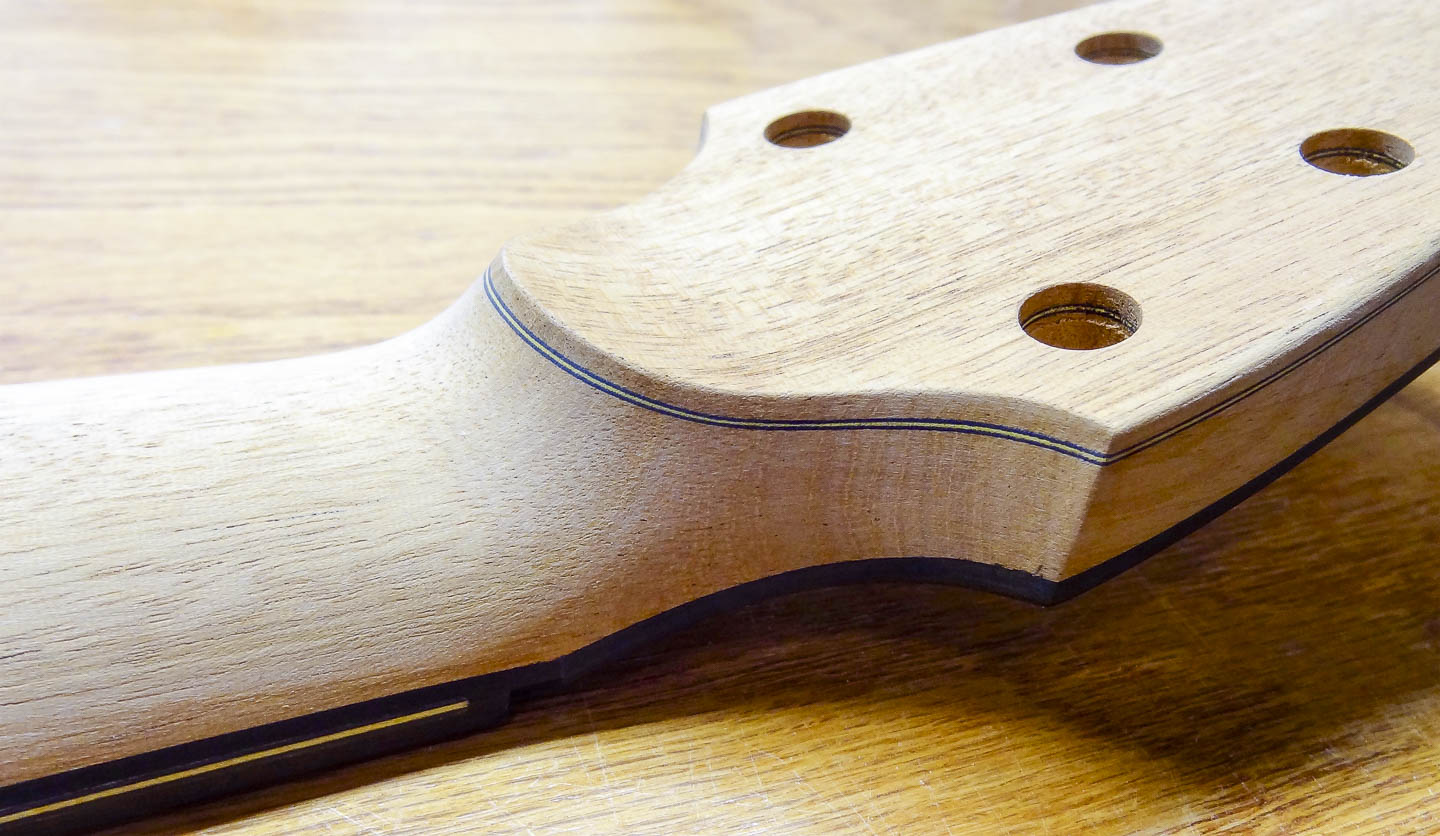
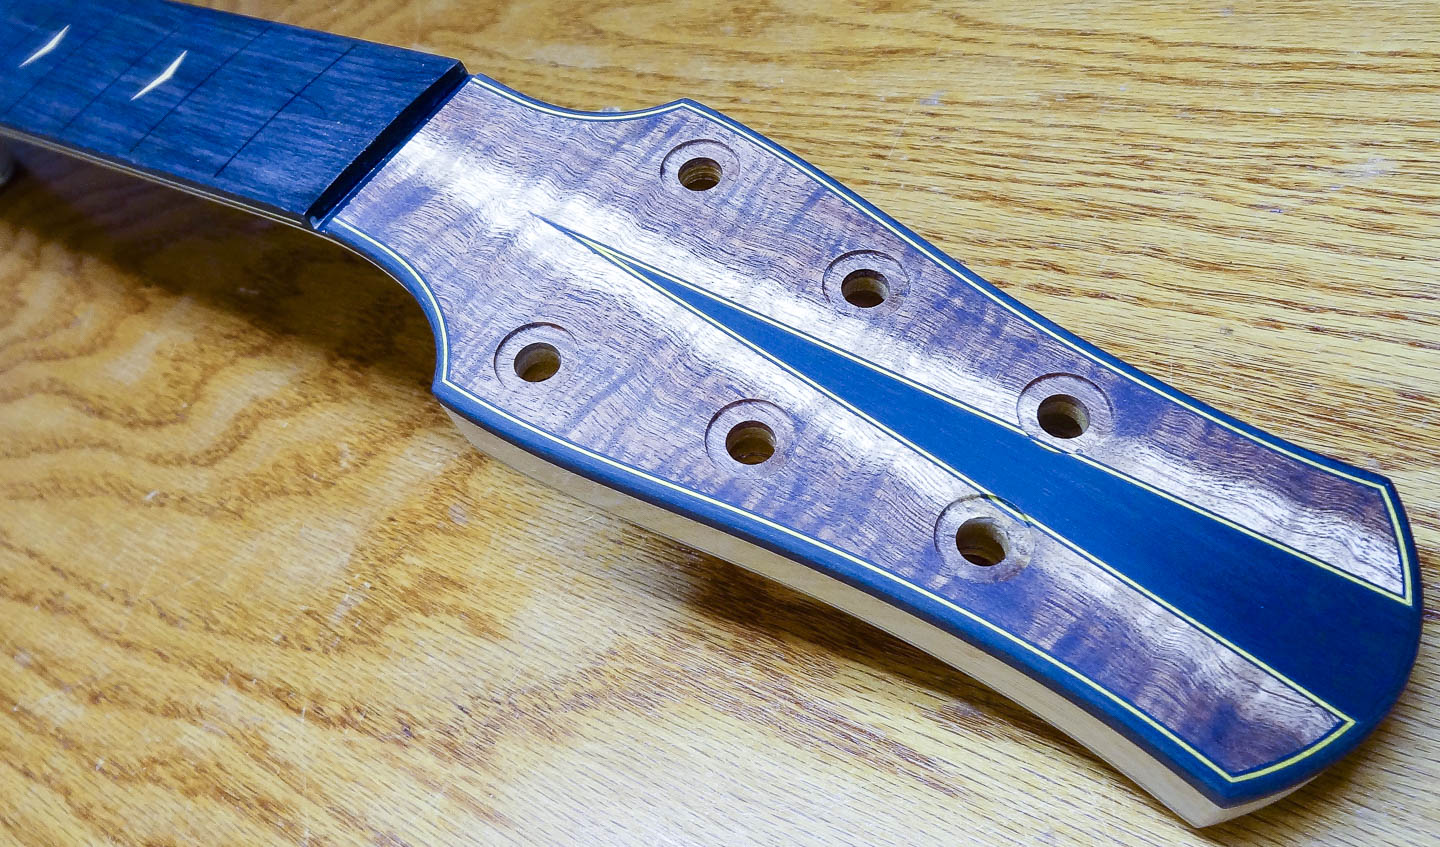
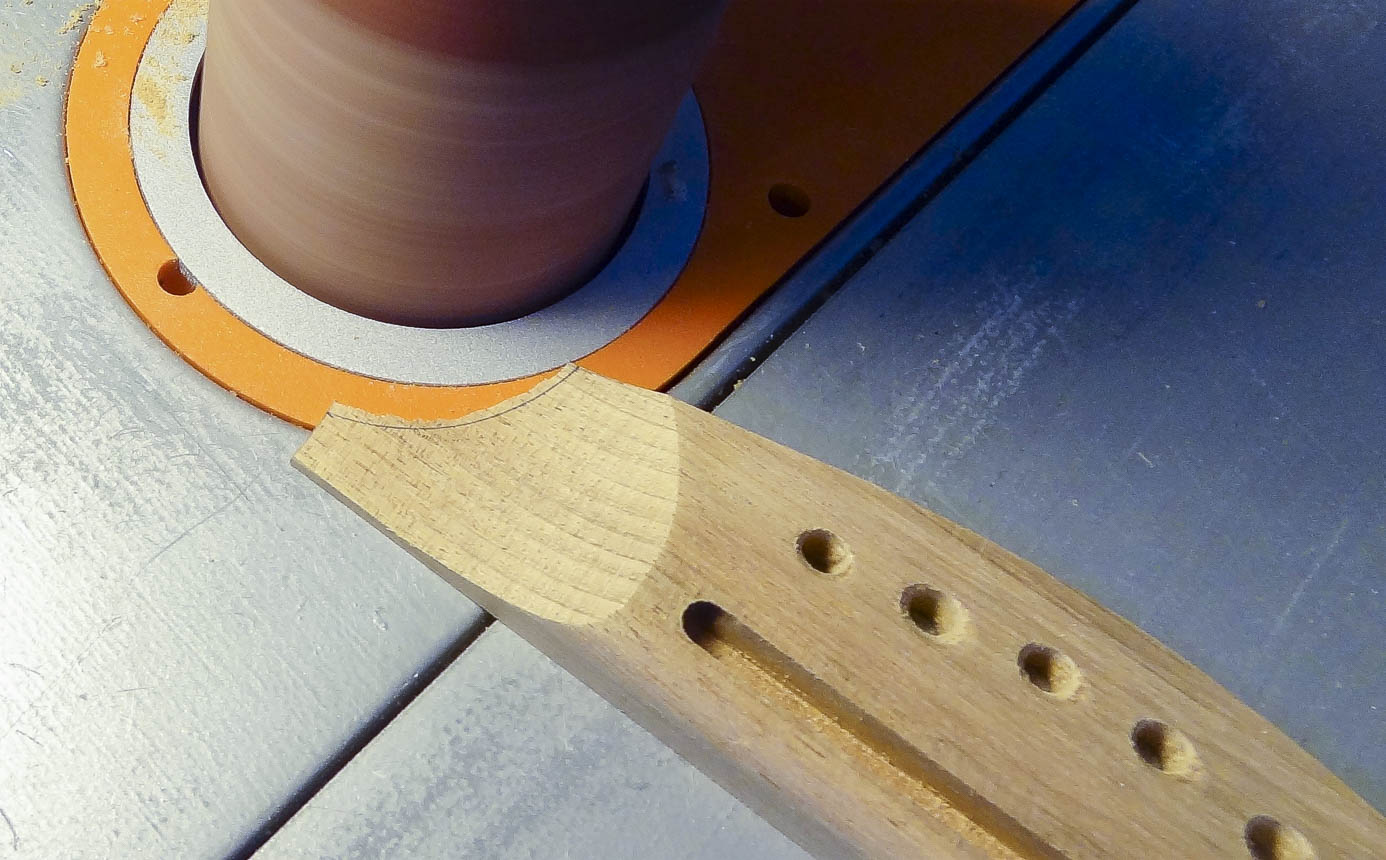
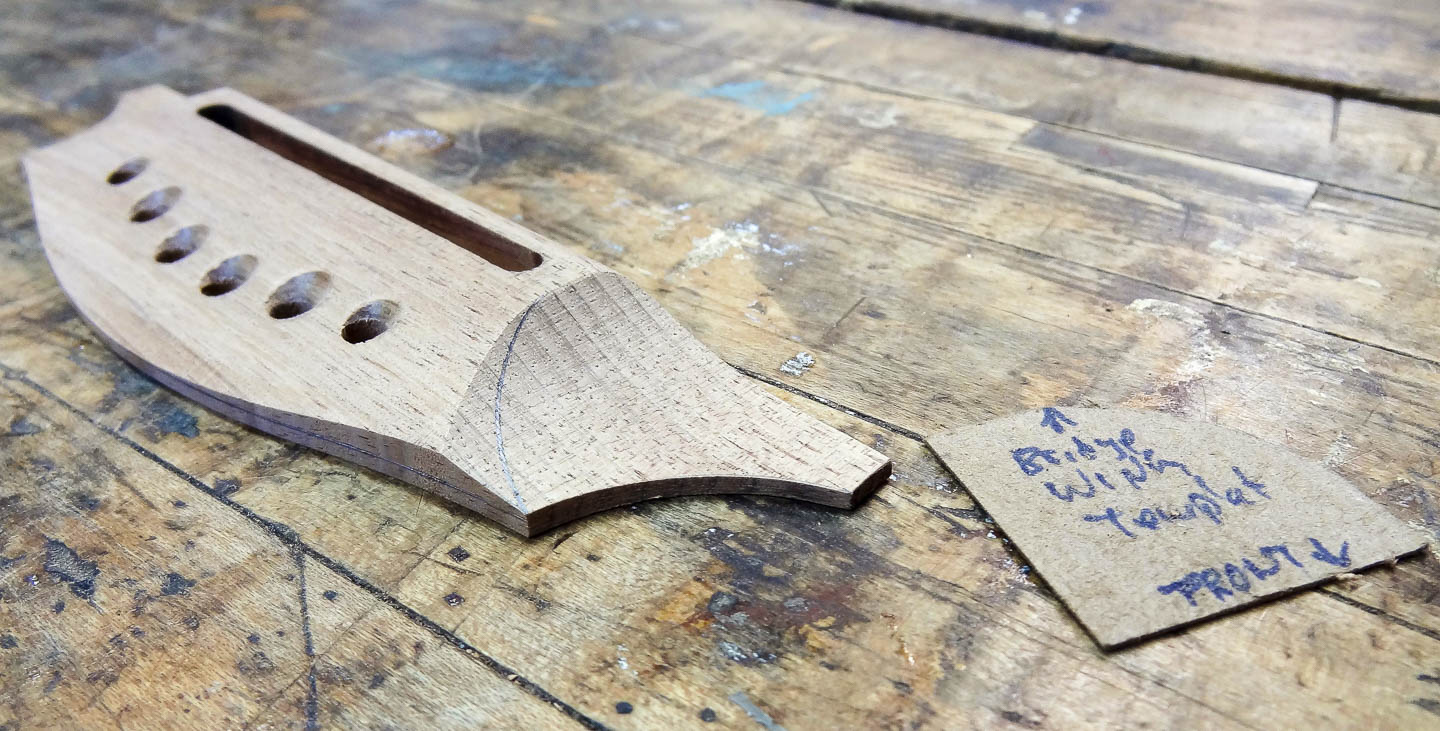
SHAPING THE VOLUTE
The volute at the neck to head stock transition is shaped much like the heel was. Guidelines are established, and the same tools are used to define the shape. The last steps to complete the wood working on the neck are to ease the top and bottom corners of the head stock and give the whole thing a scrutinous once-over with fine sand paper.
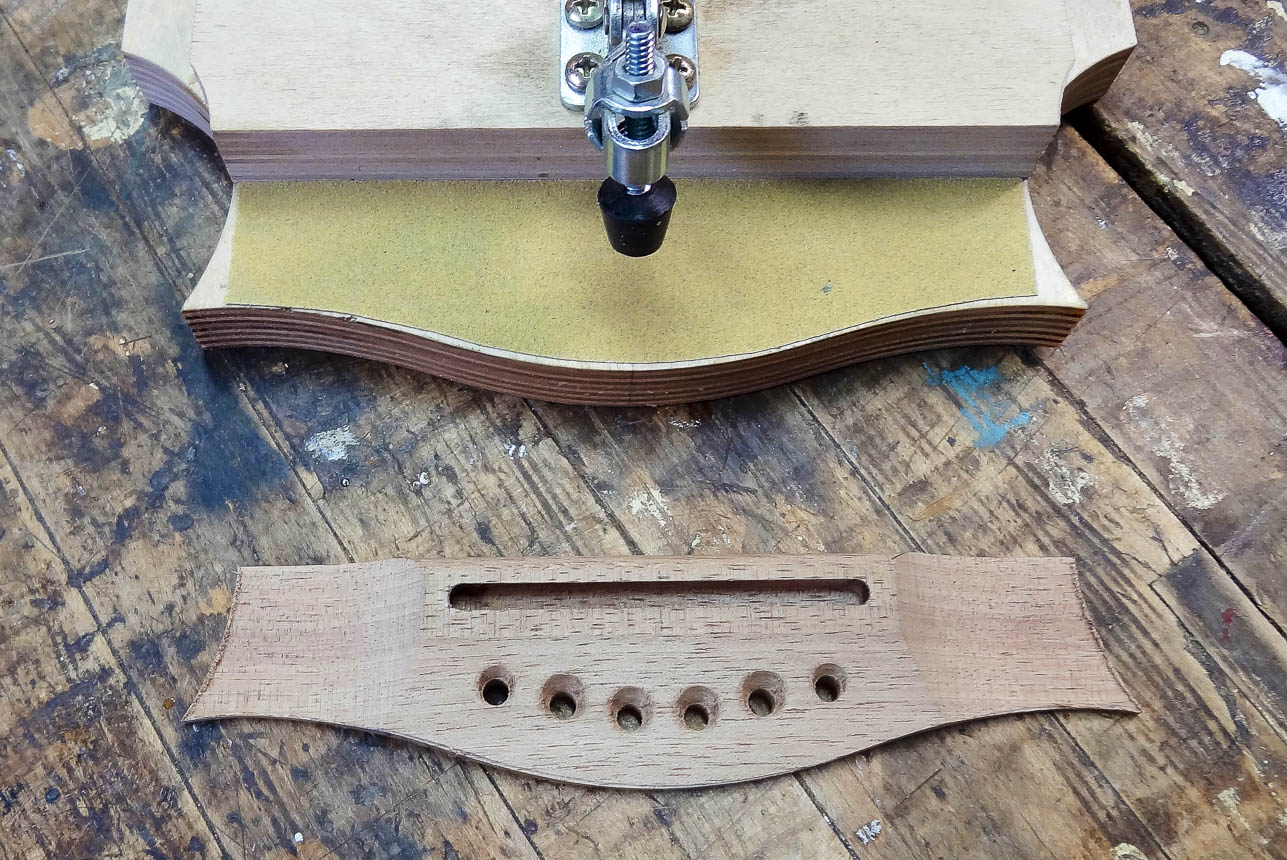
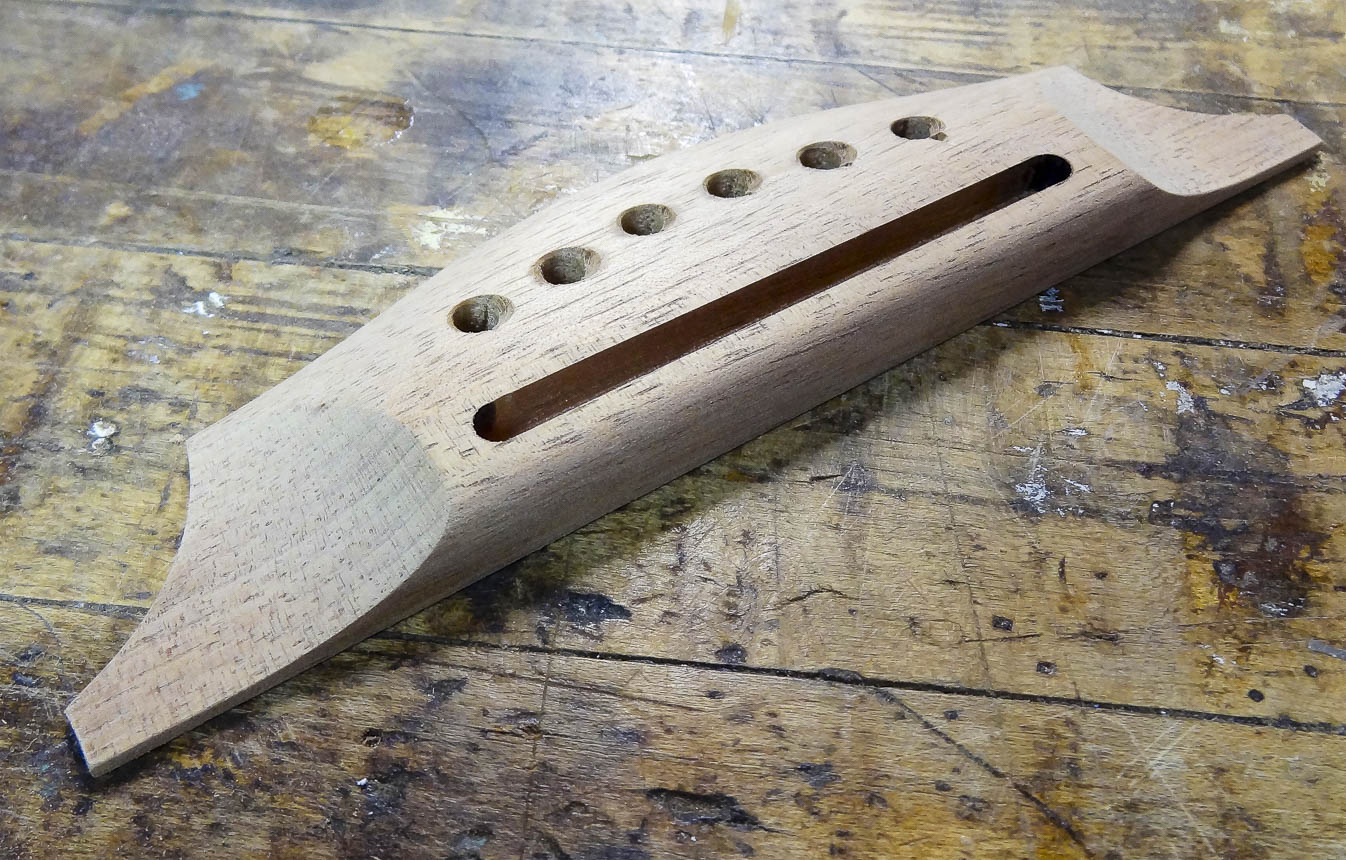
THE BRIDGE
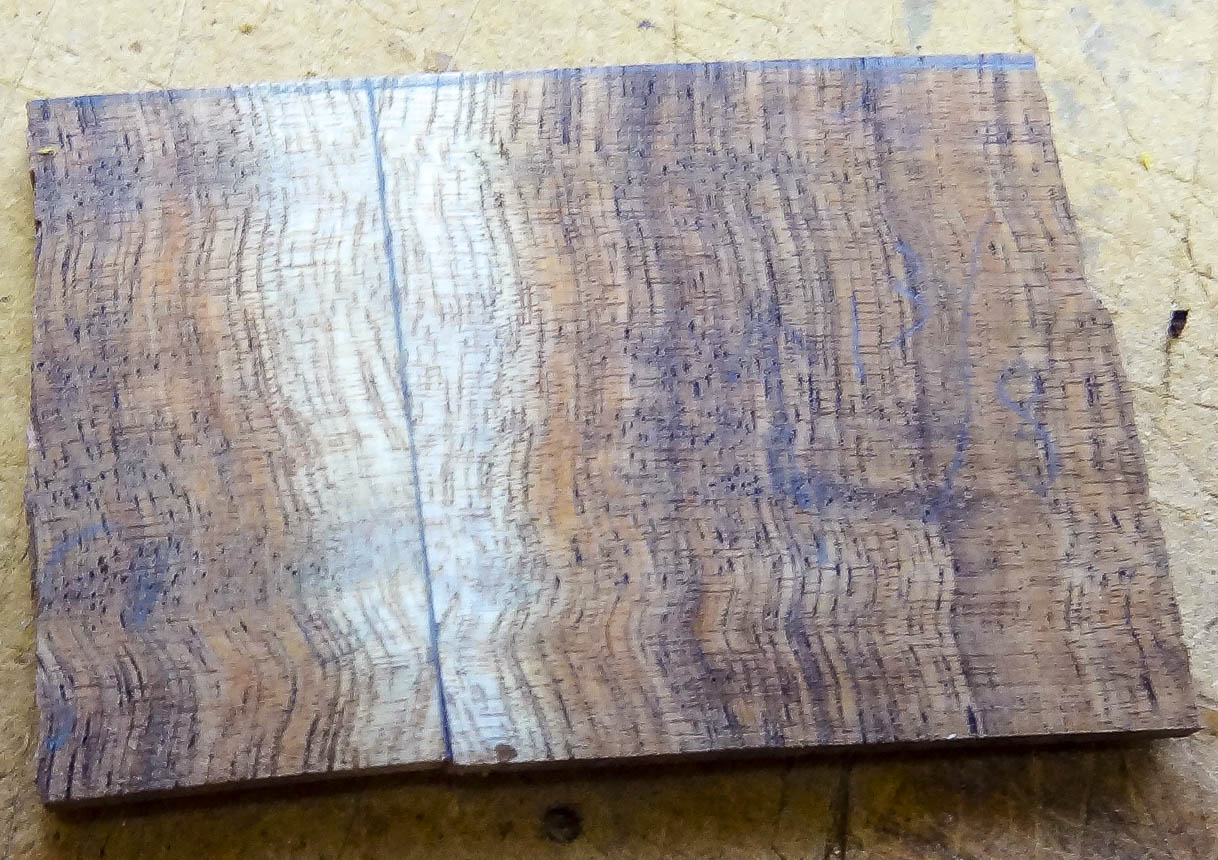
Traditionally, the bridge is made from ebony or rosewood. The physics of what’s going on with the sound board and bridge suggests that these woods are not the best choice, however. The problem is they are very dense and heavy for this application. A combined sound board and bridge that weigh less—has lower mass—is going to respond to the strings vibration to a higher degree than one that’s heavier. It’s simple physics: Acceleration = force divided by mass. To accelerate the top more, you can either increase the force (pluck the string harder), or lower the mass of the top. A lighter top leads directly to a more responsive guitar that produces more volume. That’s why I select wood that meets the criteria for a good bridge, yet has lower density and weight. Australian blackwood is one such wood, and I use some wonderfully quartersawn examples of it.
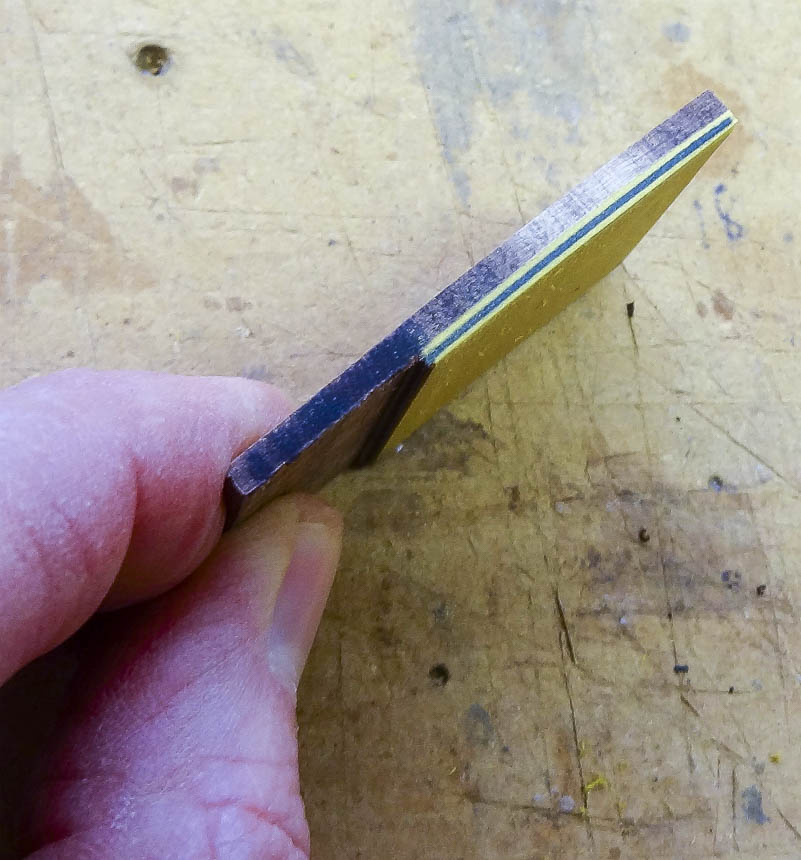
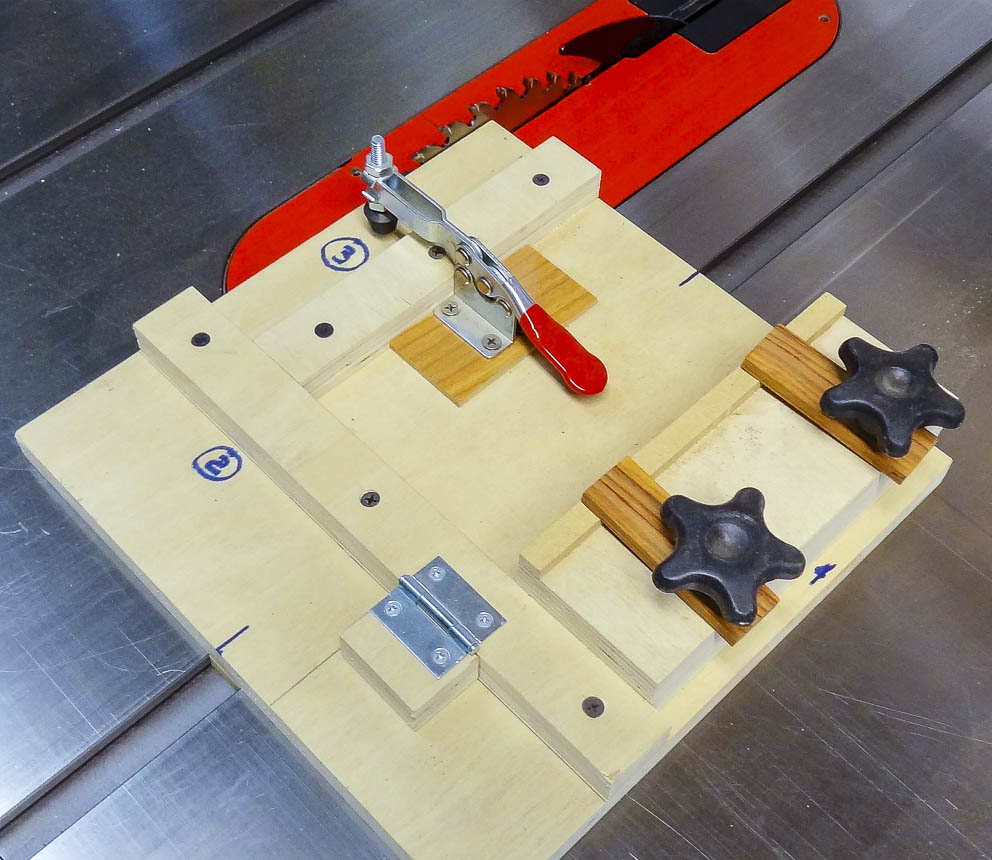
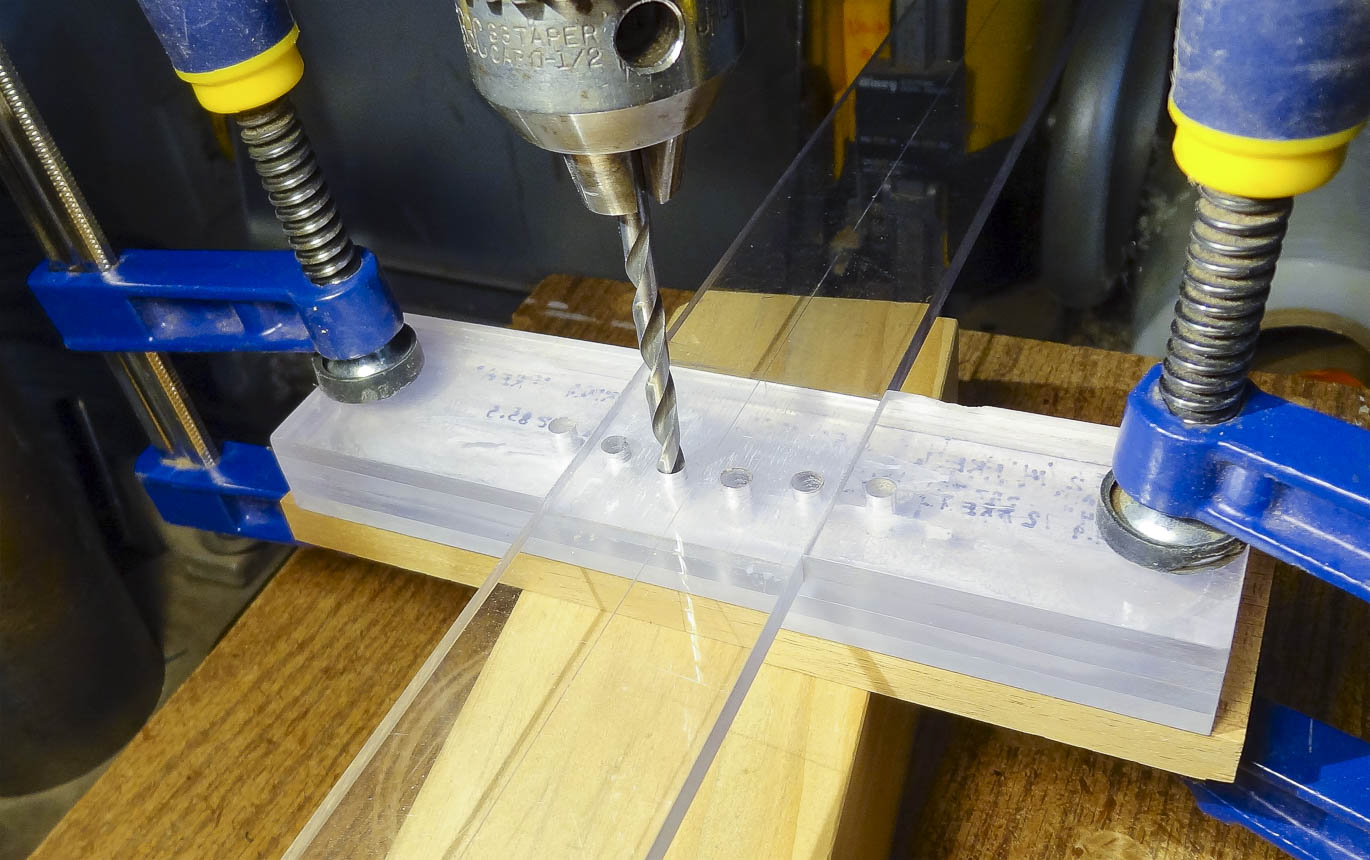
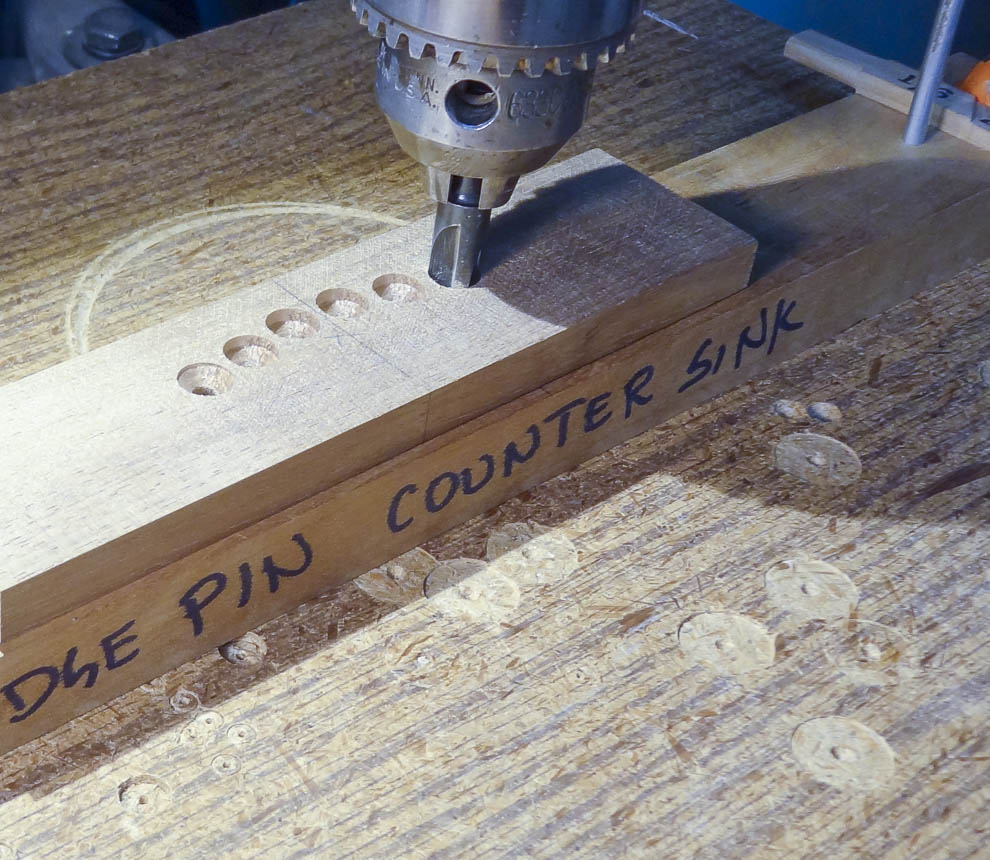
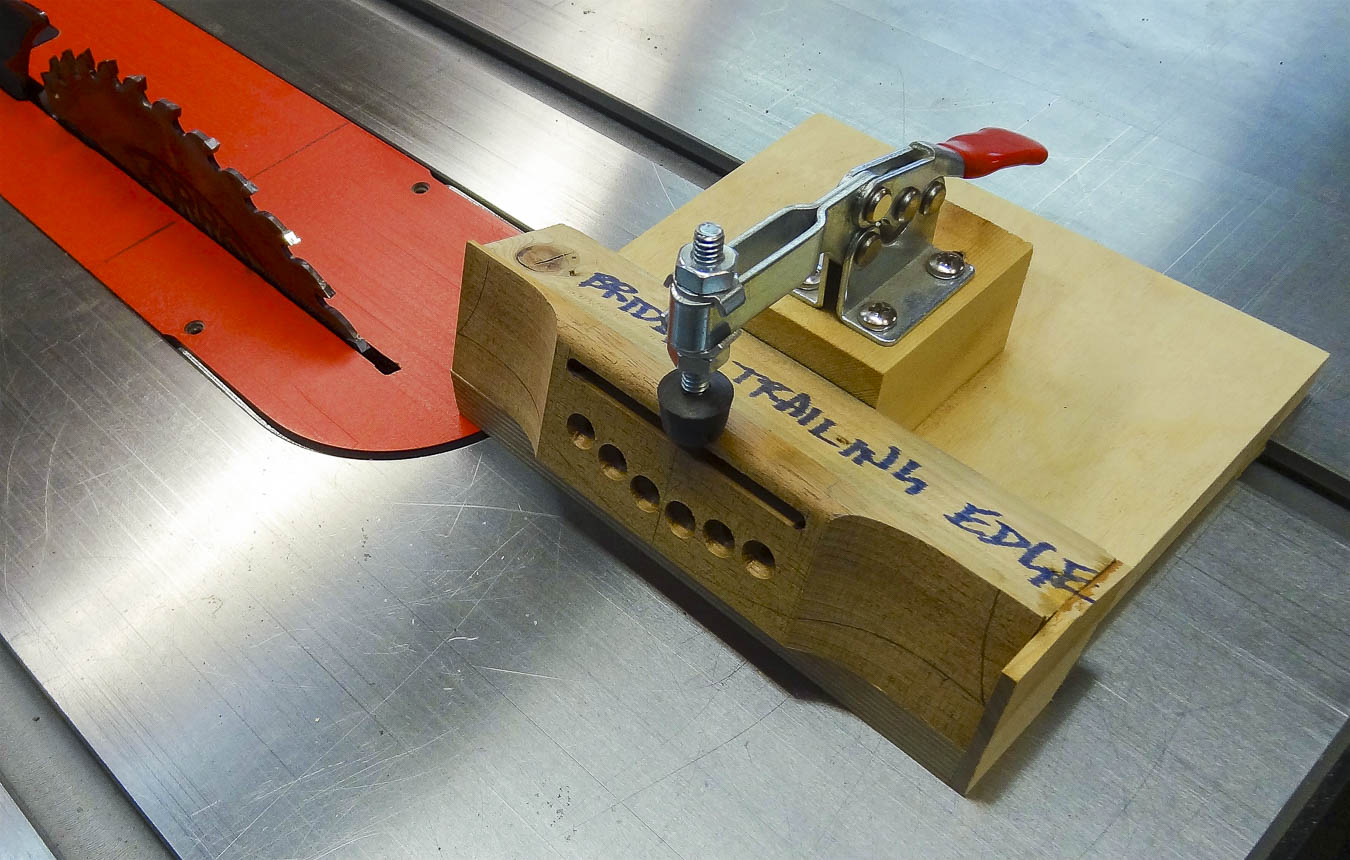
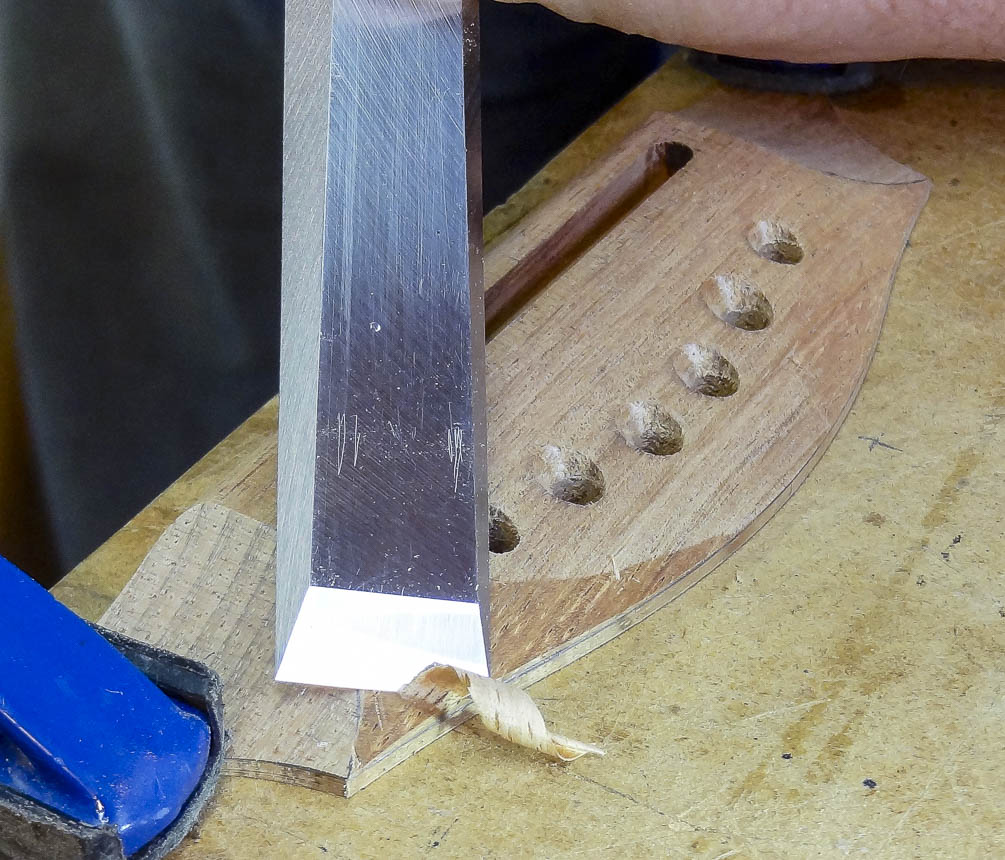
I start with a rough blank and flatten one edge and one face square to each other to produce reference surfaces. I use a four function jig that slides in the table saw miter gauge slots and refine the blank to the desired length, width and thickness. I drill the bridge pin holes on the drill press using the same jig I used to locate the holes in the sound board. These holes are then counter-sunk so the bridge pins fit better.
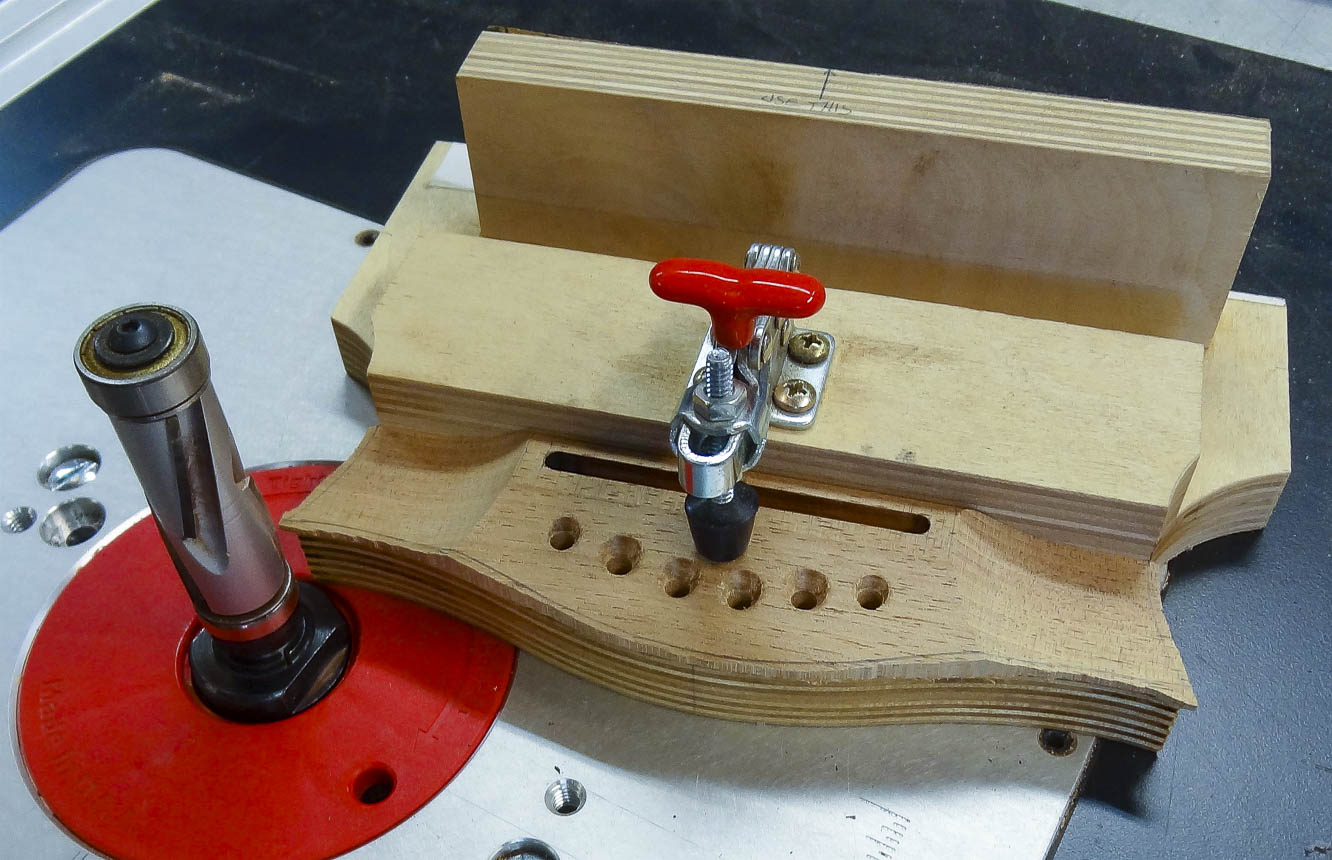
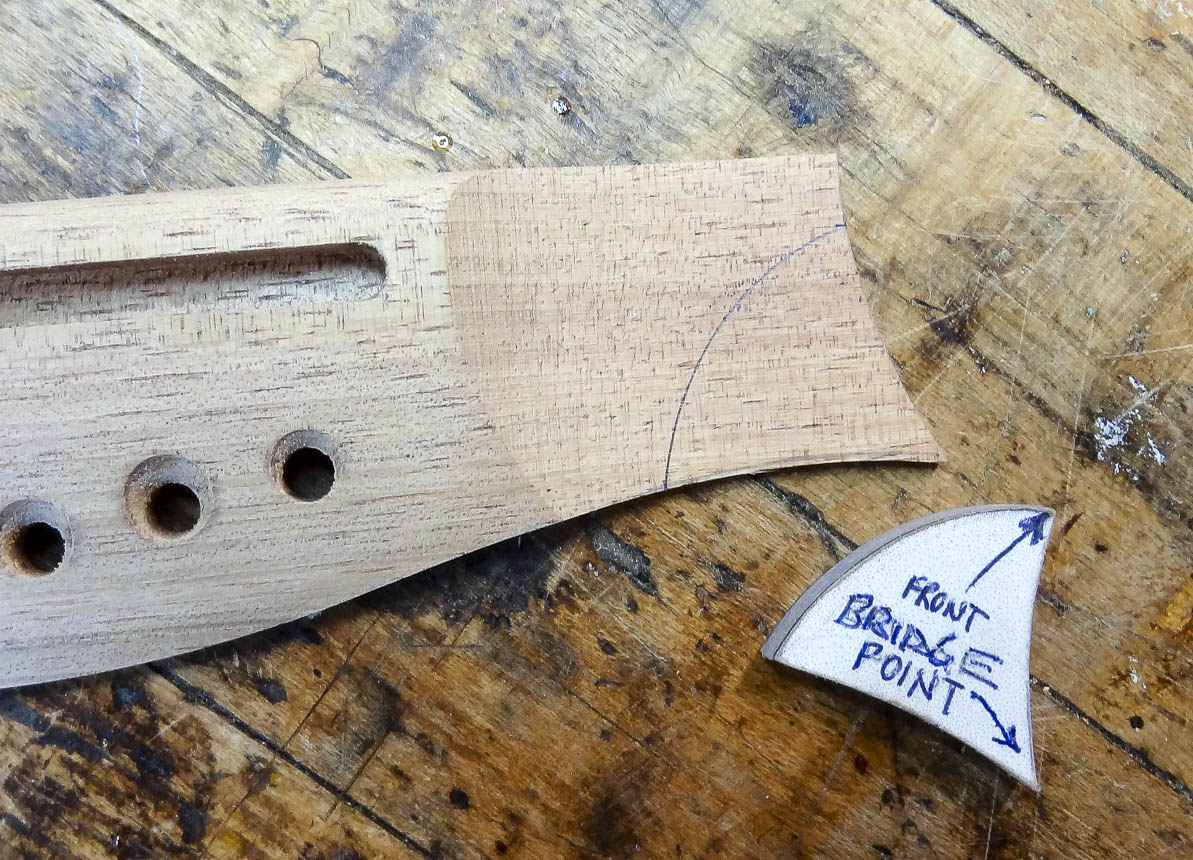
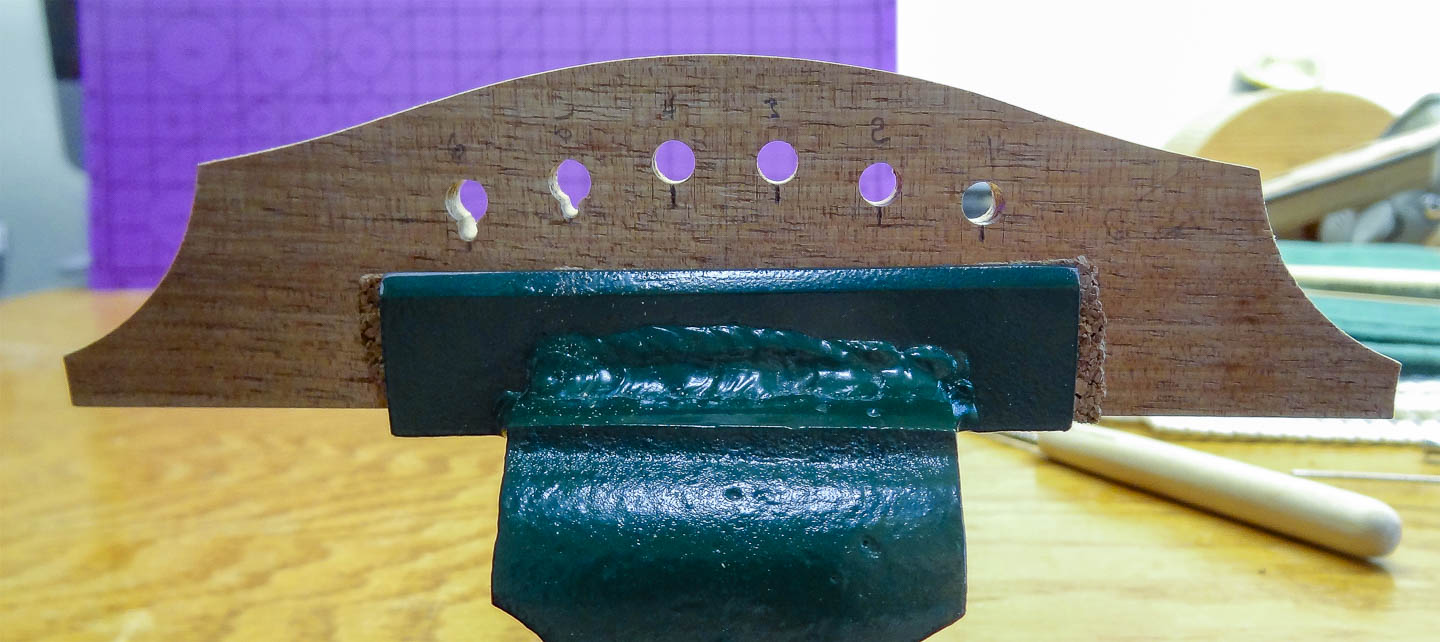
The location of the saddle slot is critical. With the neck attached to the body, and the bridge indexed to the body using steel pins, I measure and mark the slot’s calculated location on the bridge. The saddle slot is cut at this marked location with the router table. Notice that the slot is not angled like on most guitars. I can do this because I use a wider than normal saddle, and because I set compensation points for each string at both the nut and saddle, this leaves enough “real-estate” on the saddle for compensation without it being angled. I also round over the leading edge of the bridge on the router table.
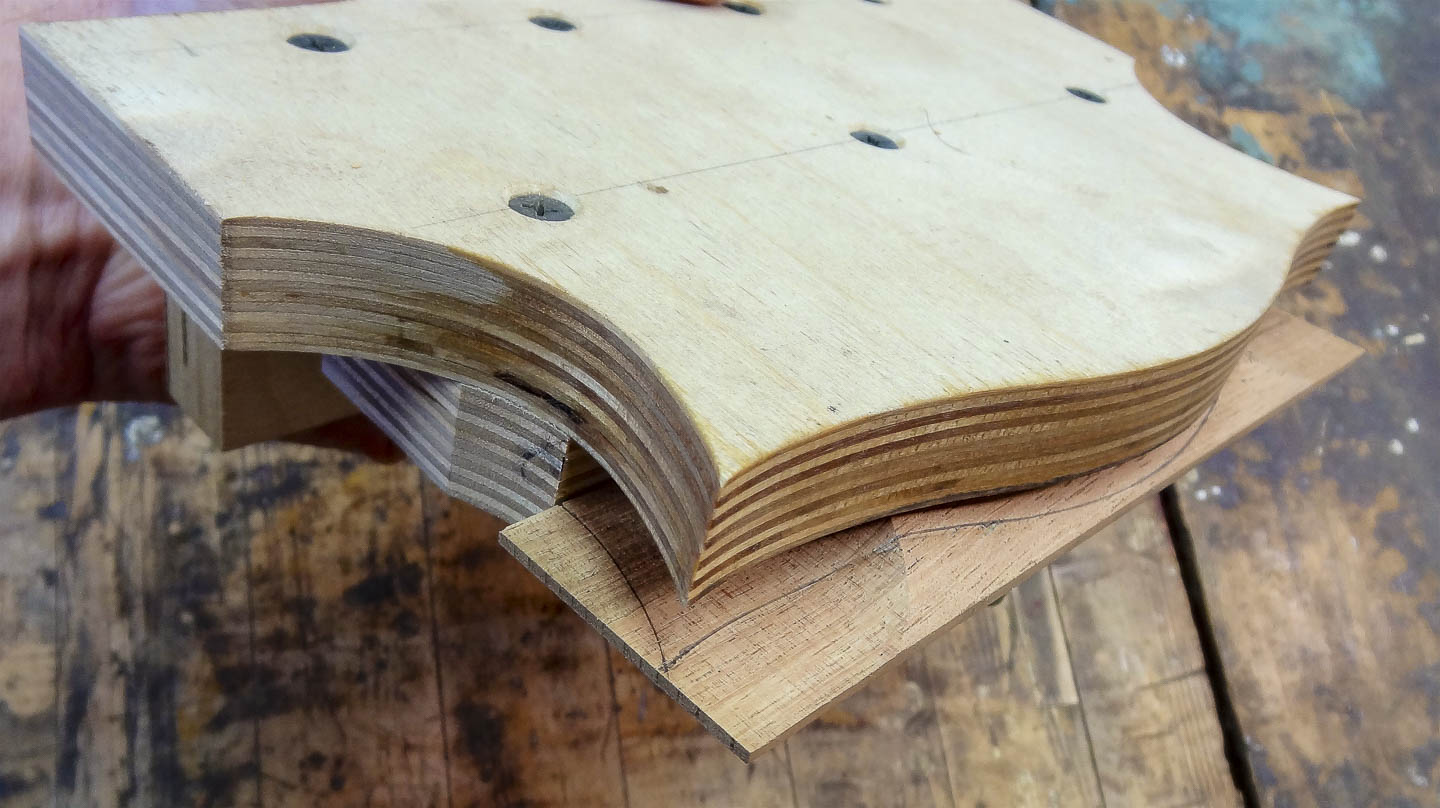
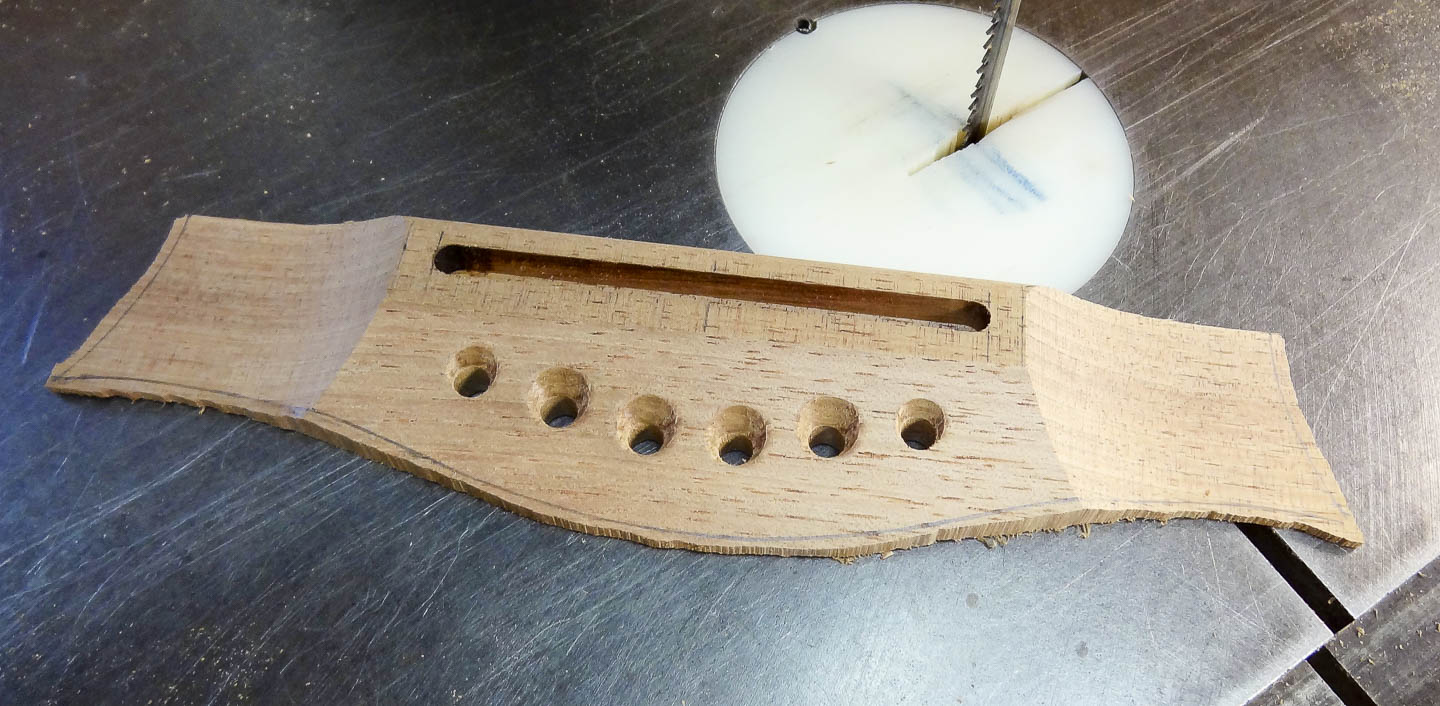
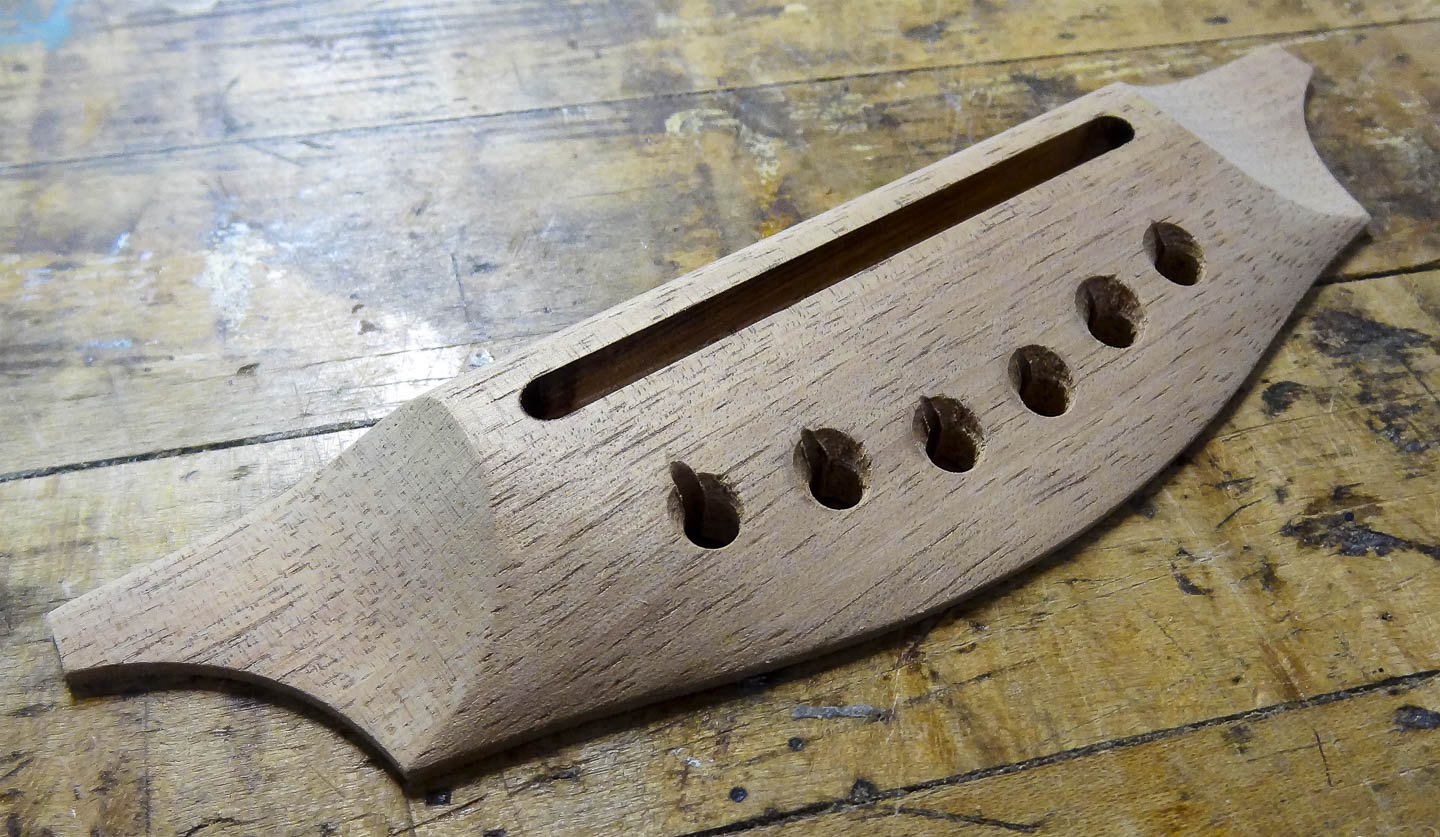
I have a two-part jig to mark and cut the bridge to shape. First I mark the taper on the outboard “wings”, then cut and sand them to shape. The bridge tapers from behind the saddle slot to the trailing edge, and a jig on the table saw takes care of this. The trailing edge and tips of the wings are marked and cut out, then shaped with a bearing guided router bit. The final shape could stop here, but I want something a bit more unique than the “pointy” wings seen on many guitars, with the added benefit of further weight reduction. A pattern defines the shape and it’s cut out and sanded on the spindle sander. I use a chisel to pare down the bulkiness and make an even thickness around the perimeter edges.
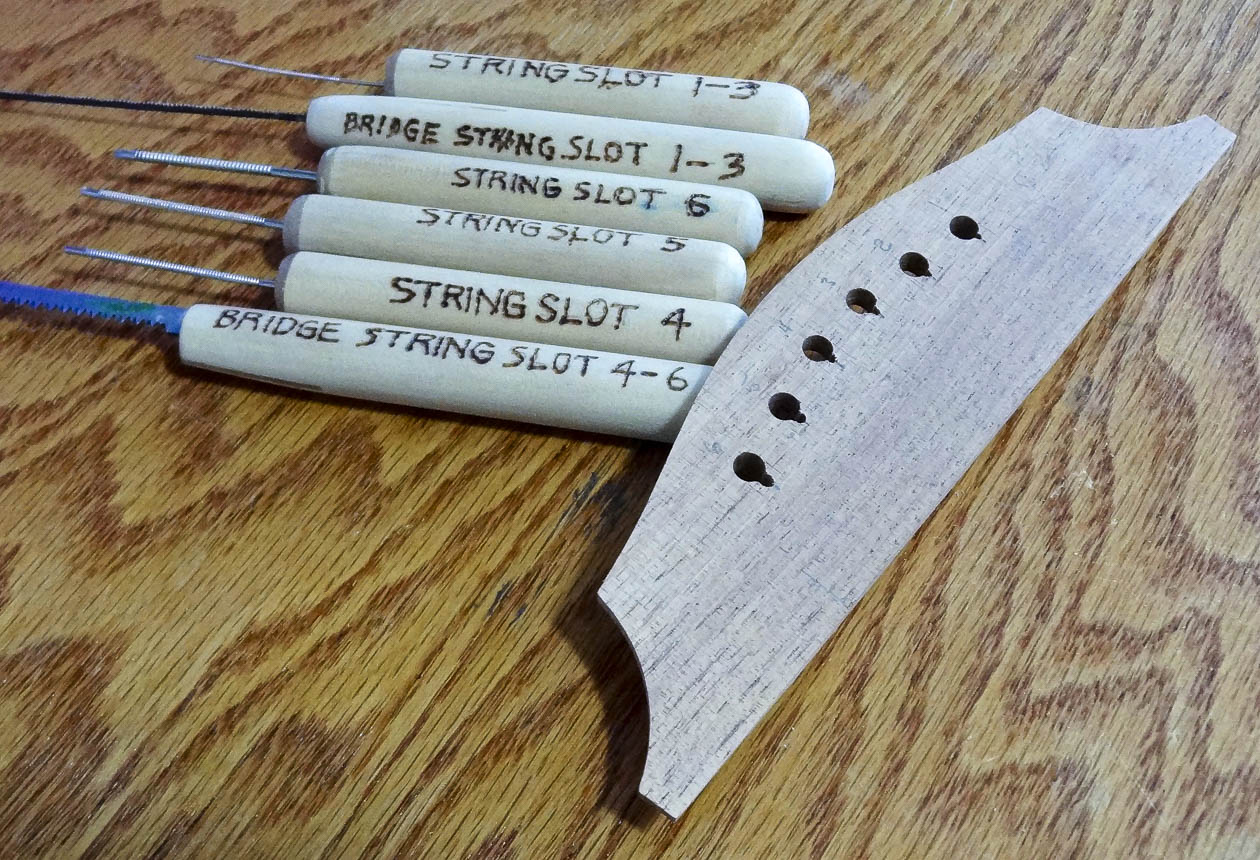
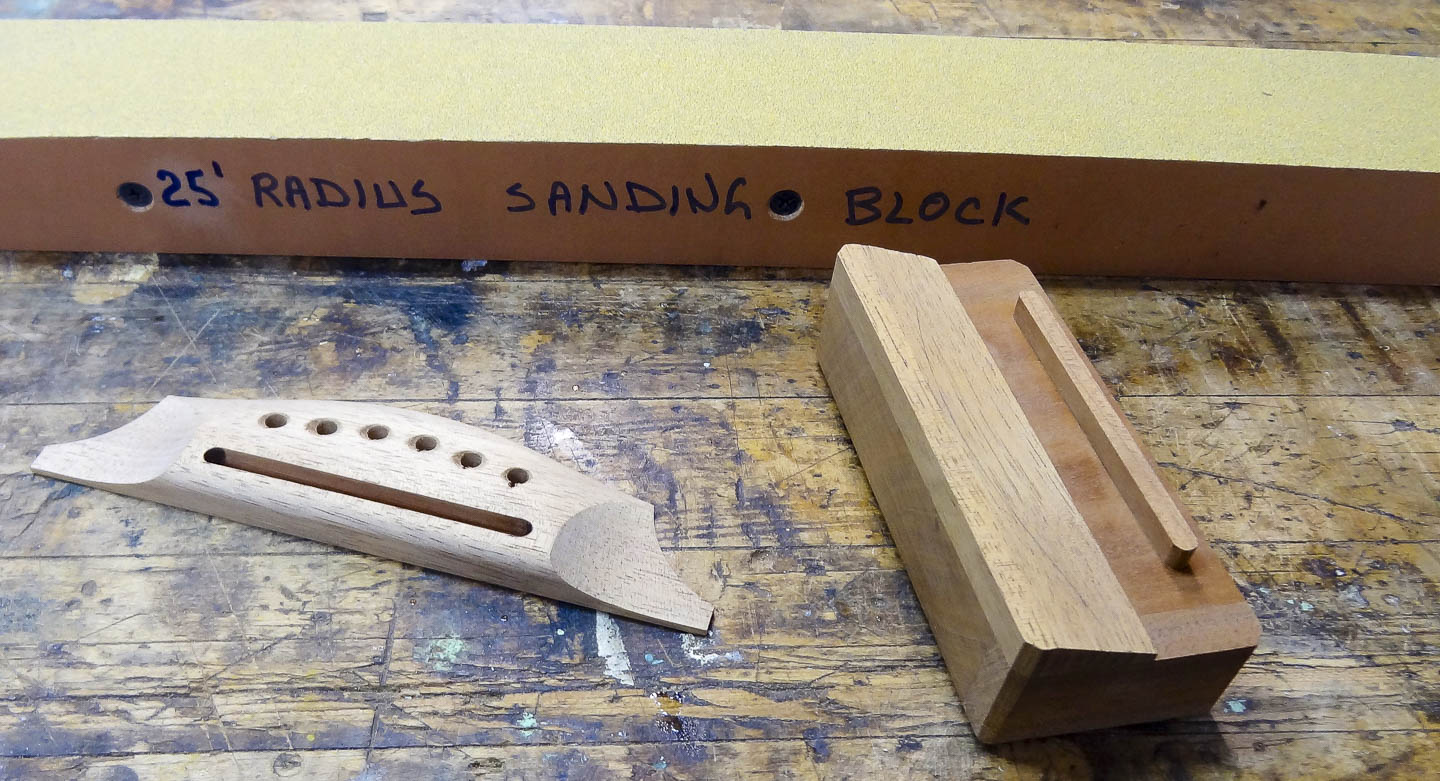
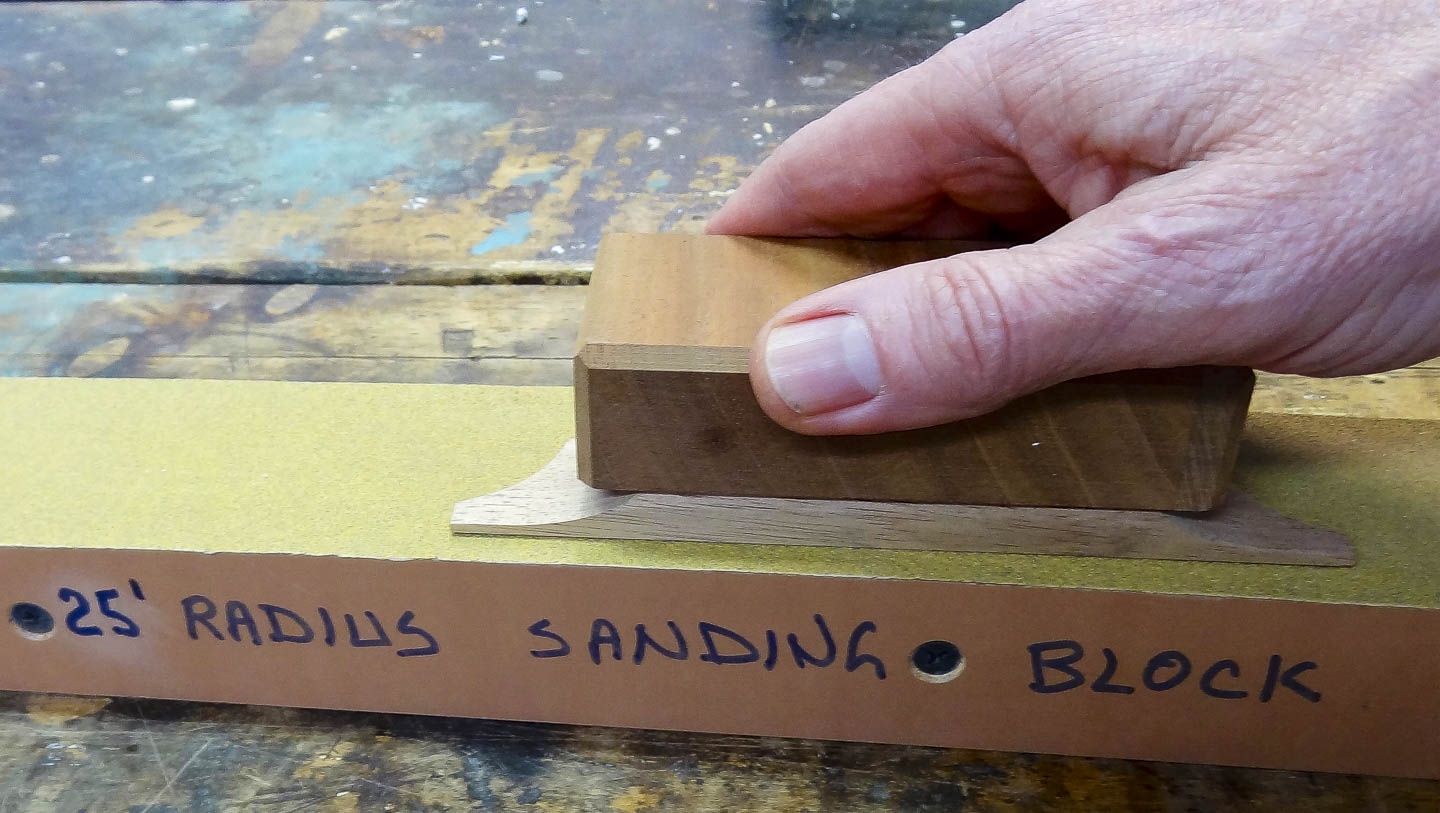
My preference is to use un-slotted bridge pins, so the string slots need to be milled into the bridge pin holes. I mark the exact center of the holes and use small saws and files to cut these slots to match the diameter of individual strings. I believe this configuration leads to less wear on the bridge plate from the ball ends of the strings and adds longevity to the instrument. I put the 25’ radius on the bottom so it will match the dome of the top using a sanding block and holder. I will often finish this type of bridge with a few light coats of shellac. It’s glued onto the body after the body is finished, and a very small step will be milled around the perimeter of the bottom to overlap the thickness of the finish.
FRET JOB
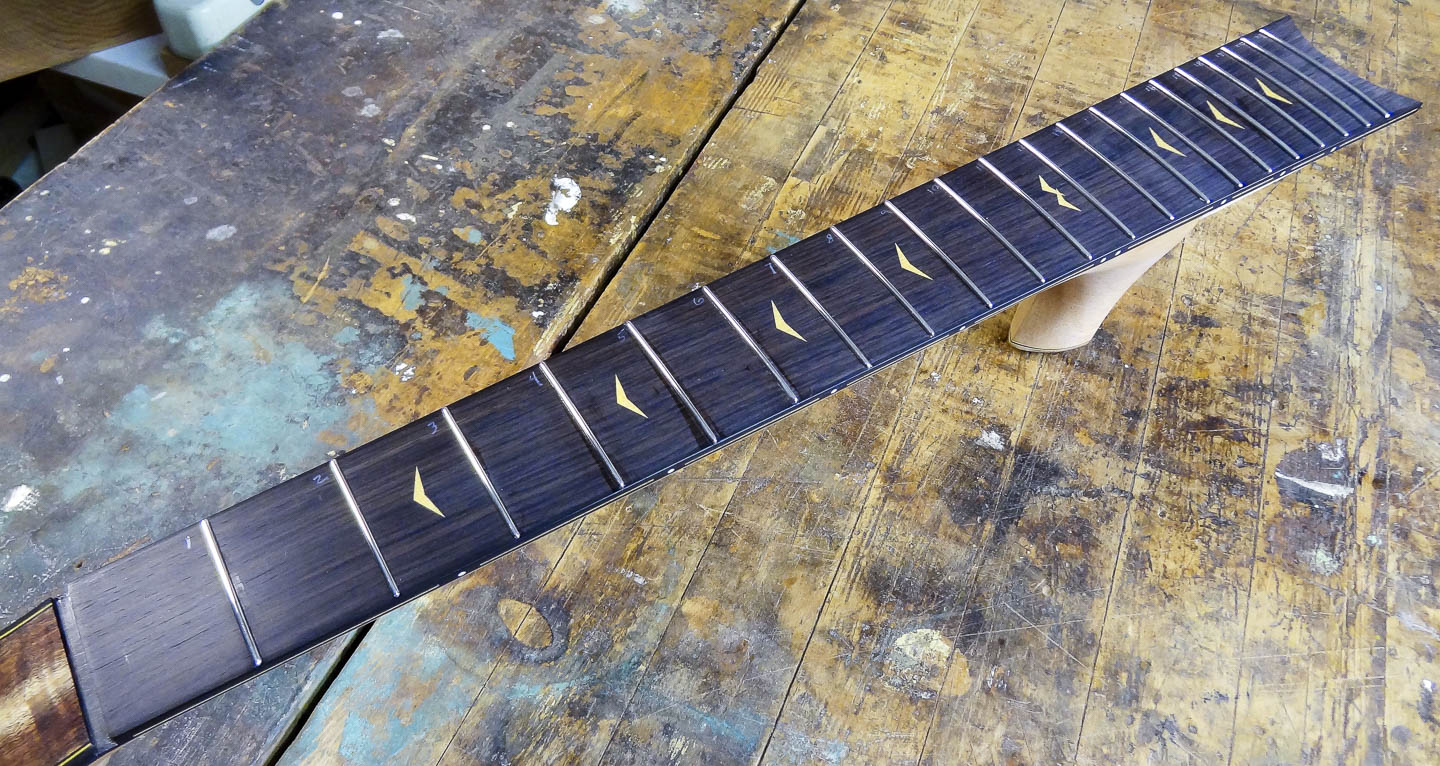
Great fret-work begins with a fret board that is sanded completely level before you begin. This was already done before shaping the neck, but I revisit it to get a completely flat fret board from end to end and sanded with a very fine grit. I also sand the long edges of the fret board to give them a small radius so it feels nice as you play.
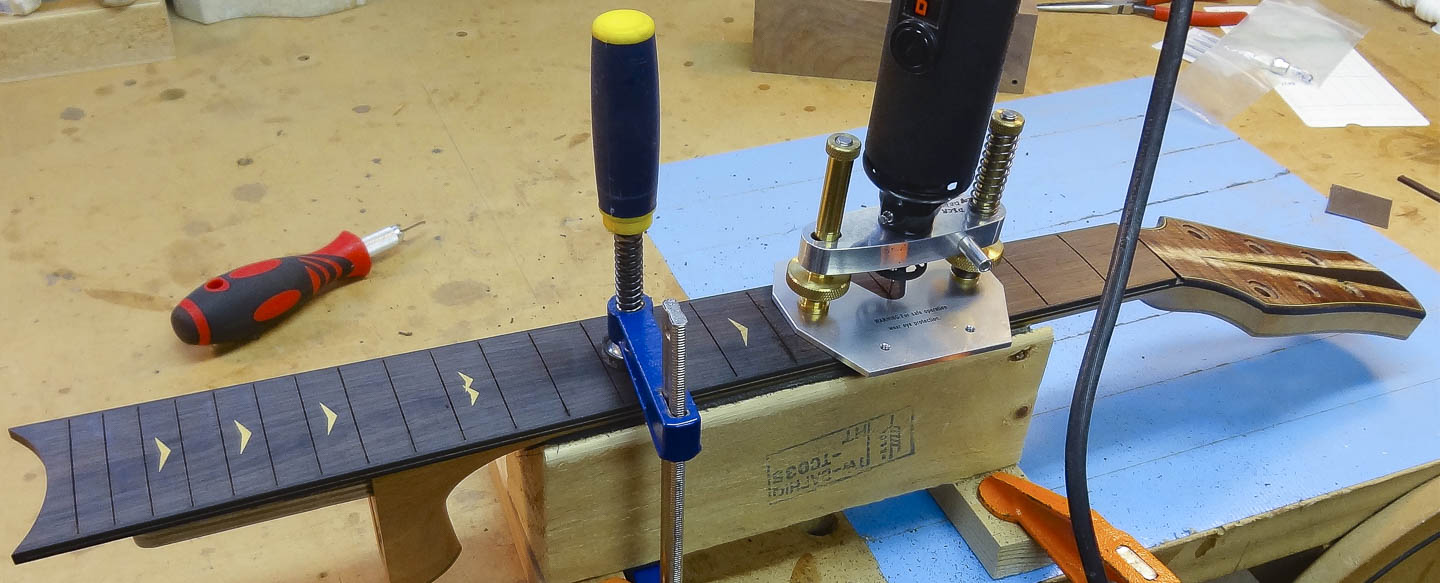
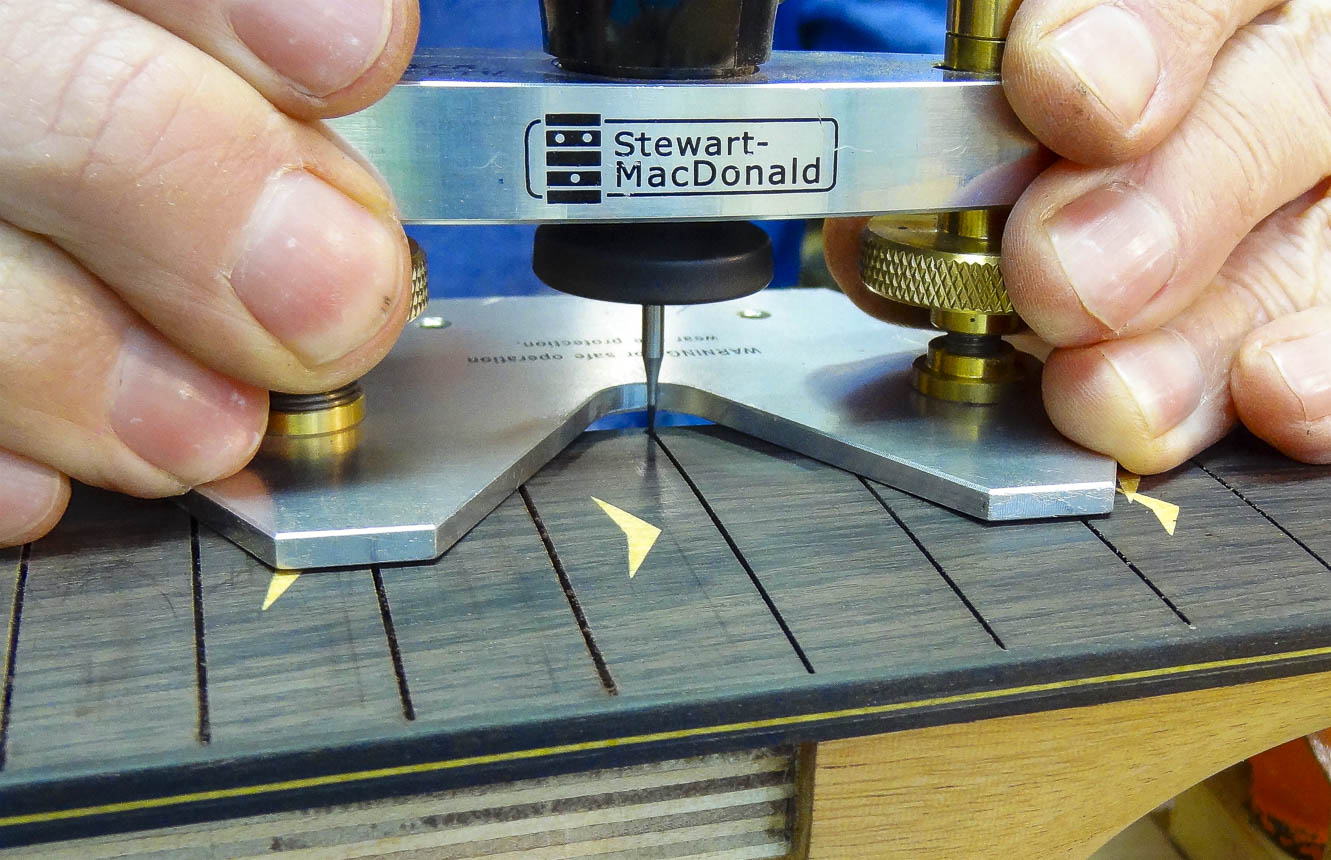
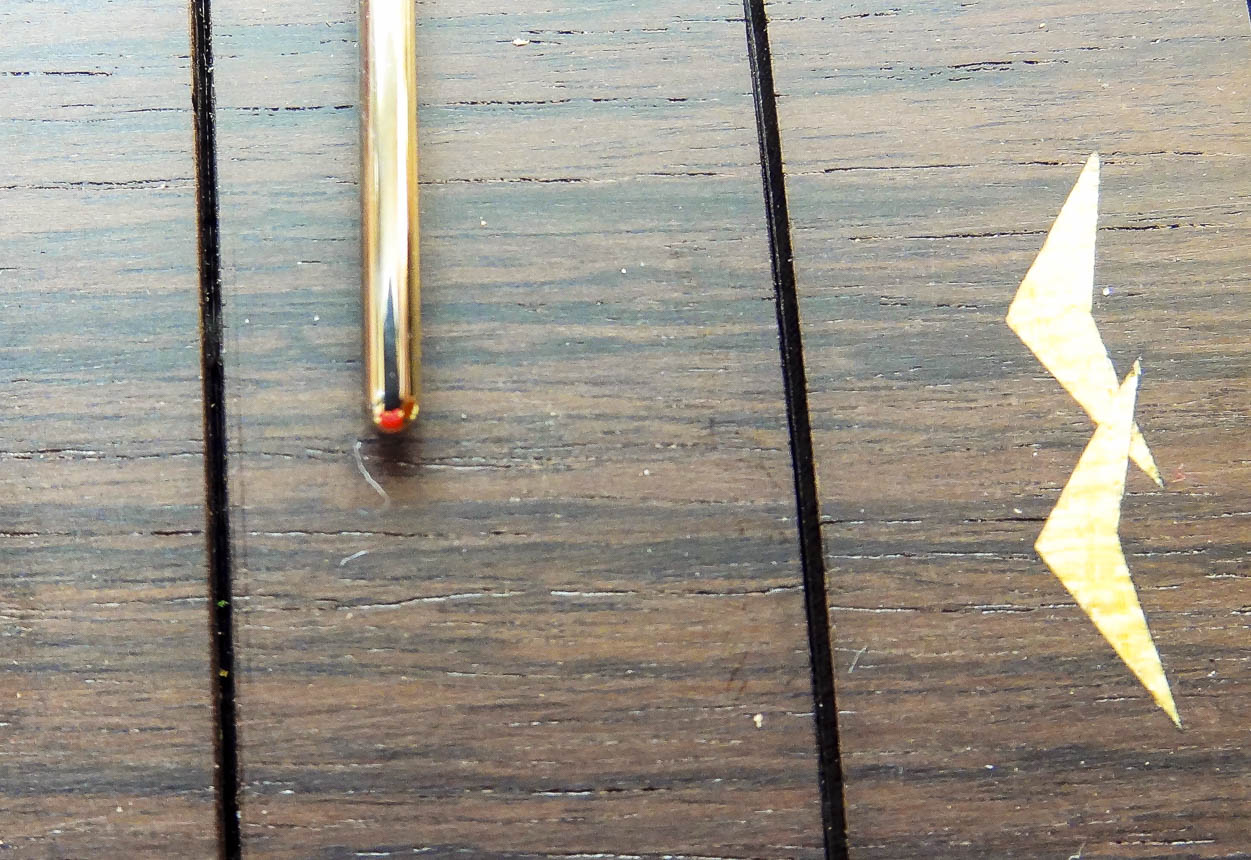
I use a Dremel tool with a dental bit to dial in the width and depth of the fret slots. Making sure the slot is deep enough eliminates a huge amount of heart ache when you hammer in the frets. I triple check this with a piece of fret wire because if it’s not deep enough, the fret won’t seat properly.
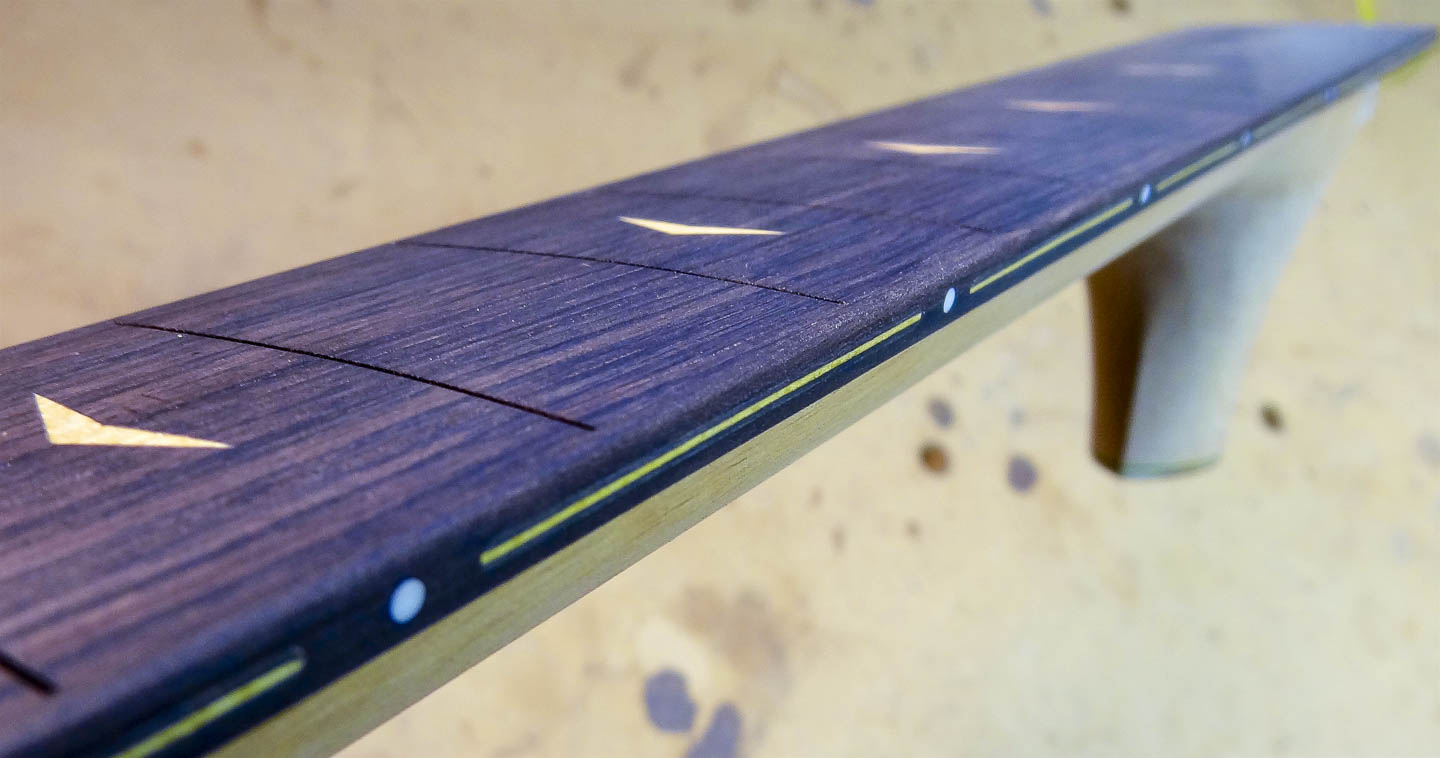
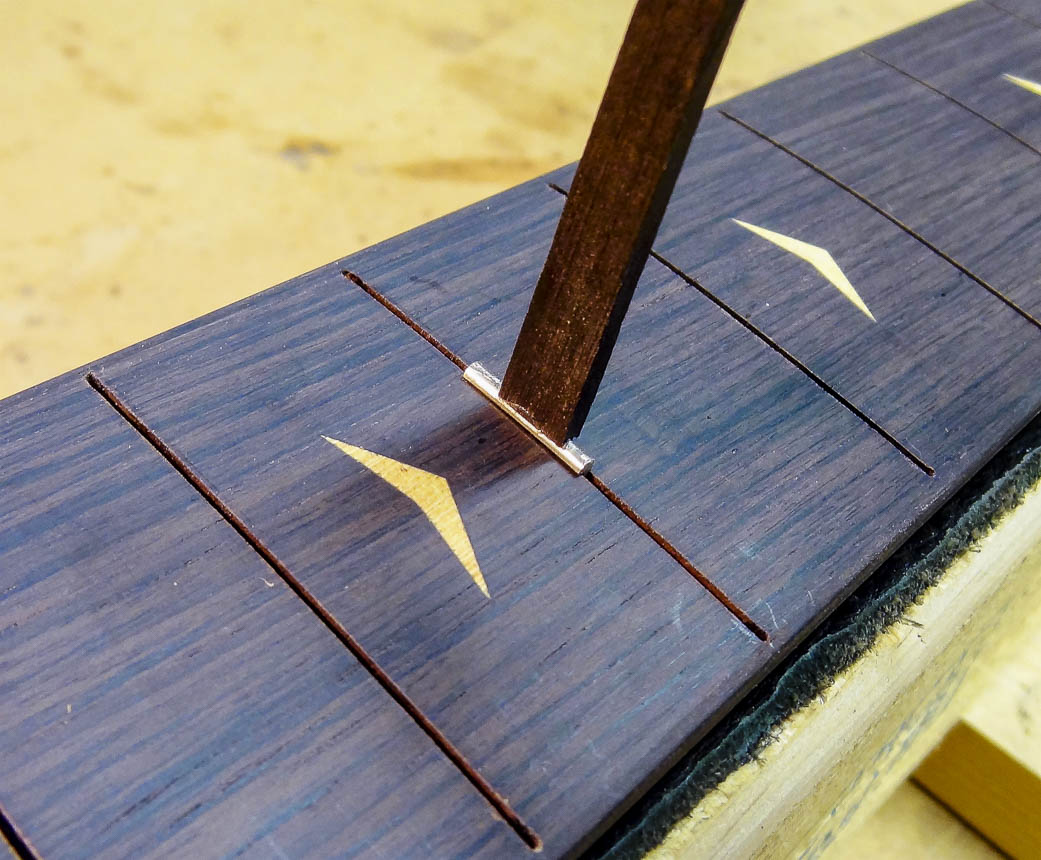
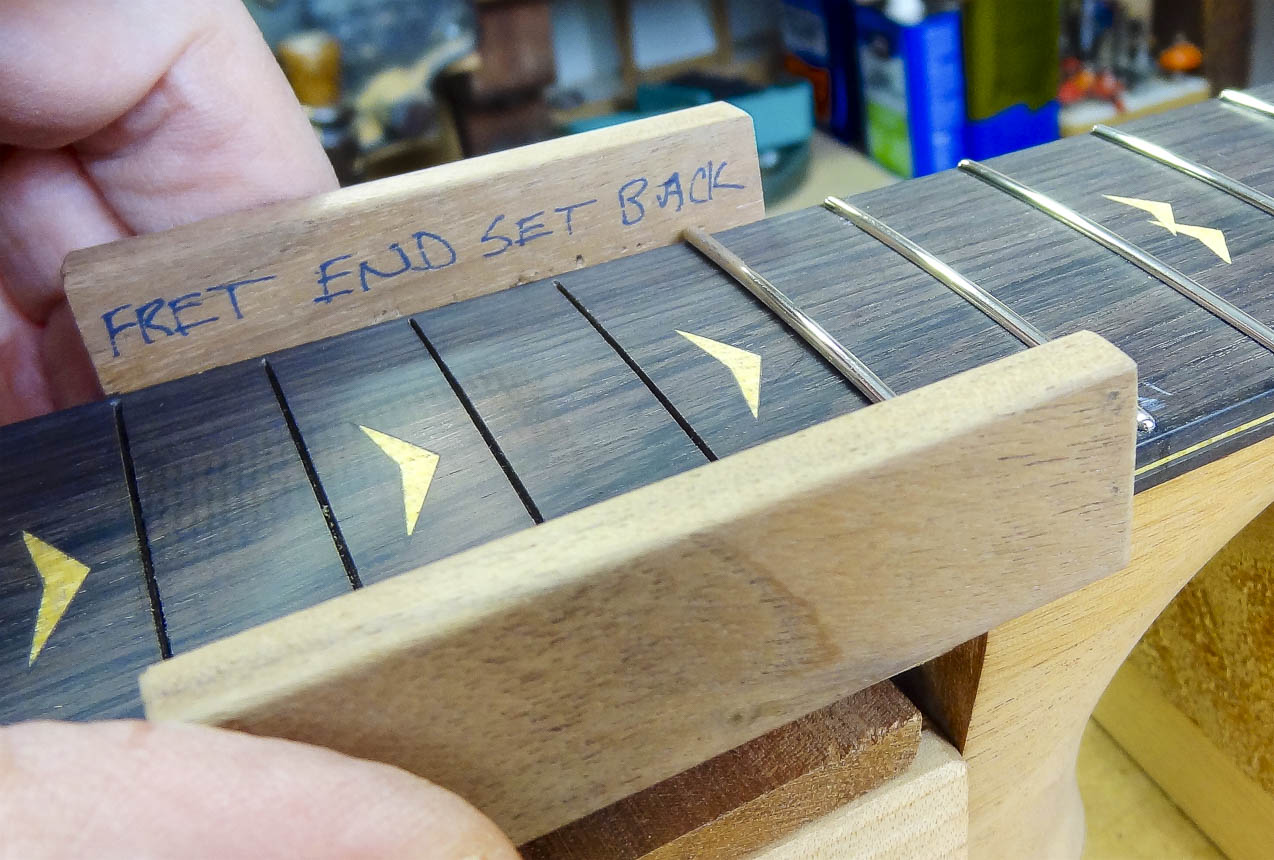
Normally, the frets are set into the fret board with the ends extending beyond either edge and then filed flush with the edge. After the frets are leveled, the ends are shaped with small files so they are smooth to the touch. I often do it this way, but on this build I use a less common technique. I cut the frets to finished length first, and shape the fret ends into semi-hemispheres before they are hammered into the fret board. I like this method because I can pre-radius the fret board’s edges so it’s comfortable to the touch, and the semi-hemispheres look and feel great also.
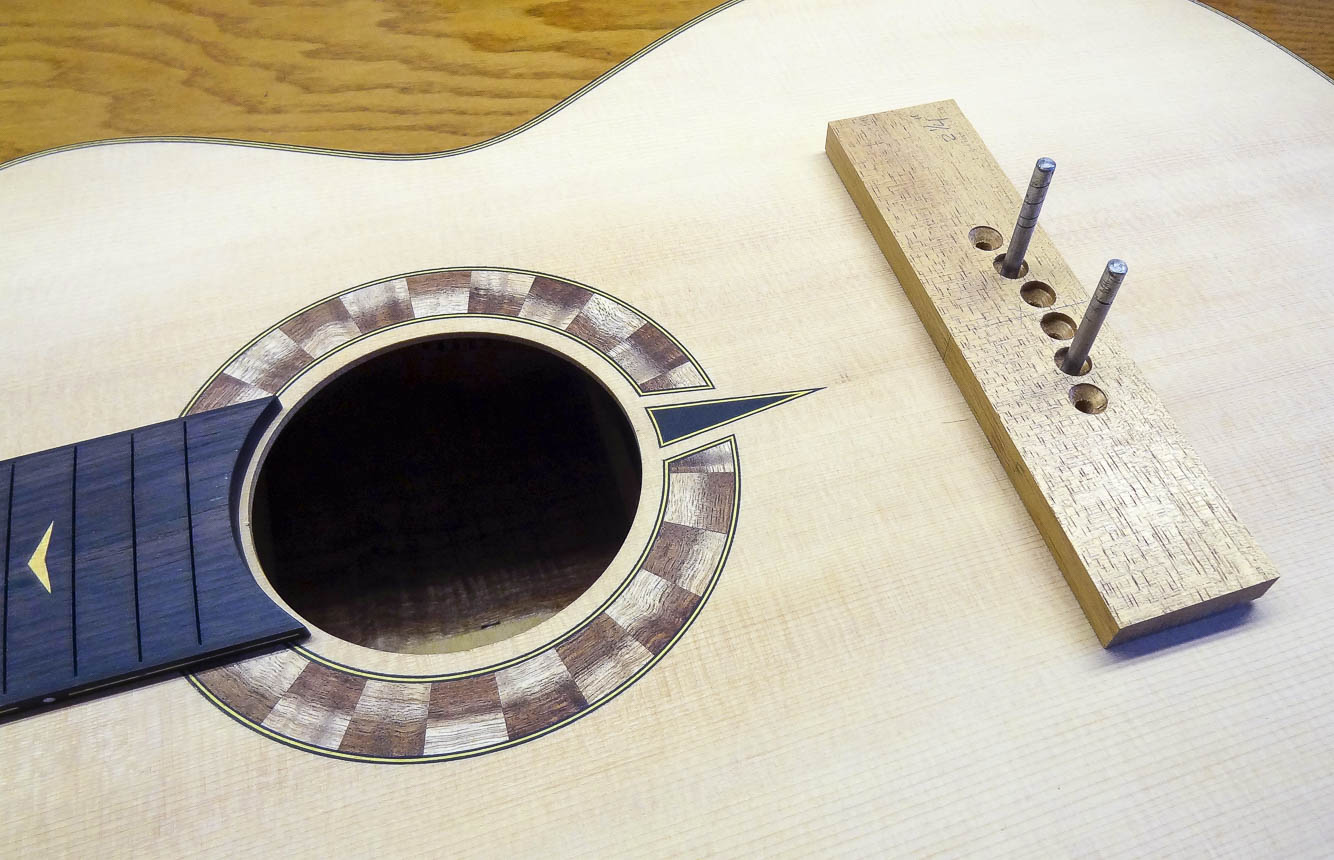
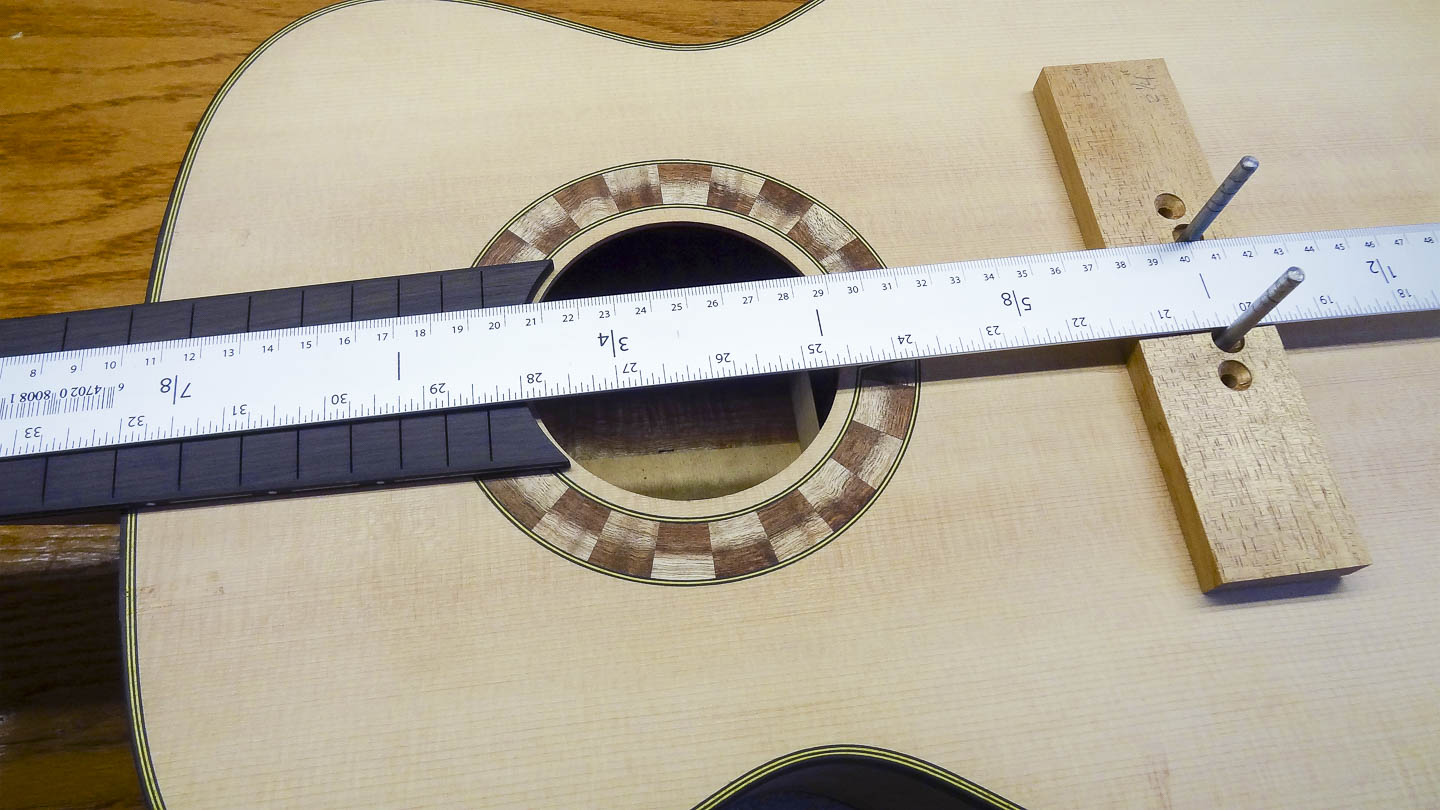
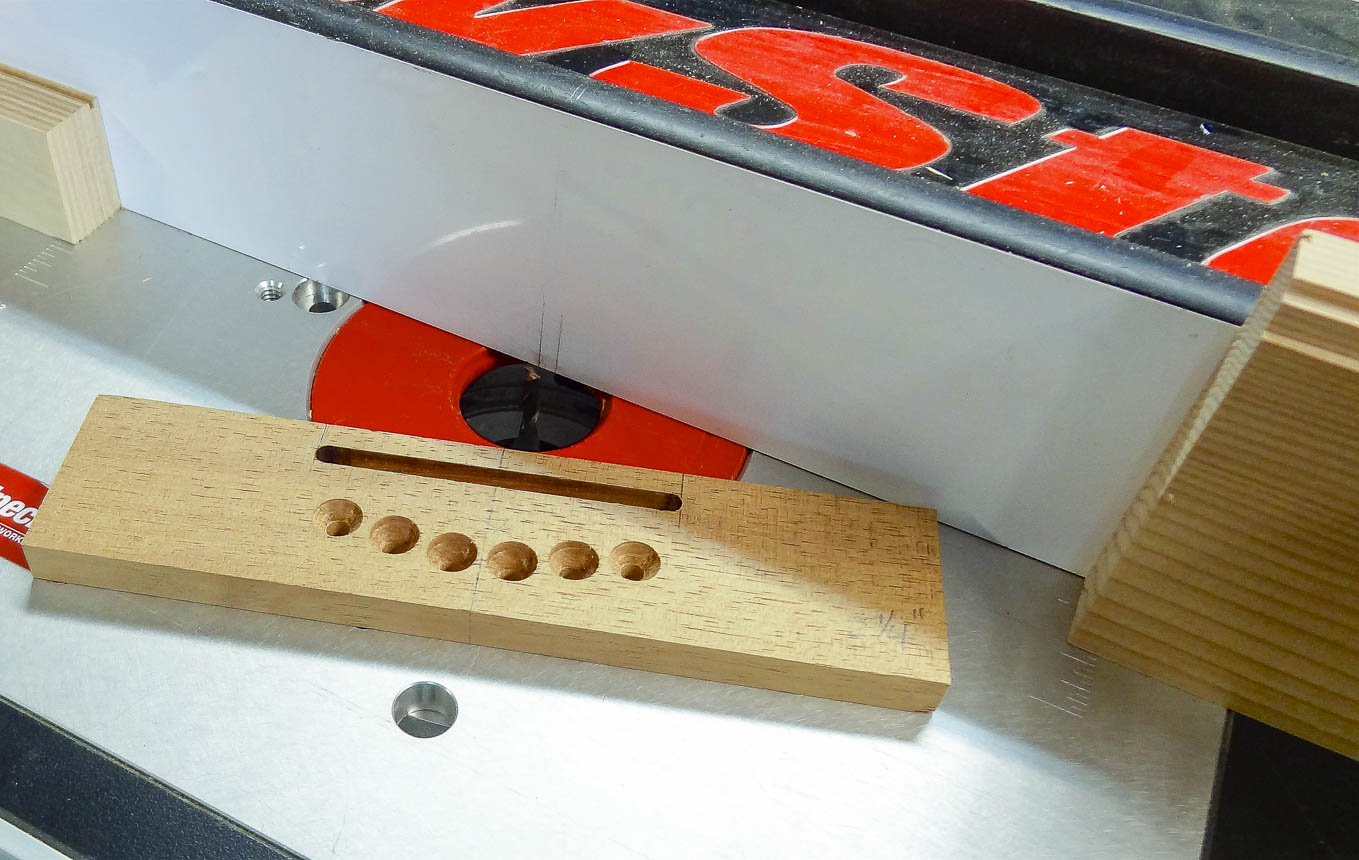
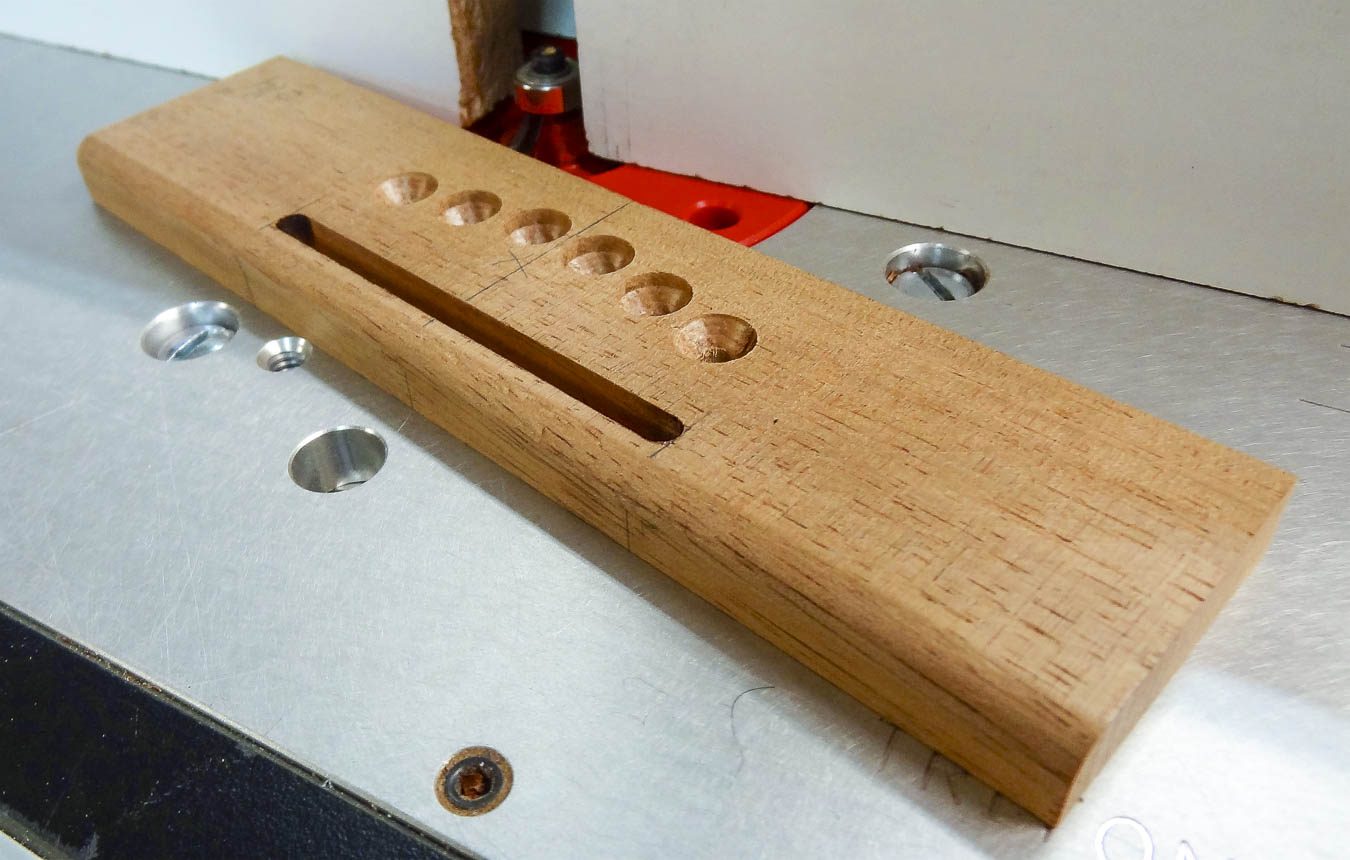
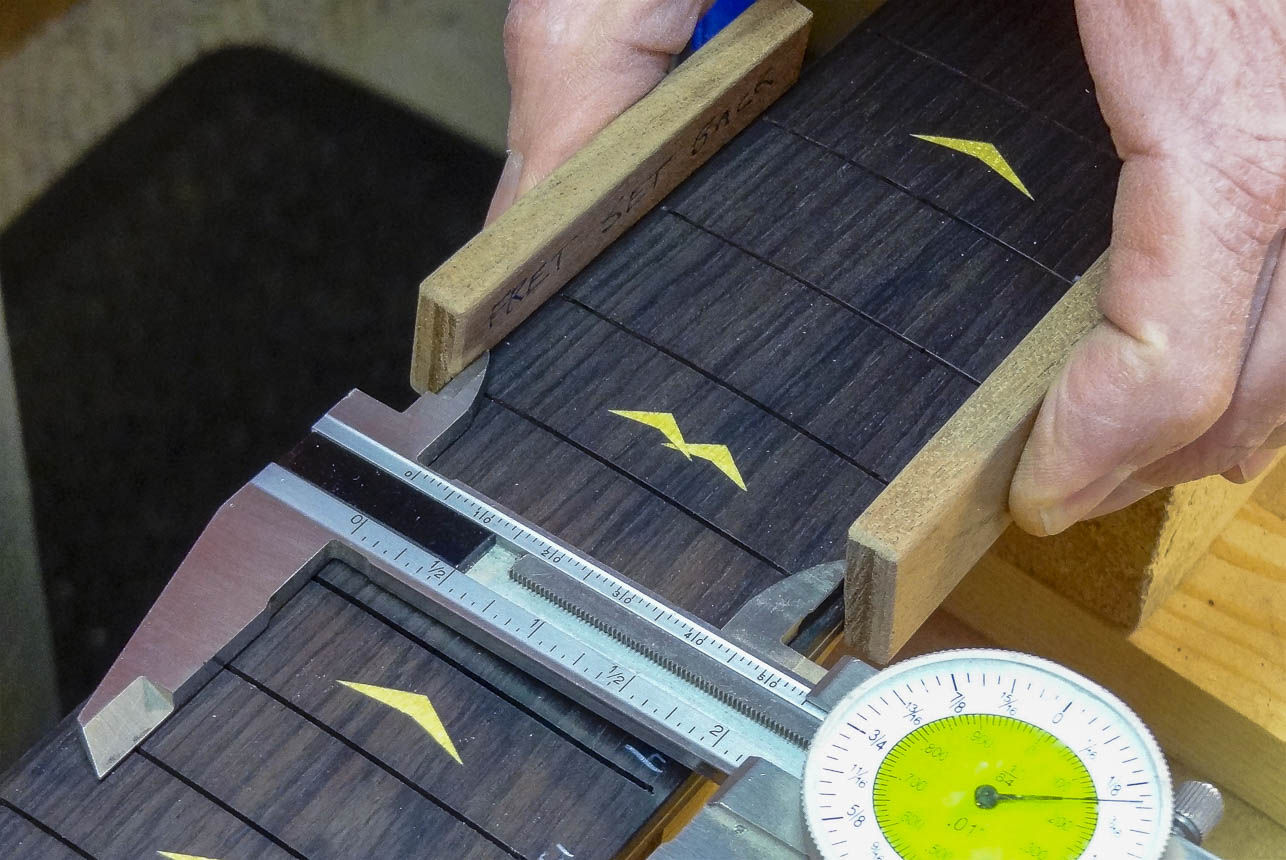
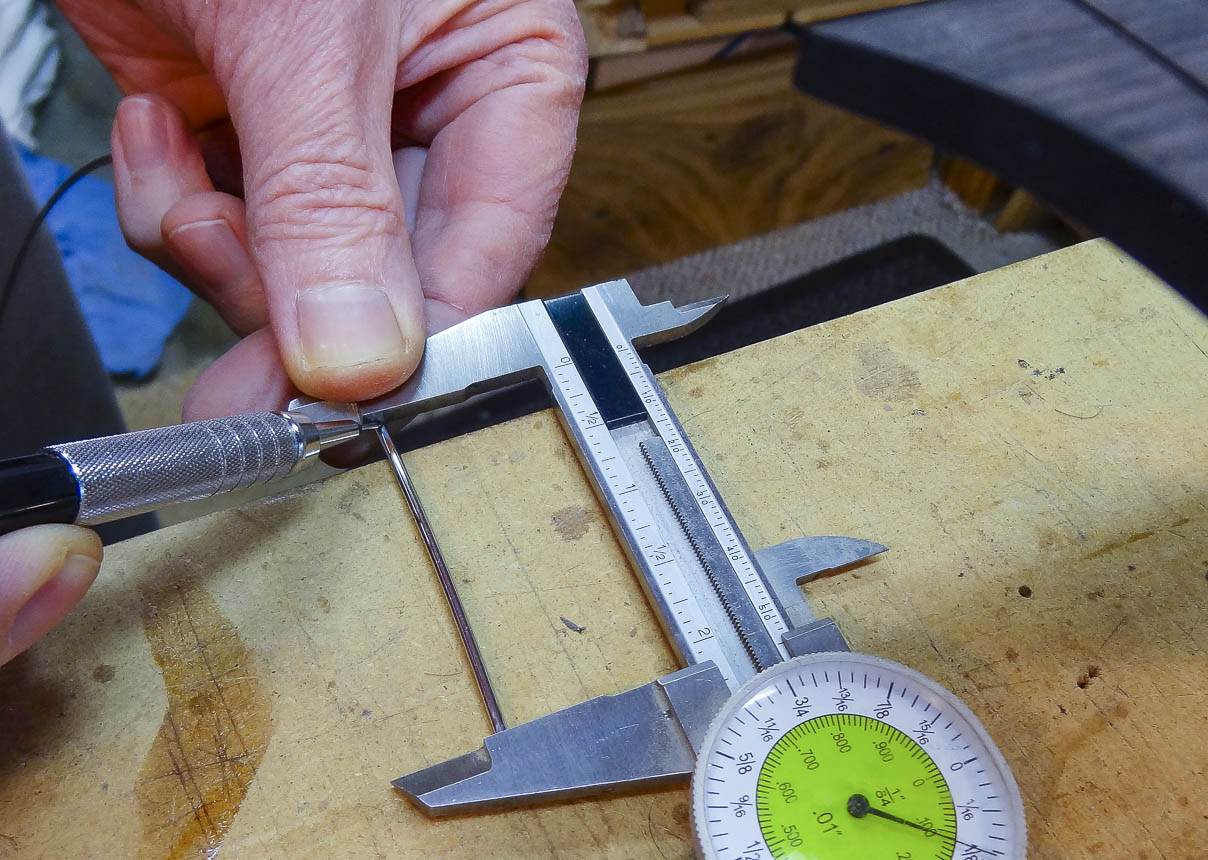
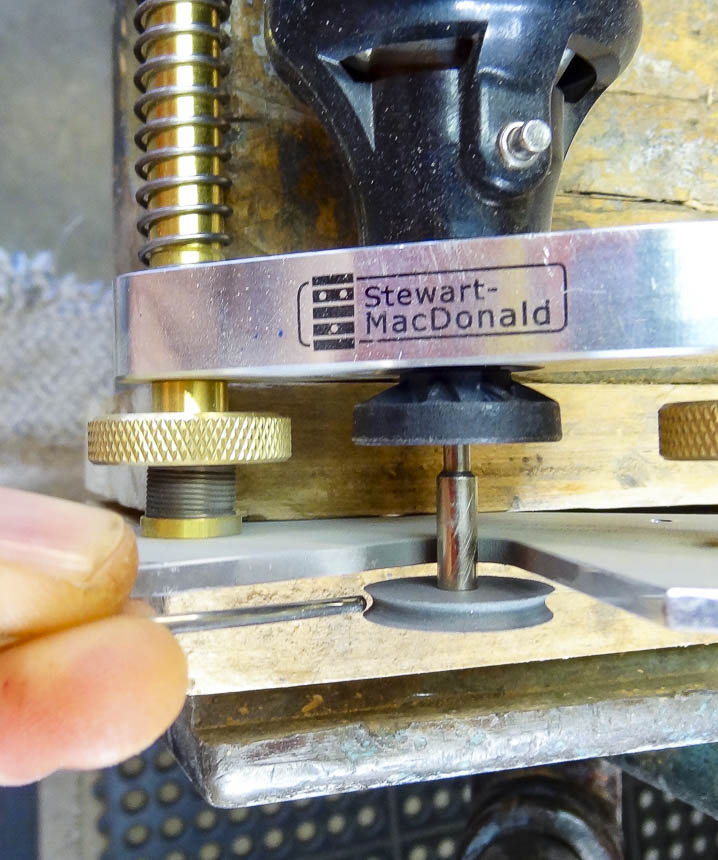
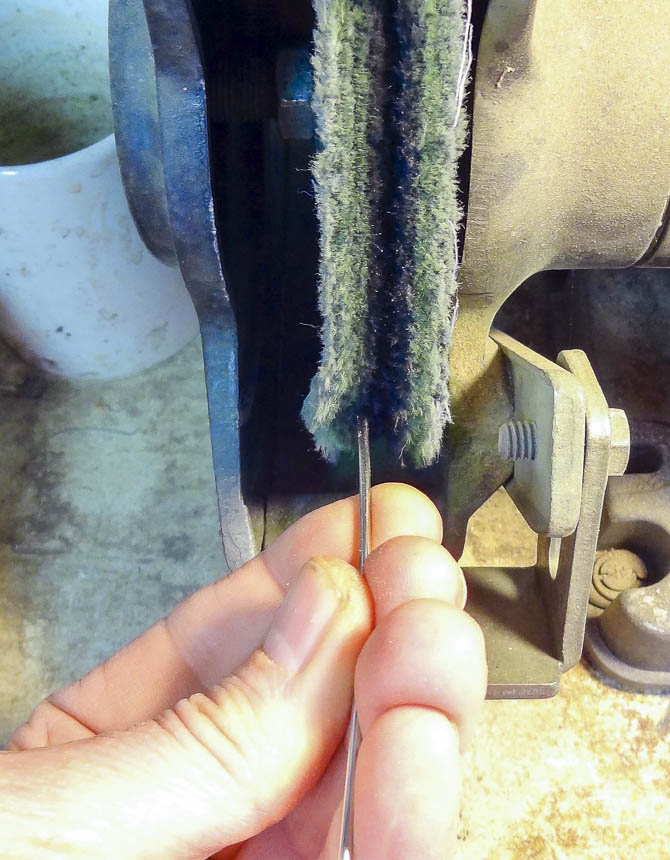
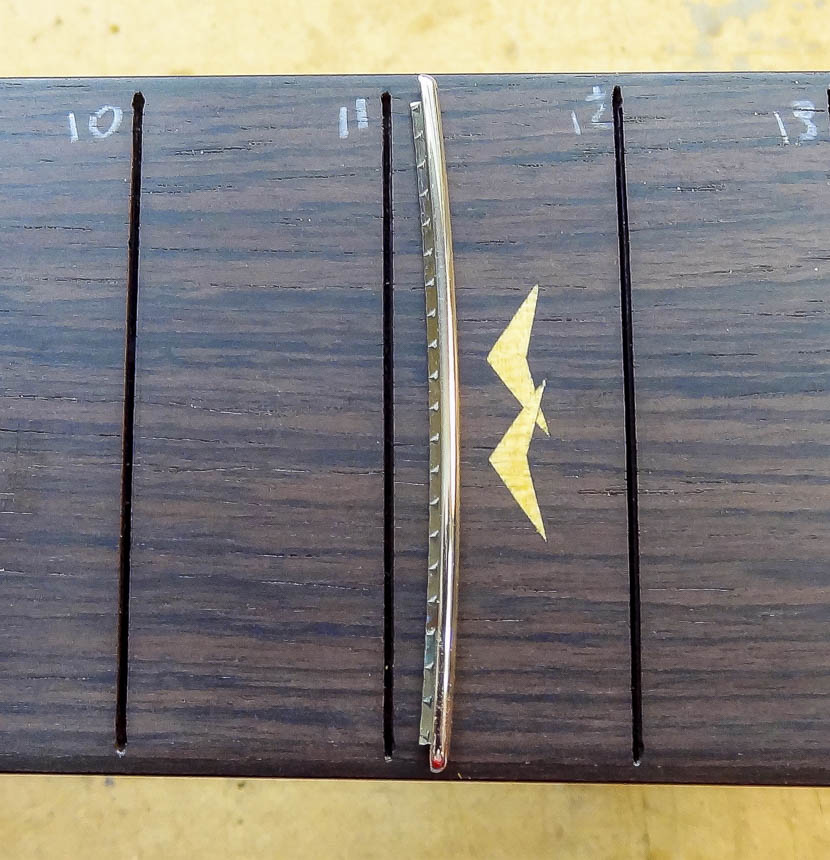
I use a specially shaped grinding wheel in the Dremel tool to shape one end of a long piece of fret wire, and then buff it to a high polish on a buffing wheel. I use calipers to measure the needed fret length at each position on the fret board. A couple of guide blocks with a step milled into them gives me the required inset from the edge of the fret board. I transfer the length measurement to the fret wire, cut it over long a bit, and repeat the shaping on this end so it ends up at the required length.
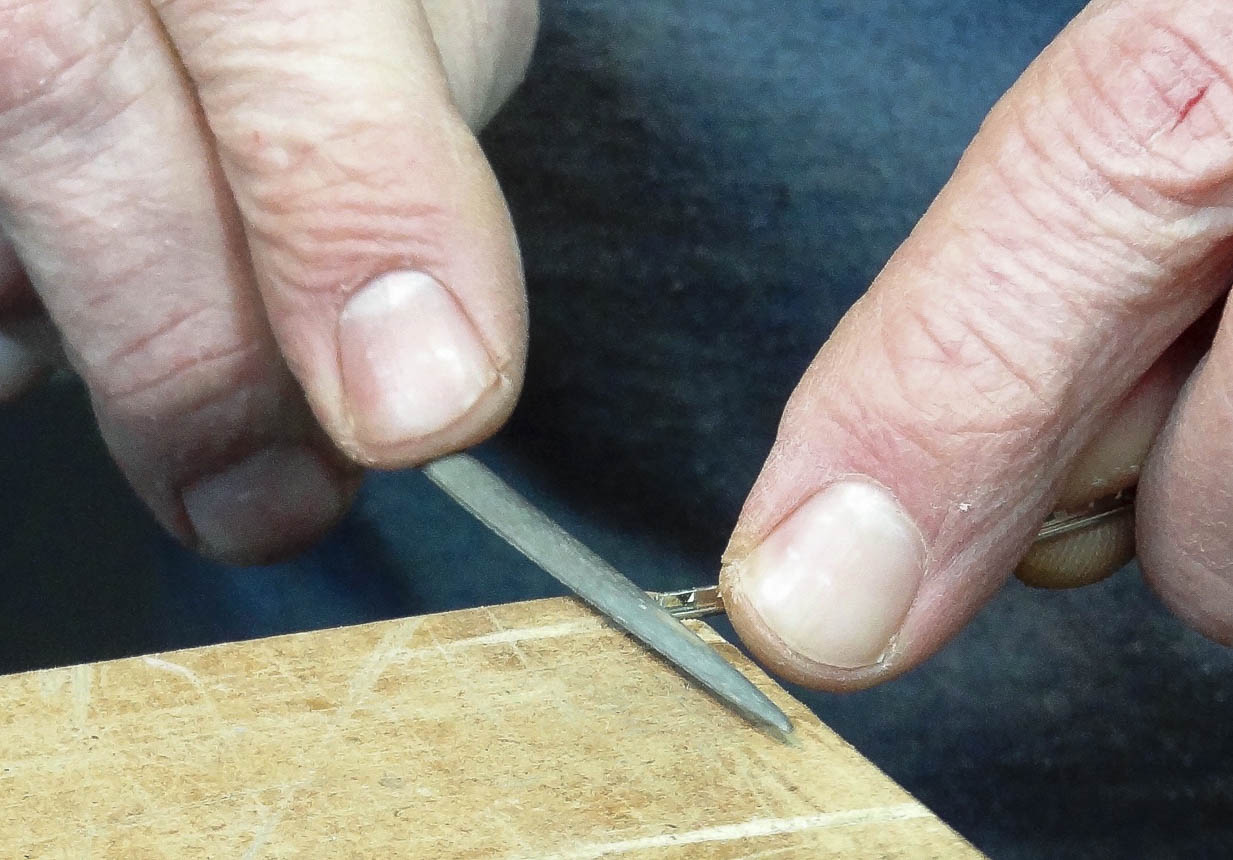
The fret board has binding along each edge, so the fret tang needs to be nipped off the ends of all the frets. A special tool does this, but a nub is left over that I file off with a needle file.
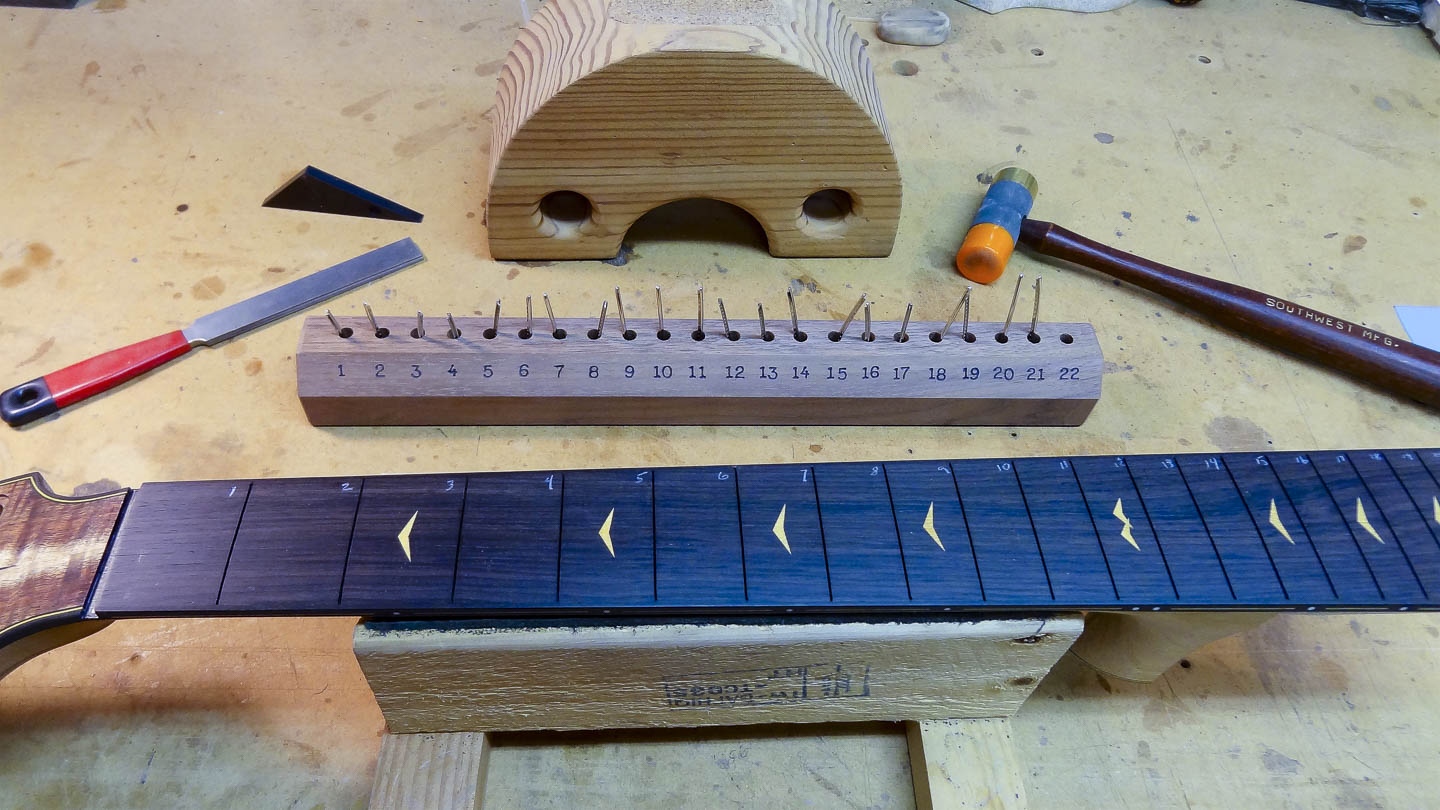
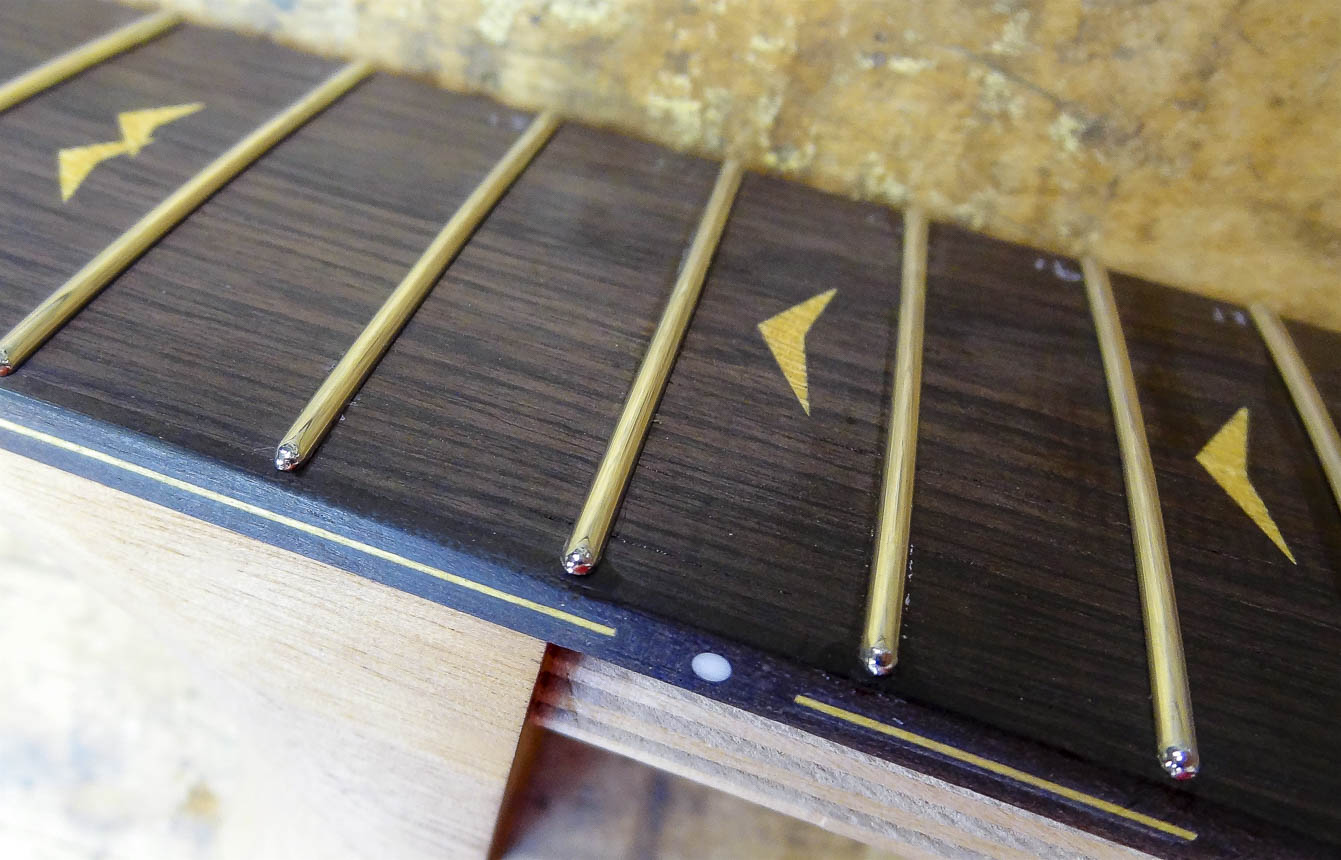
With all the frets organized in a holder, I set them one at a time by running a bead of medium thick cyanoacrylate glue down the slot, and hammer them in. I use the guide blocks again to make sure they are centered on the fret board as I hammer them in.
The fret board is done for now until the finish is applied to the guitar. After that, I will level all the frets to each other and polish the fret board.
HOW I BUILD GUITARS
MATERIALS
NECK & HEADSTOCK
HEADSTOCK: HEADPLATE & VOLUTE
SIDE BENDING
THE RIM
KERFED LINING
CUTTING THE RIM TO WIDTH
SIDE BRACES
TOP & BACK PLATES
ROSETTE
BRACING THE TOP
BRACING THE BACK
THE BOX
BINDING & PURFLING
FITTING THE NECK TO THE BODY
THE FRETBOARD
HEADSTOCK SHAPE, TUNER HOLES, BINDING & PURFLING
GLUING THE FRETBOARD TO THE NECK
This Page
SHAPING THE NECK
SHAPING THE HEEL
SHAPING THE VOLUTE
THE BRIDGE
FRET JOB
THE FINISH
ODDS & ENDS
SET UP & FINAL DETAILS