HOW I BUILD GUITARS
MATERIALS
NECK & HEADSTOCK
HEADSTOCK: HEADPLATE & VOLUTE
SIDE BENDING
THE RIM
KERFED LINING
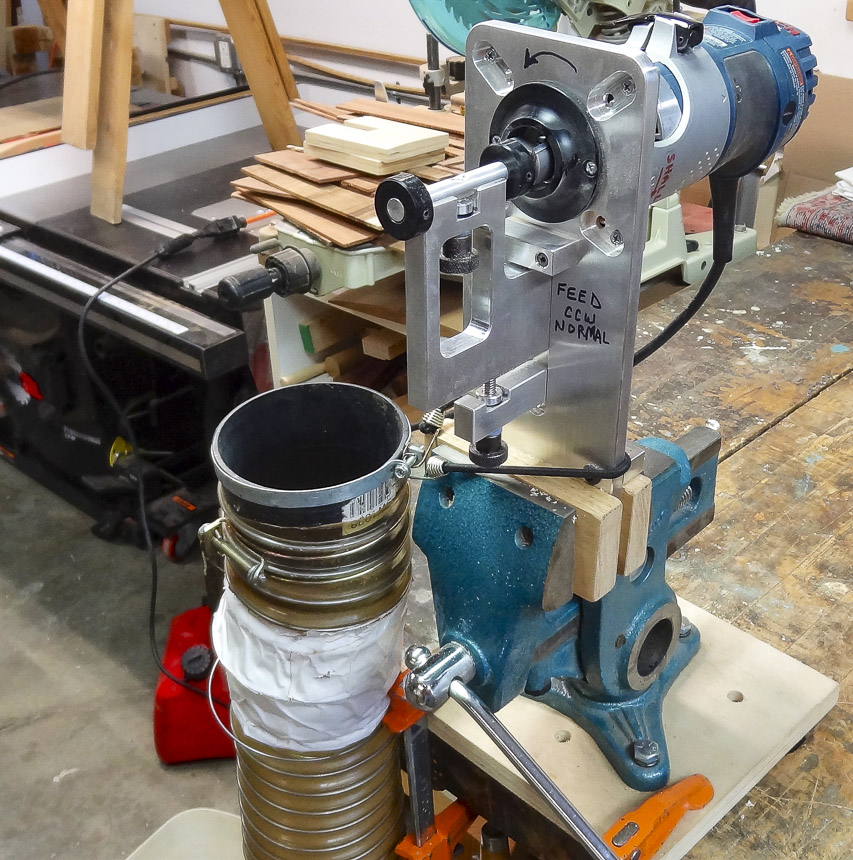
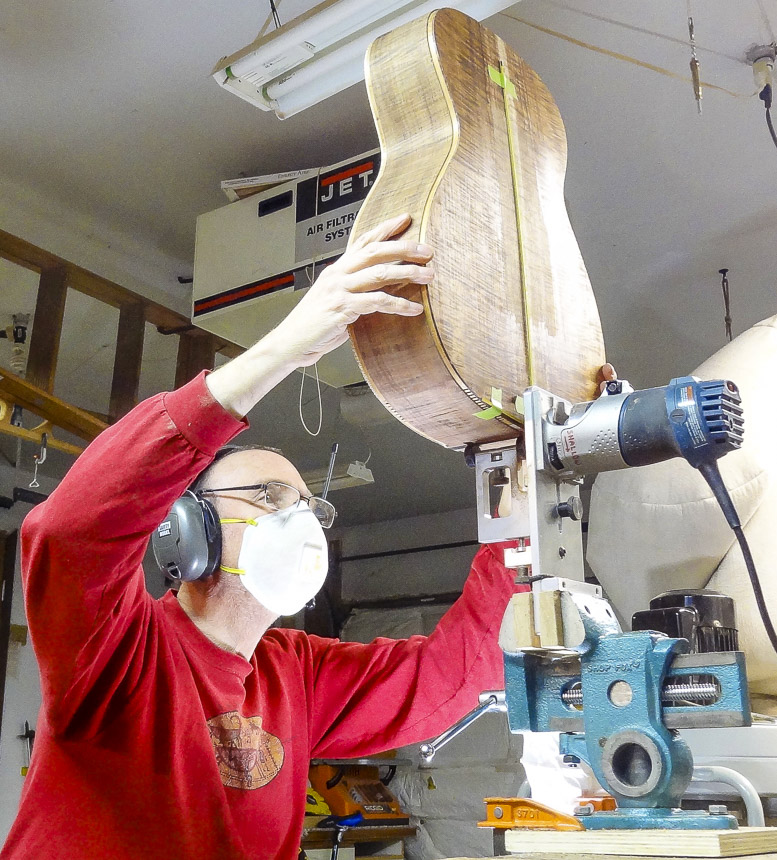
CUTTING THE RIM TO WIDTH
SIDE BRACES
TOP & BACK PLATES
This Page
ROSETTE
BRACING THE TOP
BRACING THE BACK
THE BOX
BINDING & PURFLING
FITTING THE NECK TO THE BODY
THE FRETBOARD
HEADSTOCK SHAPE, TUNER HOLES, BINDING & PURFLING
GLUING THE FRETBOARD TO THE NECK
SHAPING THE NECK
SHAPING THE HEEL
SHAPING THE VOLUTE
THE BRIDGE
FRET JOB
THE FINISH
ODDS & ENDS
SET UP & FINAL DETAILS
ROSETTE
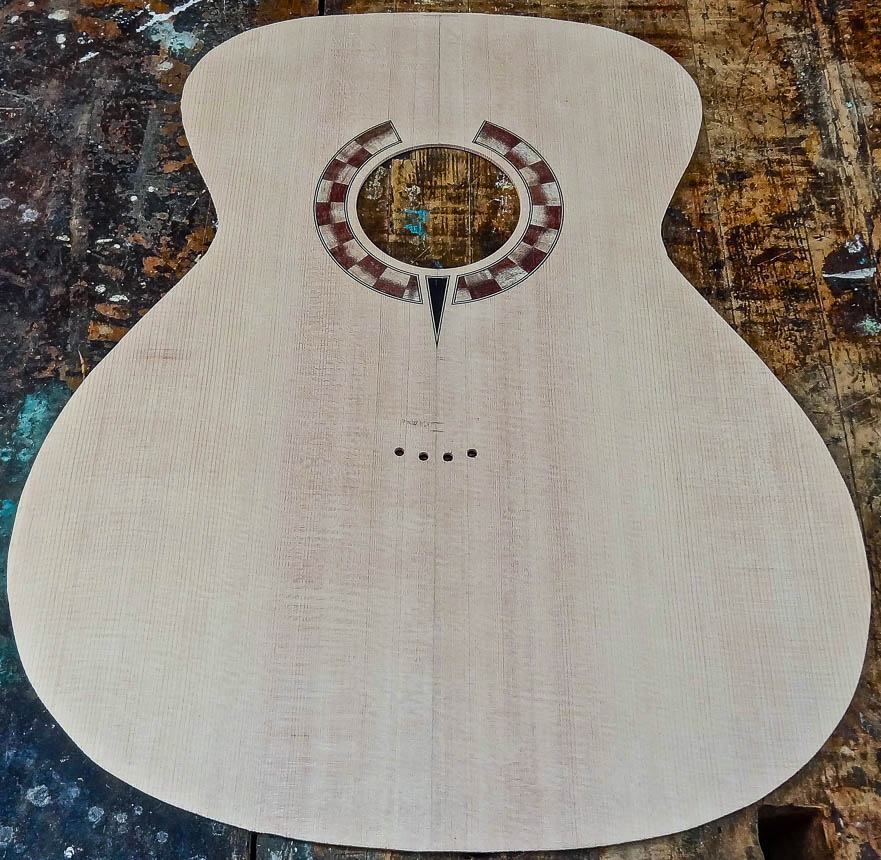
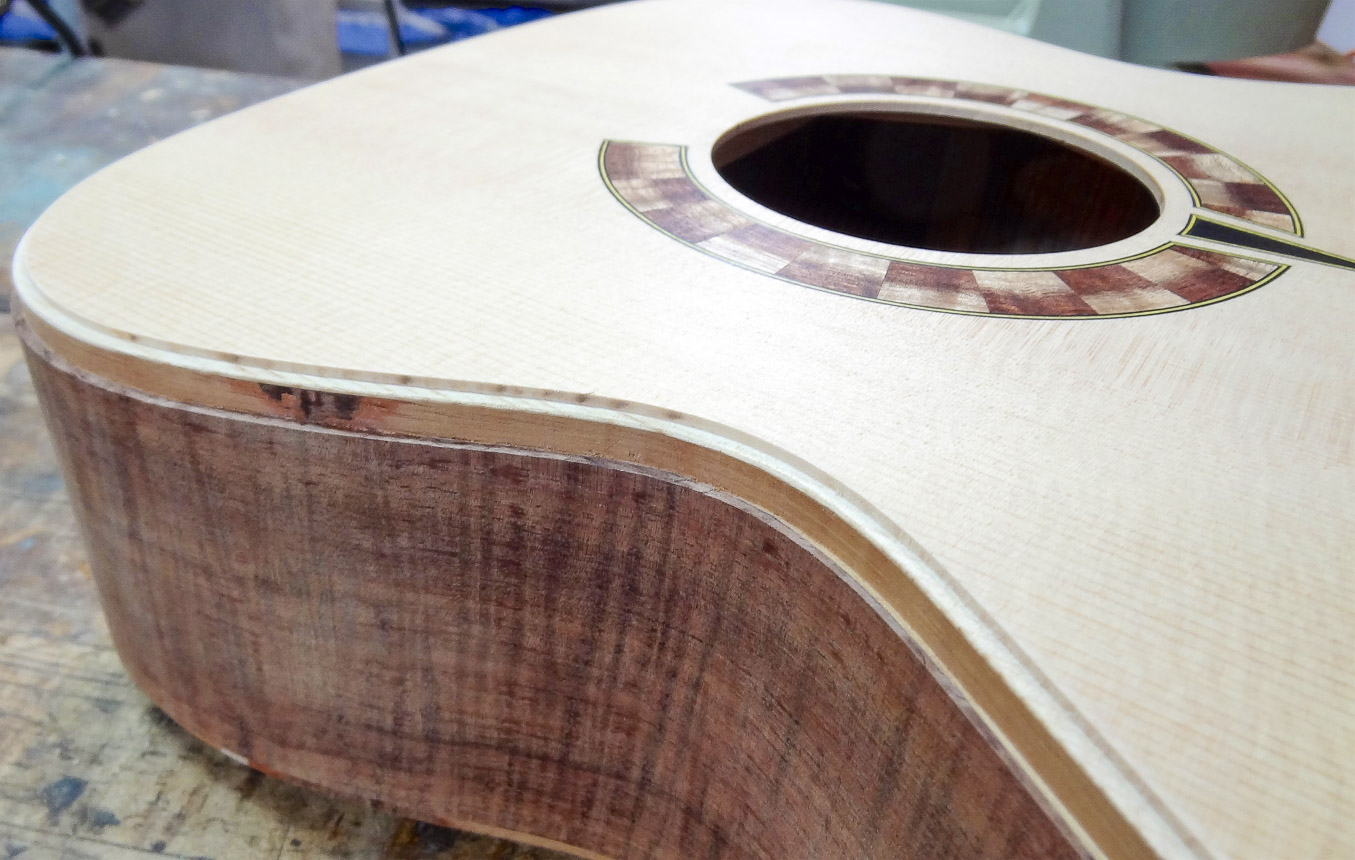
The rosette is a design element surrounding the sound hole. With only a few exceptions, the primary components of the guitar—the top, back & rim that form the body, and the neck, head stock and fingerboard—are more or less identical from one instrument to the next. This is for good reason because when they are designed and constructed with care, they come together and consistently deliver the great sound I’m striving for. And while I get tremendous satisfaction from making all these various parts, it’s a true pleasure to reach a phase in the build where I can ditch the routine and scratch my creativity itch. The rosette is one of these phases.
The visual splendor of a guitar is realized in the types of wood we make it from, the shapes of some of the various components like the bridge and head stock, the choice of binding and purfling, the design of the headplate veneers as well as the design of the rosette. I will often choose an overall design scheme that has overlap between many of these elements to tie it all together visually.
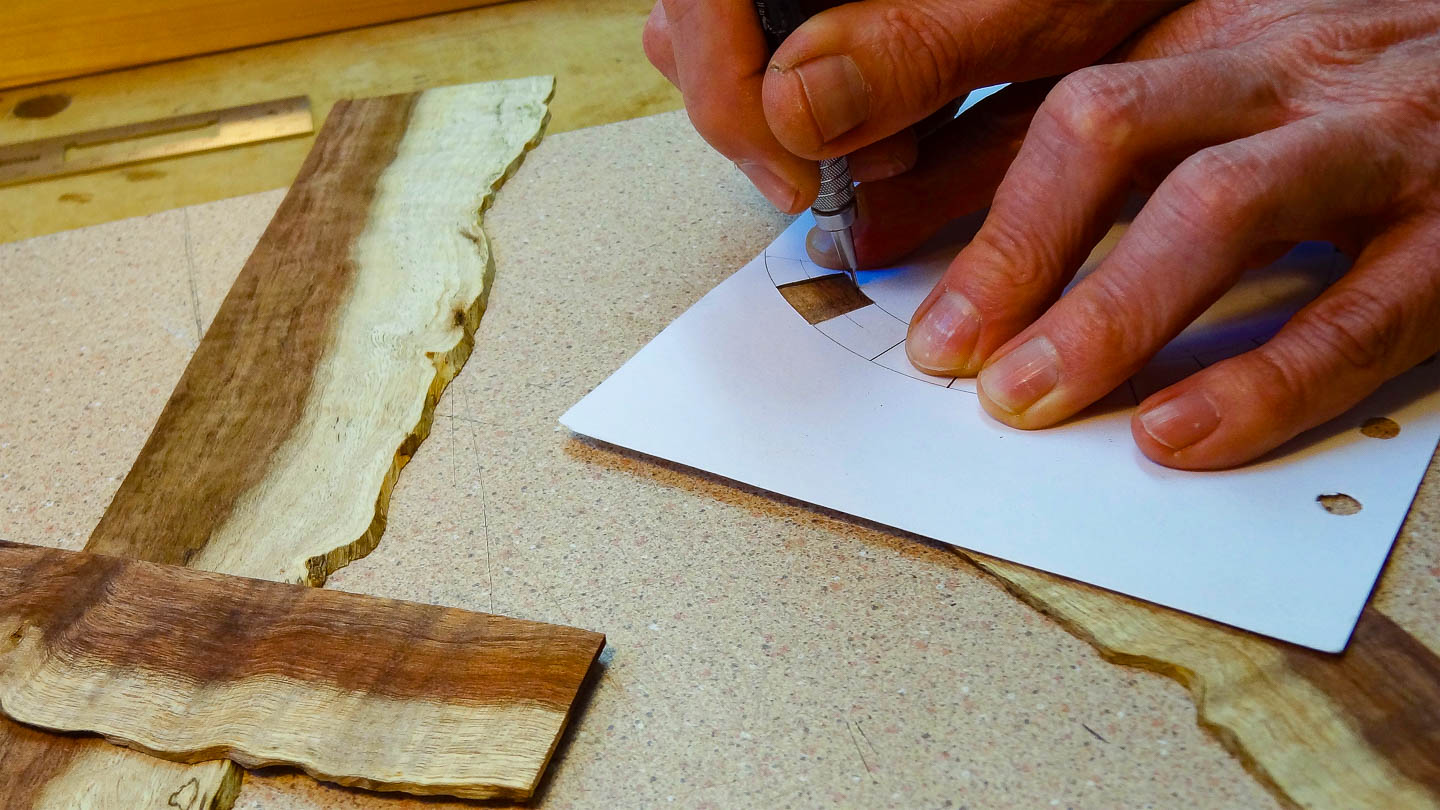
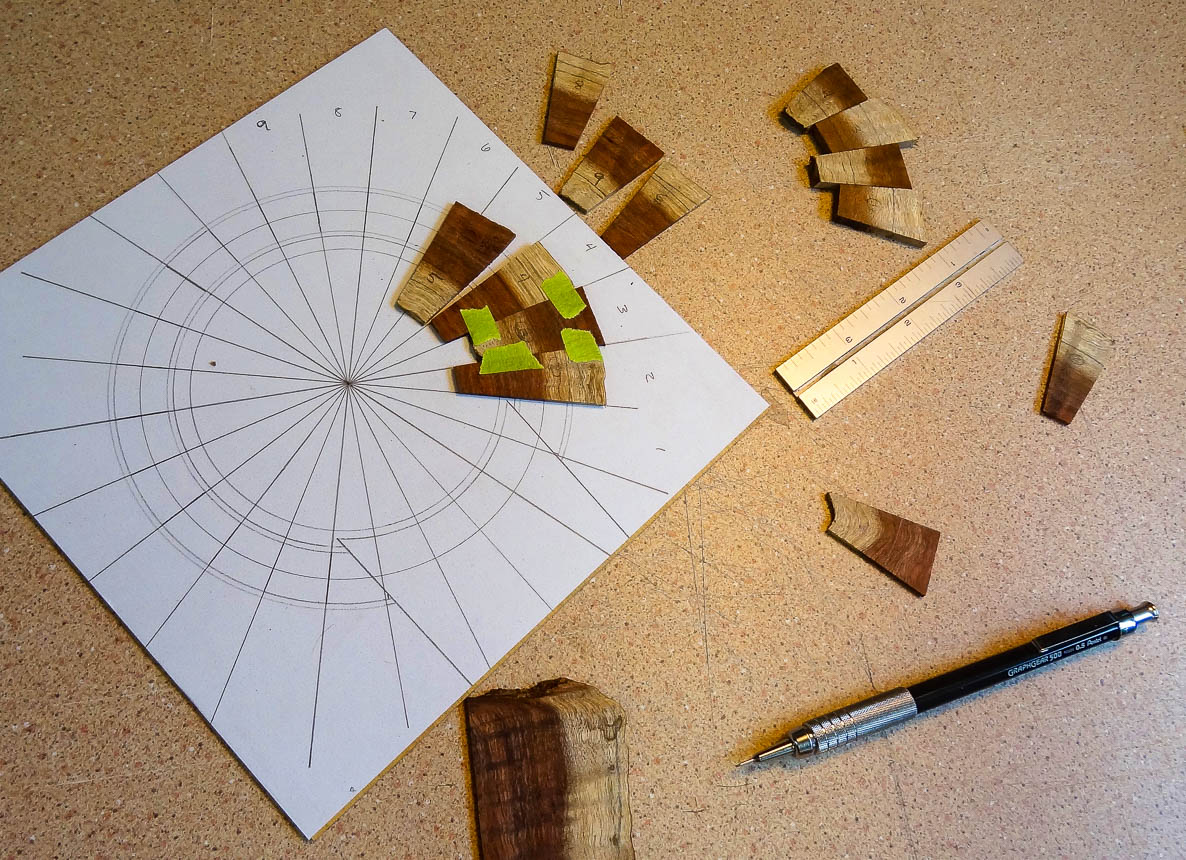
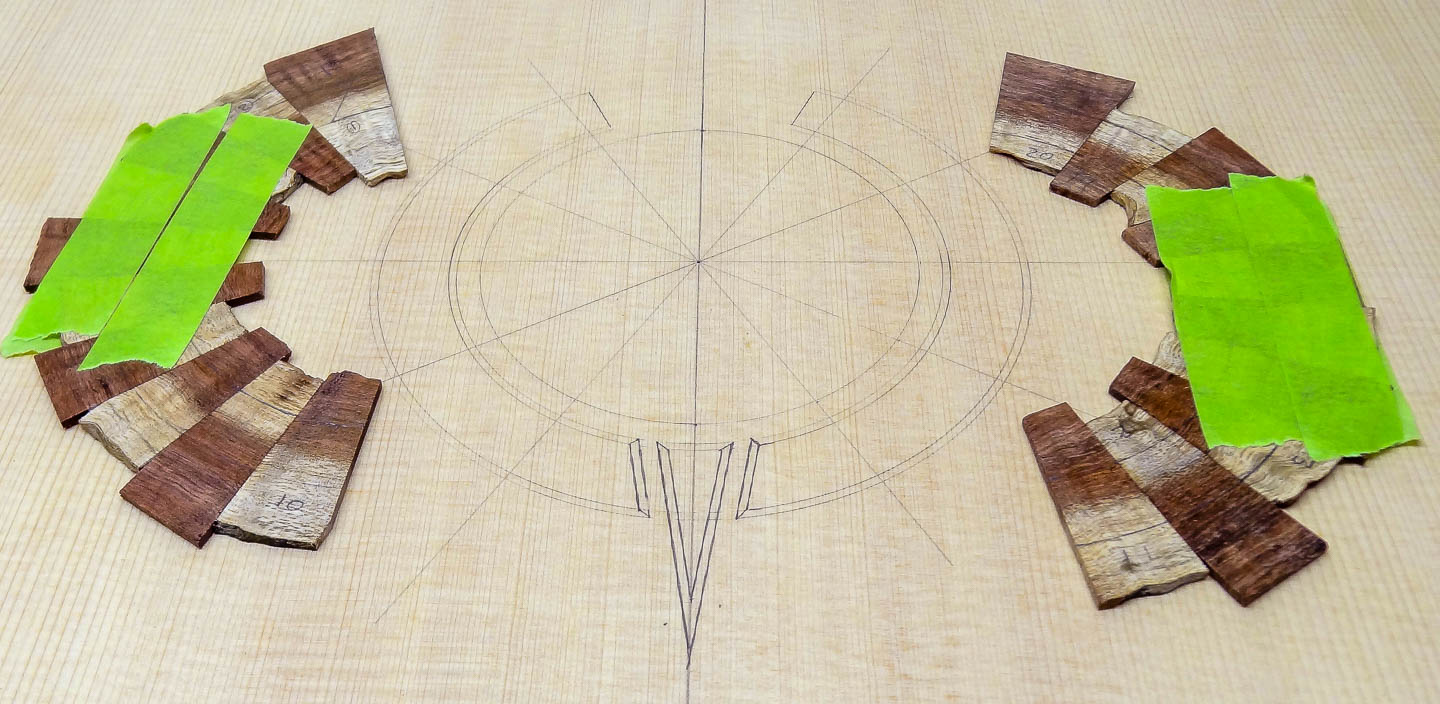
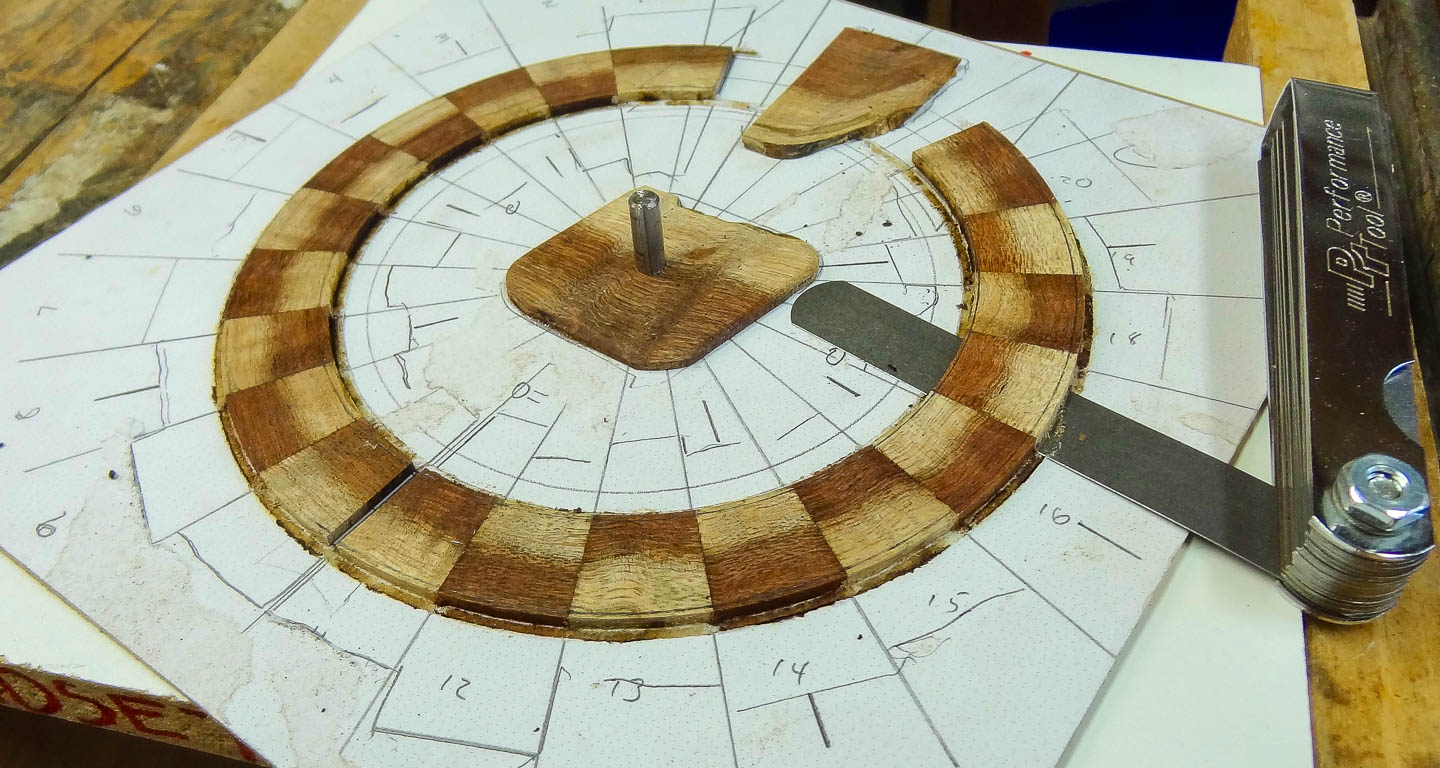
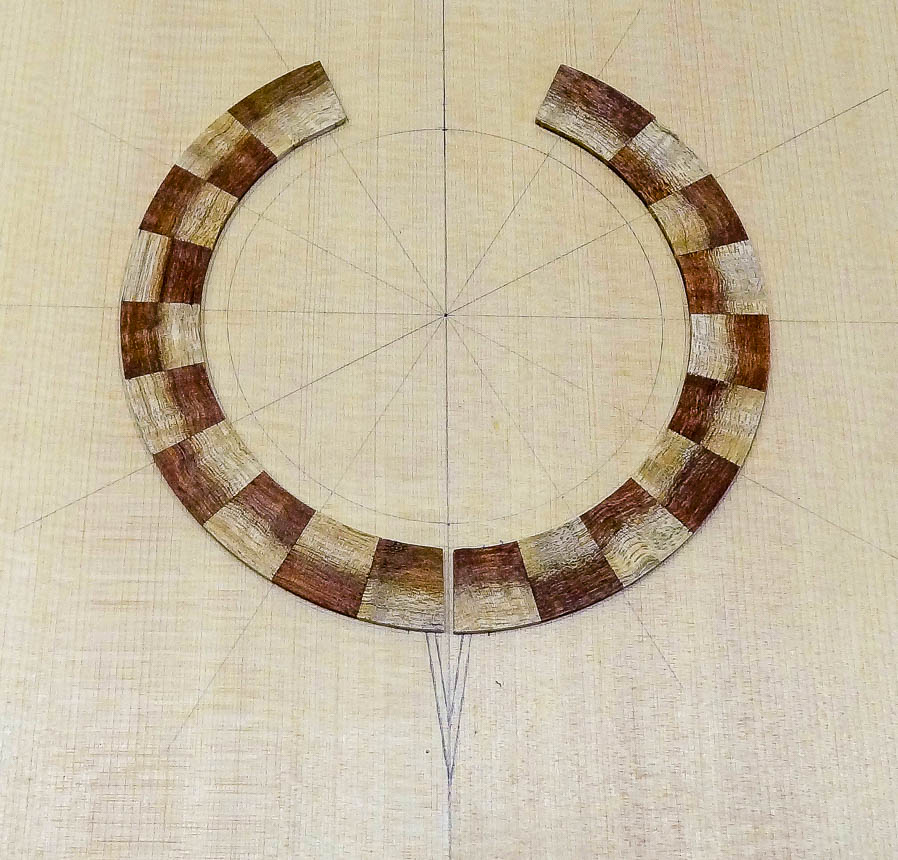
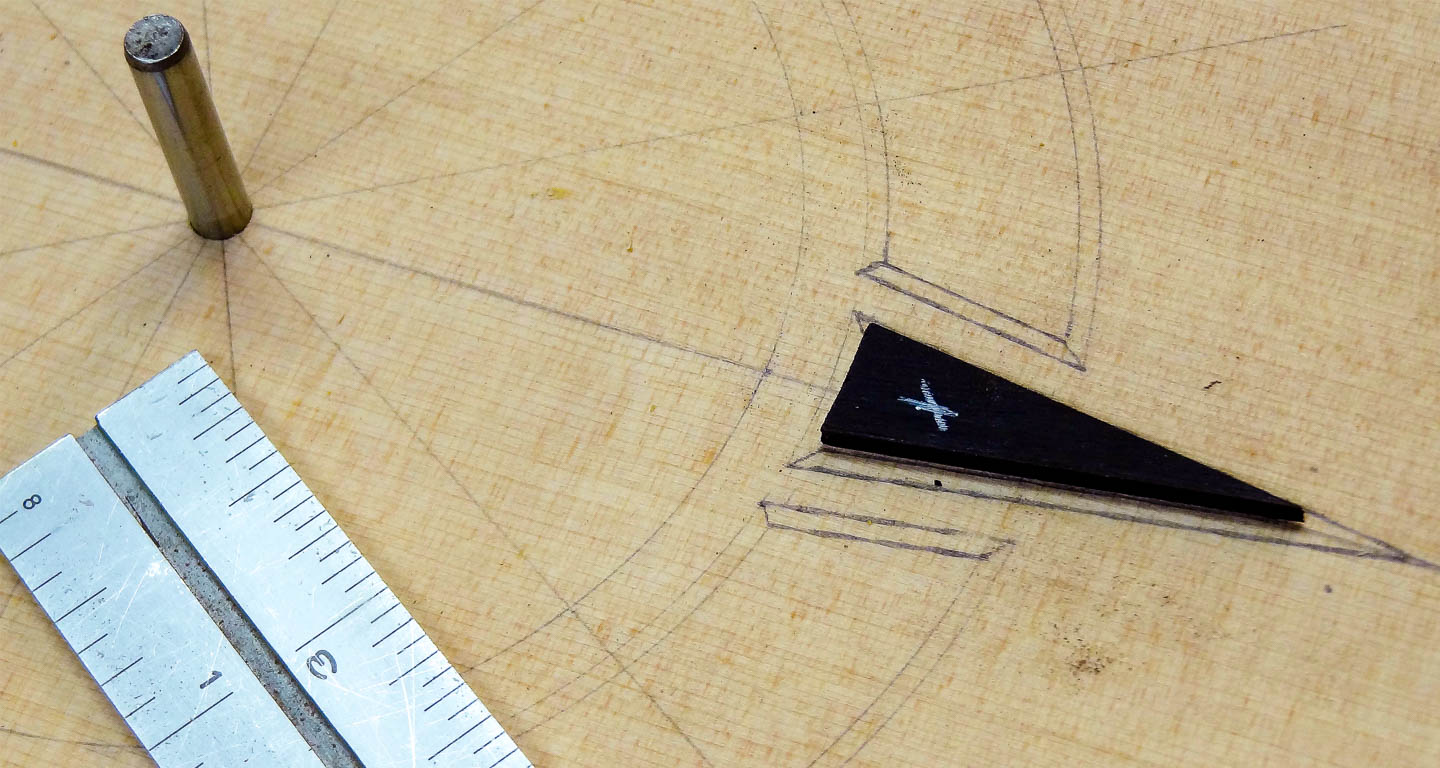
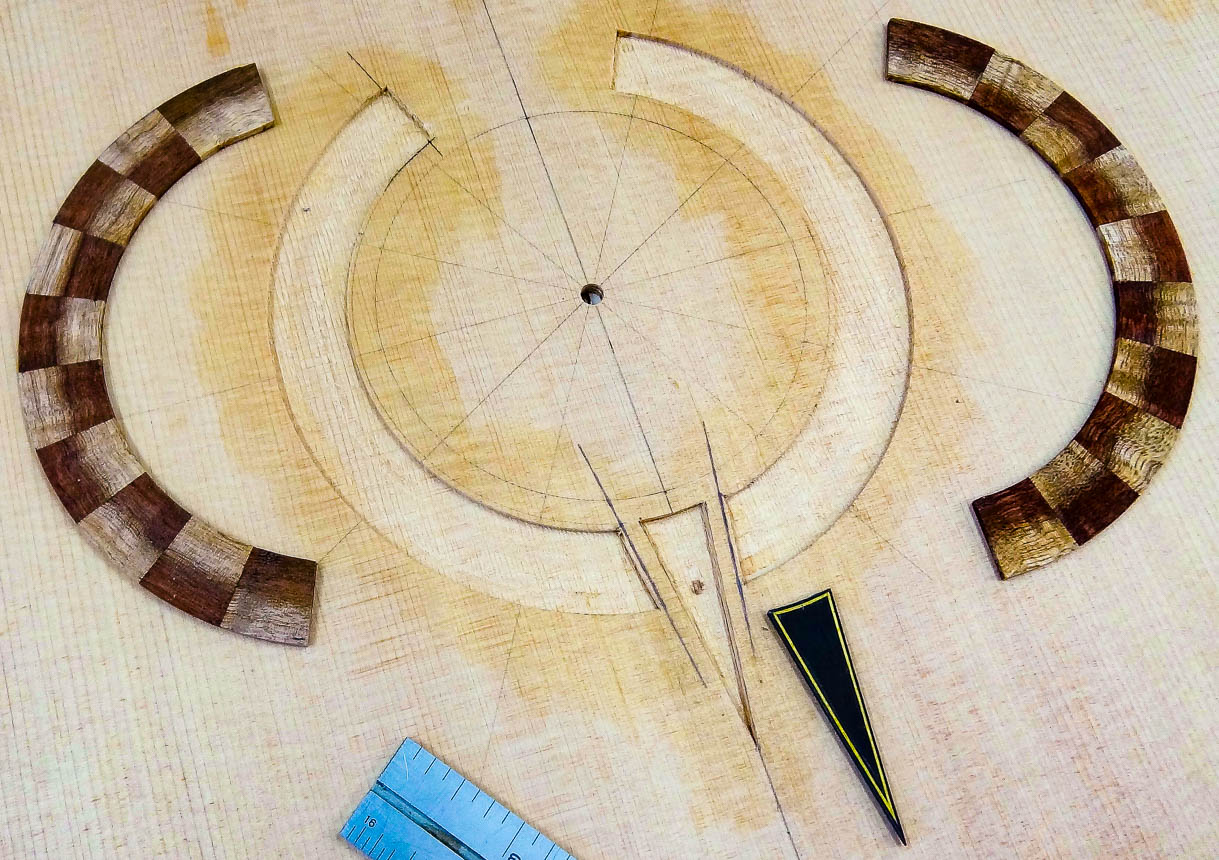
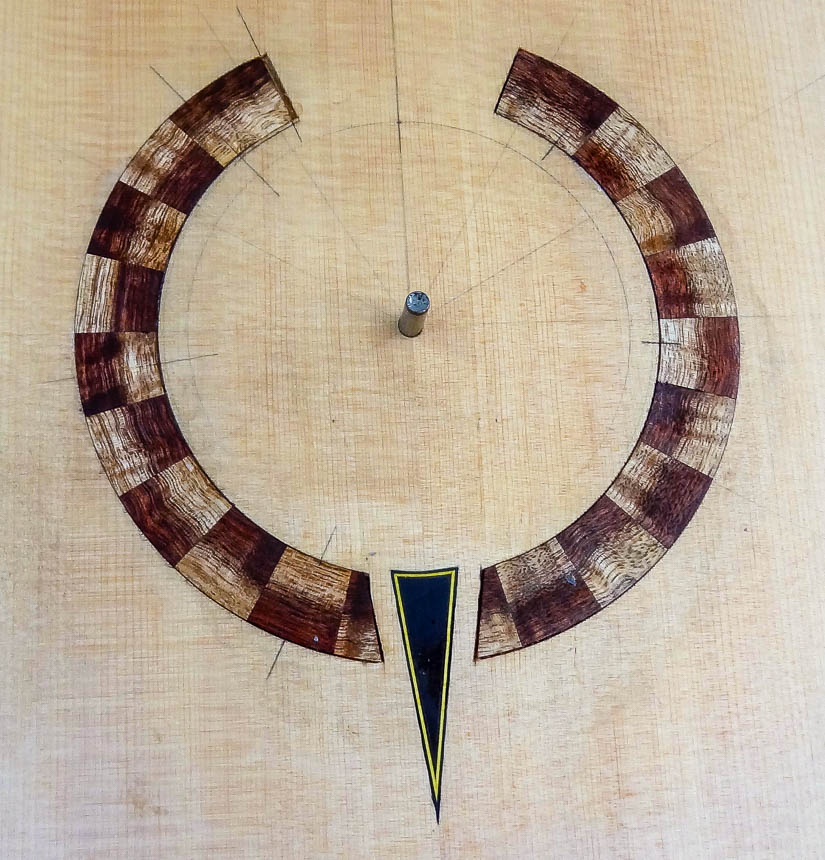
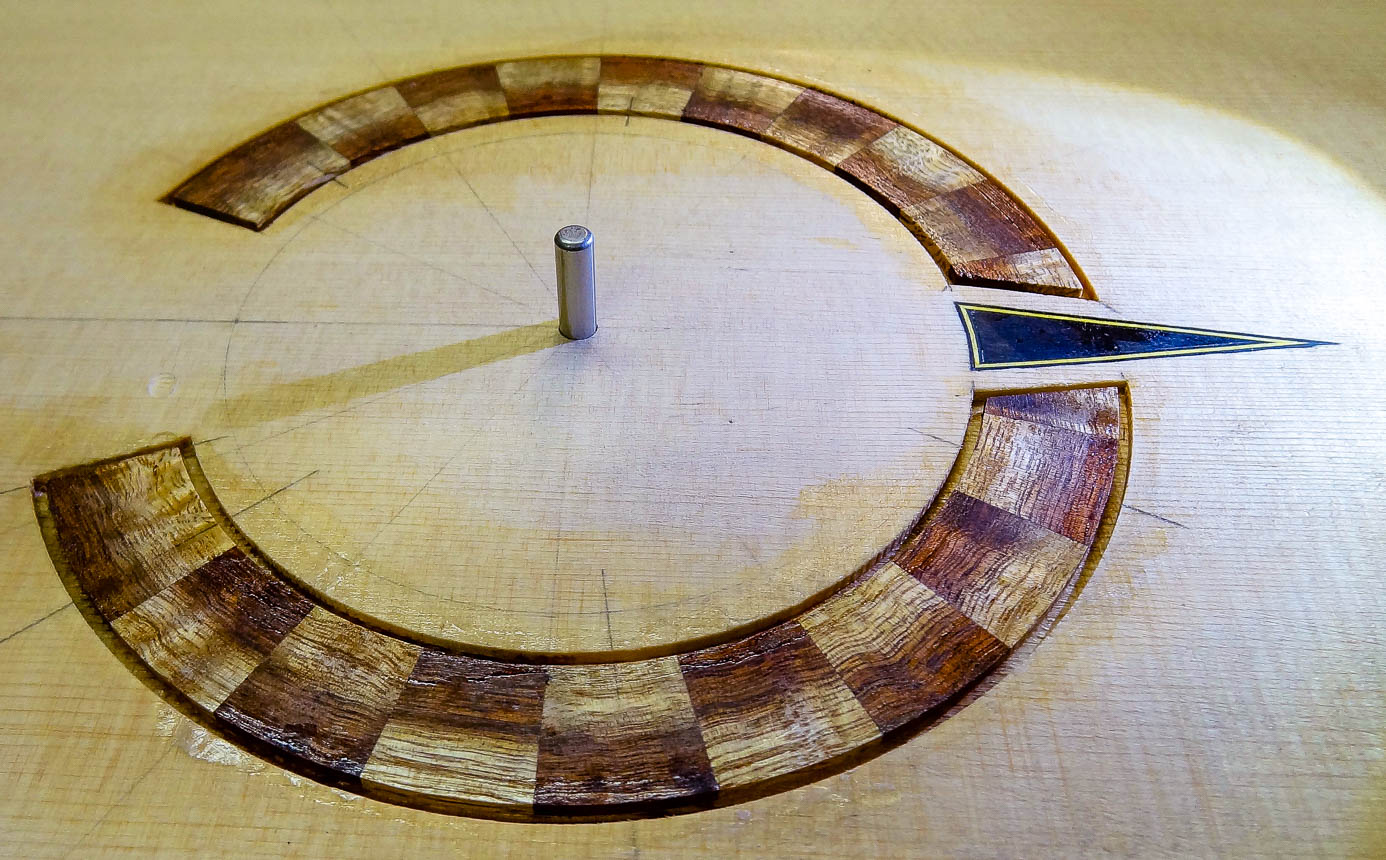
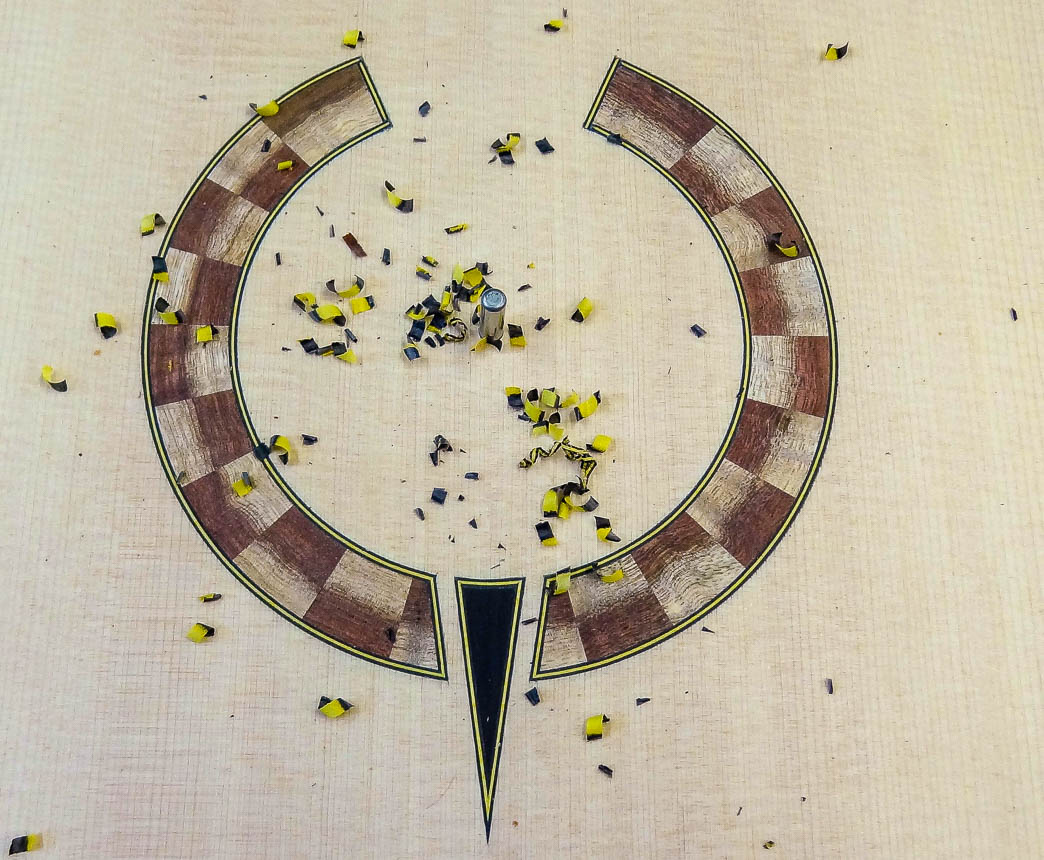
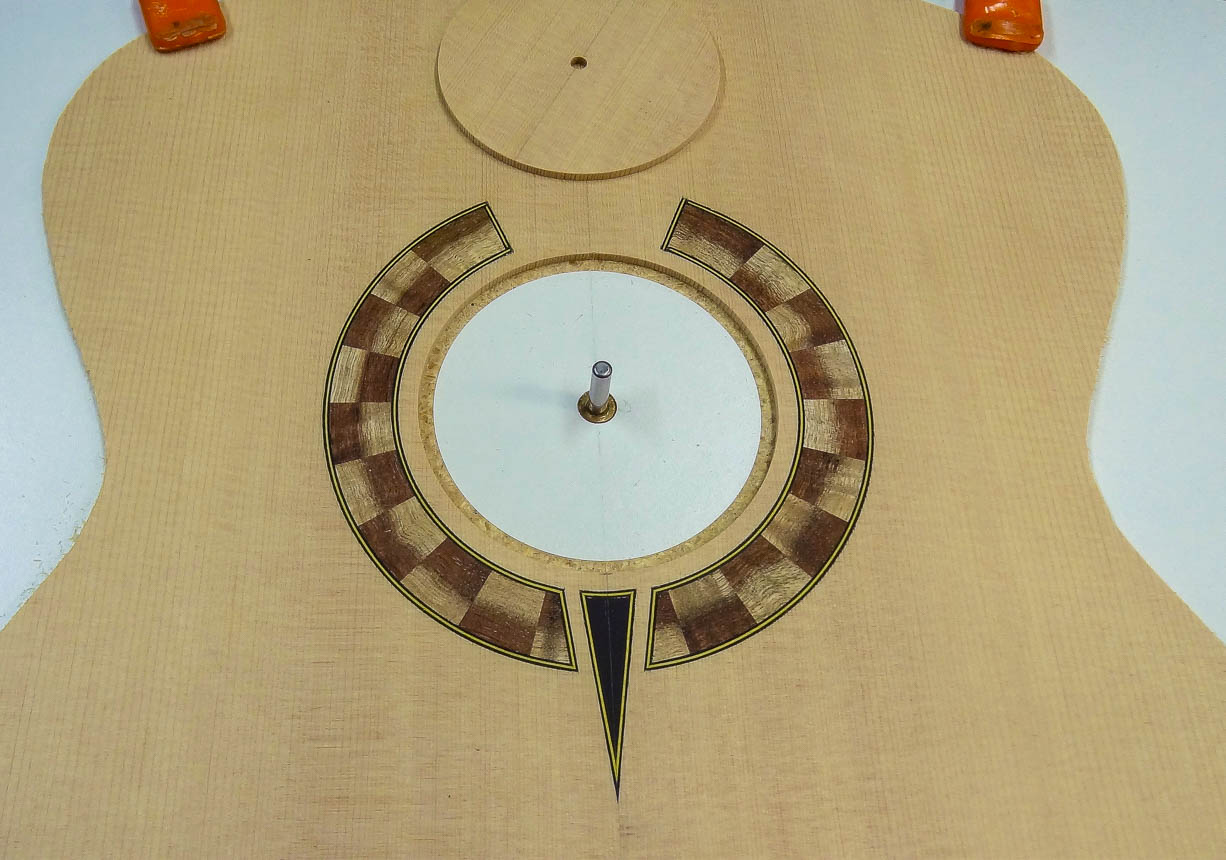
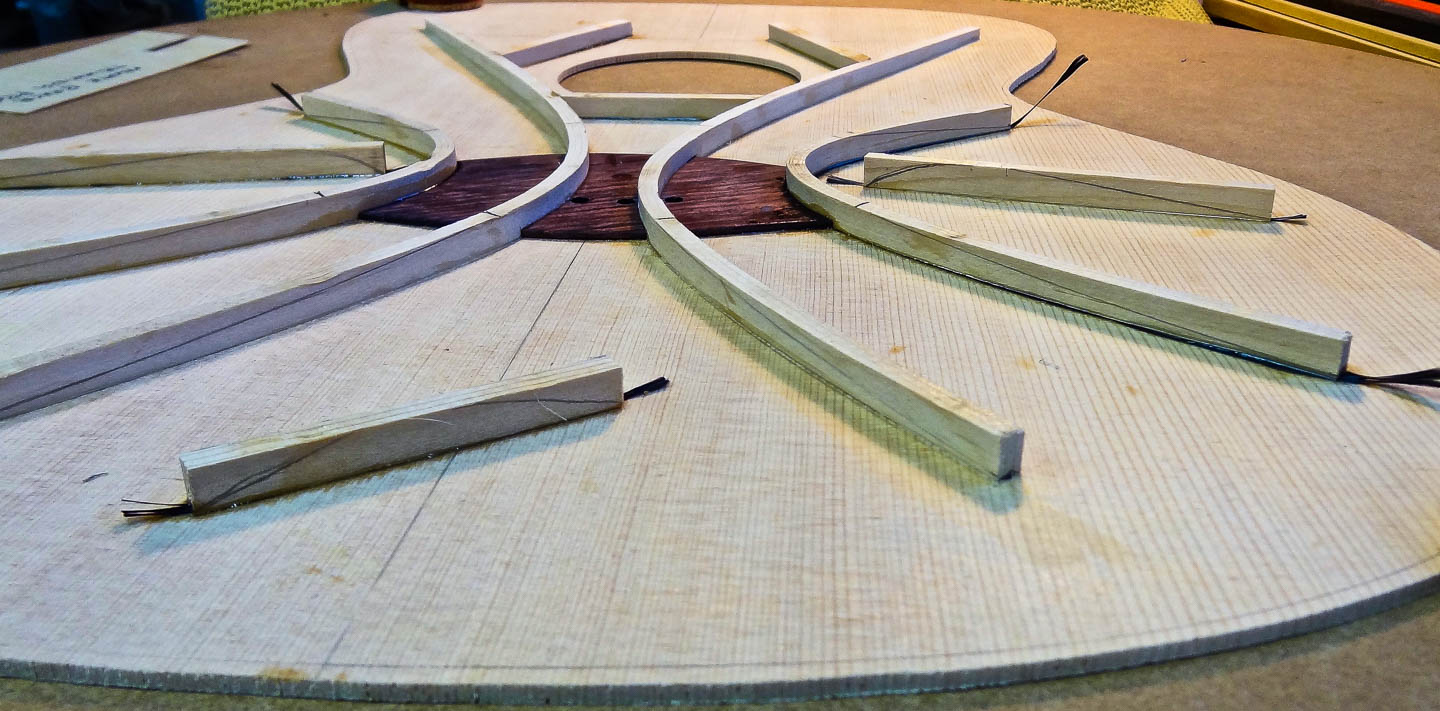
In this build, I’m going to use koa wood with a combination of dark colored heartwood (old growth) and light colored sapwood (new growth) as the common design thread. The body’s back plate and the head stock have already incorporated these elements, now it’s the rosette’s turn. This design will have radial segments, so I lay it out on paper, on thin cardboard and the actual sound board where it is centered on the future sound hole. This is very important to get the symmetry correct, and have guidance for cutting and laying out each segment.
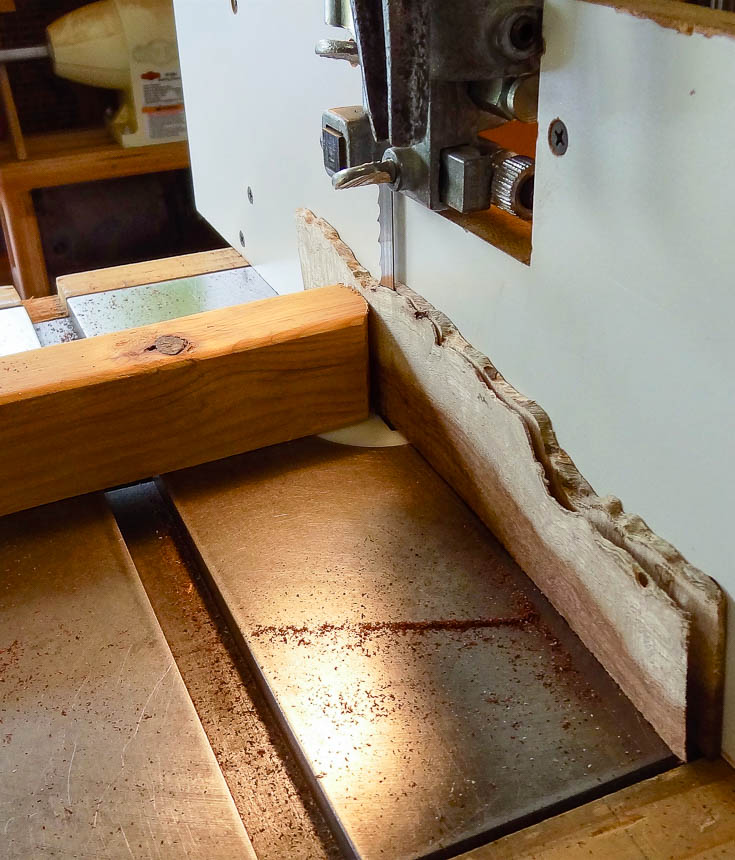
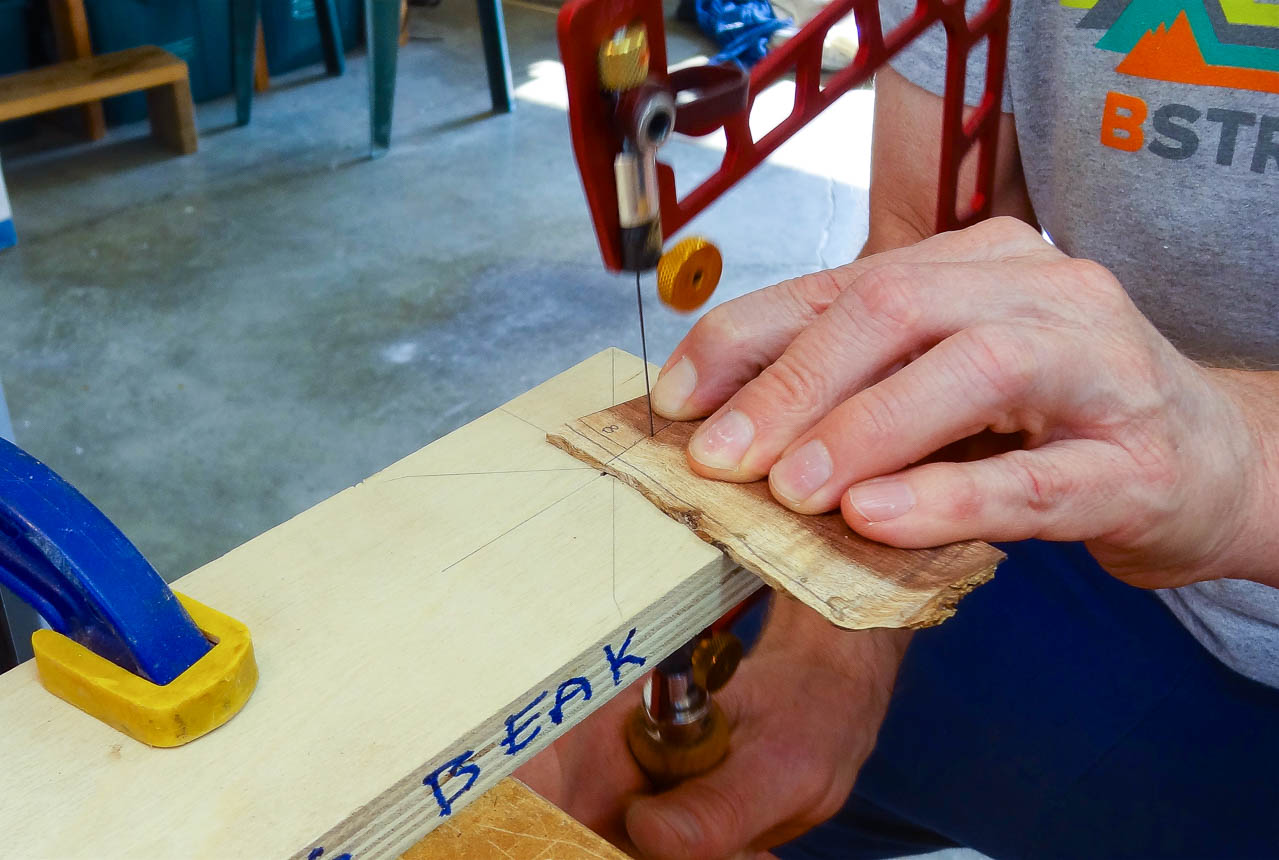
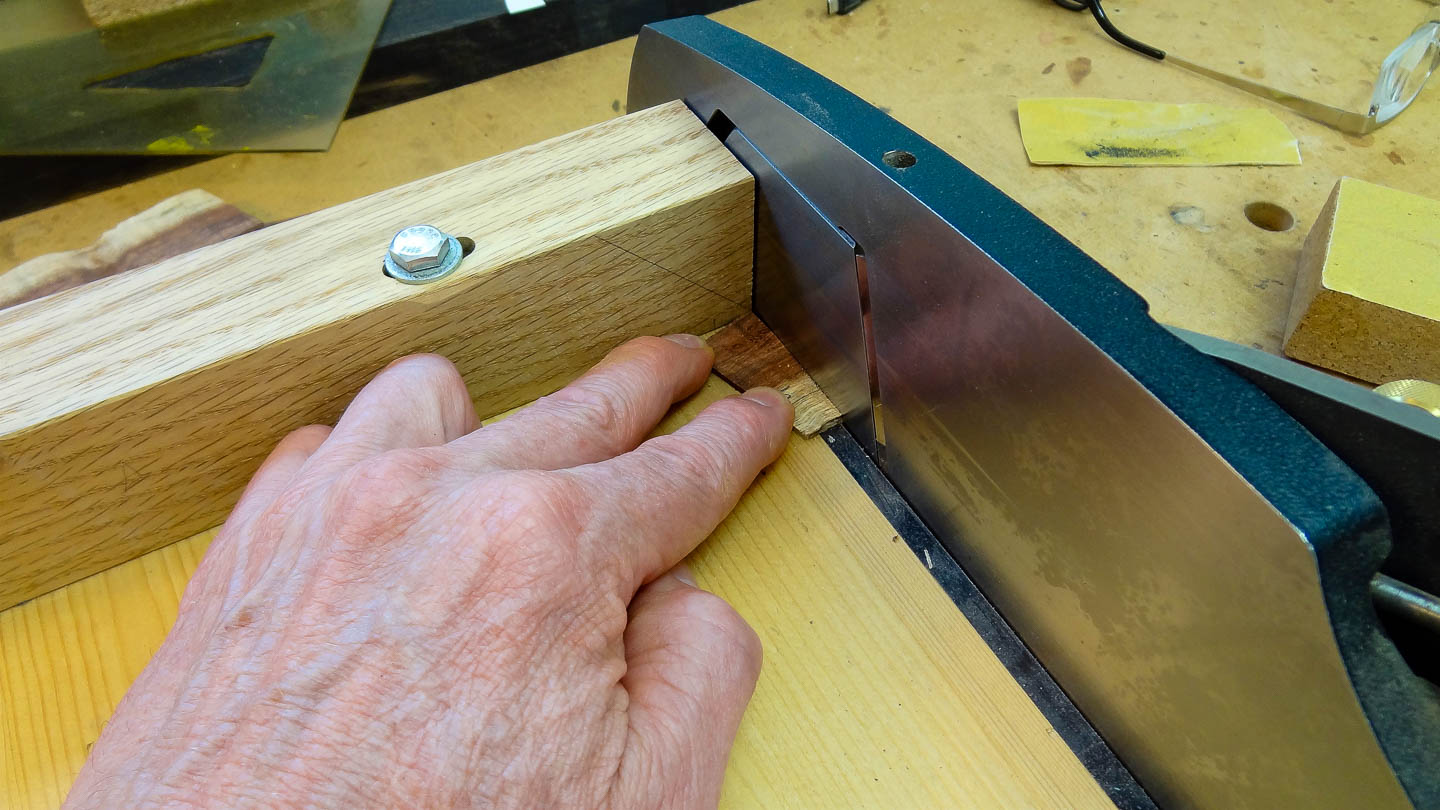
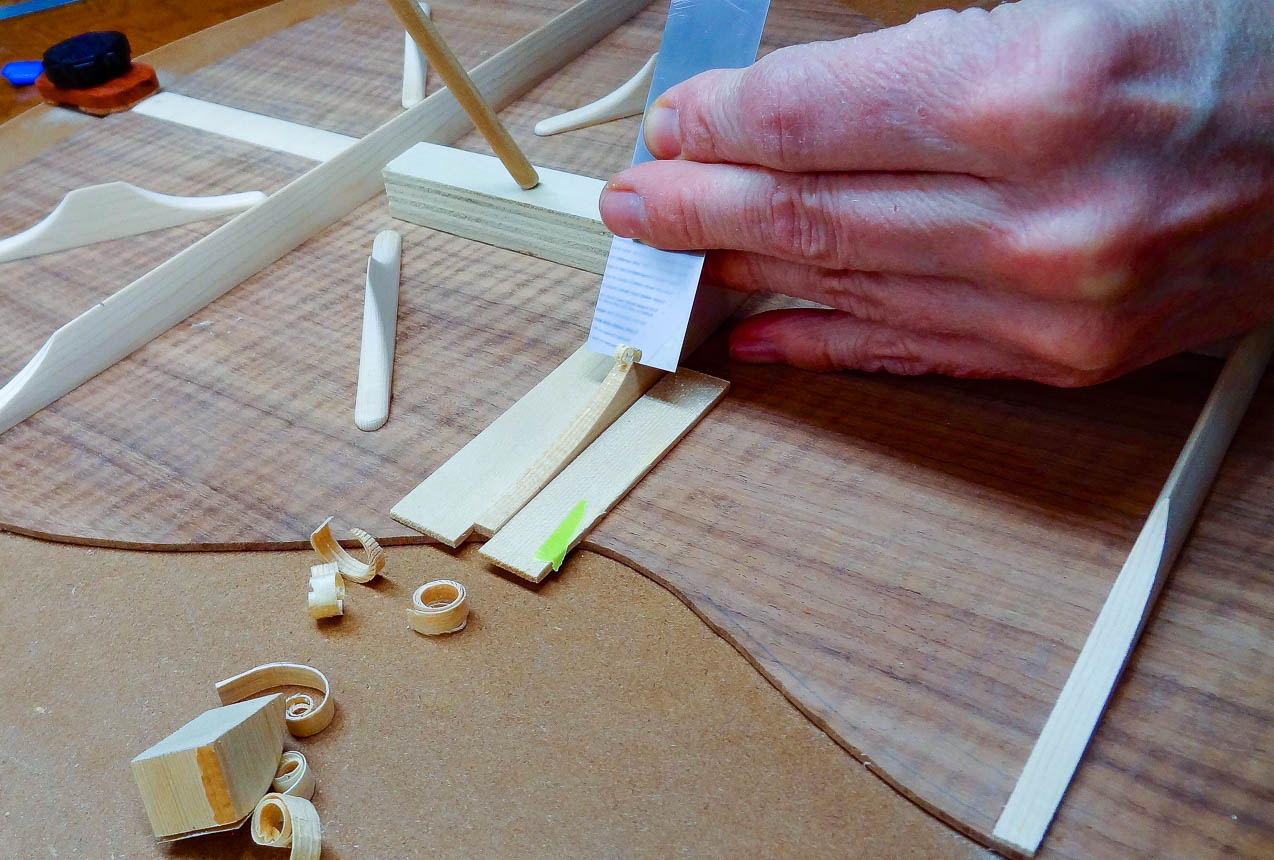
I have some scrap pieces of koa with sapwood along one edge, but they are too thick to be used for this process so I use my bandsaw to re-saw them to the proper thickness. My idea is to flip-flop each segment so the heartwood/sapwood alternates, creating a sort of checkerboard pattern. The thin cardboard pattern has one segment cut out of it and I used it to draw the shape of individual segments on the material, a fret saw cuts them out to rough shape. One of my favorite tools, the shooting-board and hand plane is used to very accurately trim each segment to size. This is repeated over and over until I have enough to fill my pattern. The fretboard will cover the top part of the rosette, so none are needed there, and I’m adding a different design element at the opposite side.
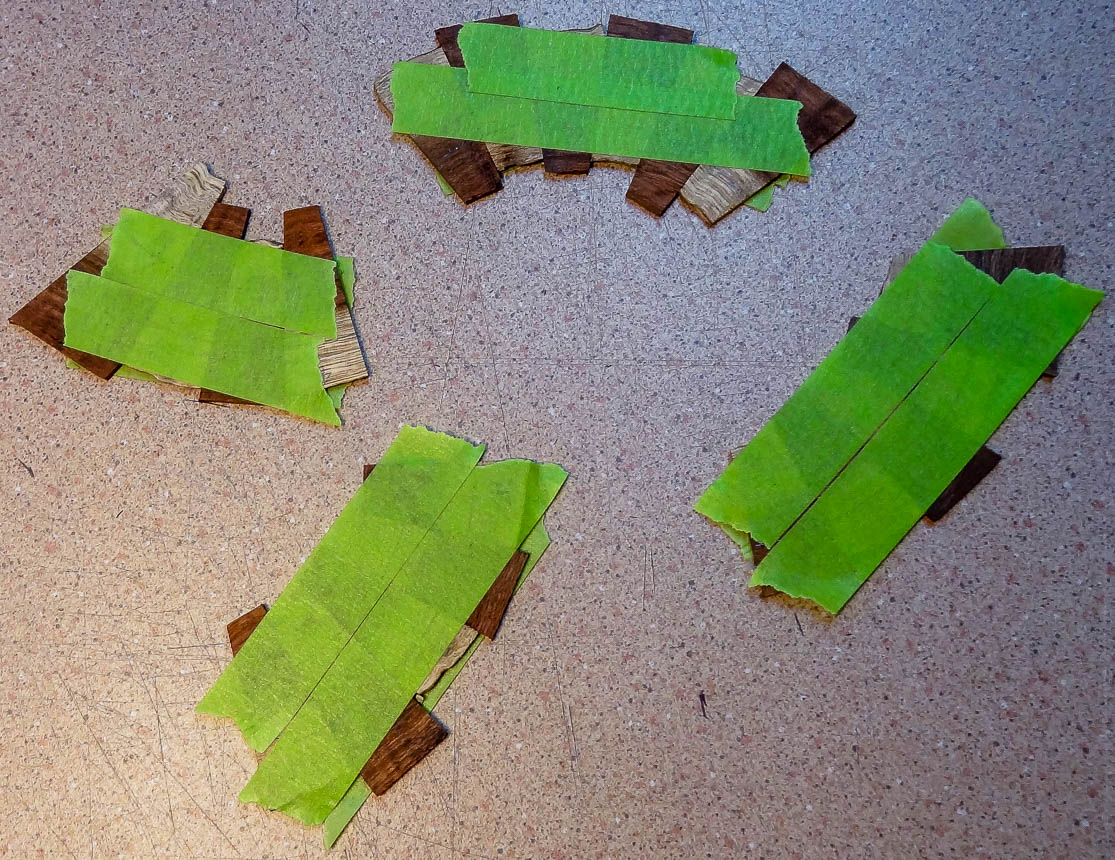
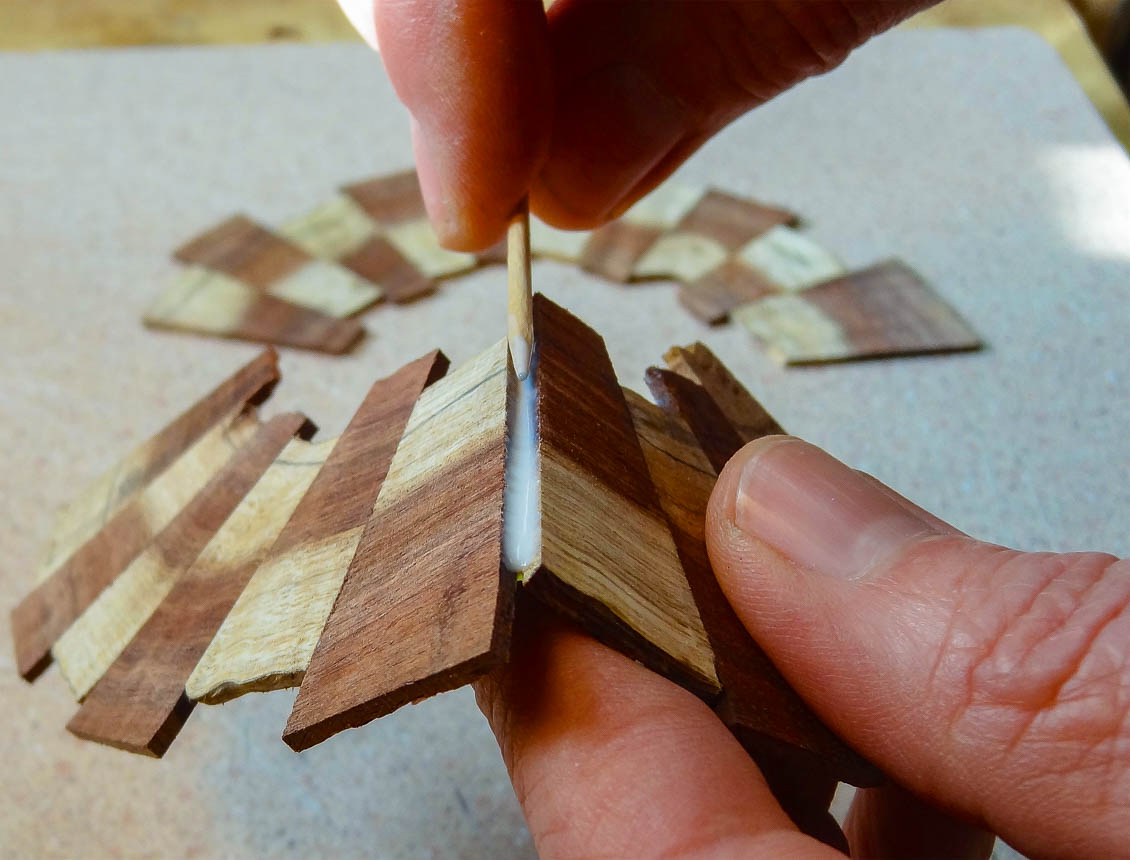
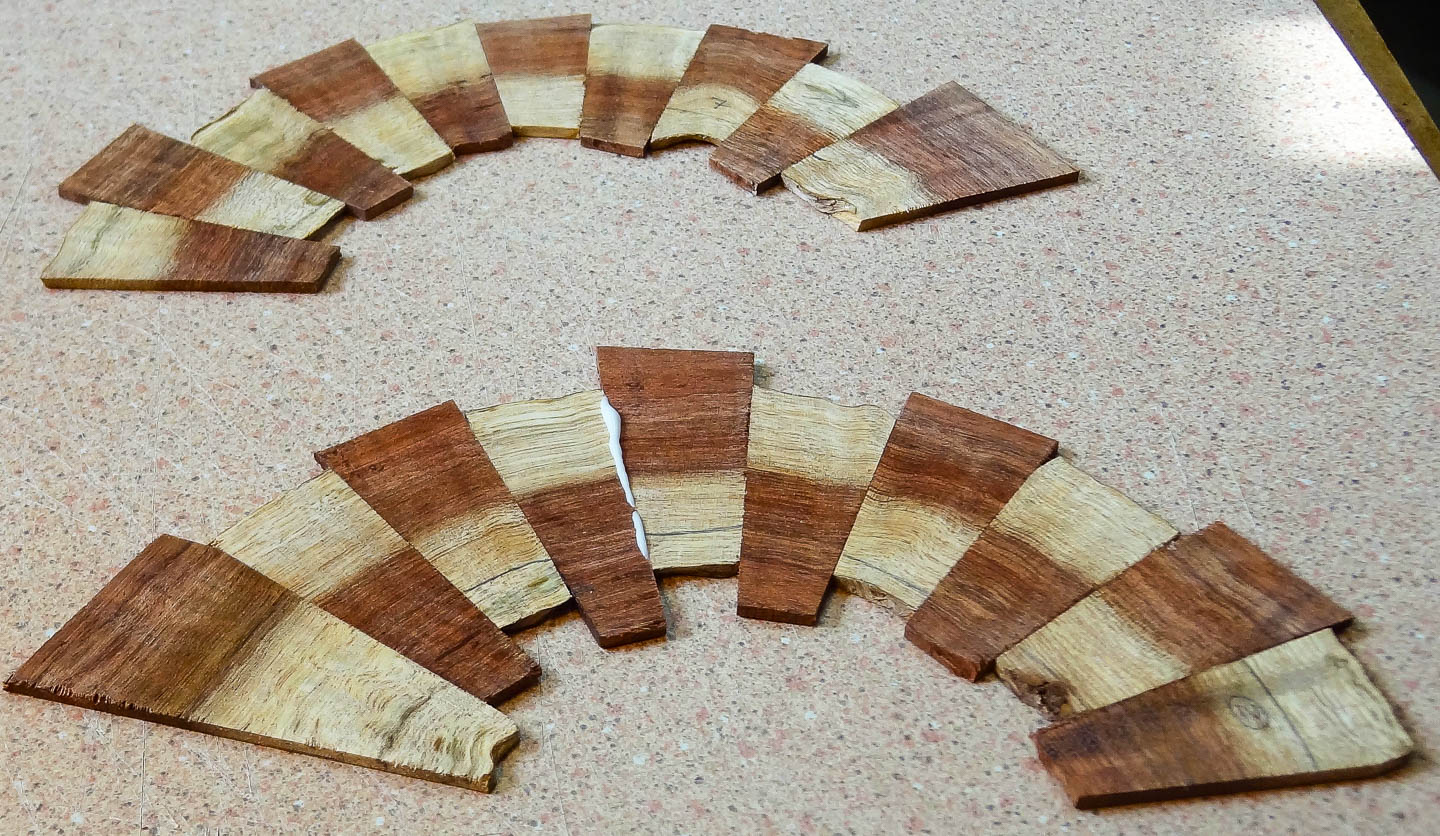
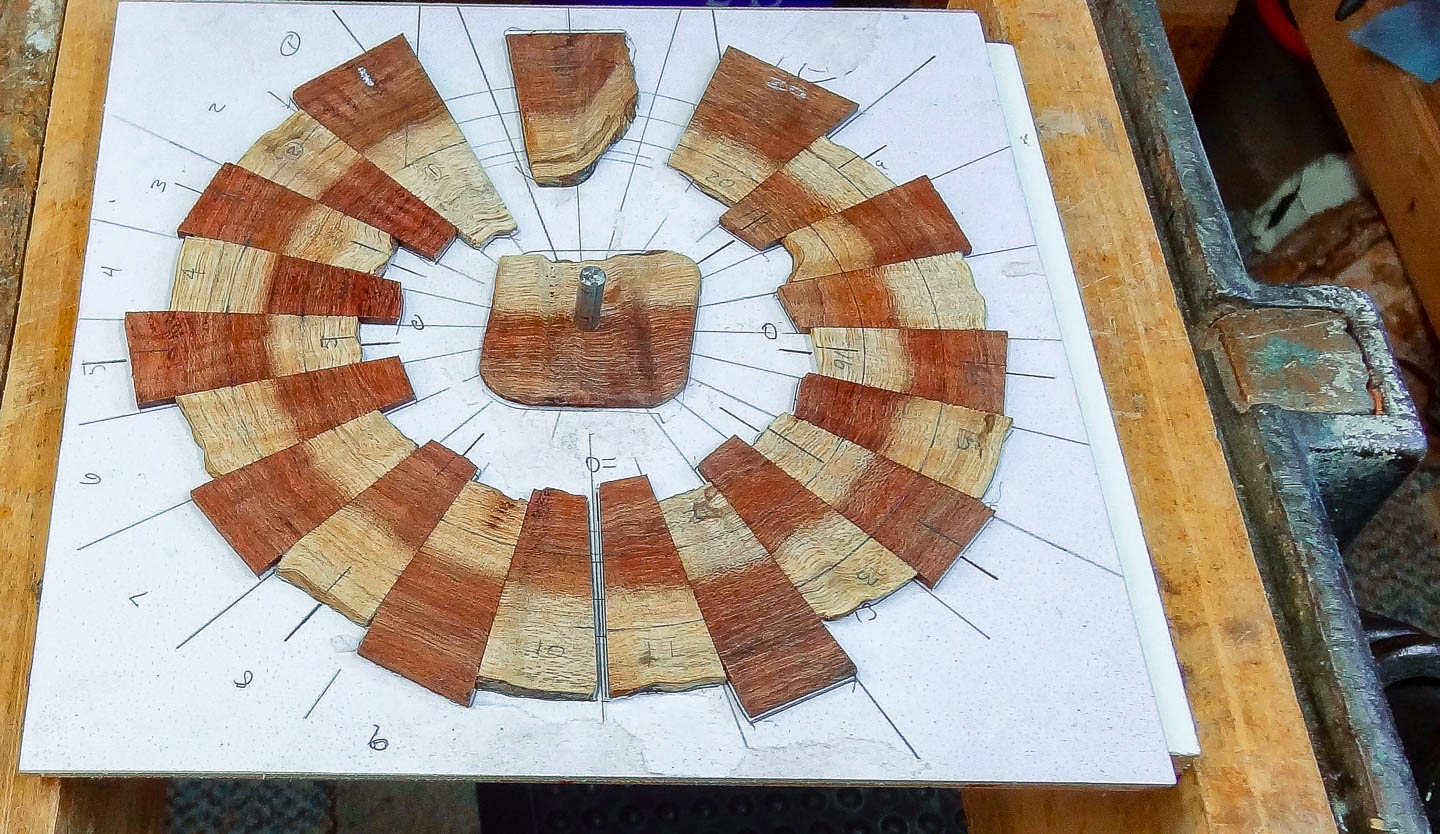
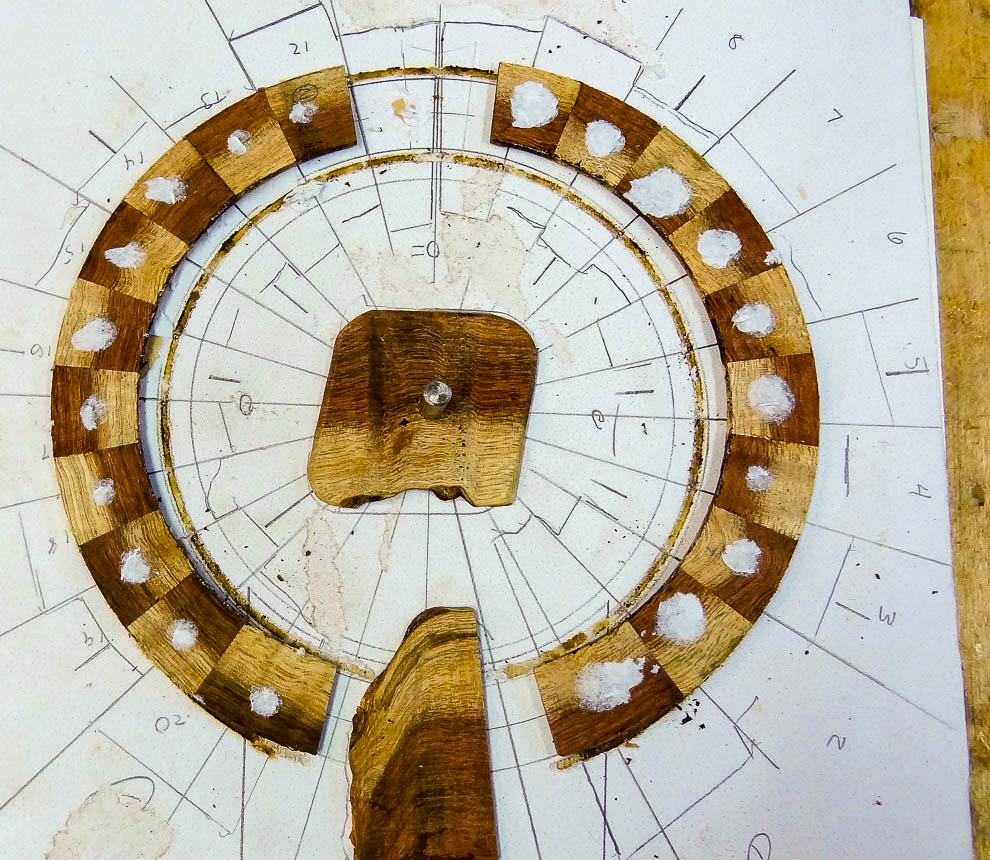
I hold the segments together with masking tape and glue five together at a time. By stretching the tape across them it draws each segment together tightly. Once each group is dry, I glue each group together in the same way. There are two separate halves on either side of the sound hole.
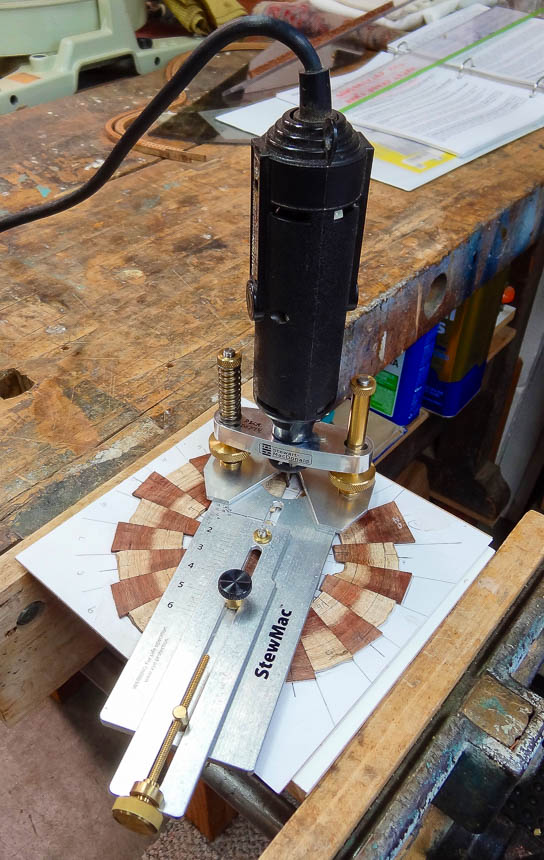
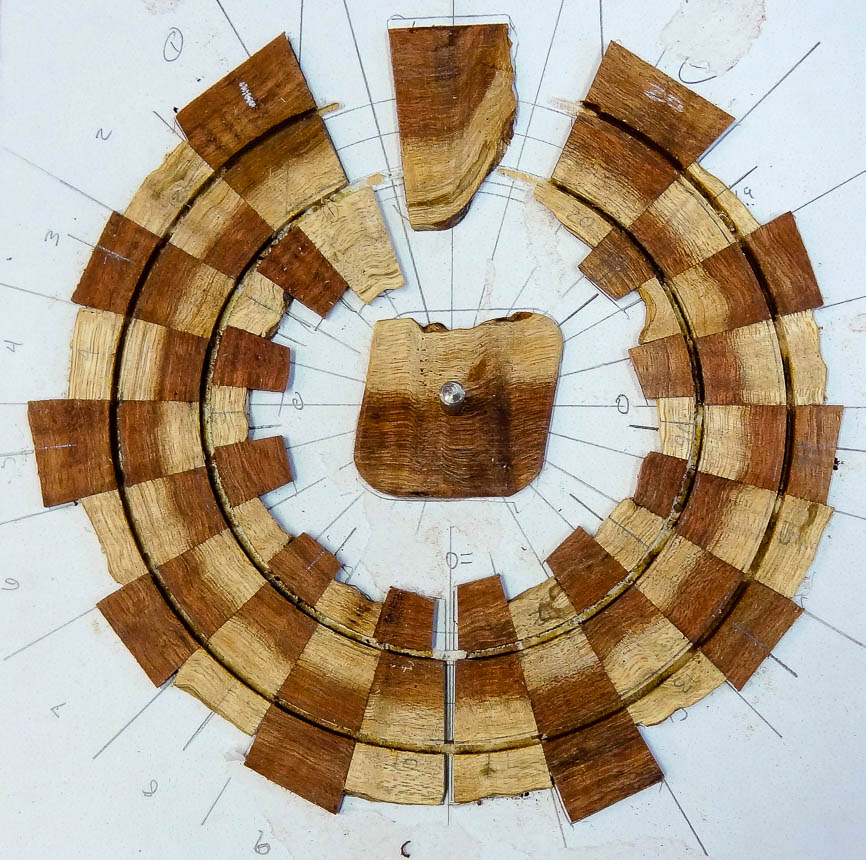
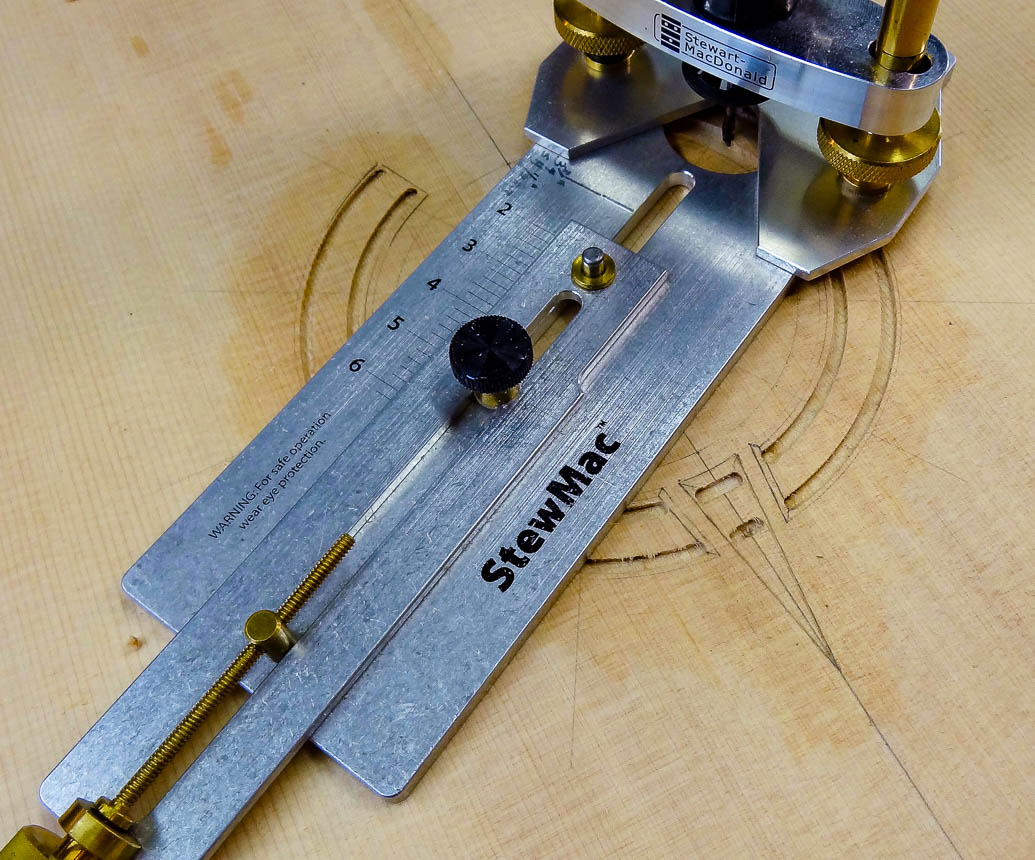
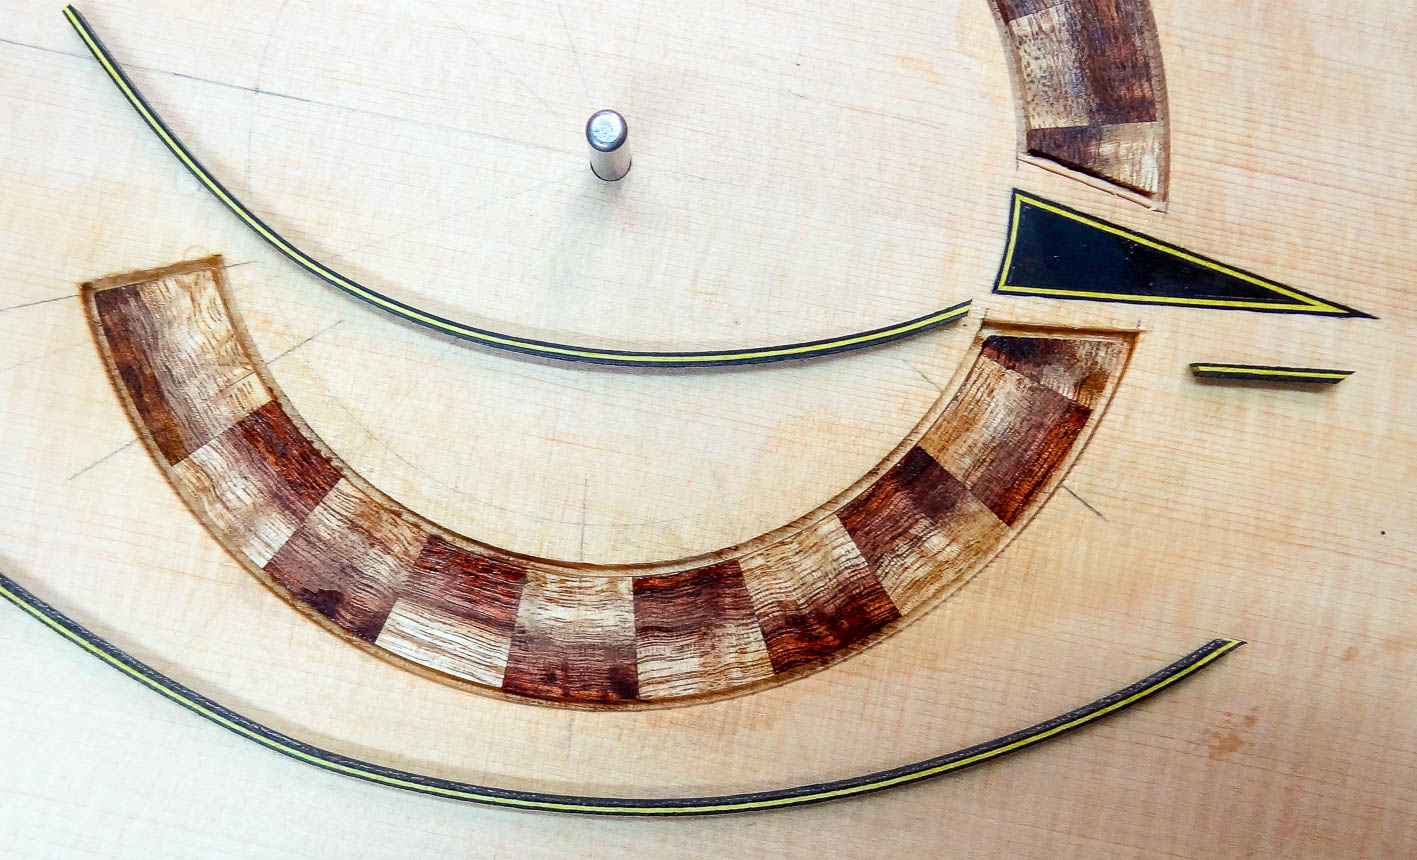
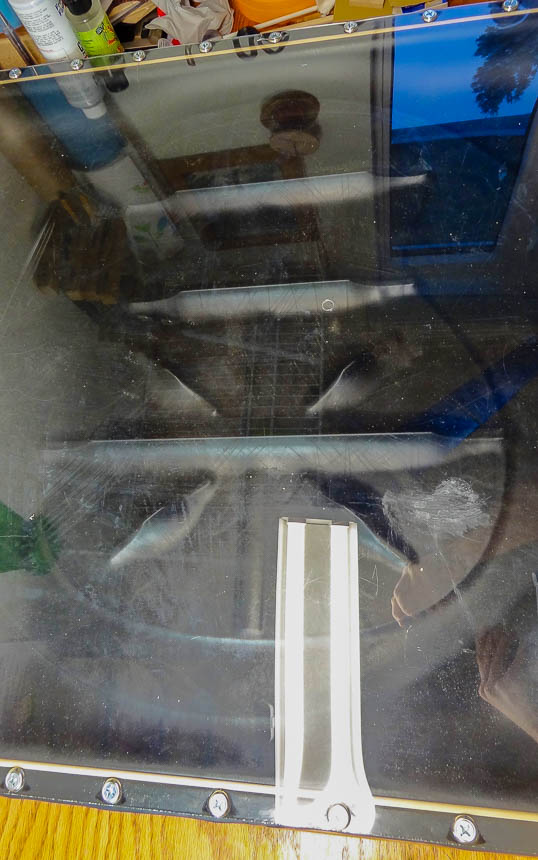
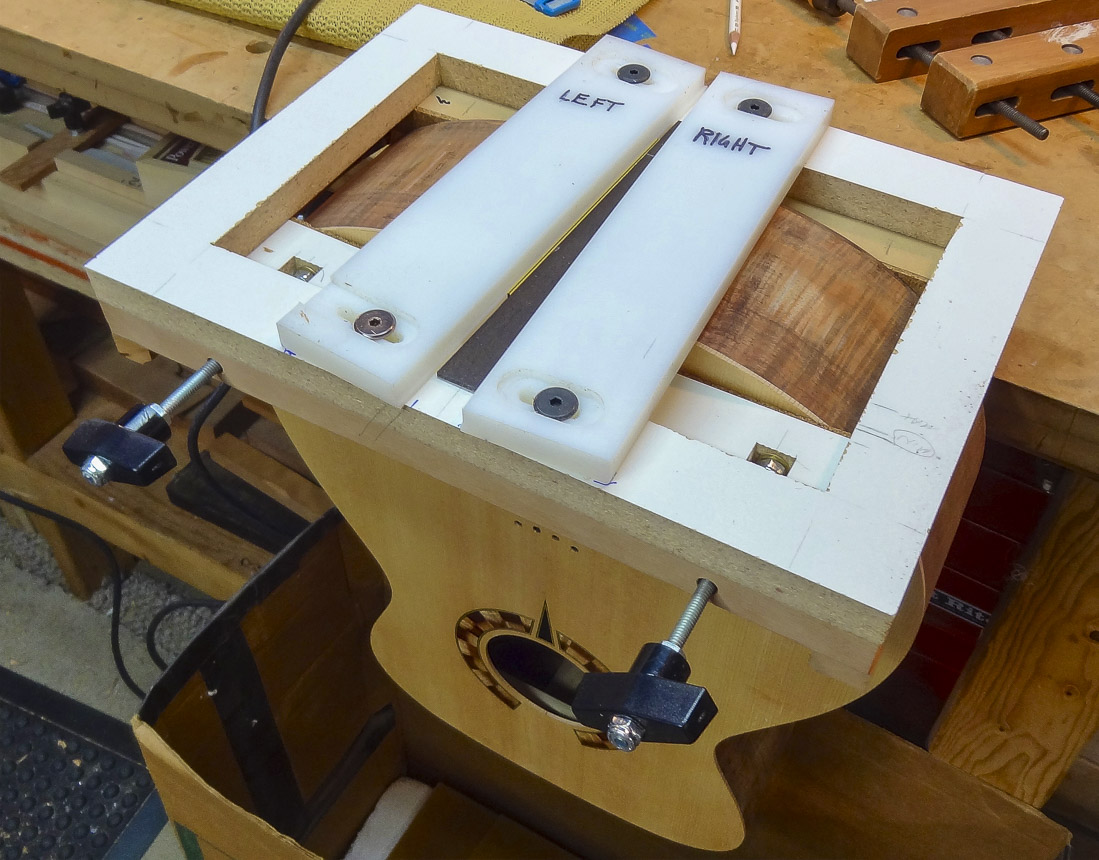
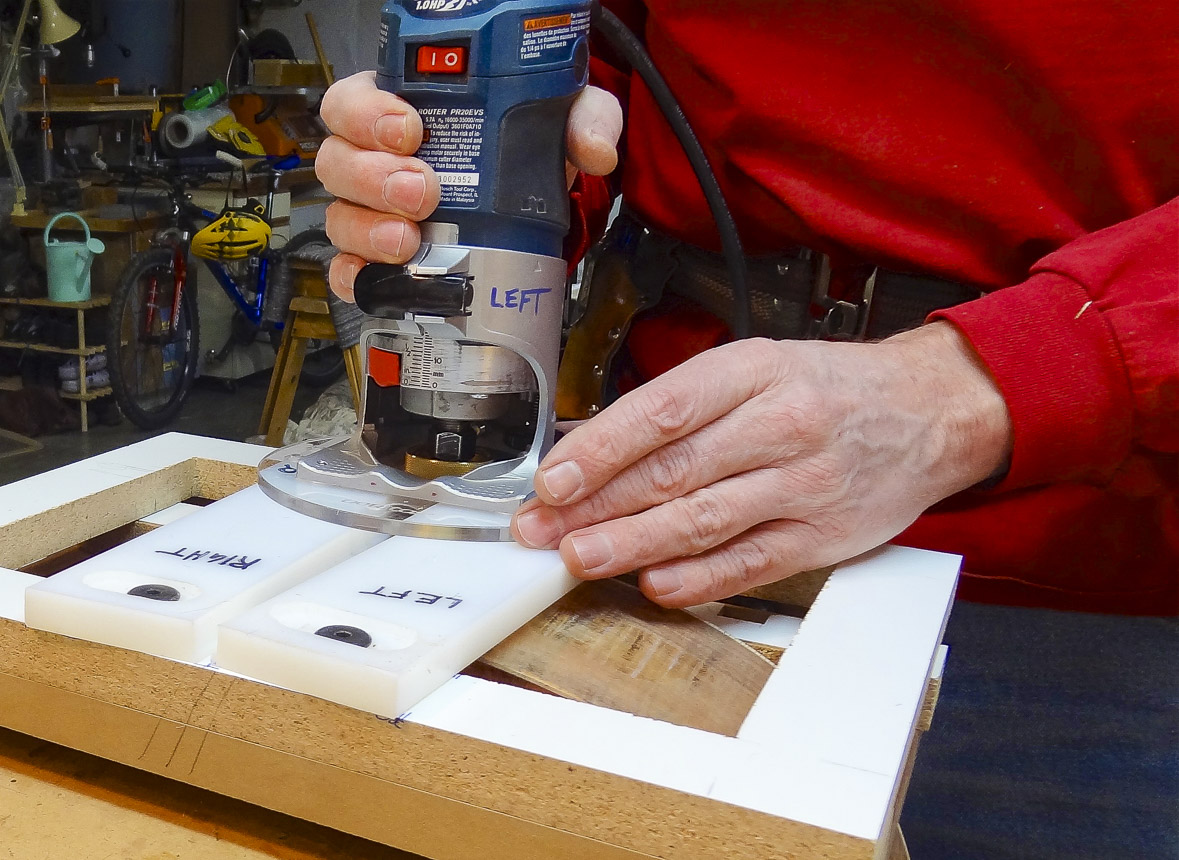
The paper pattern is glued to a thin piece of plywood, and the glued up segments are spot glued to the pattern. A hole is drilled at the center-point so it can be slipped over a pivot pin in my rosette building board. I use a Dremel tool on a swivel base to cut the glued up segments to width. I use a thin feeler gauge to get under the segments and pry them off the plywood.
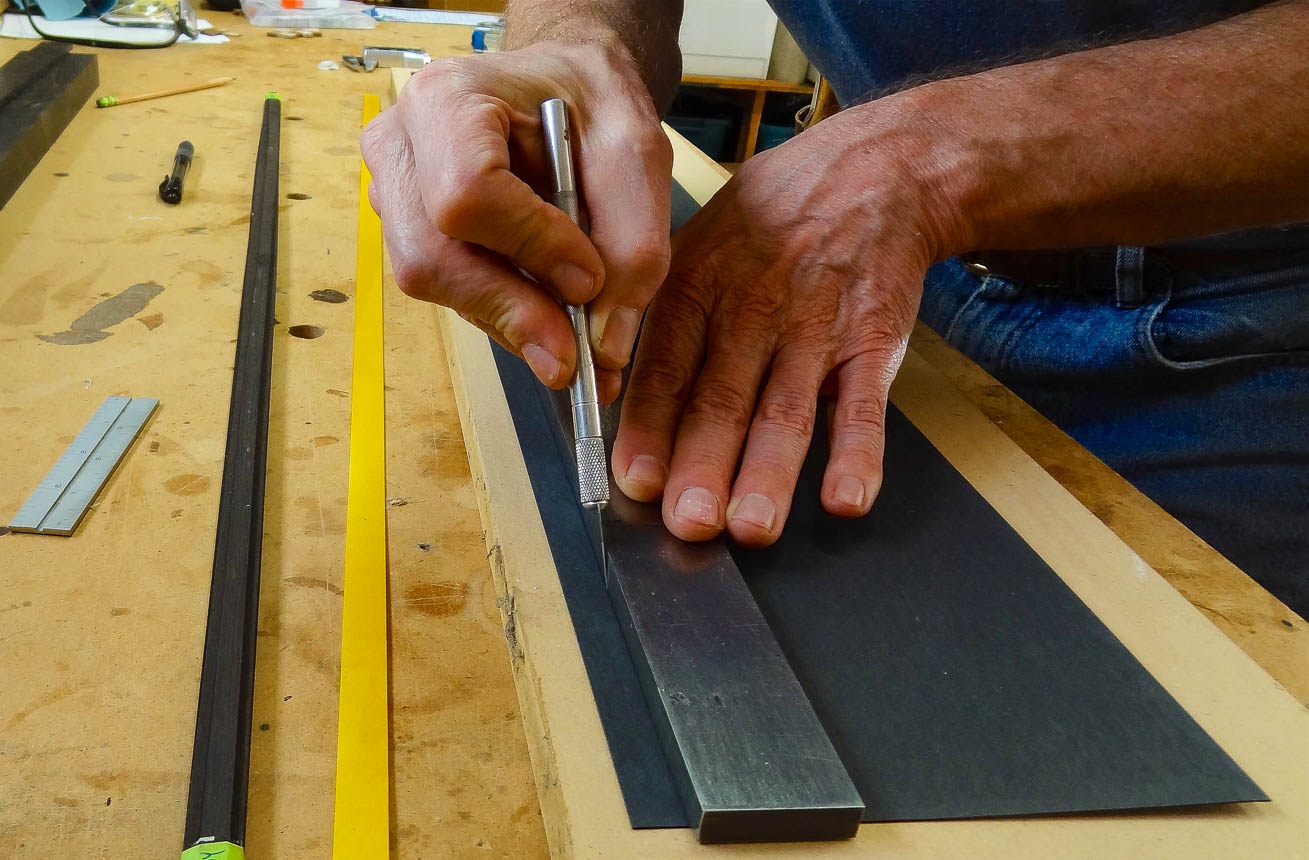
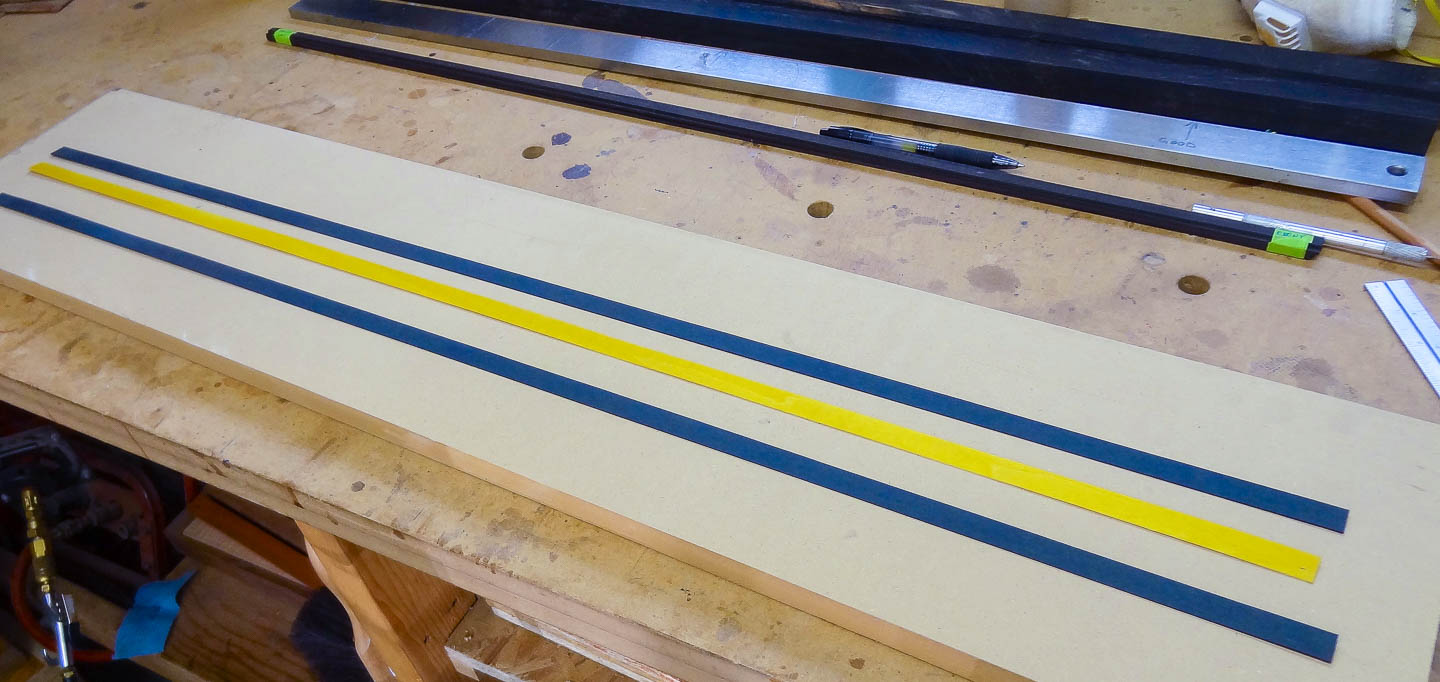
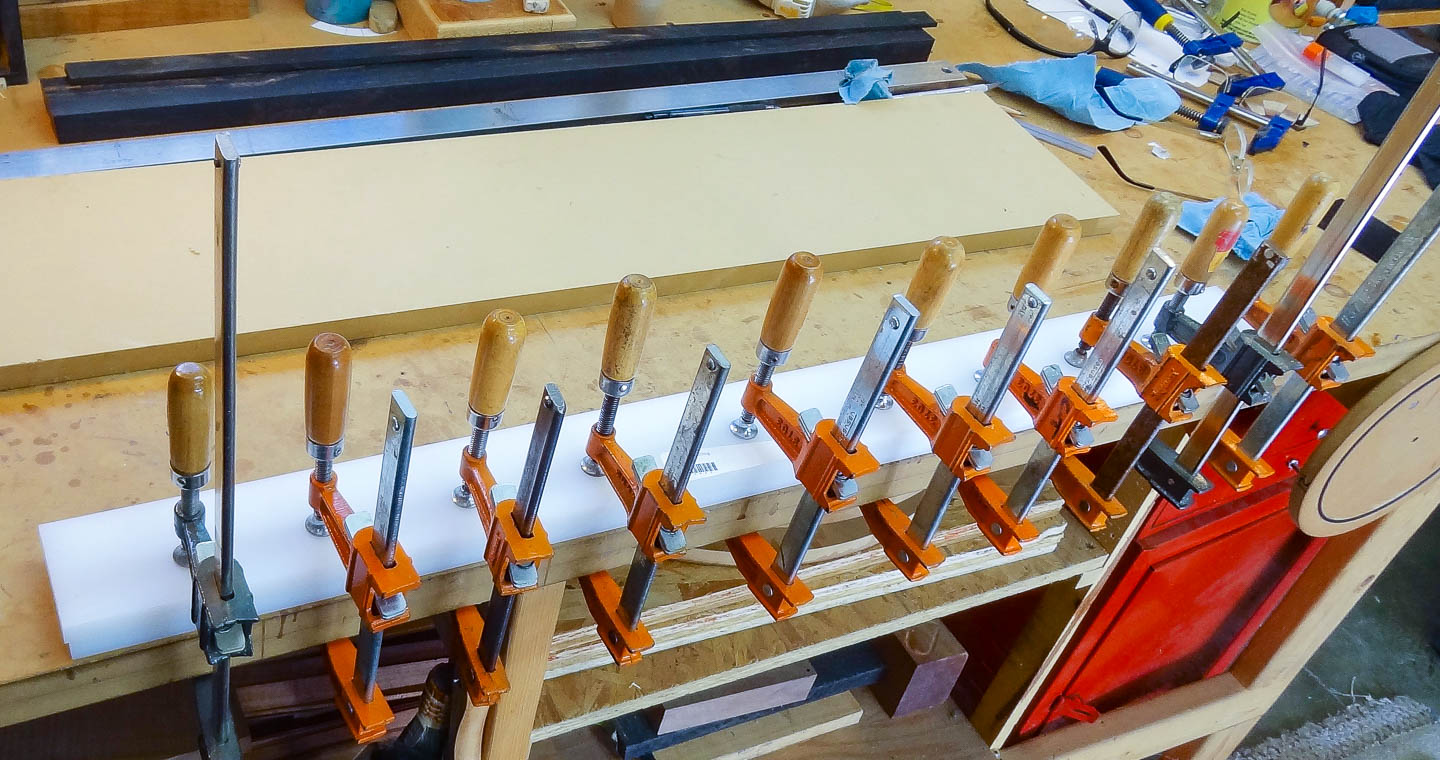
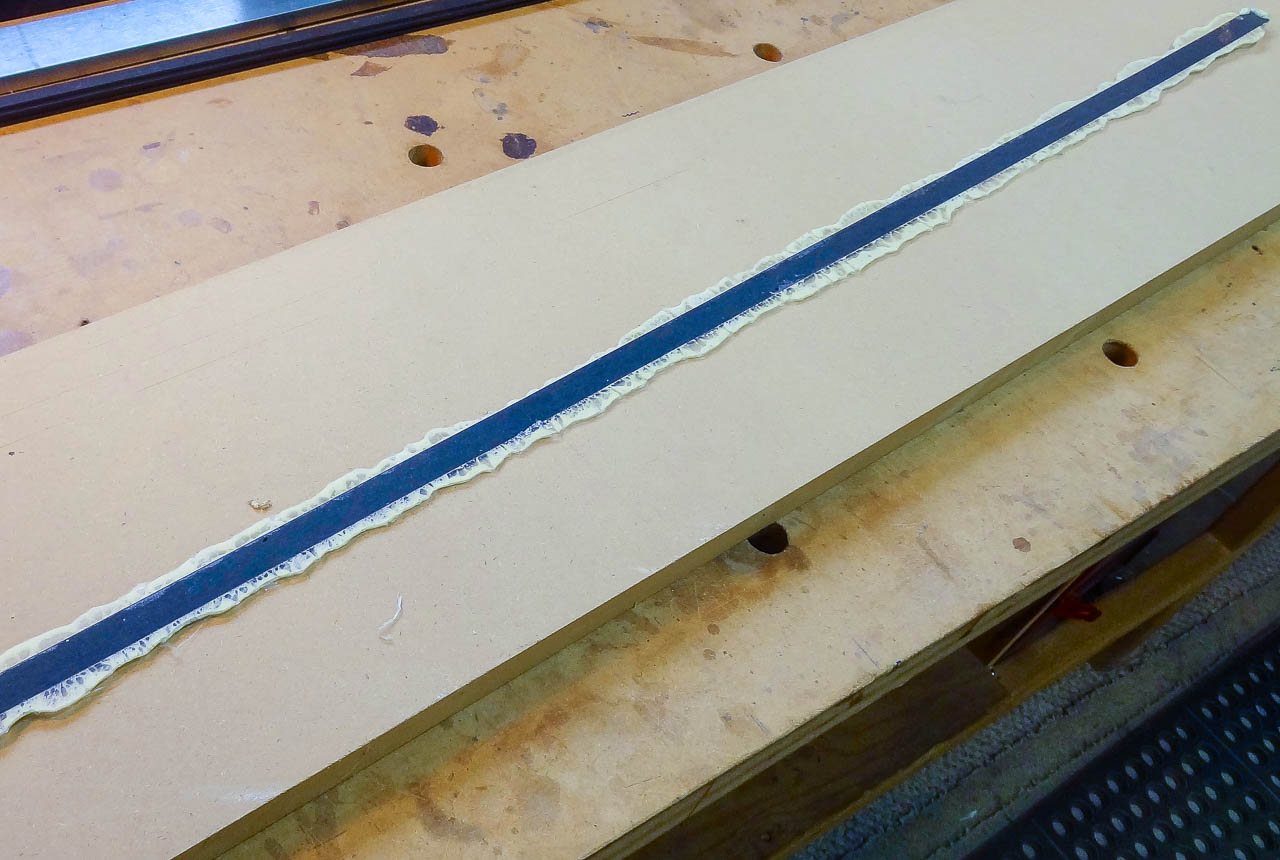
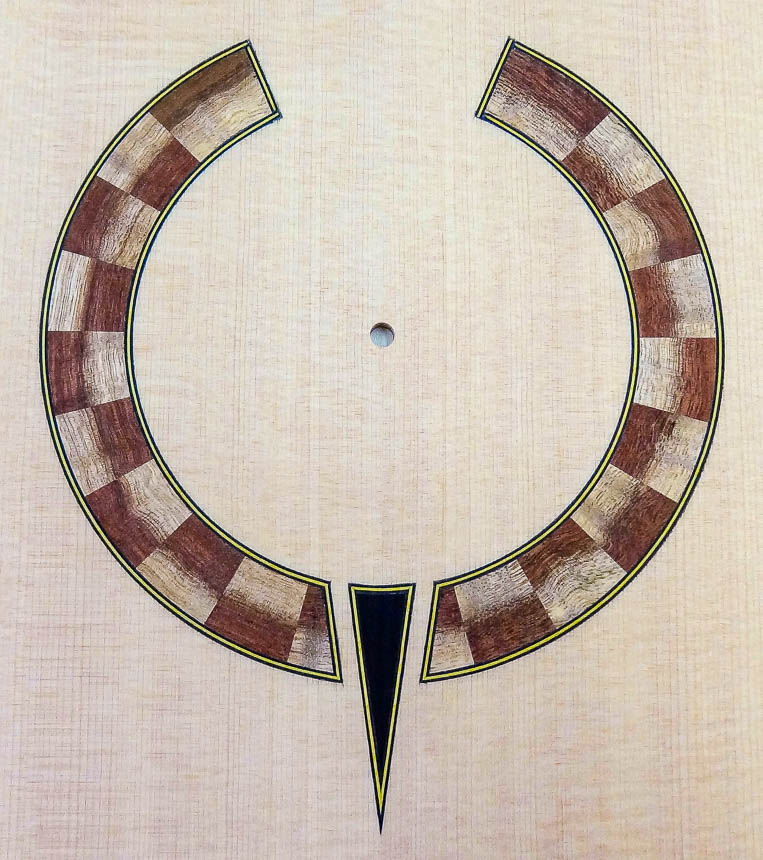
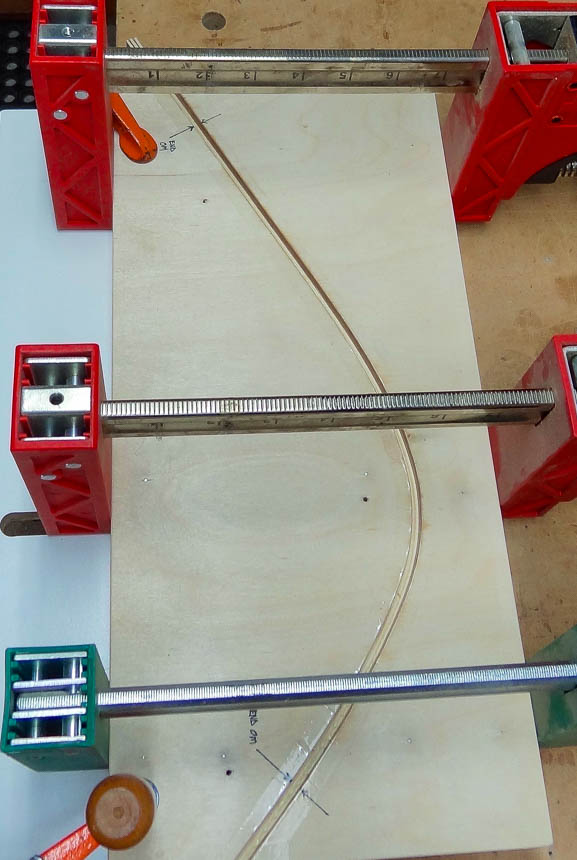
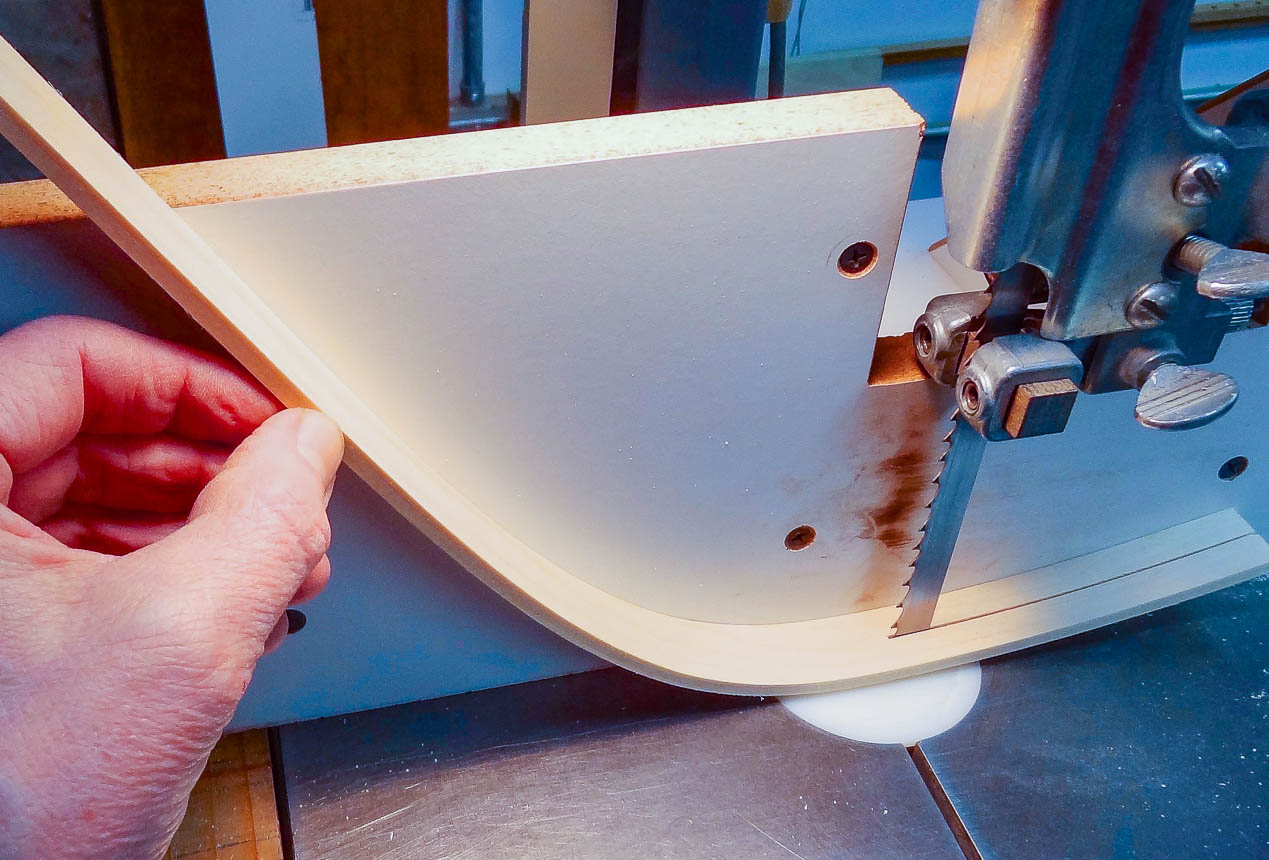
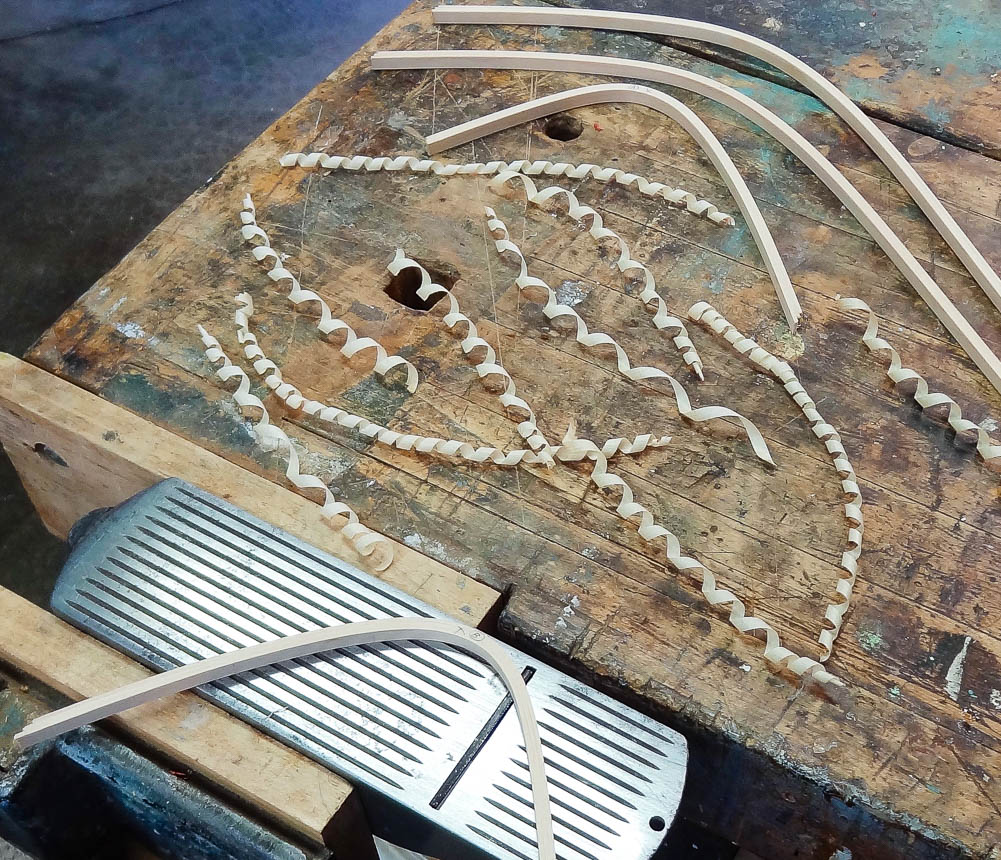
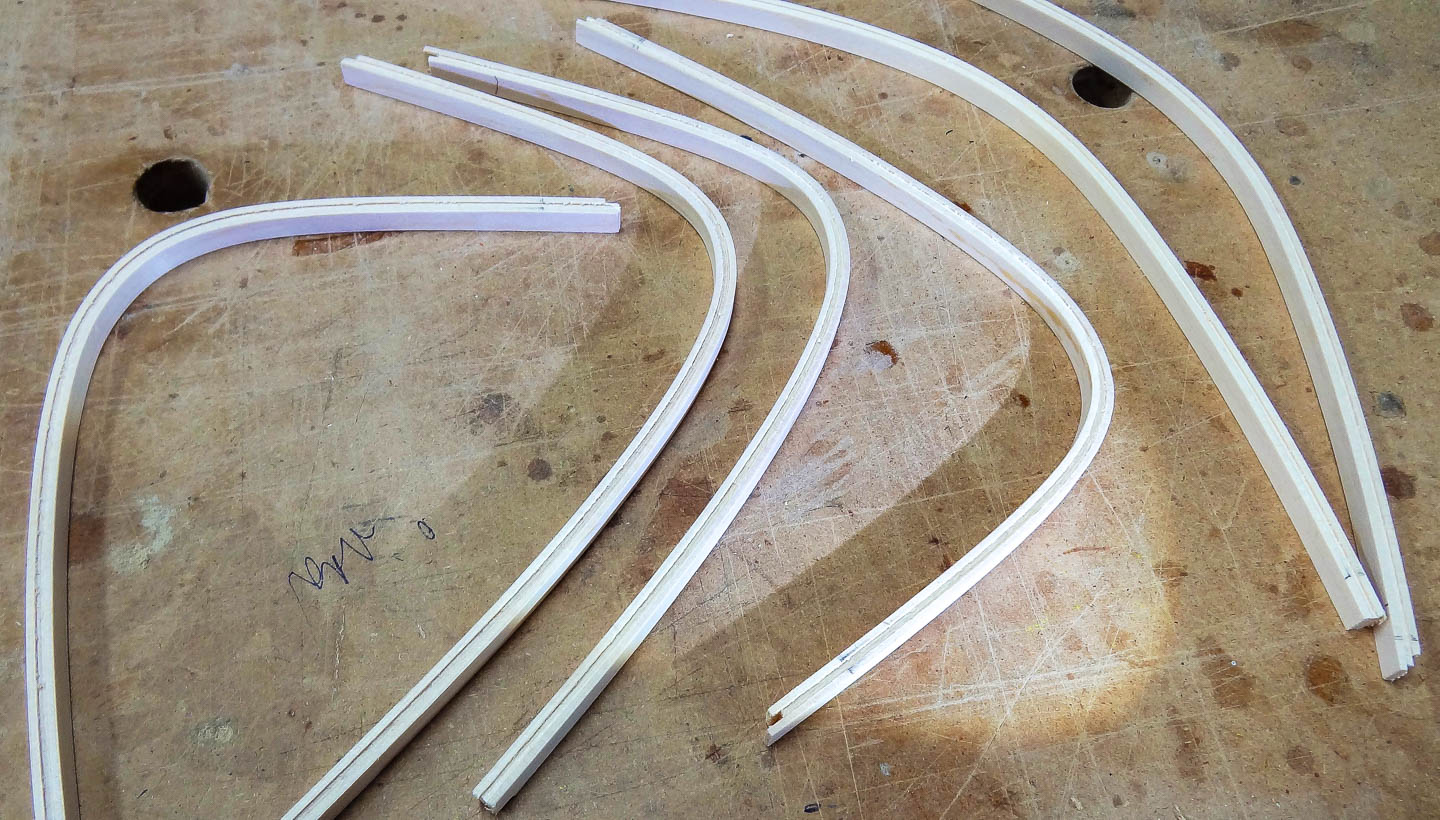
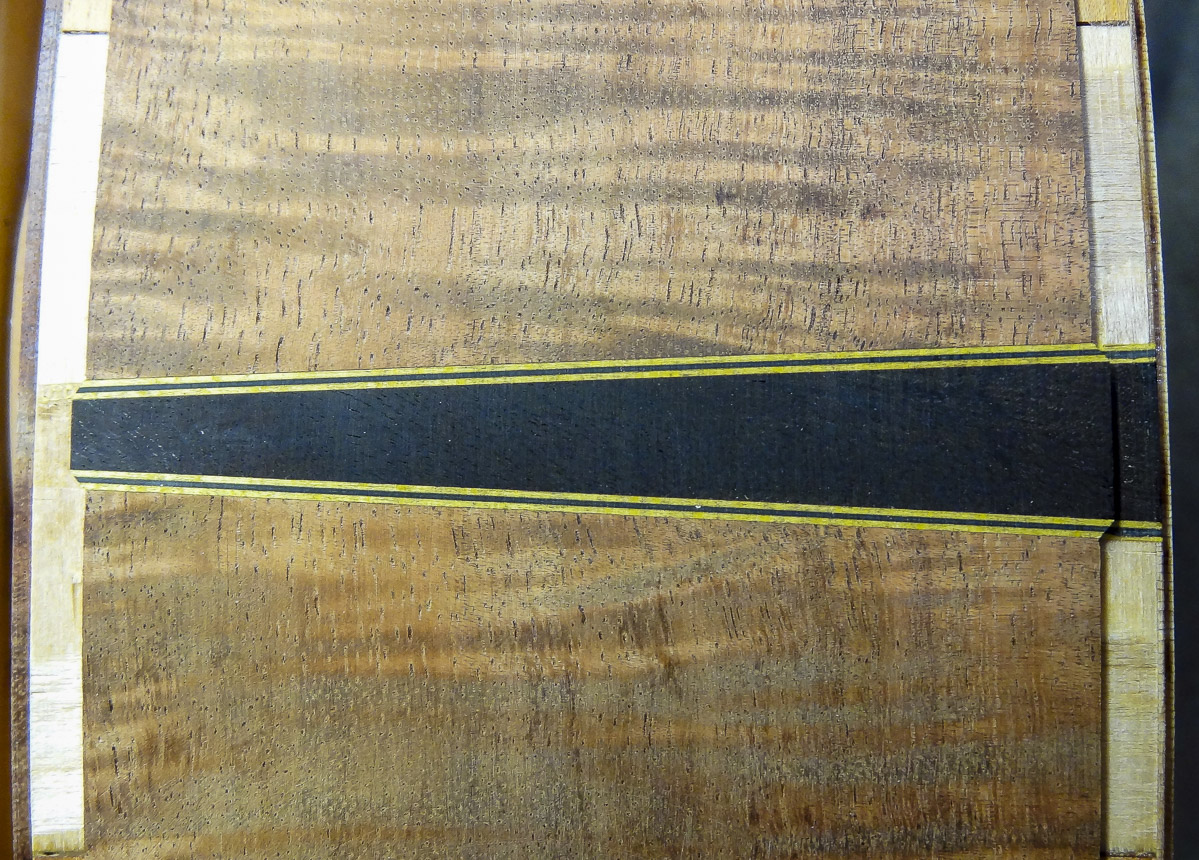
This instrument will have Master Grade purfling of black and yellow pin-stripe lines. It’s not commercially available, so it has to be made. I take sheets of black and yellow veneer and cut off enough for what I need; in this case it will be just enough to make the black/yellow/black lines to surround the rosette. I glue them together with polyurethane glue between two thick pieces of UHWM plastic so the glue won’t stick. Once dry, the band saw cuts the individual strips to width.
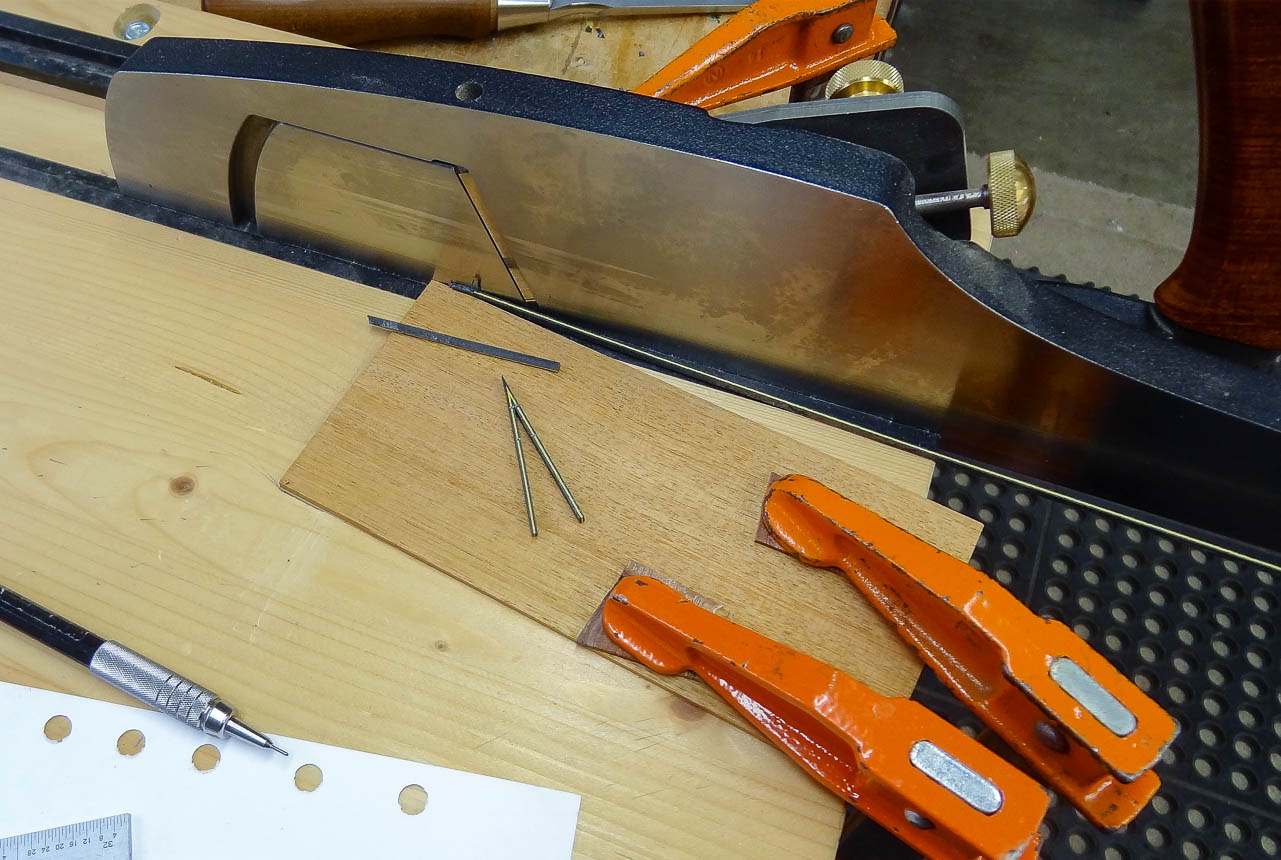
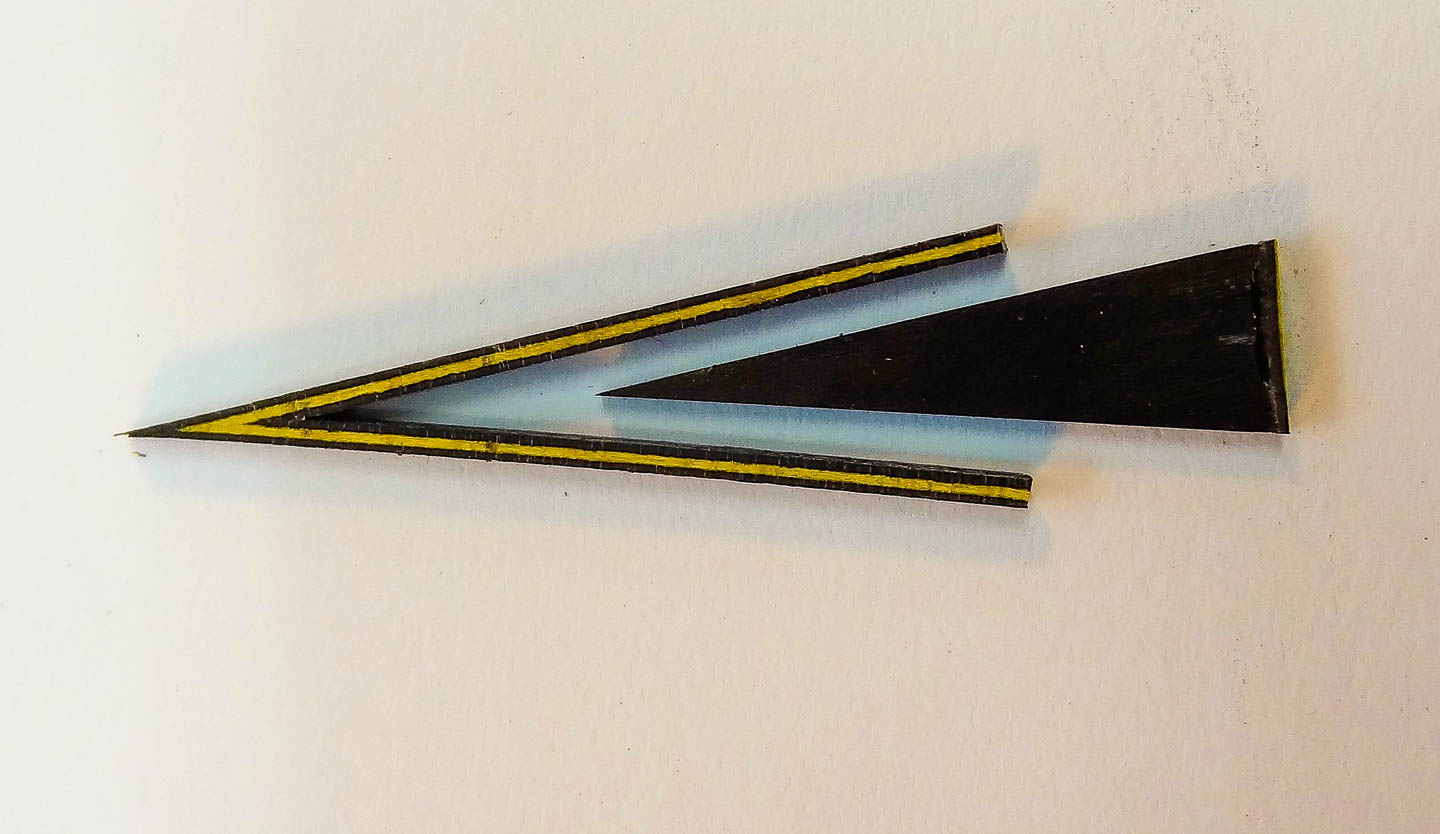
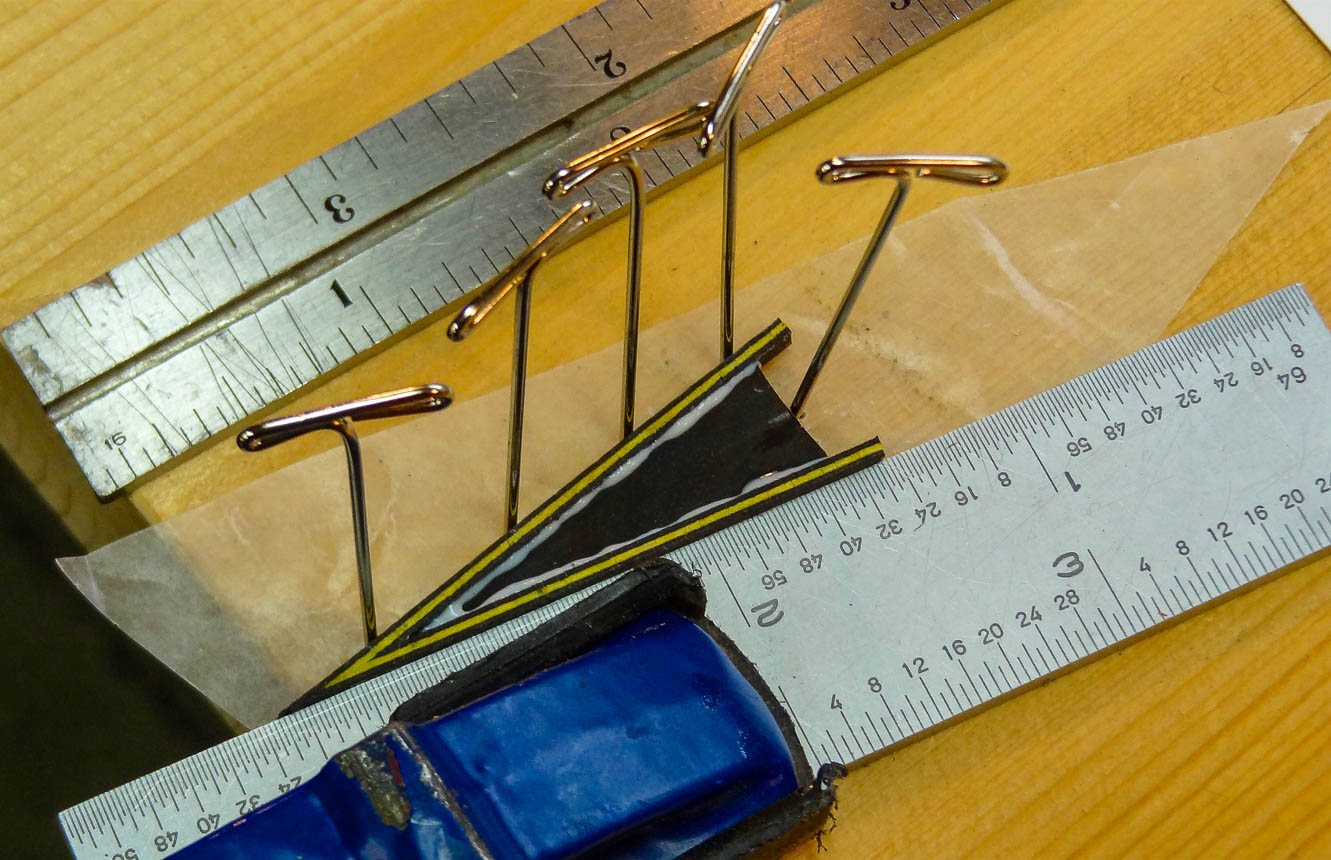
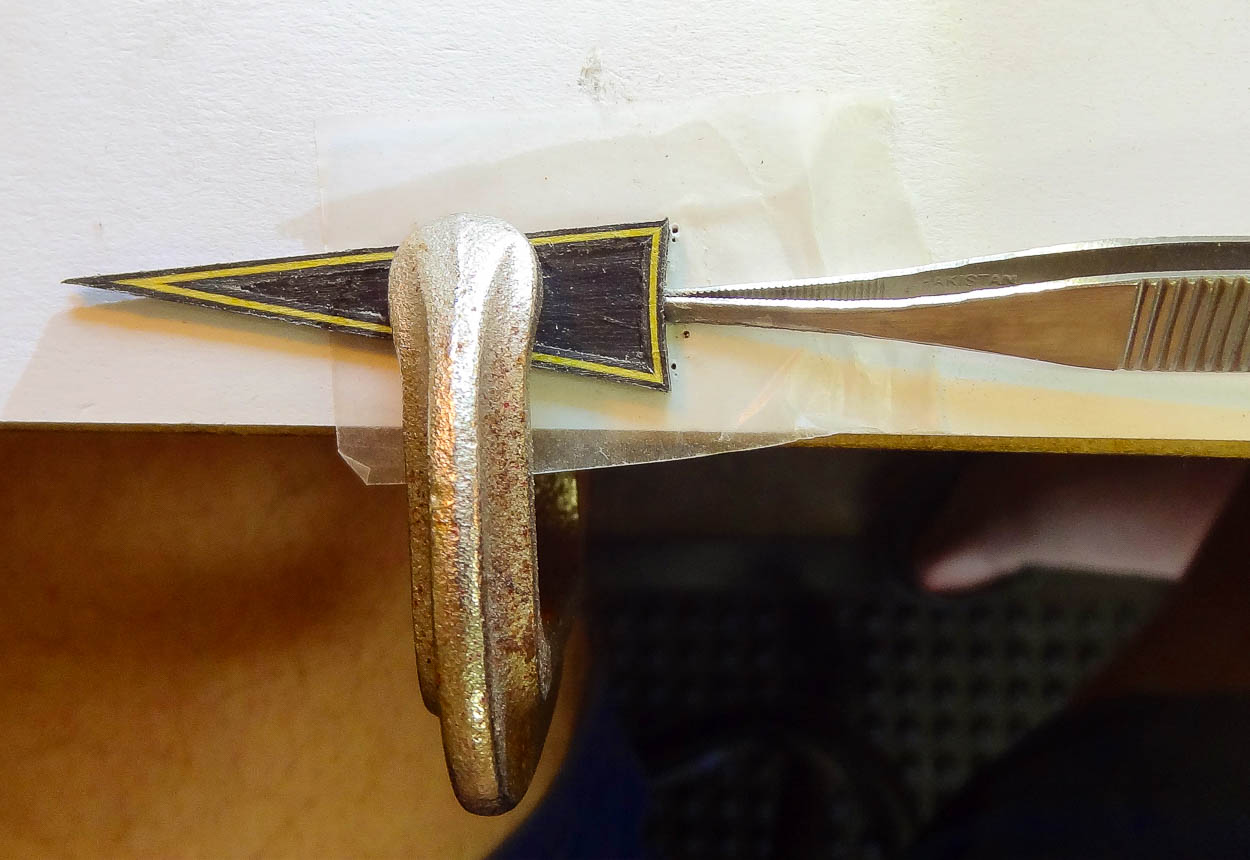
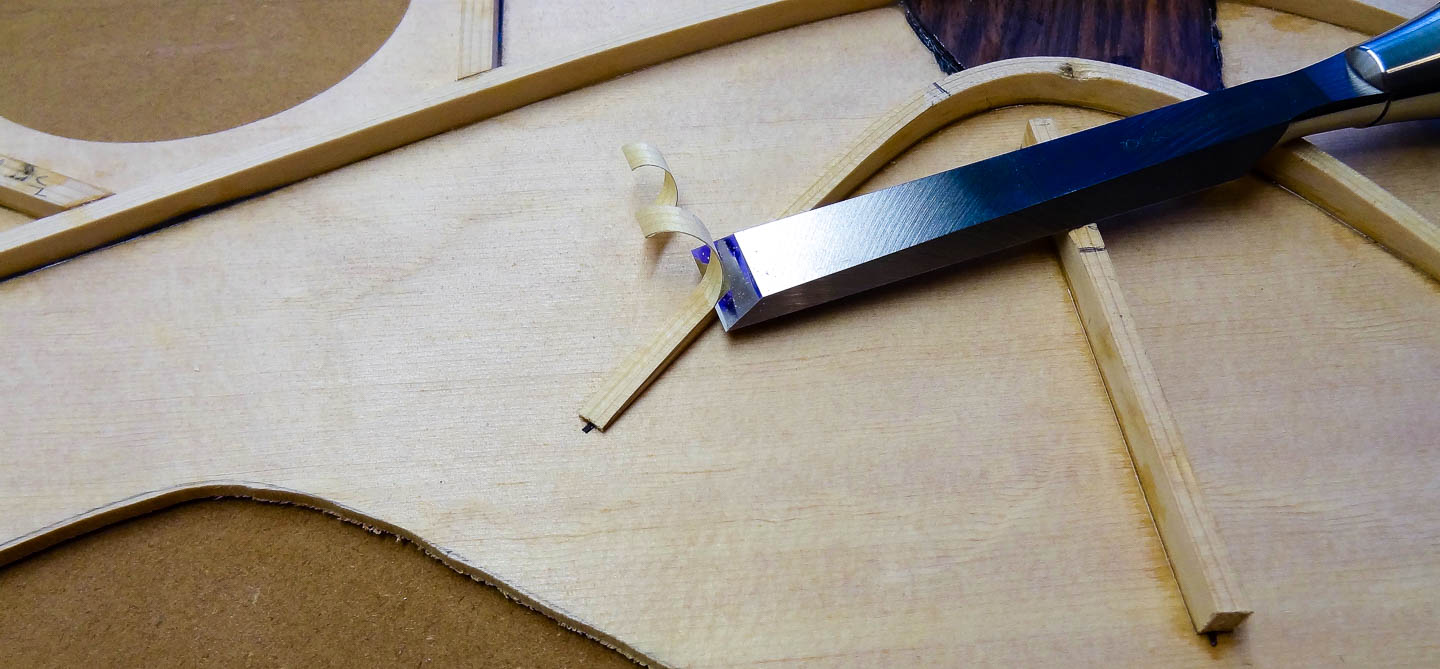
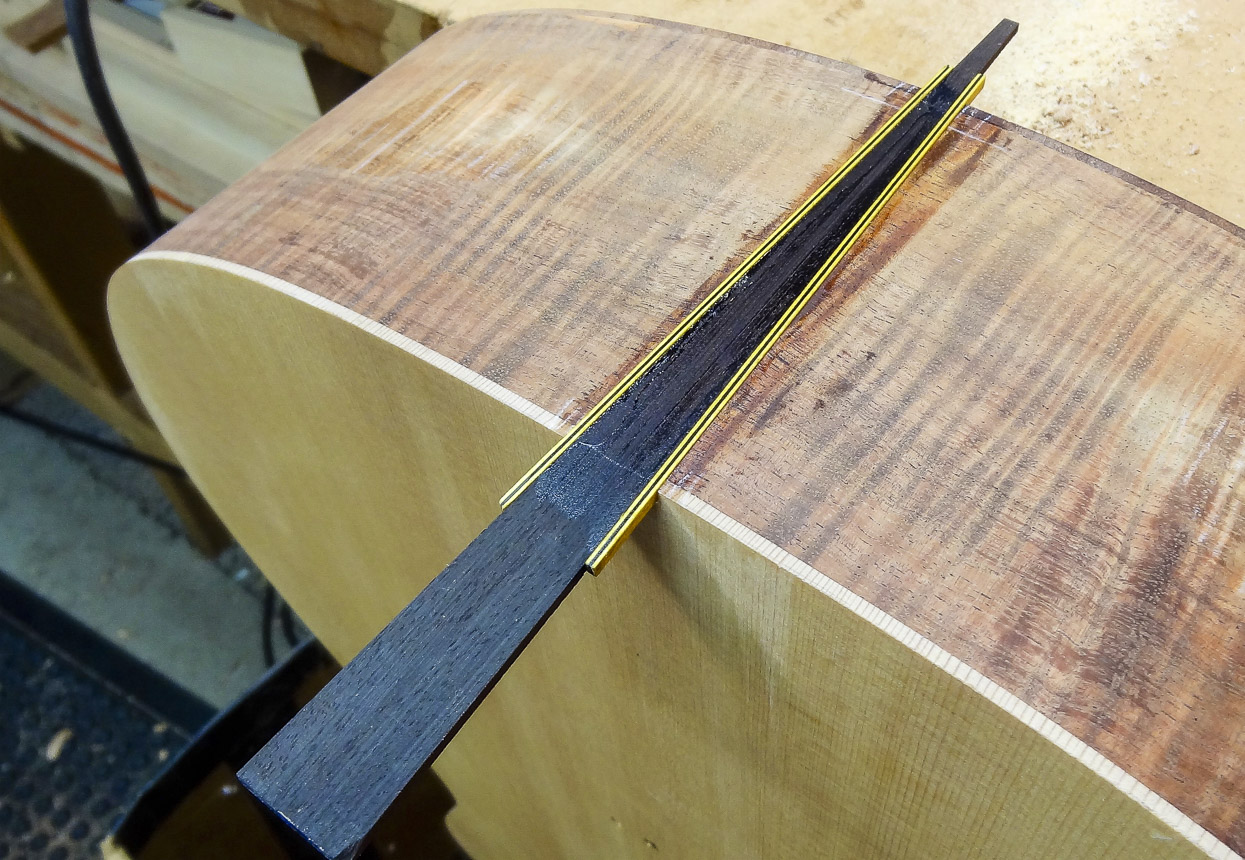
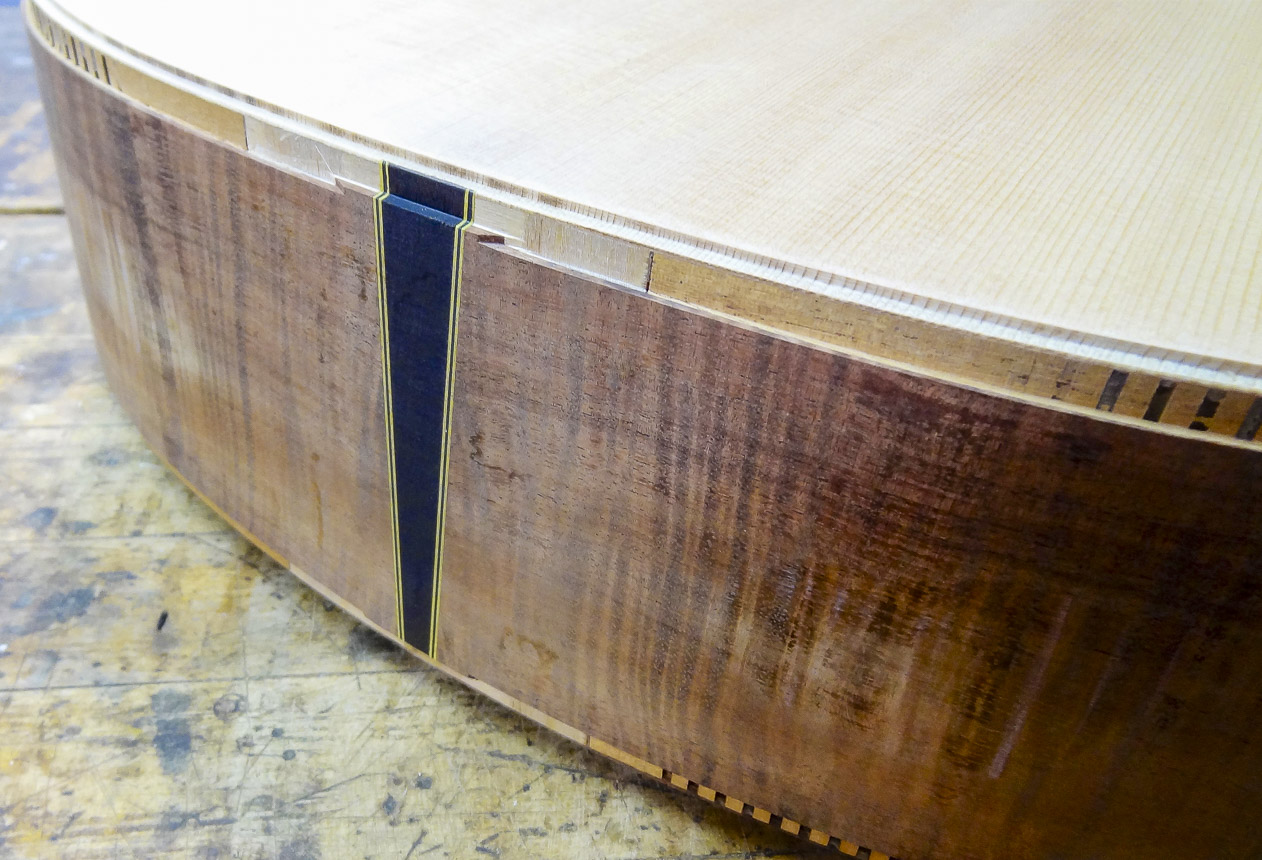
The headplate on the head stock has a triangular piece of jet black ebony as a design element, so I want to include a similar element on the rosette. Like the rosette, it will be surrounded by purfling lines. I cut a piece of ebony to the proper thickness and use a similar method as was done for individual segments to trim it to shape. The very acute angle and sharp point presents a challenge for making the purfling miter, but the shooting-board makes quick work of it. I set up a temporary “fence” at one half the required angle, and the hand plane trims the purfling to the correct angle. The purfling miters at the short end of the triangle are done with zen-like patience and a sharp chisel.
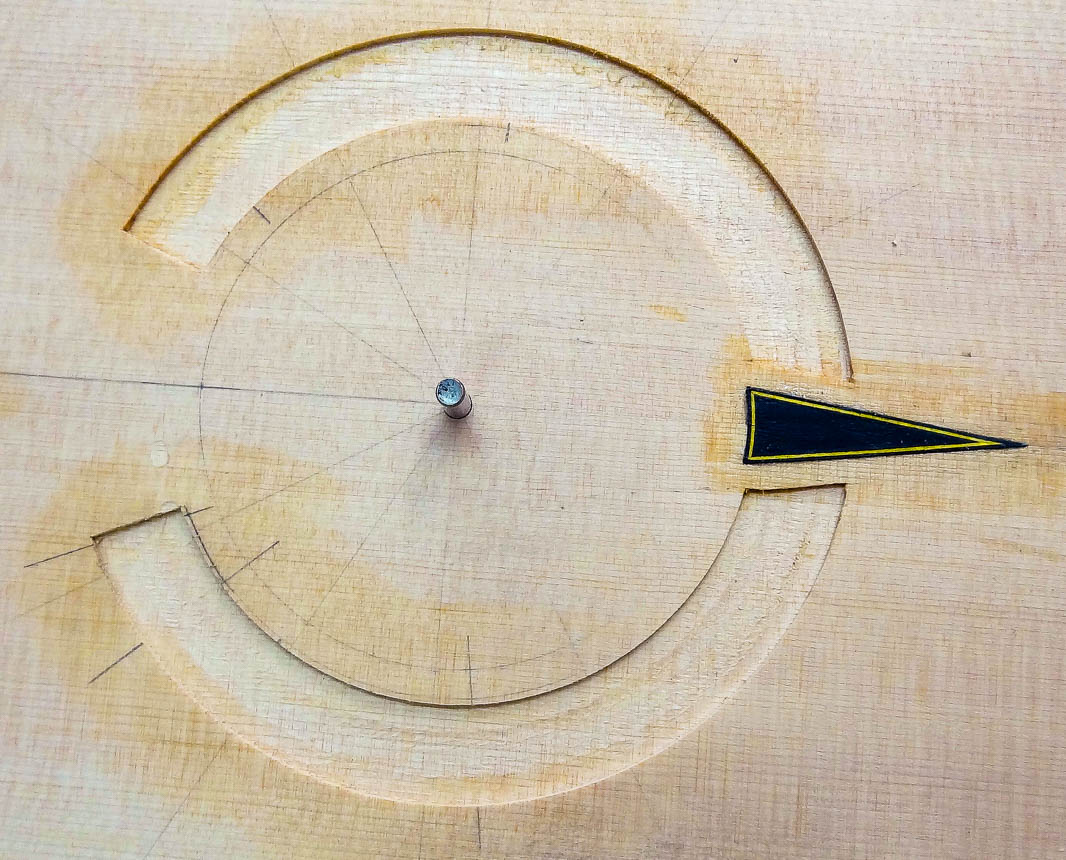
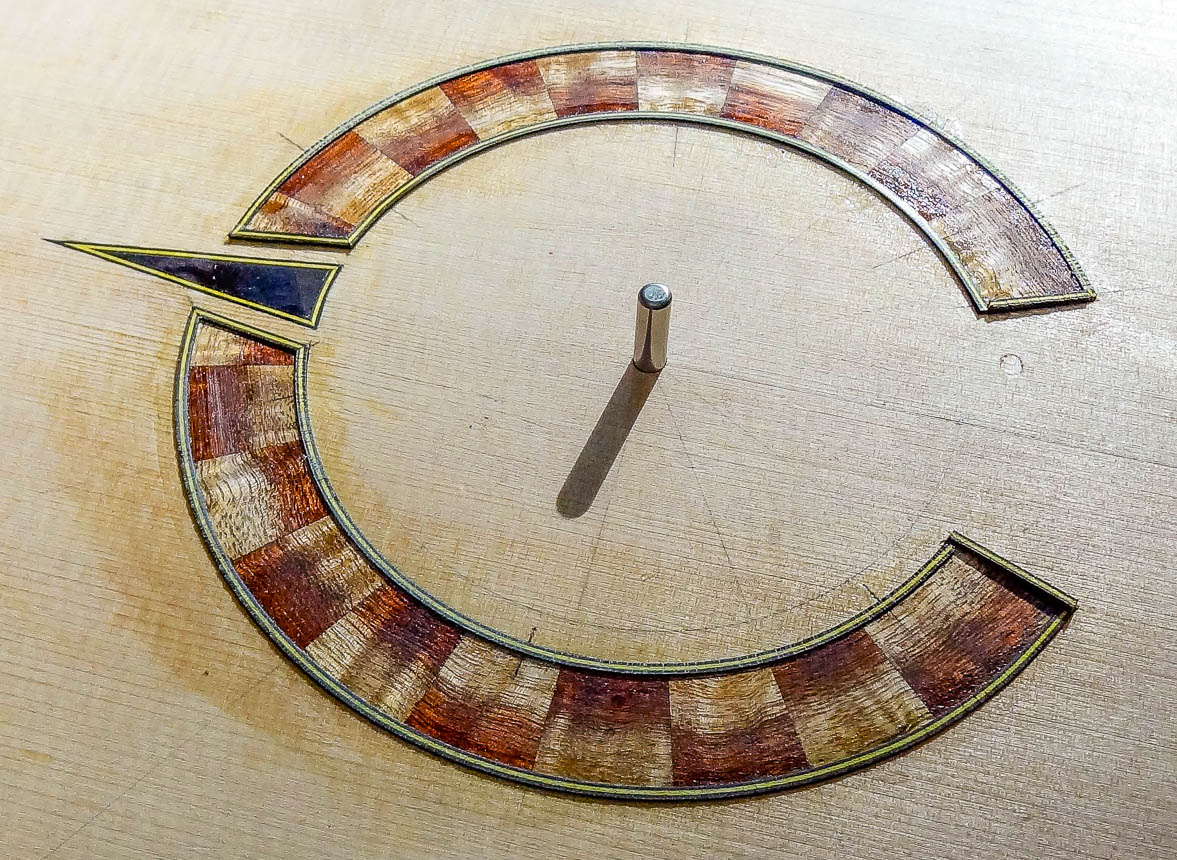
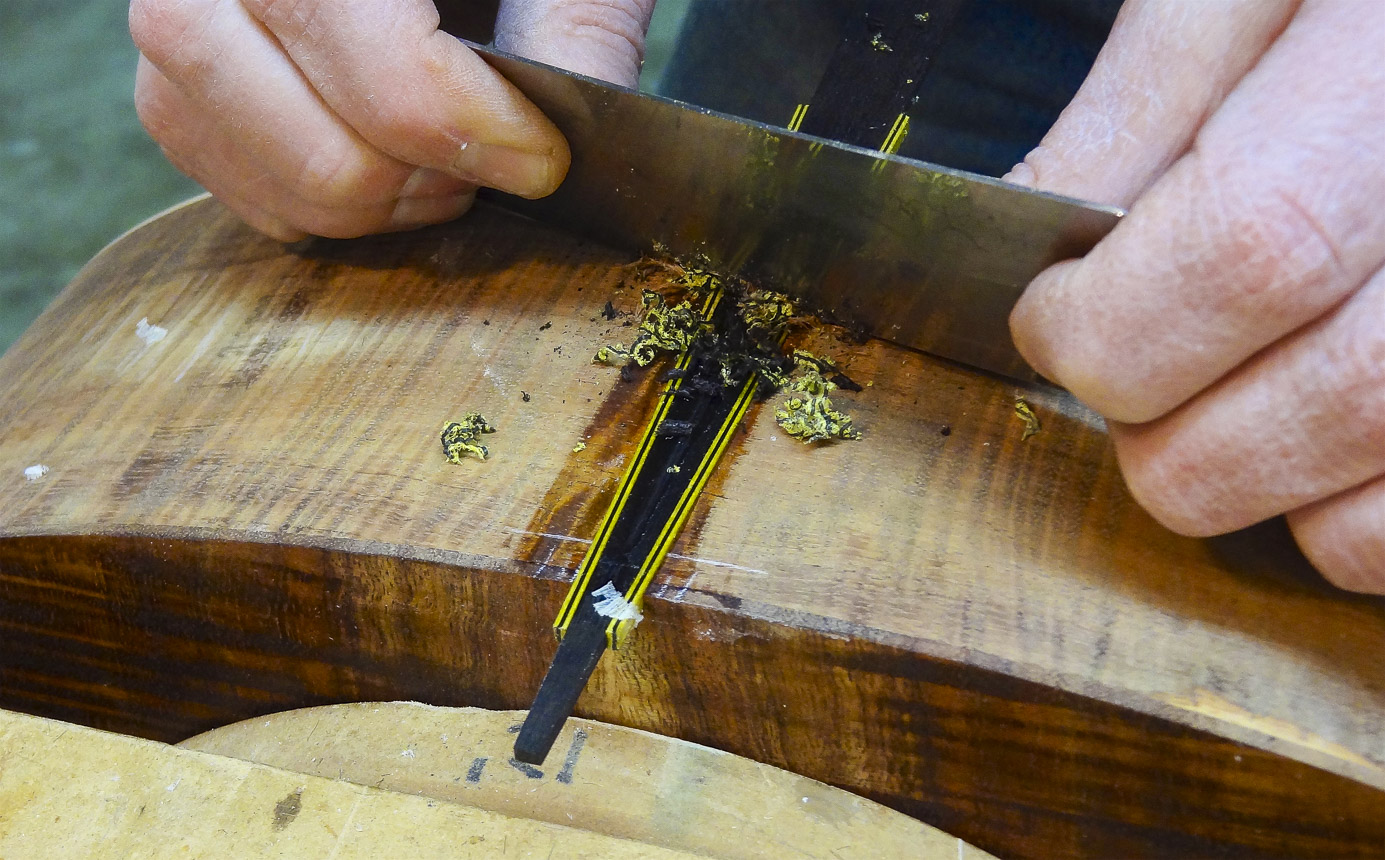
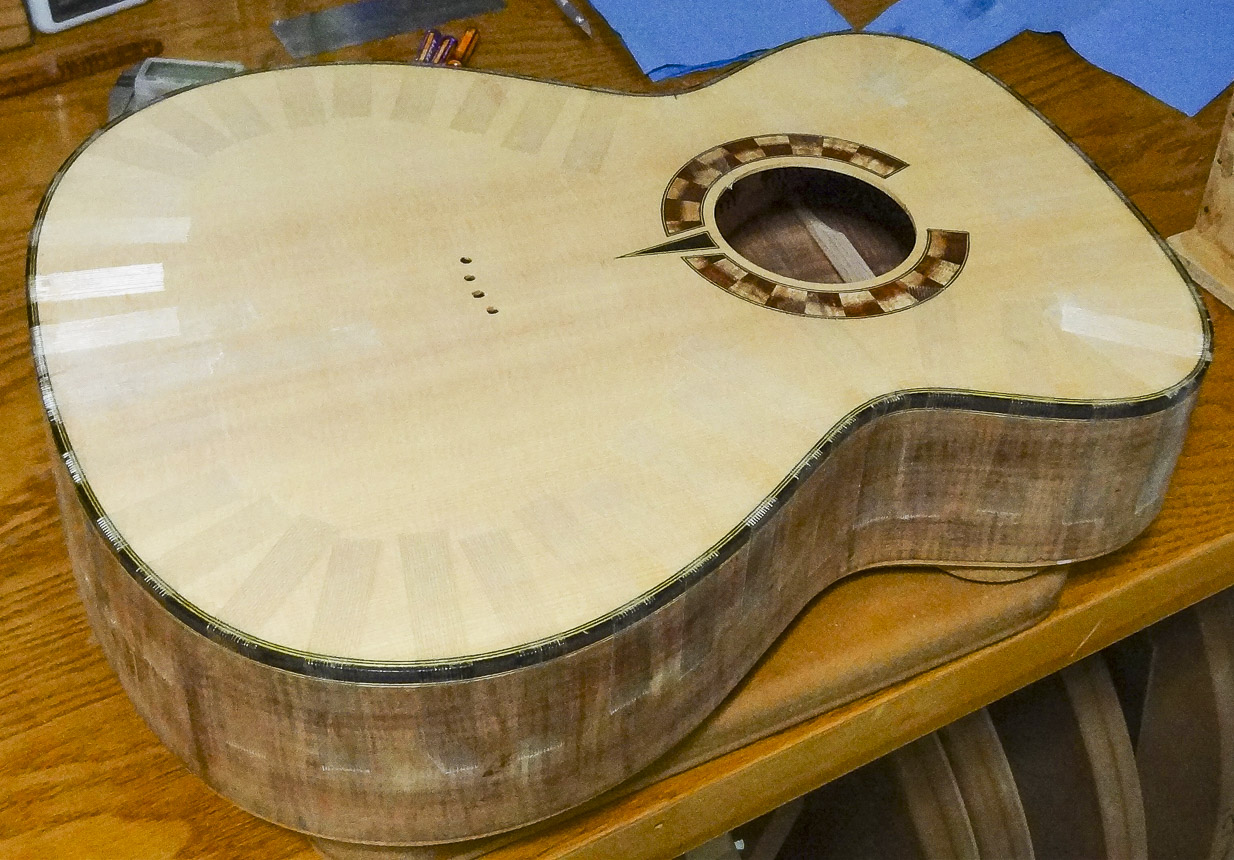
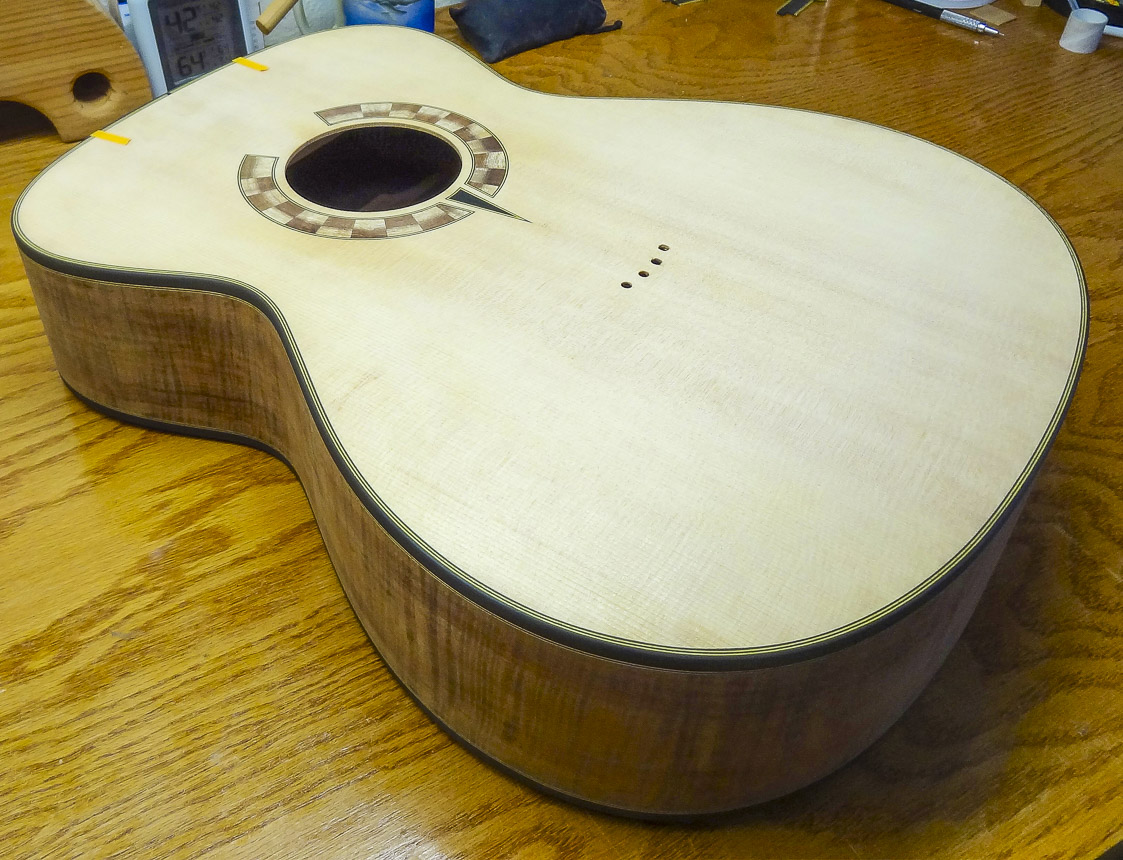
I use the Dremel and swivel base to cut the inlay recesses in the spruce top. I want the rosette to fit very tightly because once it’s inlayed, I come back with the router and a purfling sized bit to span the margin between the koa and spruce to make the channel for the purfling. For the triangle, I clear out as much as I can with the Dremel, and finish it by hand with chisels. I glue the triangle in first and flush it level with the top. After gluing in the rosette, I rout the purfling channels. I must take care to stop short of the corners and finish them by hand. The channels on the ends also need to be done by hand. Again, much painstaking effort is put into fitting the purfling so the corner miters fit perfectly. The area at the top of the rosette need not look too great, as it will be covered by the fingerboard. The final step is to send the top panel through the thickness sander to level the rosette with the top.
BRACING THE TOP
Two of the most important construction details that lead to a great-sounding guitar are the final thickness of the top plate, and how well the top is braced. Bracing is required to help distribute vibrations and to account for the tremendous tension of the strings. It’s a balancing act, walking the fine line between being over-built—which leads to an unresponsive and dead sounding guitar, and under-built—which leads to guitar that will not bear the strings tension over time and is apt to sound a bit flabby. That’s a technical term ; ).
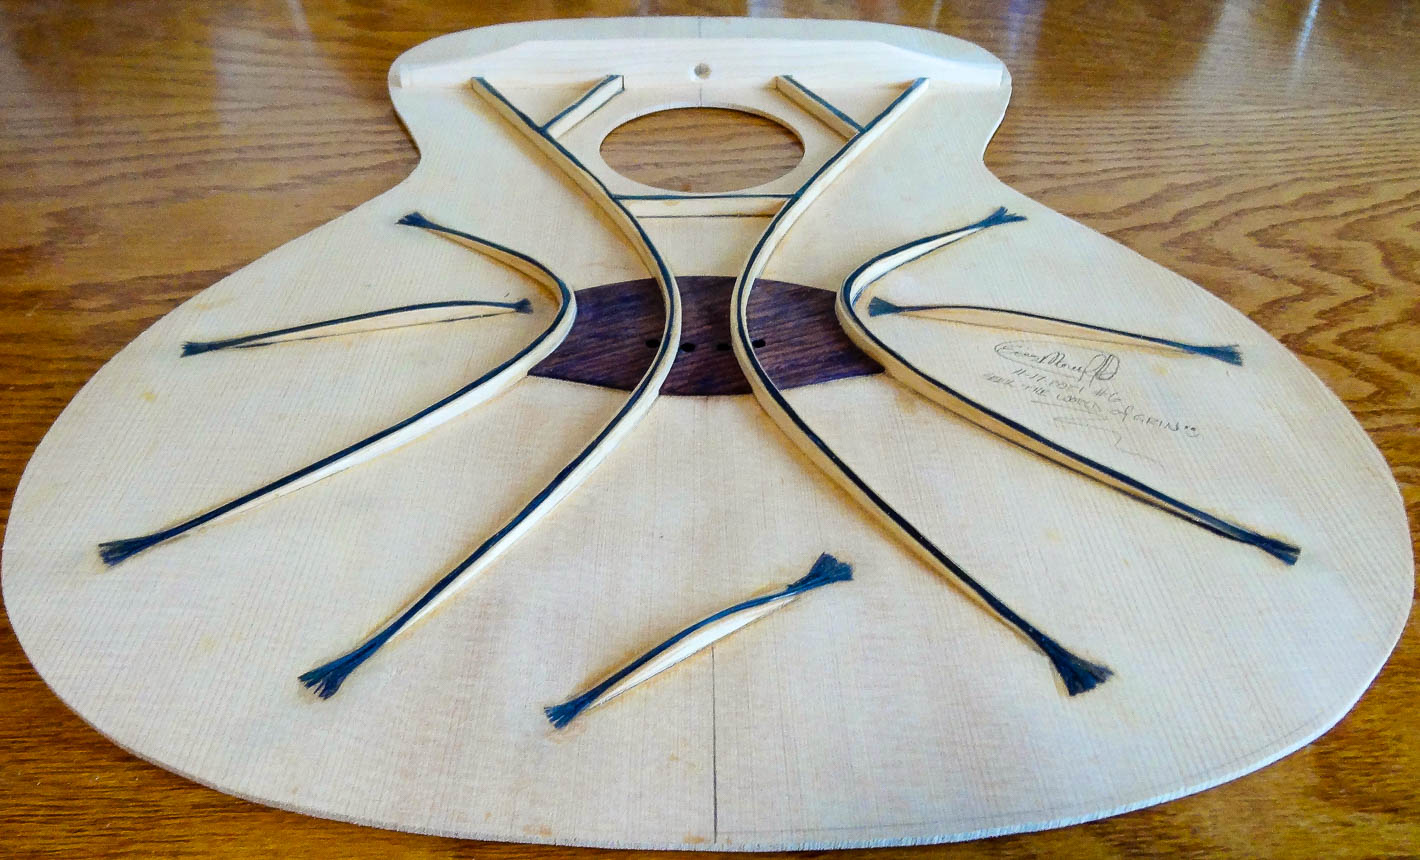
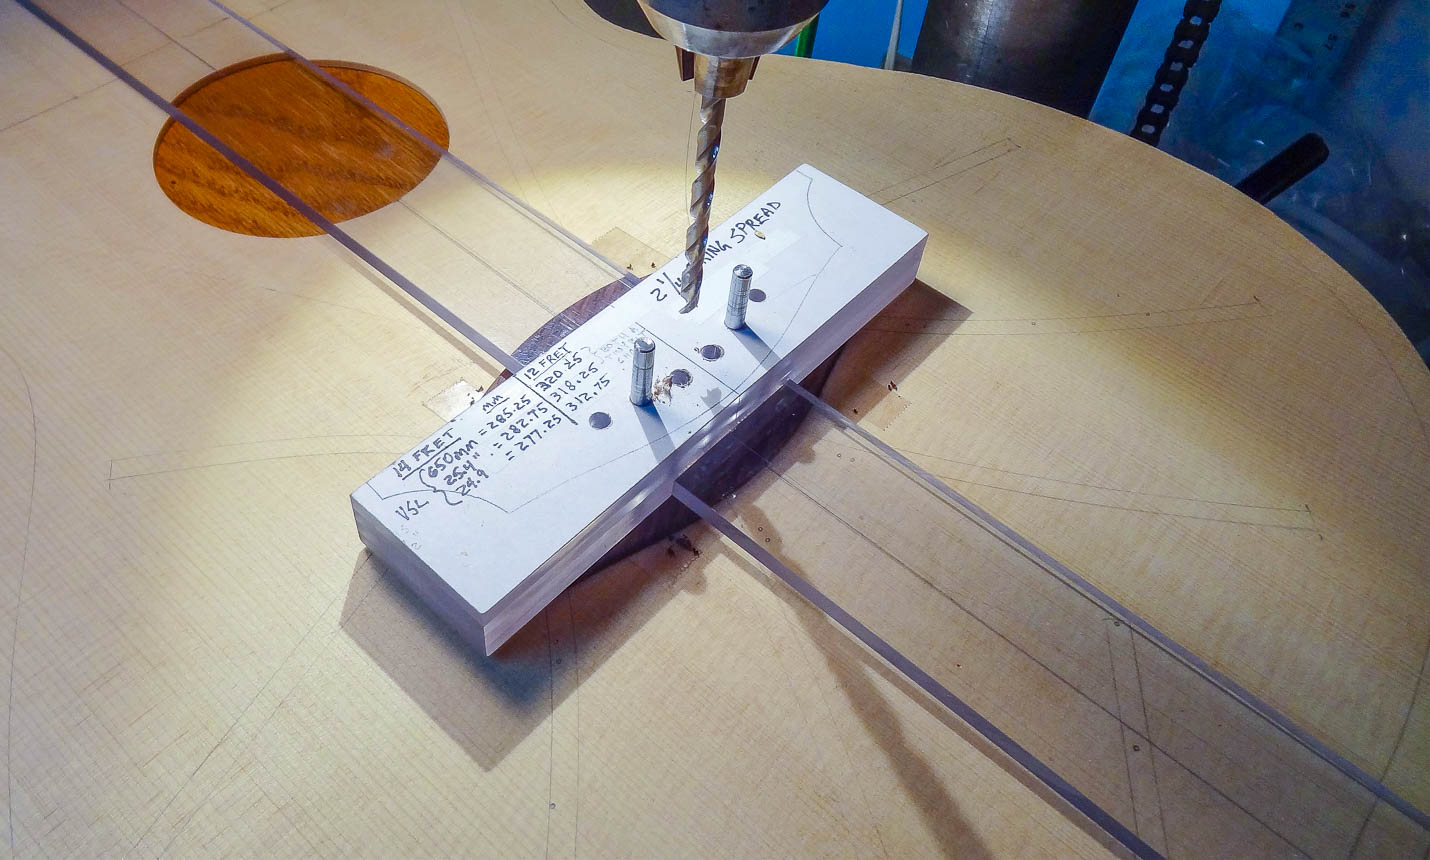
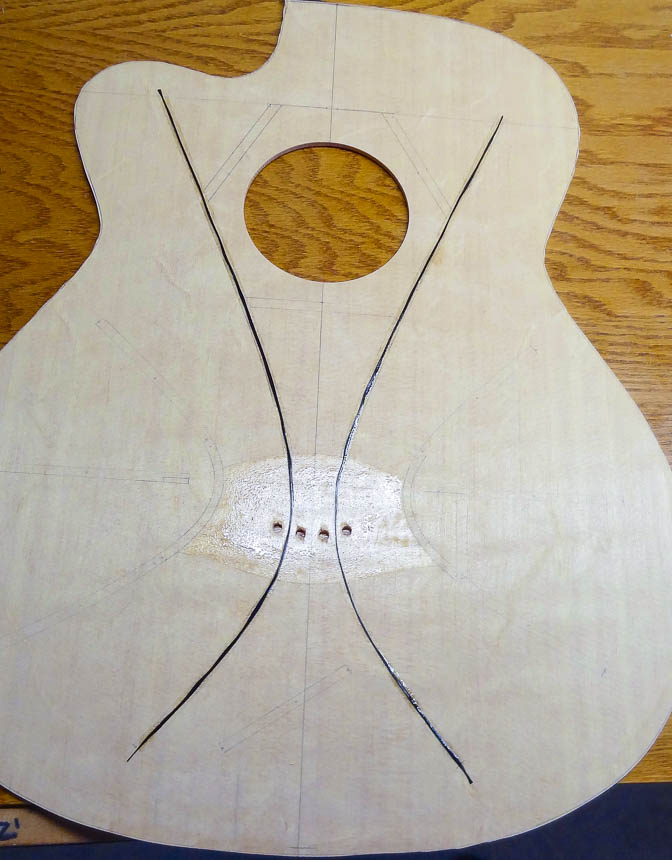
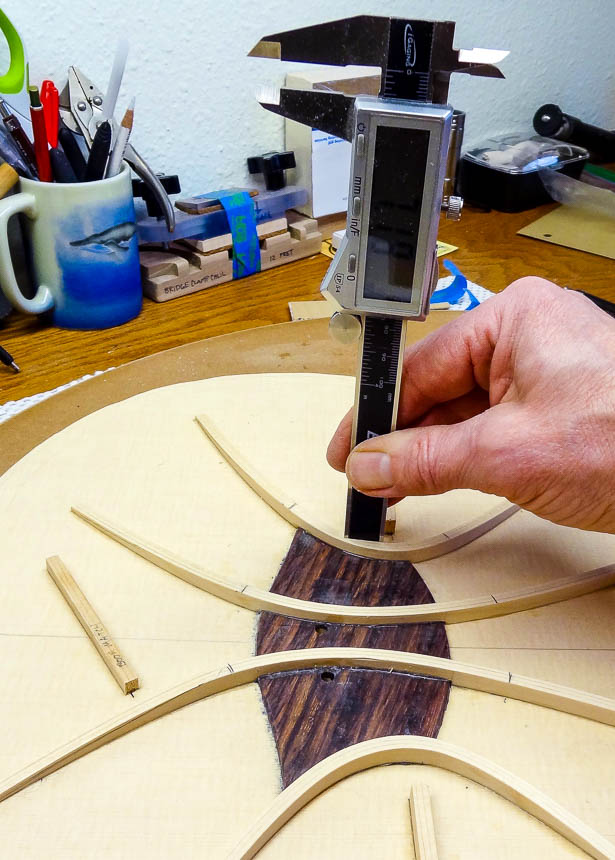
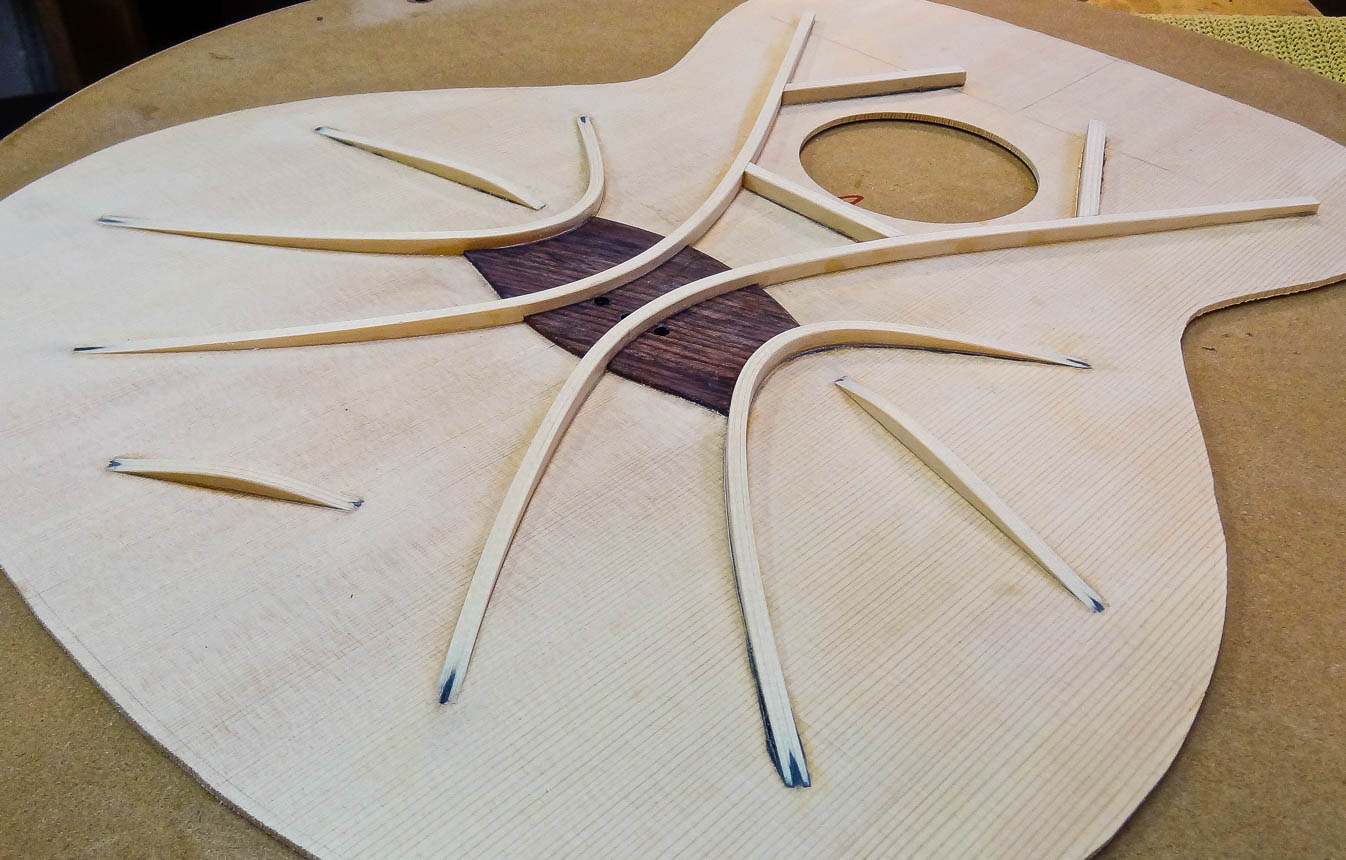
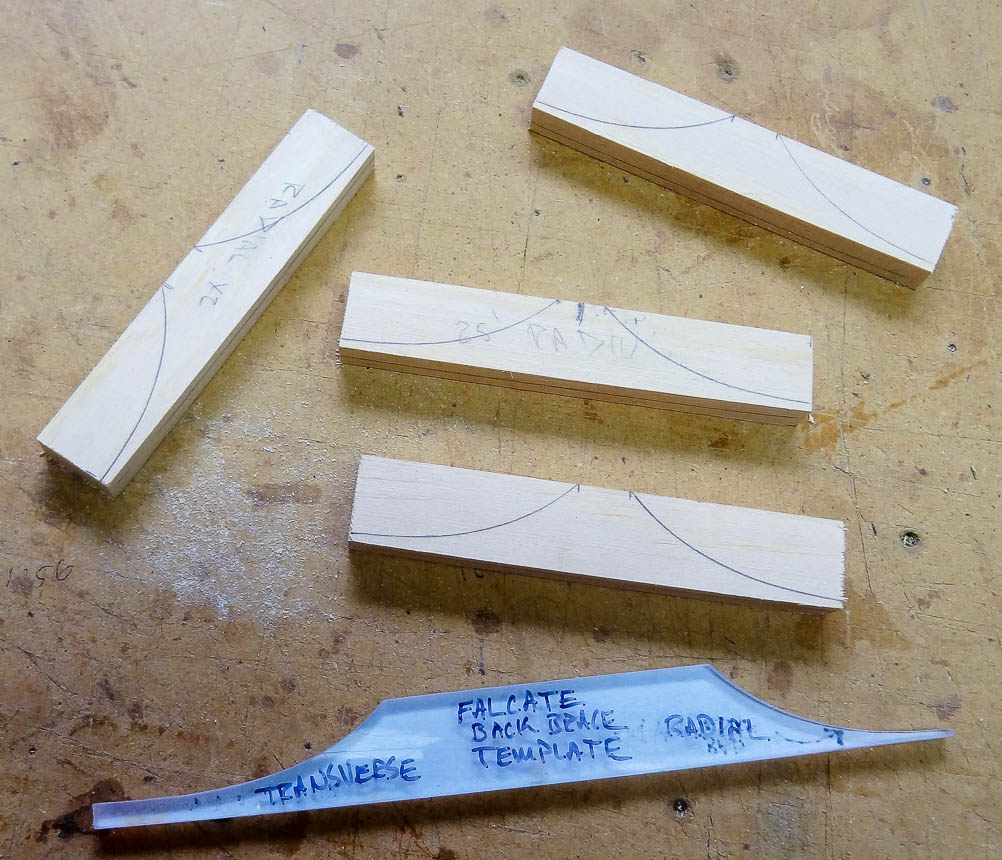
My bracing pattern is called Falcate, which means sickle shaped, or curved braces. This design lends itself to delivering a guitar with high volume, exceptional sensitivity and an extended frequency response which produces a high density of resonant peaks; all of which lead to a great sounding guitar. The design is a bit unusual, however, in that the two primary braces run between bridge pin holes. This never happens in other types of bracing patterns, and requires the bridge to be located before the top is even glued to the rim. Usually, locating the bridge is one of the very last steps accomplished before putting the finish on a completed guitar. Because of this, very tight construction tolerances need to be adhered to when laying out the geometry, gluing the top to the rim, and fitting the neck to the body. These tolerances are in the order of small fractions of a millimeter, but are easily attainable with a little bit of care and attention.
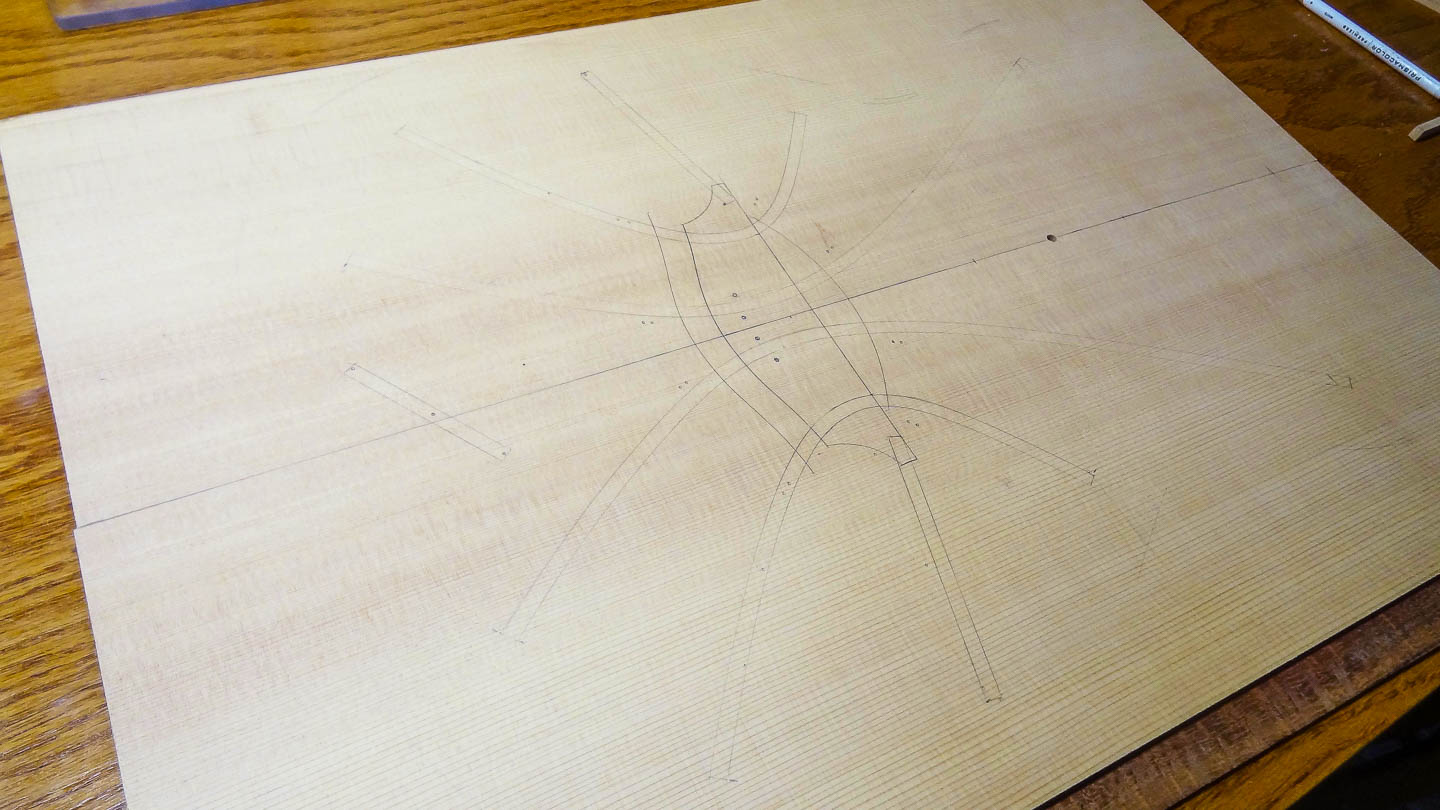
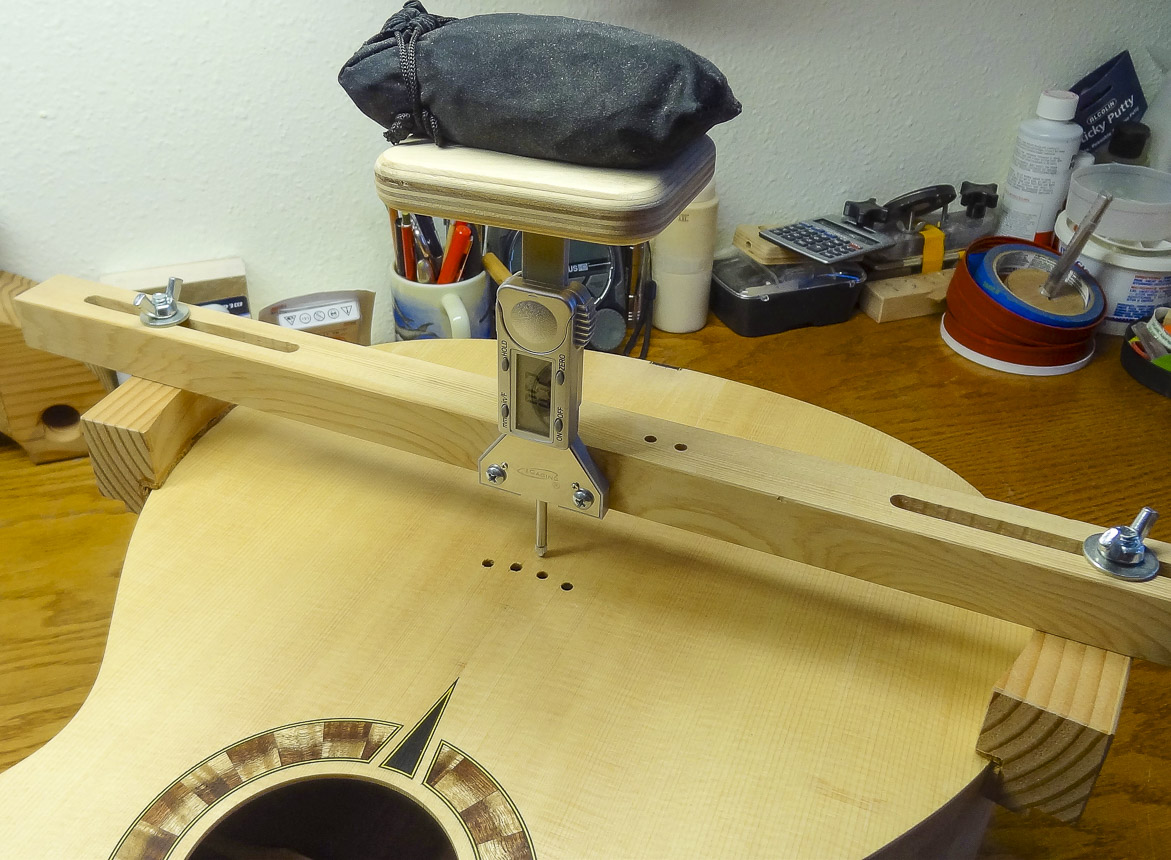
The top is close to its final thickness and has the rosette completed. The locations of the bridge, bridge plate and bracing pattern are laid out on the inside and the sound hole is cut out. I use the Bridge Pin Locating Jig for the scale length of this guitar to drill four of the six bridge pin holes. Here is where the high degree of accuracy begins.
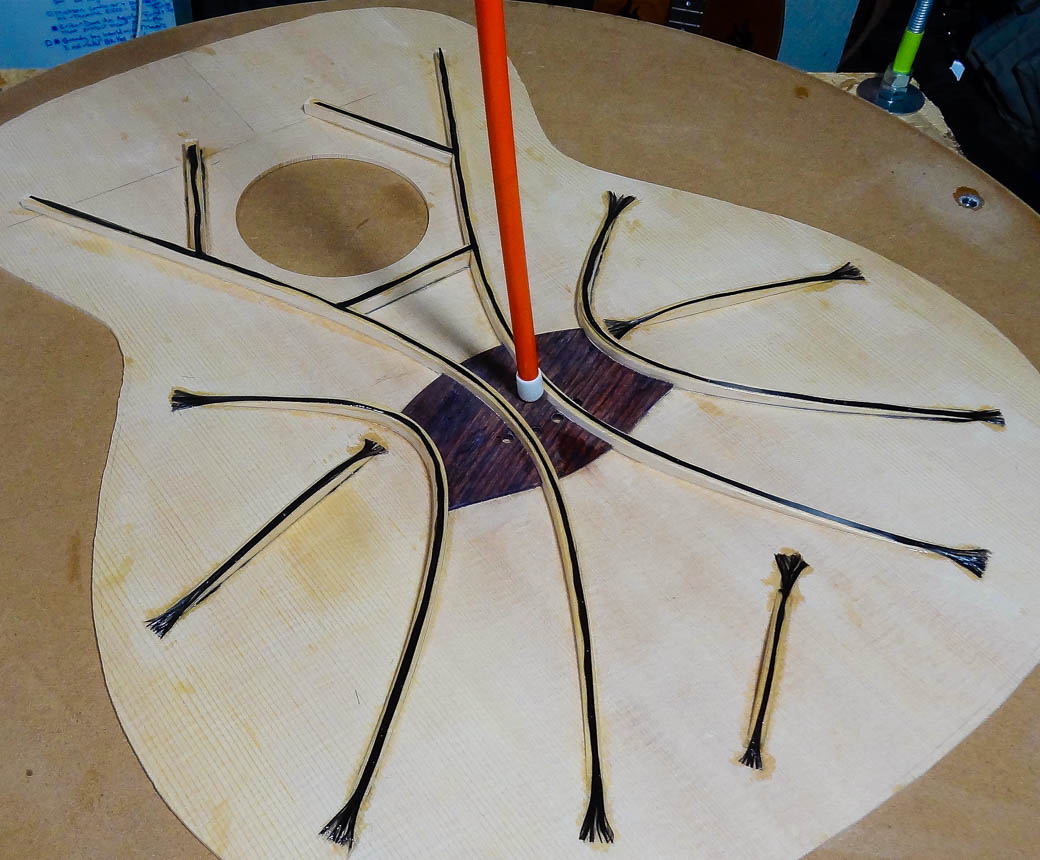
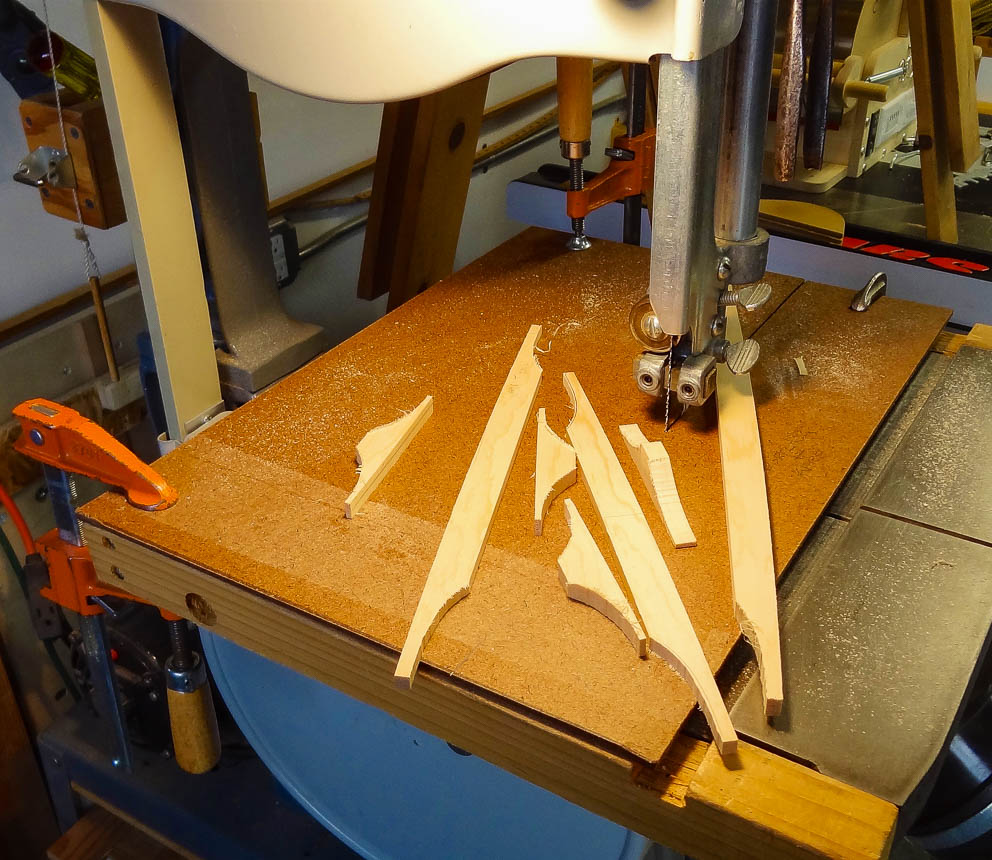
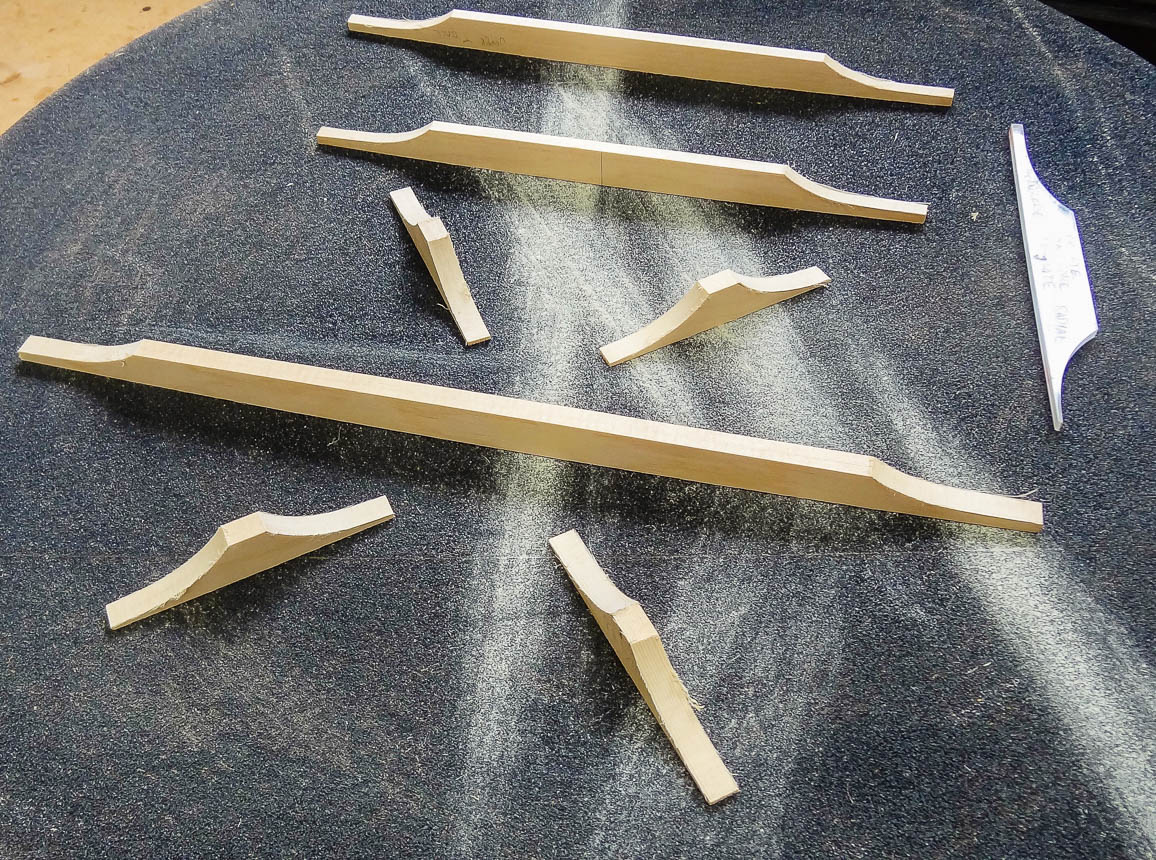
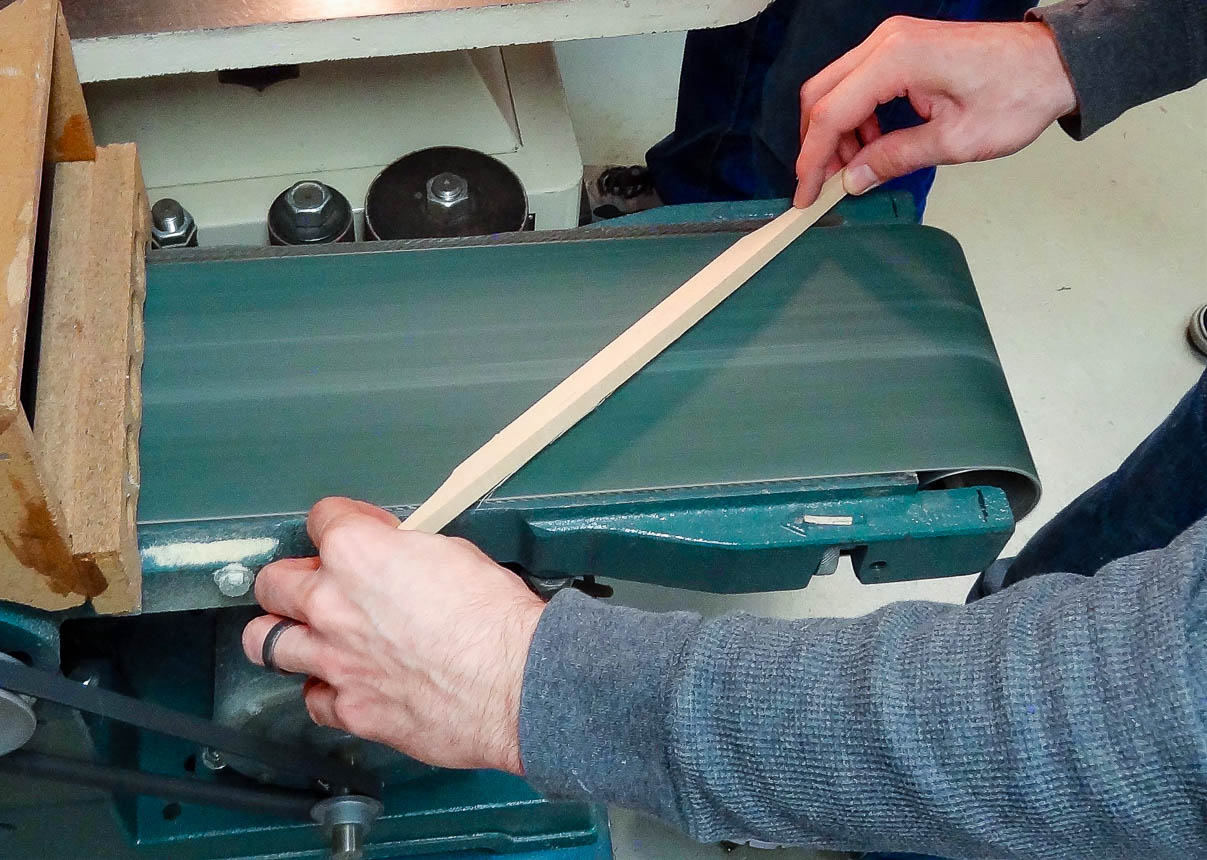
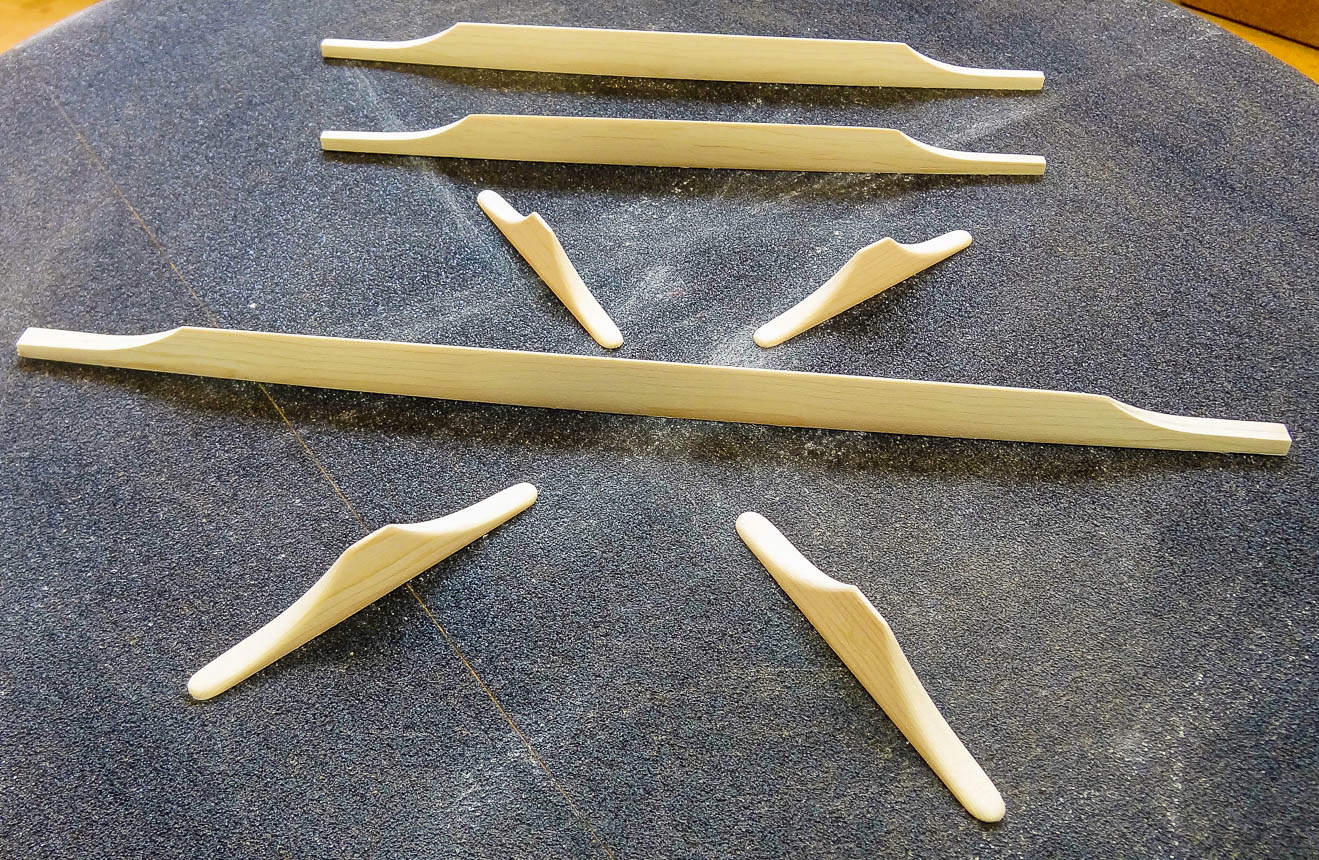
Falcate braces are composed of three strips of thin spruce glued together in a curved form. Two different forms are required for the primary and secondary braces. Each pair of braces start out as a single unit that is then cut in half on the bandsaw. Their thickness is fine-tuned with a hand plane and grooved on one edge to accept carbon fiber. The primary falcate braces are notched to fit over the bridge plate. There are also a number of straight braces that need to be made.
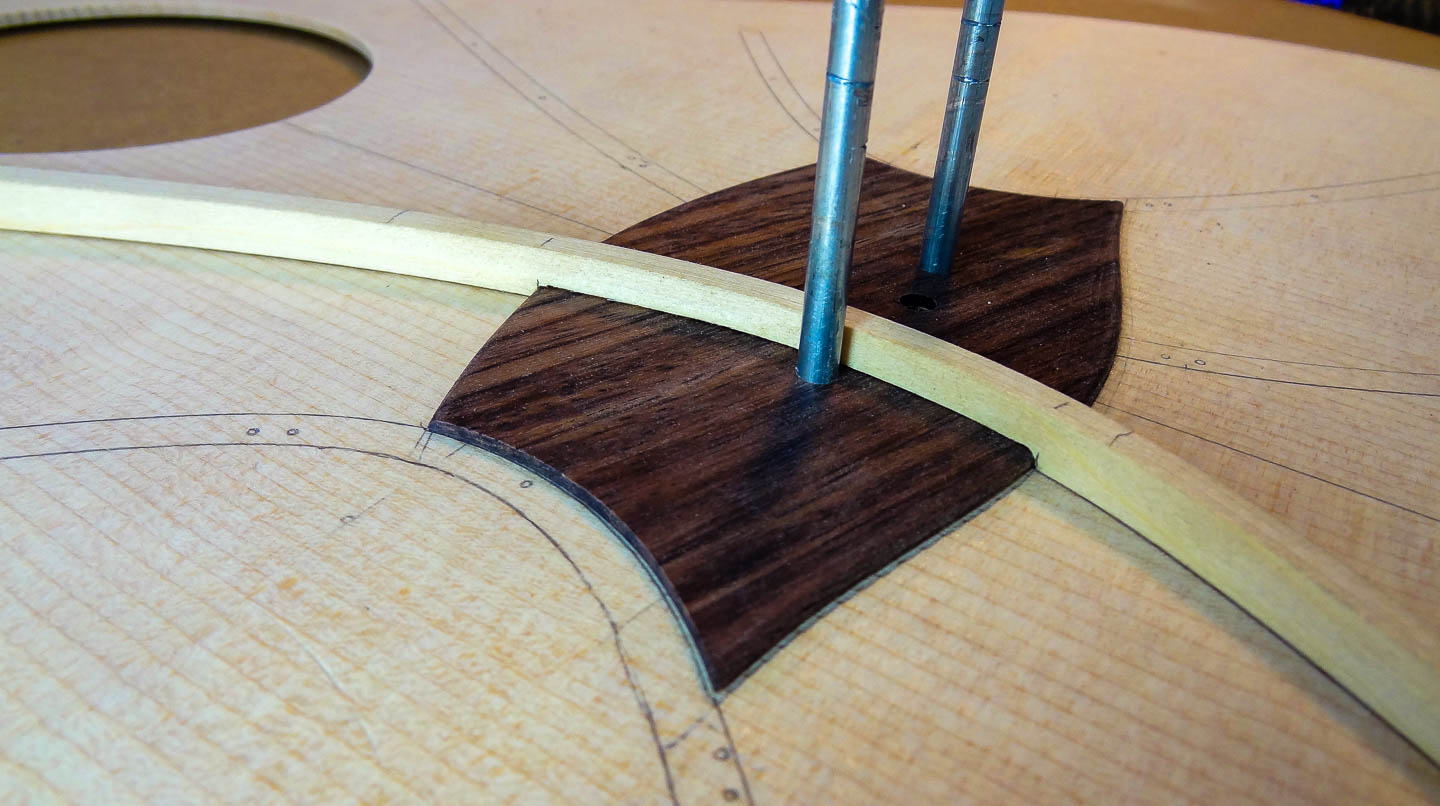
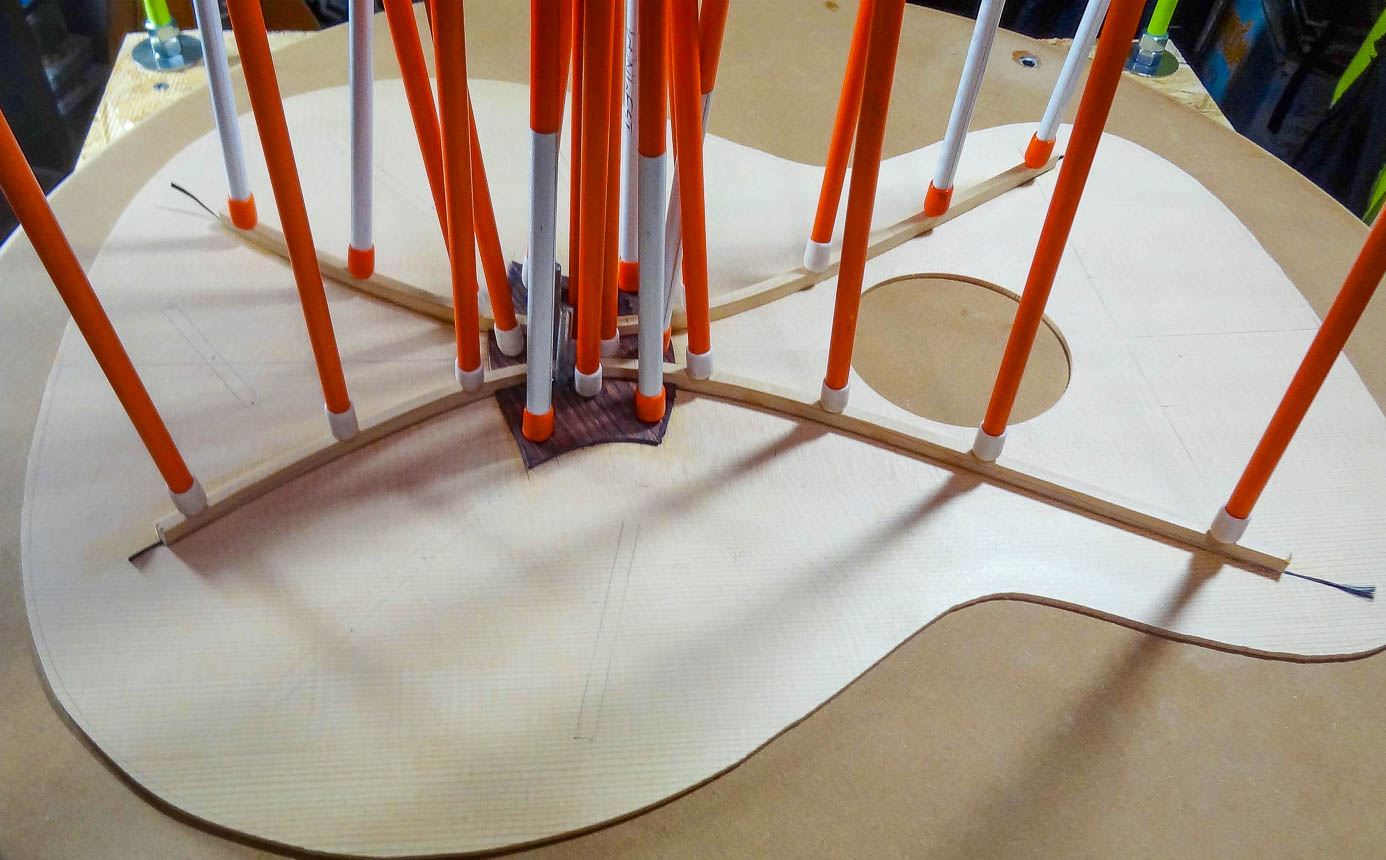
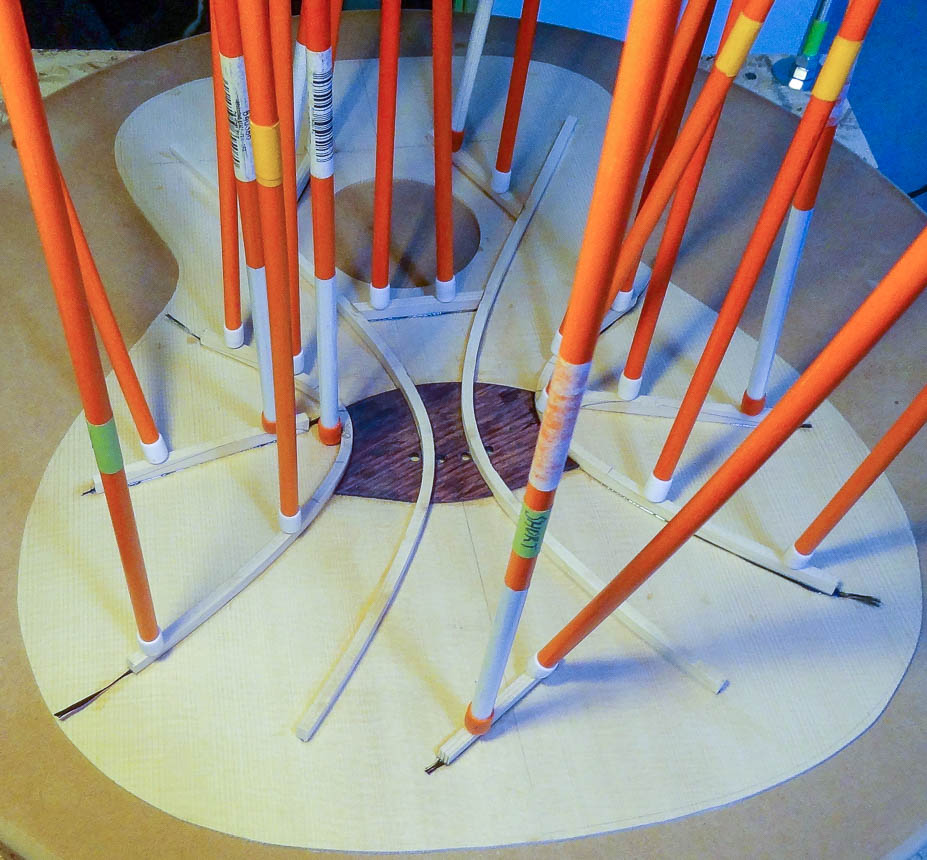
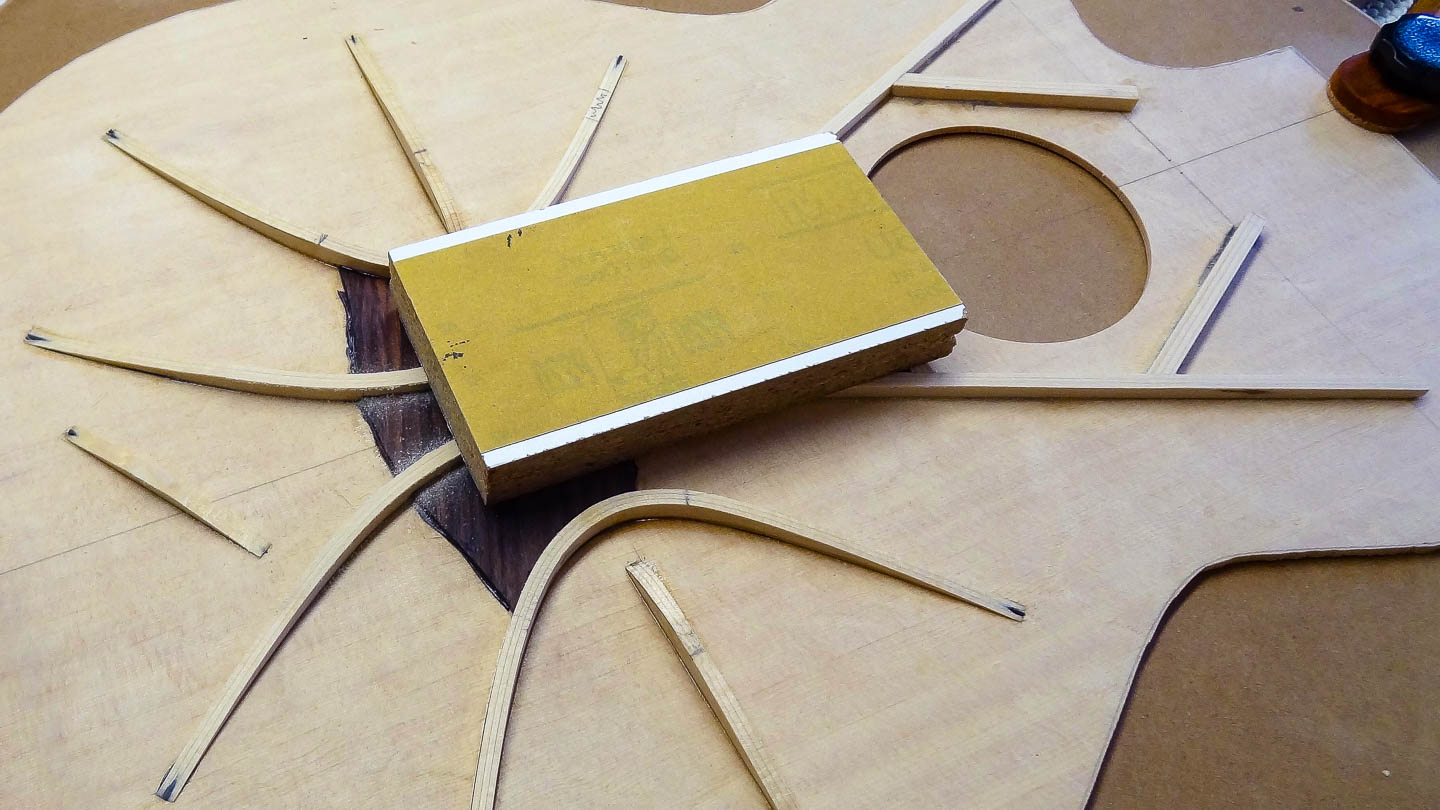
To meet the balance of strength vs responsiveness, all the braces use a composite construction made of spruce and carbon fiber. The carbon fiber is on the top and bottom edge of each brace to form a sort of “I” beam, which is very strong. This strength allows the brace to be smaller and lighter. The lighter the top and it’s bracing, the more responsive it will be to the vibrations of the strings, which leads to a better sounding guitar. The bottom carbon fiber is sandwiched between the inside of the top and the brace. Because of the carbon fiber, I use epoxy to glue the braces to the top. I start with the primary braces and the bridge plate, which also has carbon fiber underneath it.
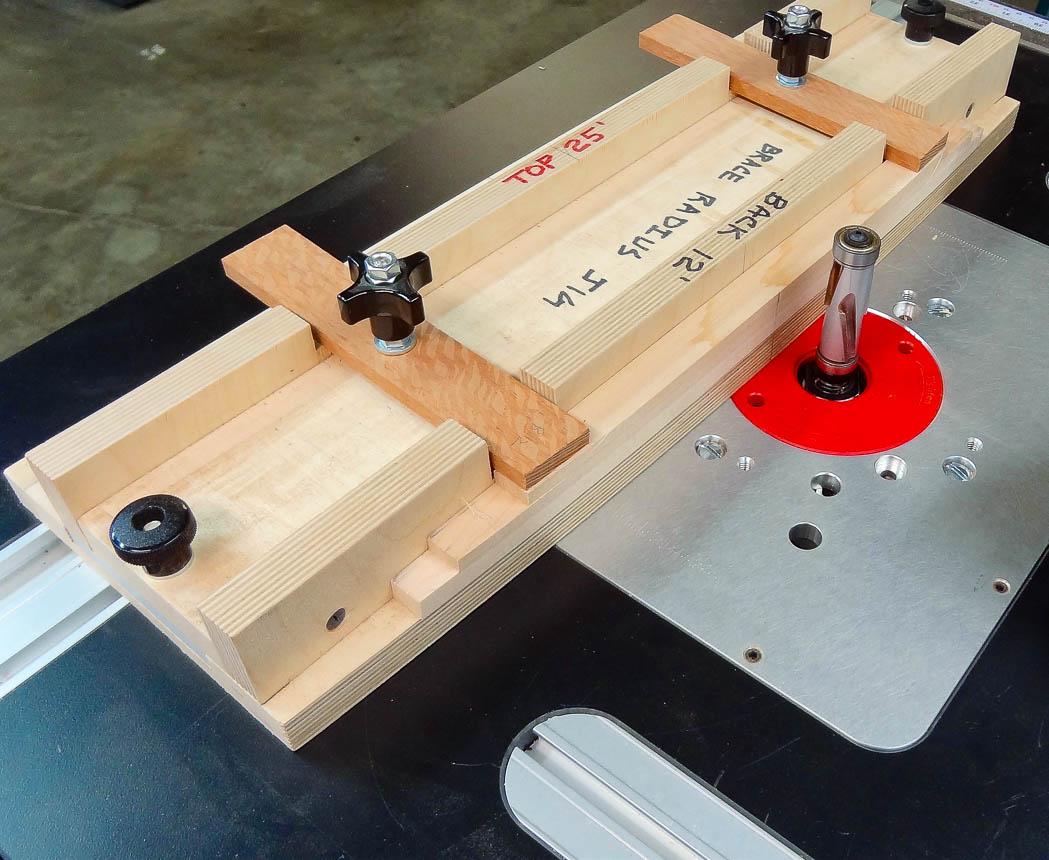
The top will eventually be domed—I use a 25’ radius—so all the braces are glued on while the top is sitting on a radius dish. All of the straight braces have this radius milled along their gluing edges and are glued on next along with the secondary falcate braces. The braces are then shaped with a chisel and sandpaper so their ends taper down to zero, and flow nicely onto the top. A critical decision has to be made as to the height of the braces over the bridge plate, as this will greatly affect how the top vibrates. A difference of one millimeter in height can greatly influence the sound. I use a flat sanding block to dial in this height.
With all the braces shaped the way I want them, I finish the “I” beam by laying the outer carbon fiber over the top of all the braces and fan them out onto the top
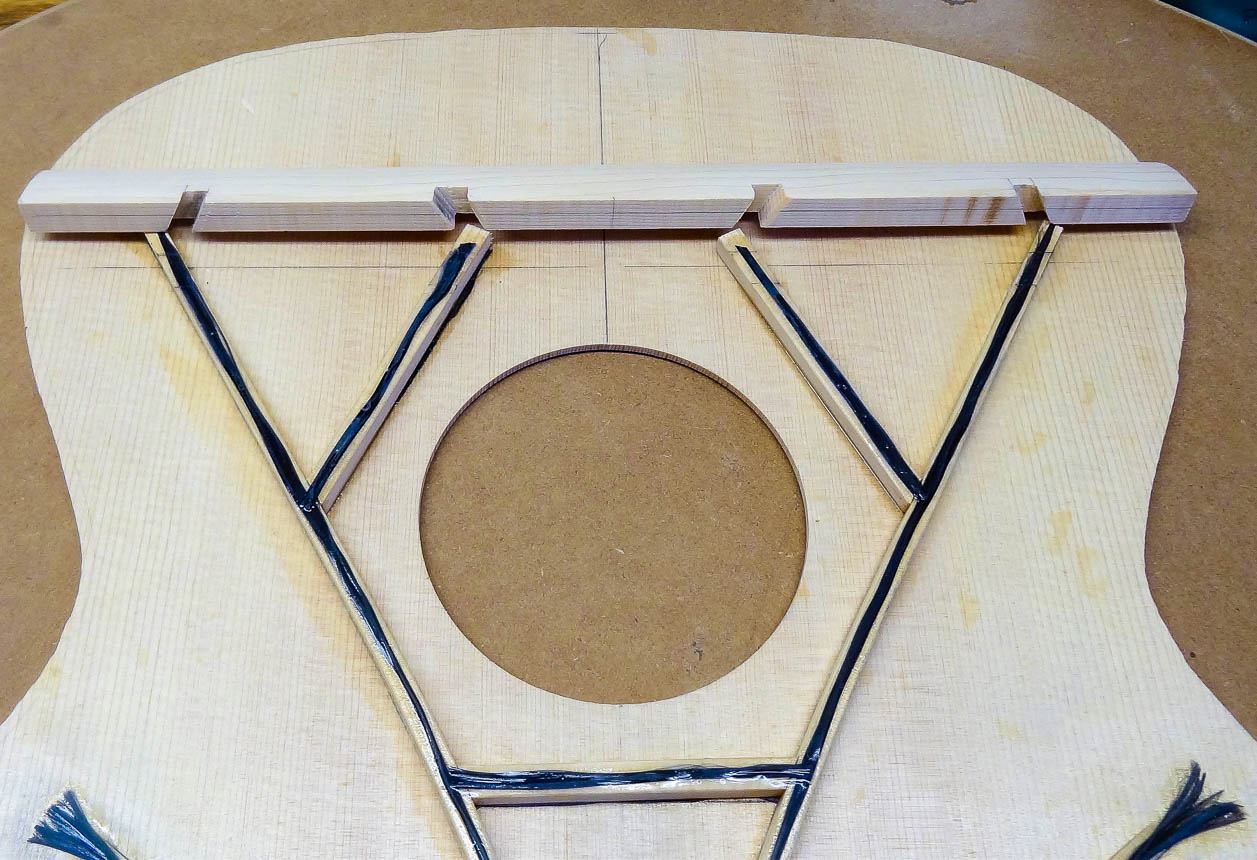
The last step is to fit and glue the upper transverse brace. It already has some pre-shaping, but it needs to be notched to fit over the primary falcate and sound hole braces and a hole drilled in for accessing the truss rod in the neck. I don’t use the carbon fiber on this brace because the neck block of the rim is already an incredibly stout component. I glue this brace down with regular wood glue. Finally, the ends of the brace are scalloped where they will be let into the lining of the rim.
BRACING THE BACK
The back panel has gone through the same process as the top to determine its ideal thickness considering its natural vibrational frequencies, stiffness and density. This will allow the back to vibrate in harmony with the top, which adds a dynamic complexity to the sound of the guitar.
The bracing strategy starts with gluing a marriage strip down the center of the back, which adds strength to the joint between the two halves of the panel. The strip is made of left over spruce from the top panel, and has the grain orientated perpendicular to the grain of the back for added strength. It’s then carved and sanded to a nice domed shape across the width.
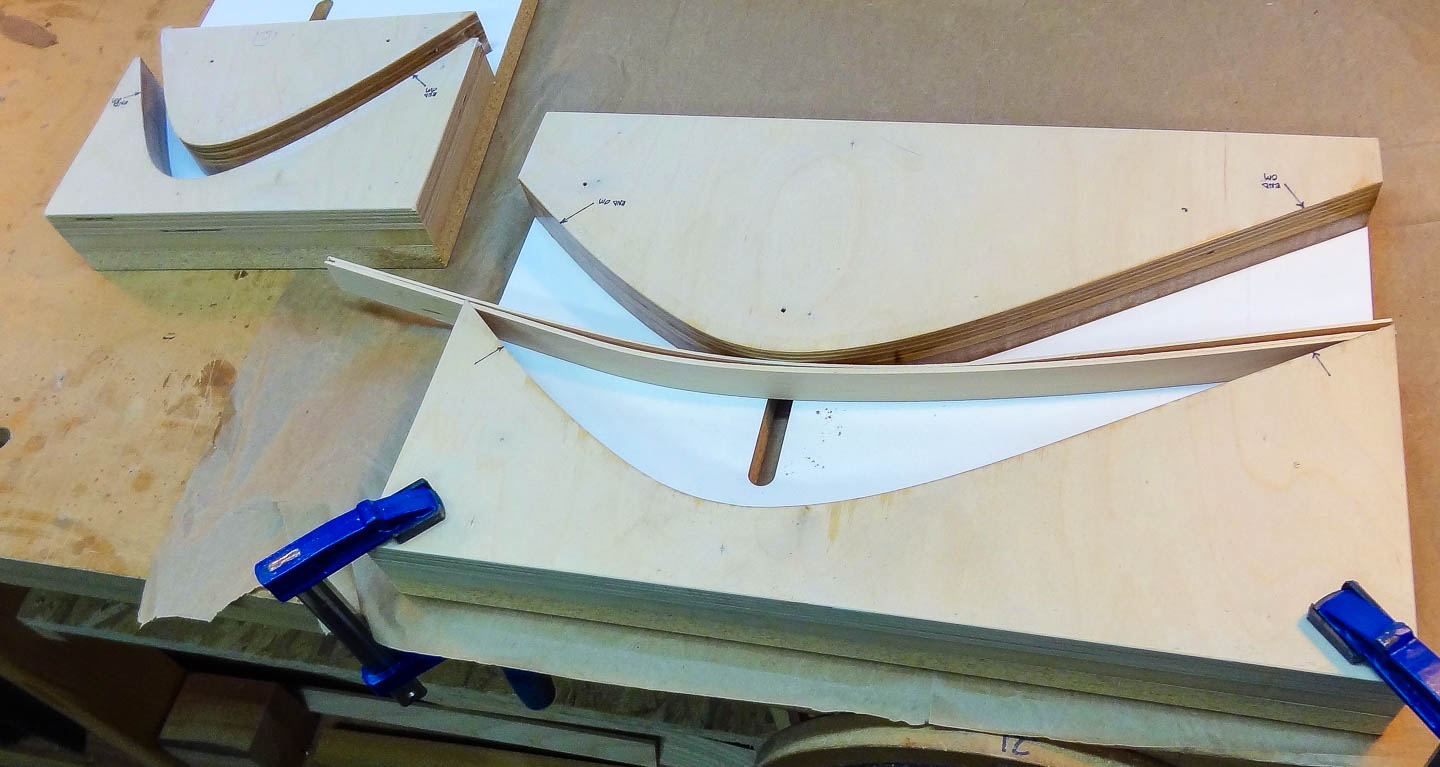
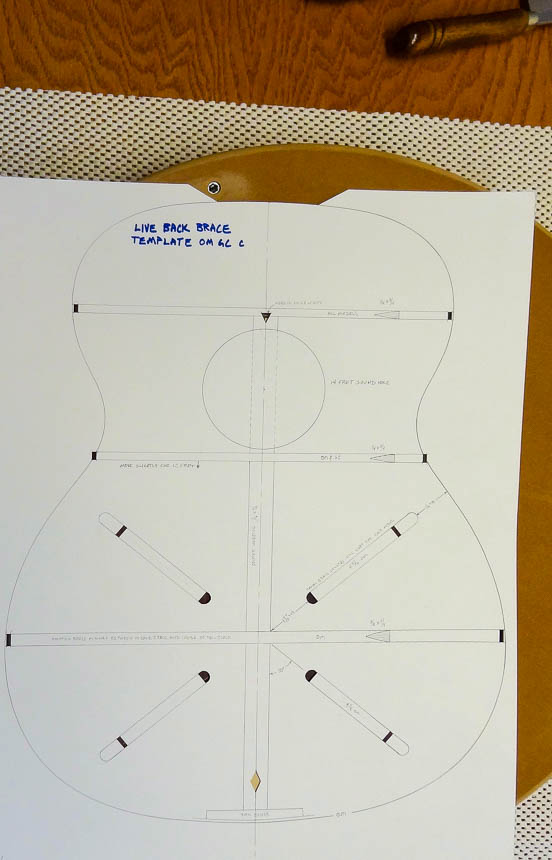
The bracing pattern has three conventional transverse braces and four somewhat unconventional radial braces which help prevent the panel from breaking up into small, uncontrollable vibrating zones. I start by laying out the pattern on the inside of the back with a master bracing template. The brace blanks are milled from blocks of spruce and are precisely sized with the grain perfectly quarter sawn—or straight up and down. My backs have a domed shape, so this 12’ radius is milled along one edge using a jig and my router table where all the blanks are ganged together and done at the same time.
Templates are used to draw the shape of each brace, the band saw cuts them out, and a spindle sander fine tune the profile. Many people shape their brace after gluing them to the back, but I find it much easier to do most of it prior to gluing them on. It’s all done on the horizontal belt sander, giving them a nice cathedral cross-sectional shape. They are 90% shaped before even gluing them on.
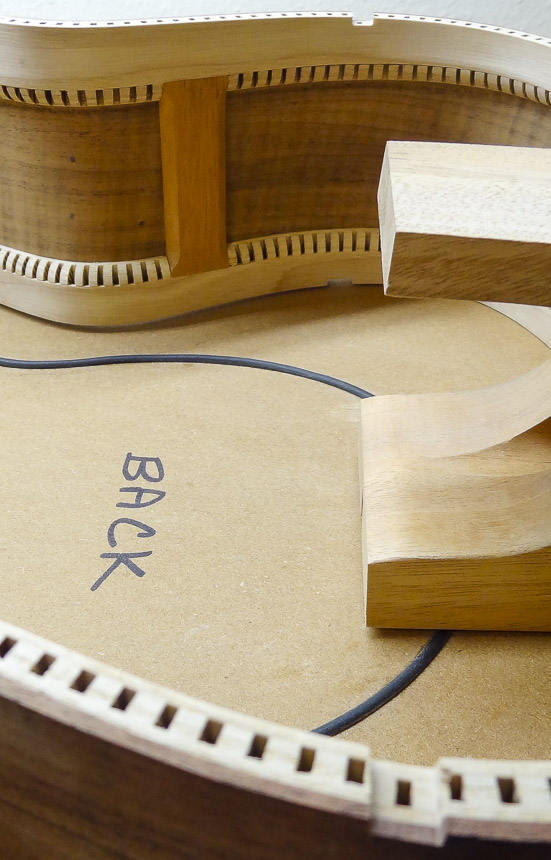
The center marriage strip needs to be cut away where each brace crosses it, and then I glue all the braces down using a large vacuum clamping fixture. The back plate rests on a radius dish during this clamping process, so the back comes out with the correct domed shape. After it is dry, the brace end scallops are fine tuned. The upper transverse brace will be let into the side of the rim for added strength, and the two lower transverse braces are scalloped down to zero height as they enter the rim.
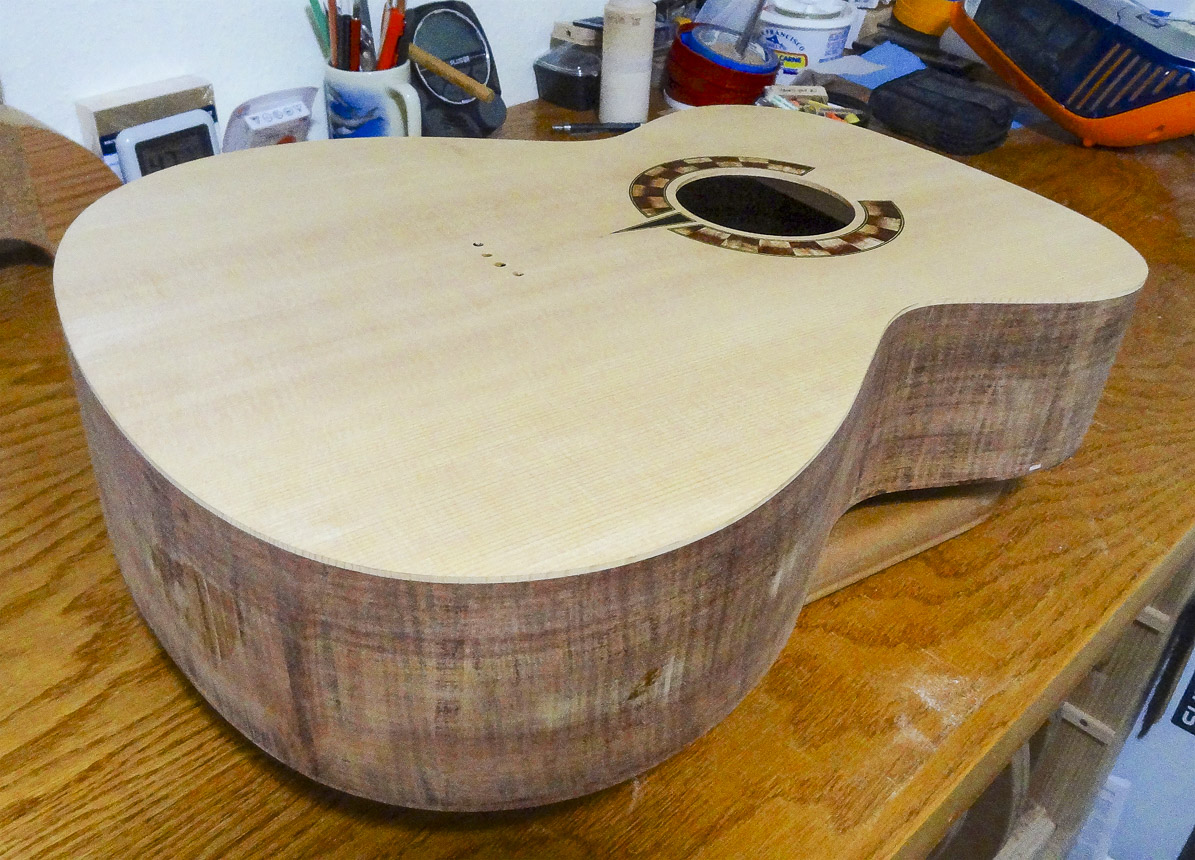
THE BOX
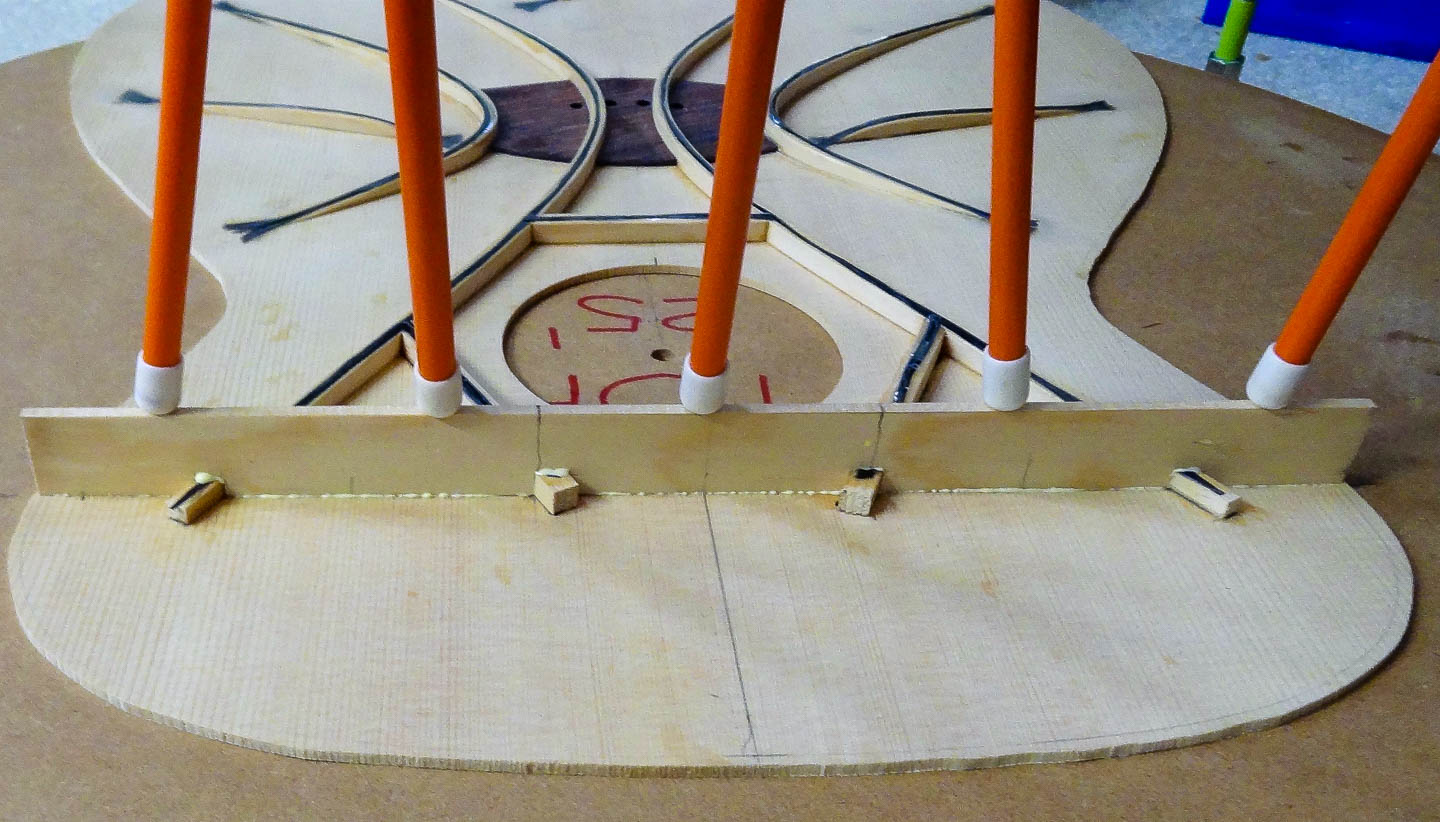
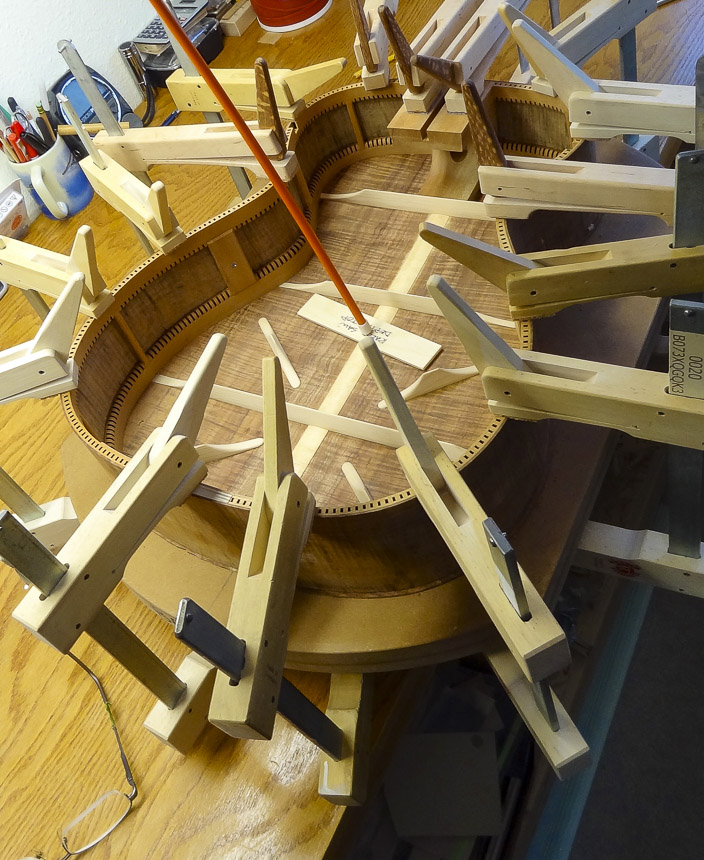
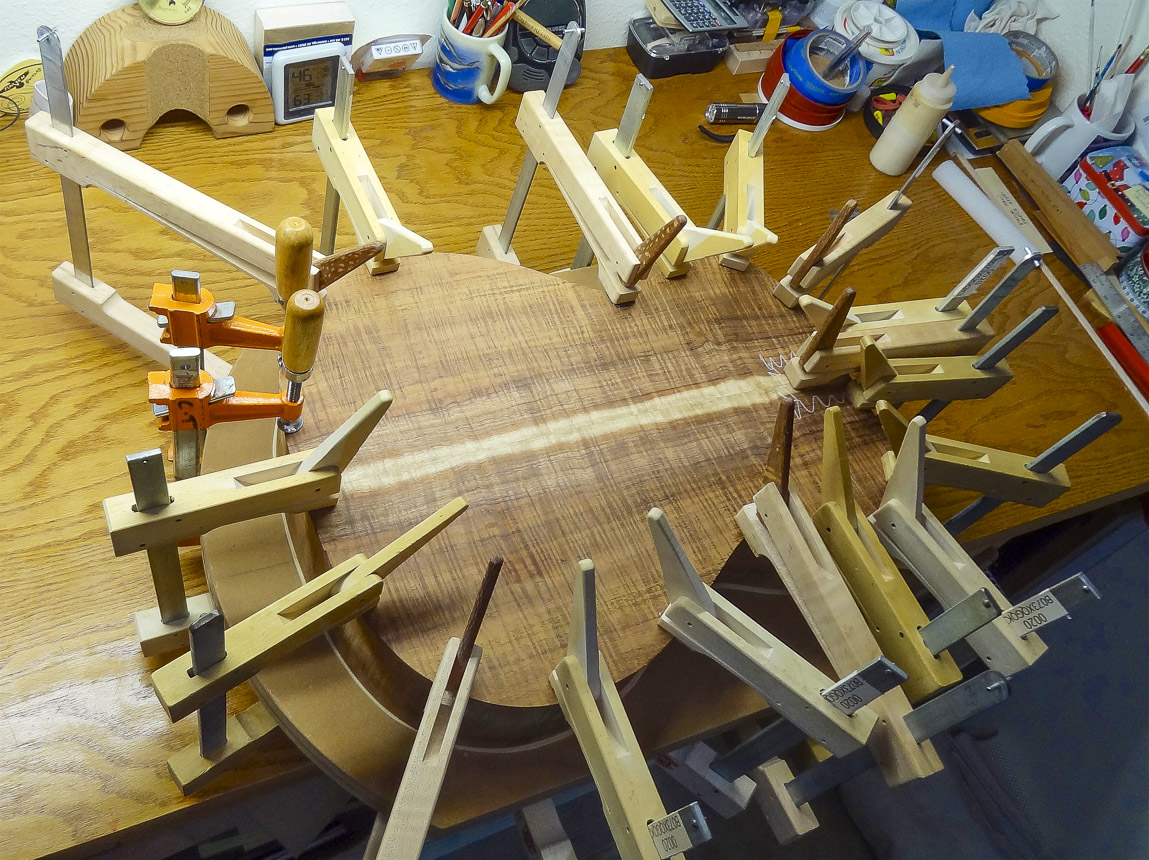
To fit the fully braced plates to the rim, notches are cut into the rim’s edges to accept the ends of the upper transverse braces for both the top and back. Two separate vacuum dishes—each with its own domed radius—suck the plates down into the correct domed shape. The back is glued on first with lots of clamps, followed by the top.
Once it’s all dry, the overhanging edges of both plates are trimmed away and the box is born. With the box closed, I use the Spectrum Analysis software and equipment to get the first readings of its three primary resonant frequencies: The main air, main top and coupled top & back frequencies. All the frequencies fell right in the pocket for where it should be at this point of construction.
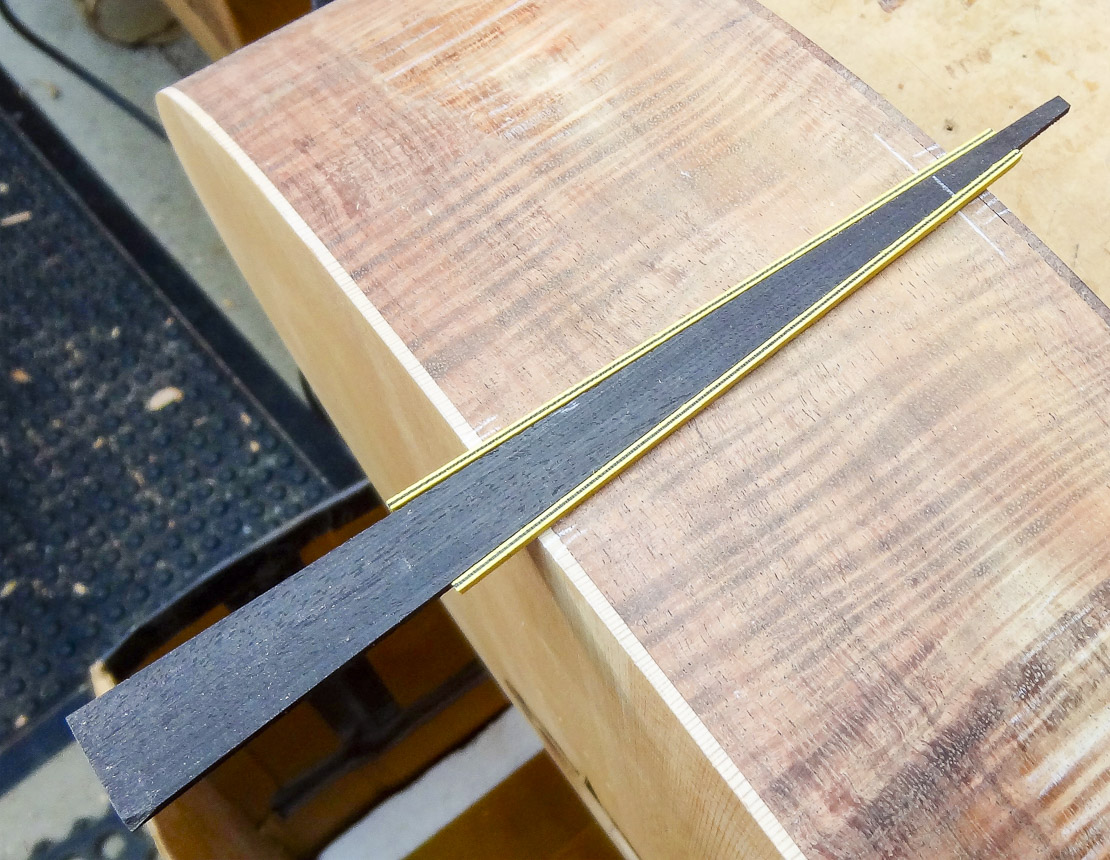
An end graft is inlaid into the tail end to cover the joint where the left and right sides of the rim come together. The end graft adds a decorative element that ties it visually into the binding/purfling scheme around the edges of the body. This guitar uses Master Grade ebony and yellow and black purfling lines that will miter into the binding’s side purfling.
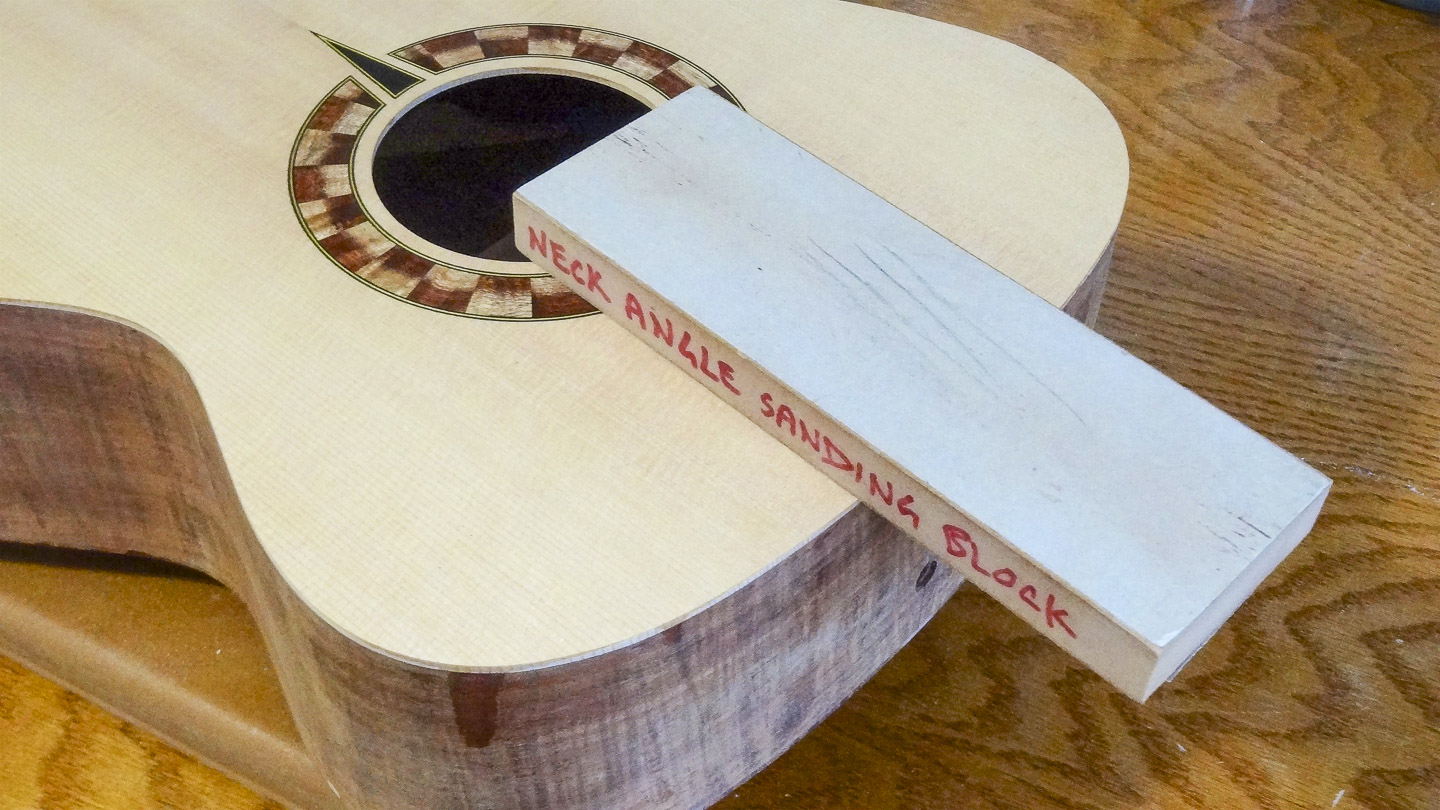
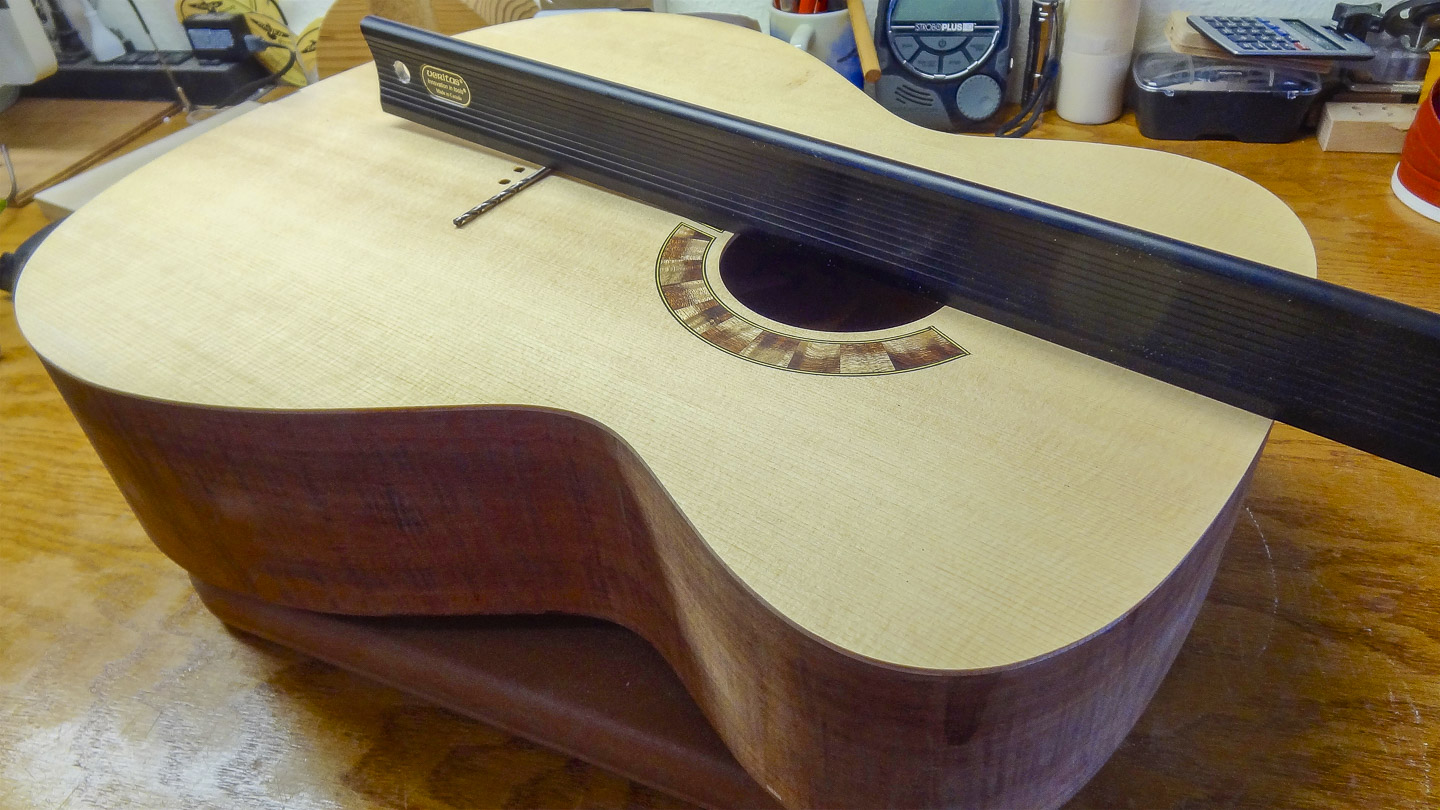
A critical step is setting the neck angle; it greatly affects playability, how the guitar will sound and how well the guitar will hold up over time. The fret board extension lays on the area of the top between the sound hole and the top of the rim. If we project the plane of that area out over the saddle location, the gap between that plane and the top determines the neck angle. To set the neck angle, I sand that area carefully so that when a long straightedge is place on it, and projected out over the saddle location, I can roll an appropriately sized drill bit between the straight edge and the top and it stops right at the saddle location.
Finally, I use a jig to determine the monopole mobility (how flexible something is) of both the top and the back. It’s a matter of measuring the top and back’s deflection using specific loads and plugging the info into my monopole mobility spread-sheet to get the value. This value—along with the resonant frequencies—will tell me if all the work I’ve done so far has got me in the ball park of a highly responsive guitar, and if I need to do any adjusting to the structure to fine tune it. So far, so good on this one.
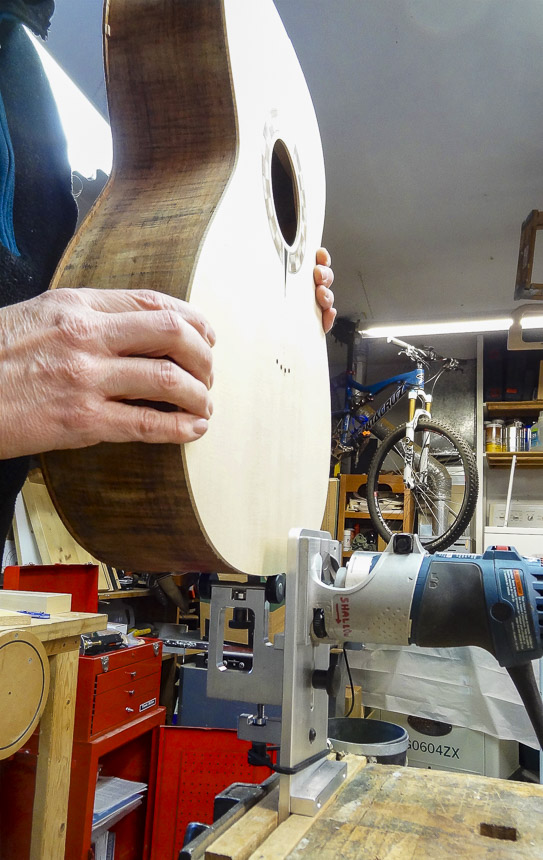
BINDING & PURFLING
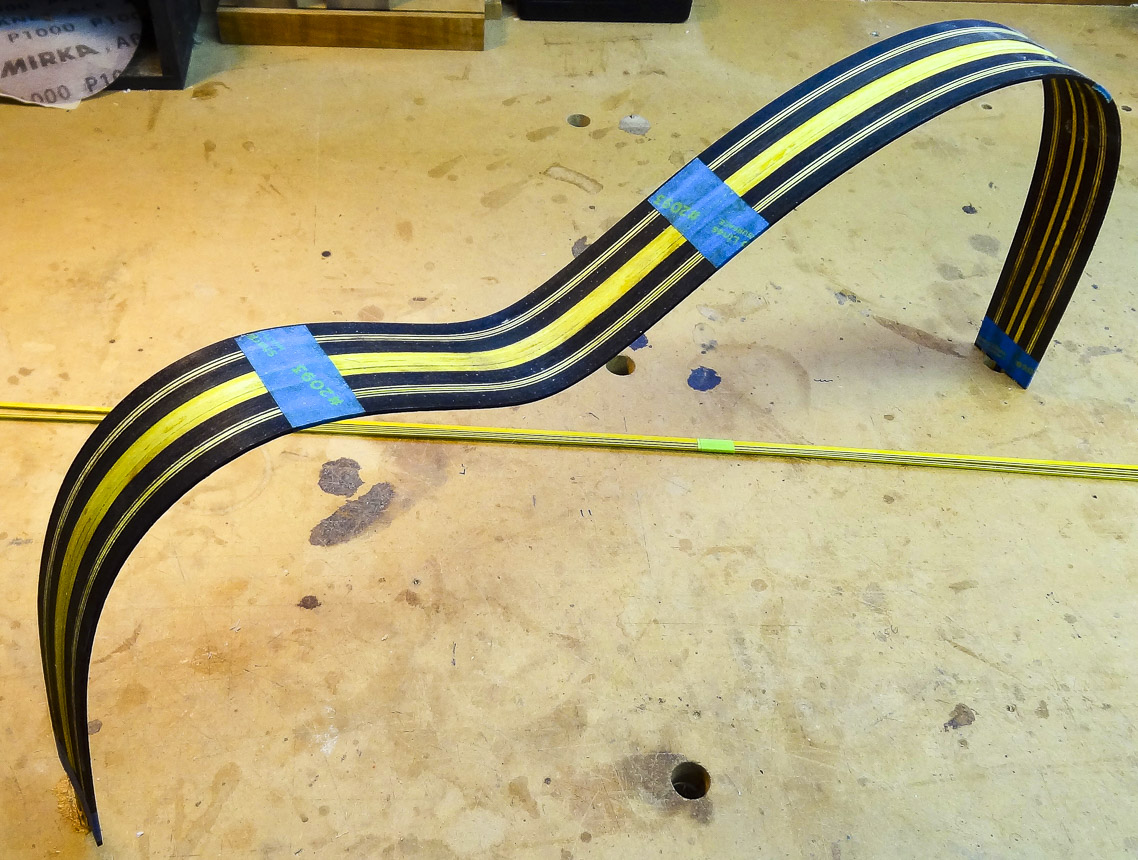
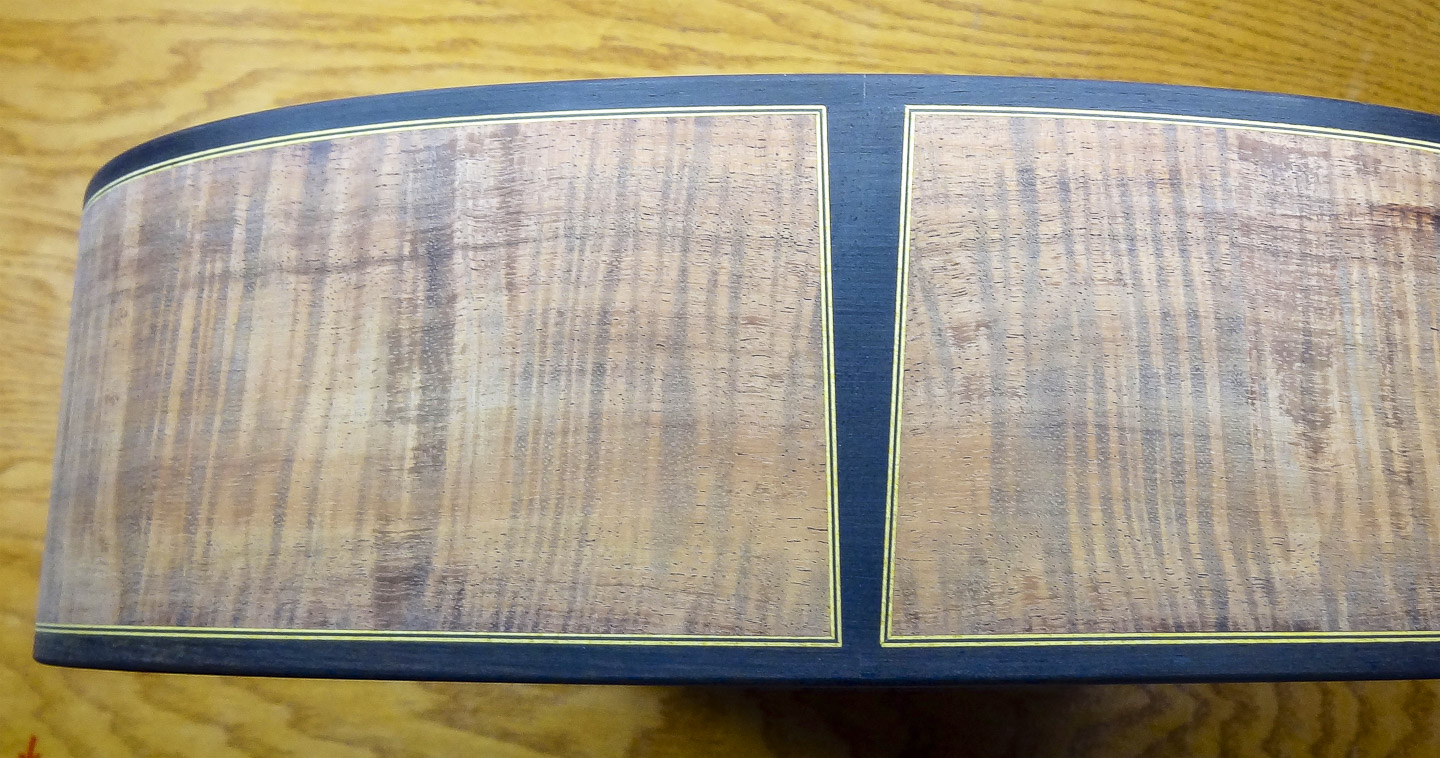
Binding is used as decoration and hides the edges of the top and back plates, as wells as adds protection to the bodies’ edges. This build uses Master Grade ebony and was bought commercially. Purfling is the thin pinstripes that are purely decorative. The purfling surrounds the perimeter of the top and back, as well as between the bindings and the sides of the rim, called side purfling. This guitar has hand-made yellow and black Master Grade purfling.
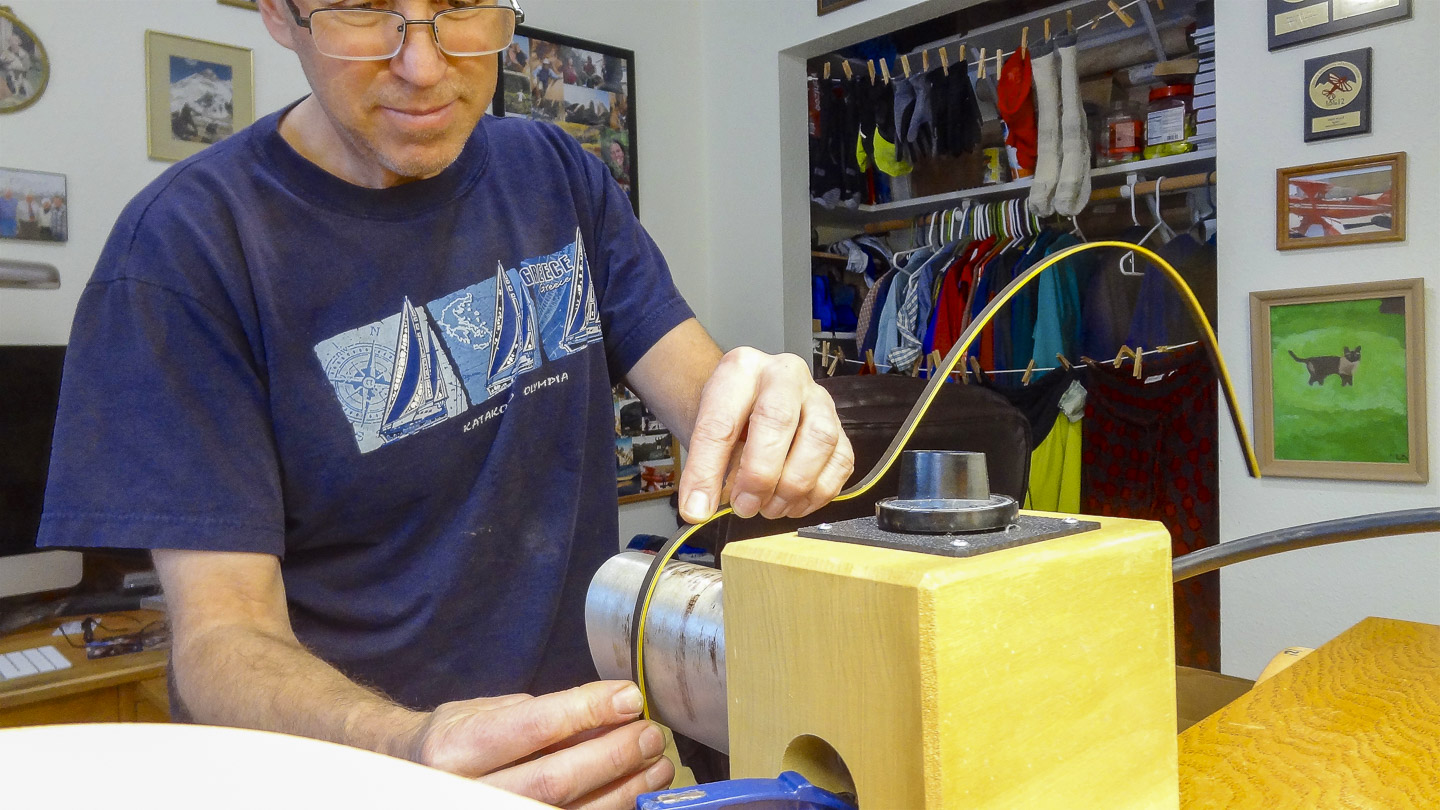
The side purfling strips are glued to the edge of the binding, and then all the parts are taped together and bent on the universal Fox side bender, just like the sides were. The channels for both binding and purfling are cut with a special jig that uses a router. It takes a different setup to cut the binding and purfling channels because they are different widths. Special care is needed when routing the binding channels across the end graft because the side purfling will miter into the end graft purfling, and I need to leave some wood to work with. All the miters are done by hand.
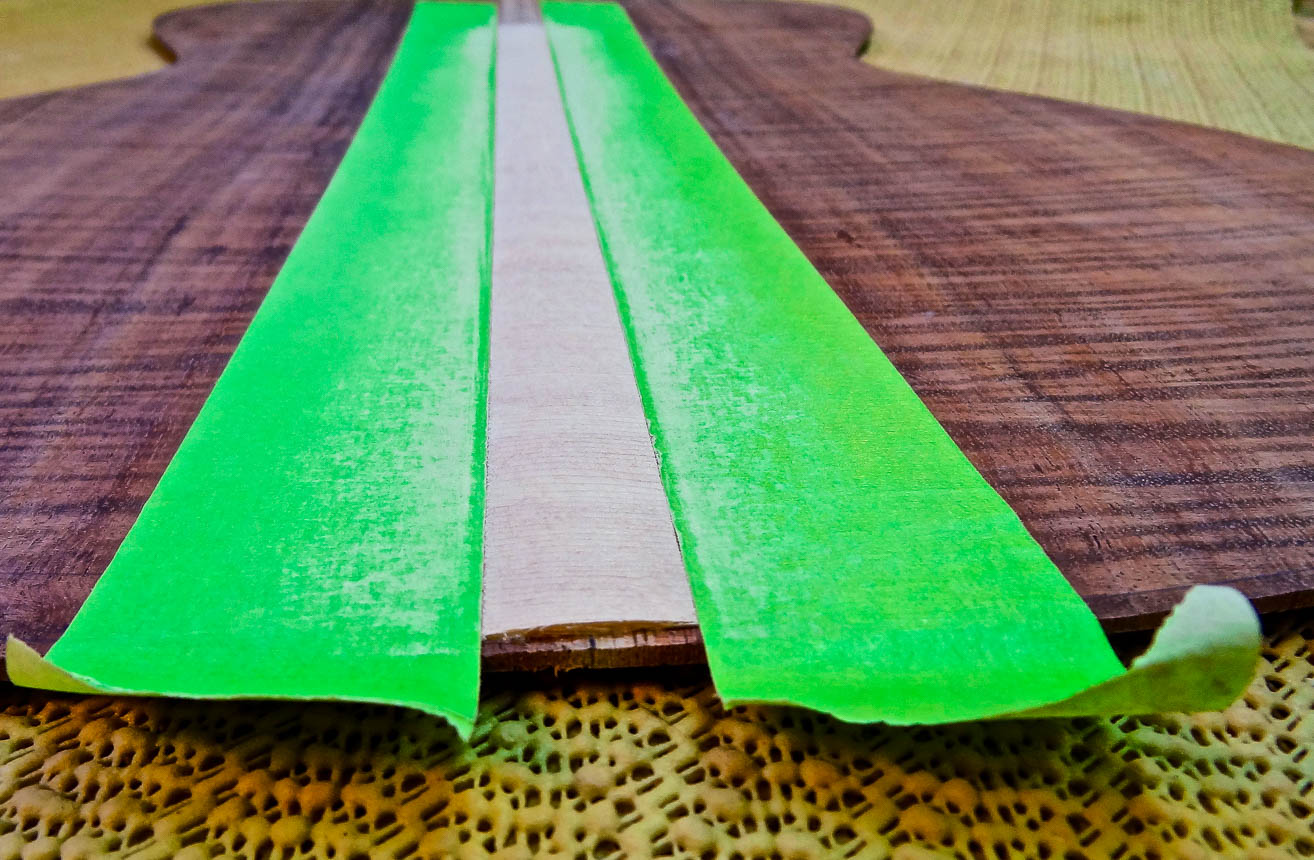
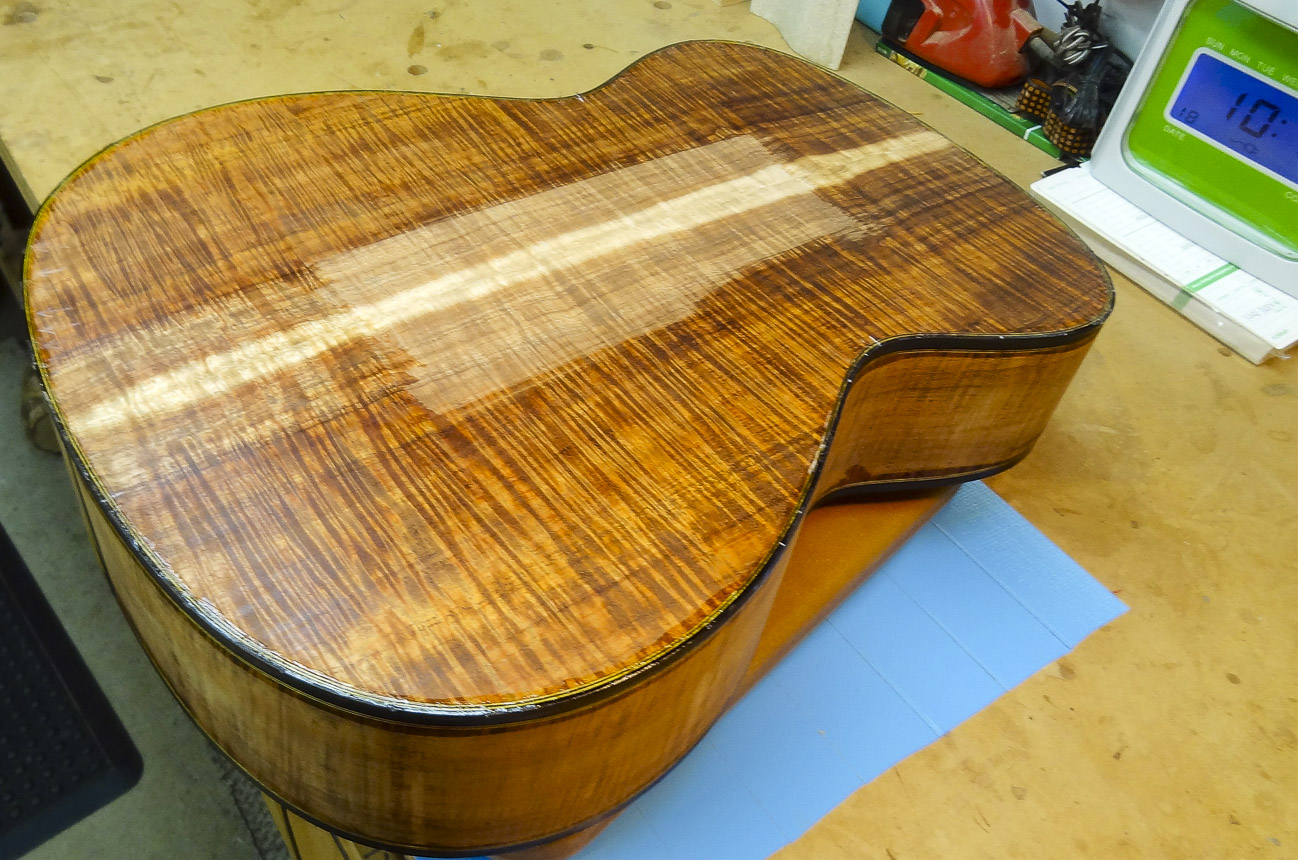
The binding is fine-tuned on a hot pipe so they fit perfectly and I get a gap-free joint. After spending a considerable amount of time on all the miters and sizing each component to fit properly, it’s all glued and taped on with strapping tape. A coat of shellack was put on the top and back before hand to help the tape stick better and prevent wood fibers from being pulled up when removing the tape. It really shows how beautiful the curly koa is going to be.
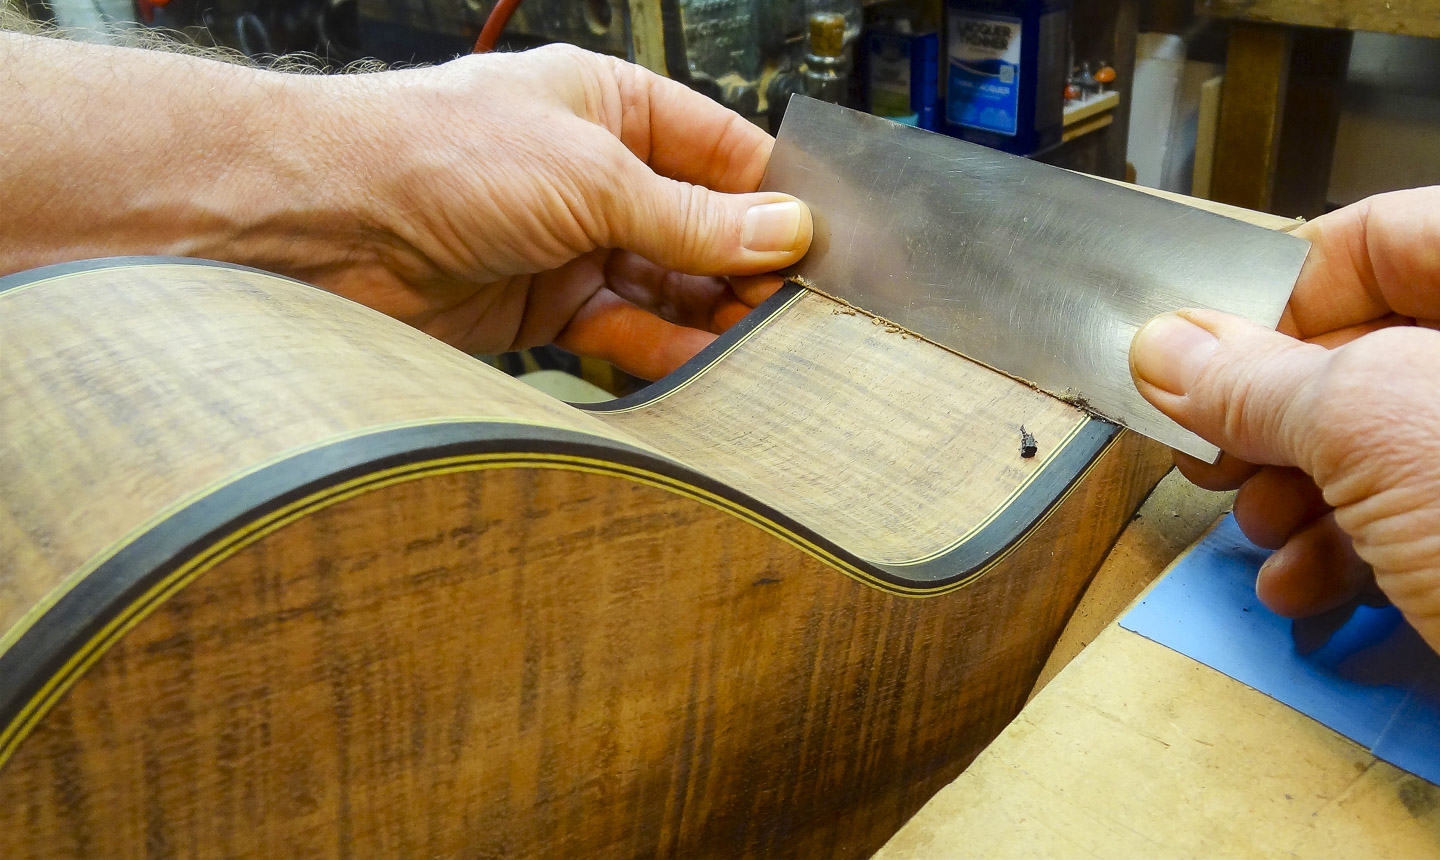
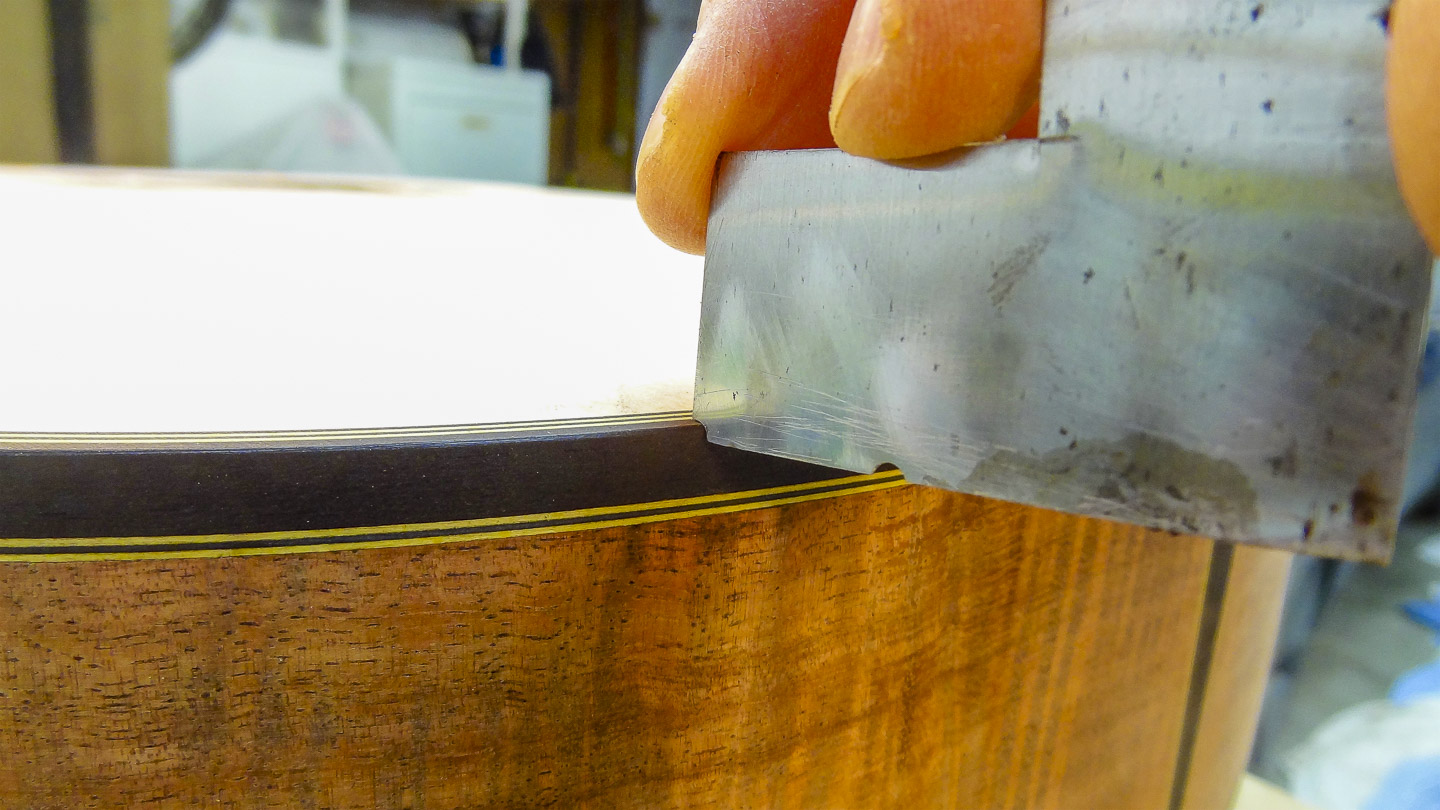
Once dry, the tape is removed, and everything needs to be leveled to the adjacent surfaces of the top, back and sides. This is done with a hand scraper and flat sanding blocks. Finally, I use a special scratch stock to round over the edge of the binding and sand it smooth.
HOW I BUILD GUITARS
MATERIALS
NECK & HEADSTOCK
HEADSTOCK: HEADPLATE & VOLUTE
SIDE BENDING
THE RIM
KERFED LINING
CUTTING THE RIM TO WIDTH
SIDE BRACES
TOP & BACK PLATES
This Page
ROSETTE
BRACING THE TOP
BRACING THE BACK
THE BOX
BINDING & PURFLING
FITTING THE NECK TO THE BODY
THE FRETBOARD
HEADSTOCK SHAPE, TUNER HOLES, BINDING & PURFLING
GLUING THE FRETBOARD TO THE NECK
SHAPING THE NECK
SHAPING THE HEEL
SHAPING THE VOLUTE
THE BRIDGE
FRET JOB
THE FINISH
ODDS & ENDS
SET UP & FINAL DETAILS