HOW I BUILD GUITARS
MATERIALS
NECK & HEADSTOCK
HEADSTOCK: HEADPLATE & VOLUTE
SIDE BENDING
THE RIM
KERFED LINING
CUTTING THE RIM TO WIDTH
SIDE BRACES
TOP & BACK PLATES
ROSETTE
BRACING THE TOP
BRACING THE BACK
THE BOX
BINDING & PURFLING
This Page
FITTING THE NECK TO THE BODY
THE FRETBOARD
HEADSTOCK SHAPE, TUNER HOLES, BINDING & PURFLING
GLUING THE FRETBOARD TO THE NECK
SHAPING THE NECK
SHAPING THE HEEL
SHAPING THE VOLUTE
THE BRIDGE
FRET JOB
THE FINISH
ODDS & ENDS
SET UP & FINAL DETAILS
FITTING THE NECK TO THE BODY
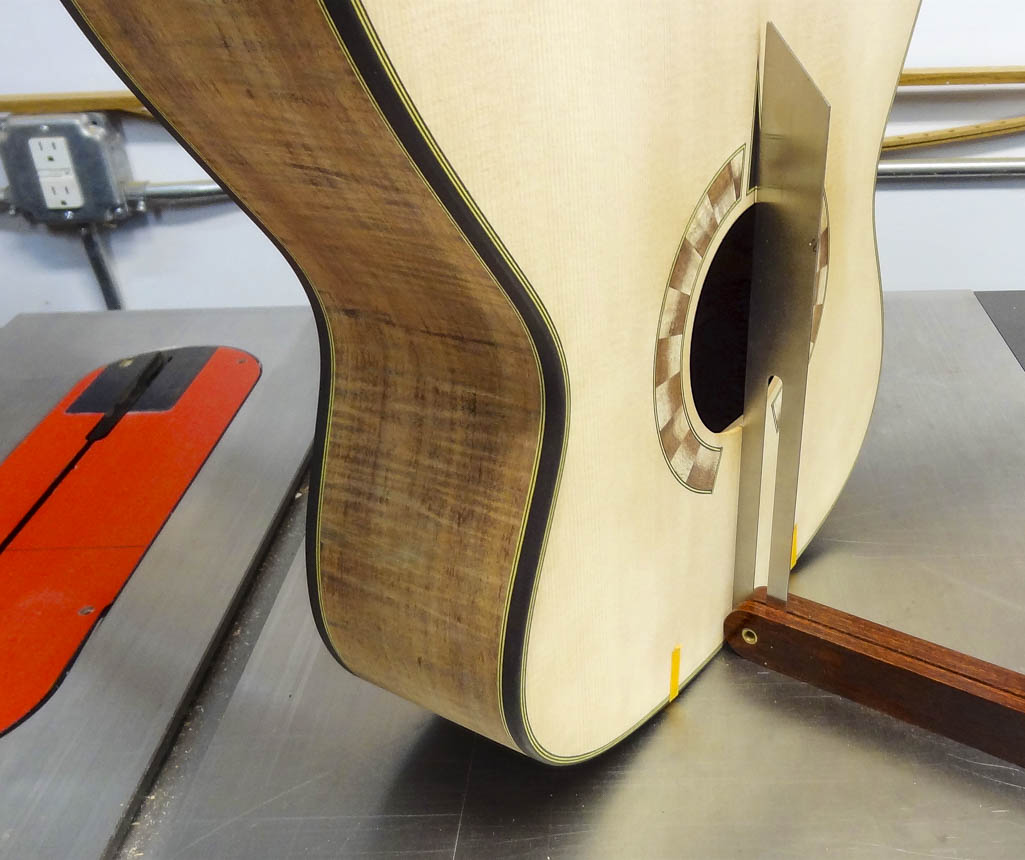
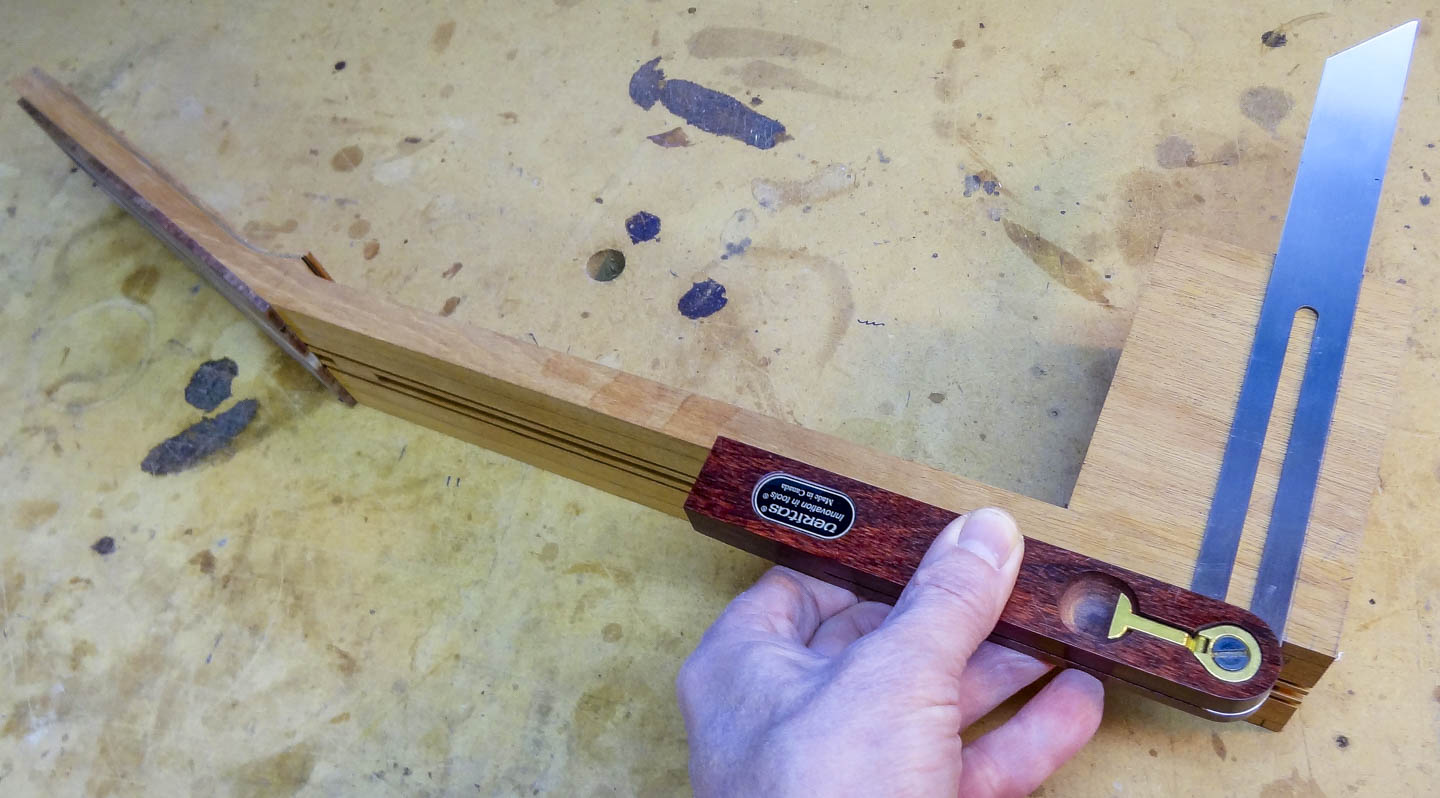
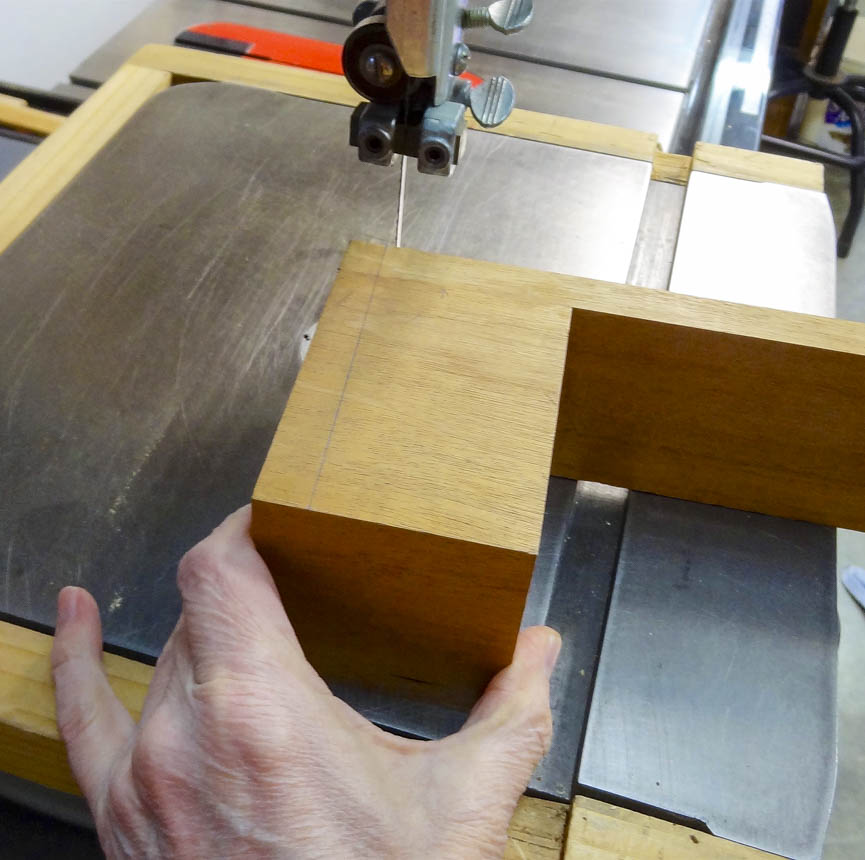
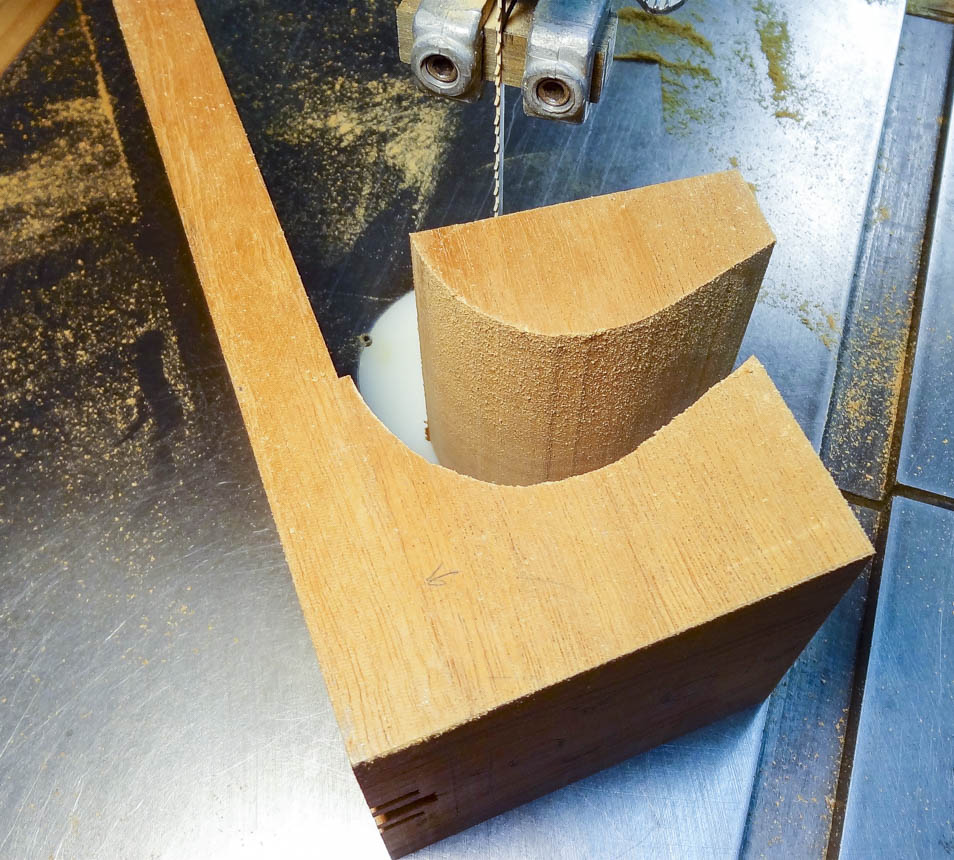
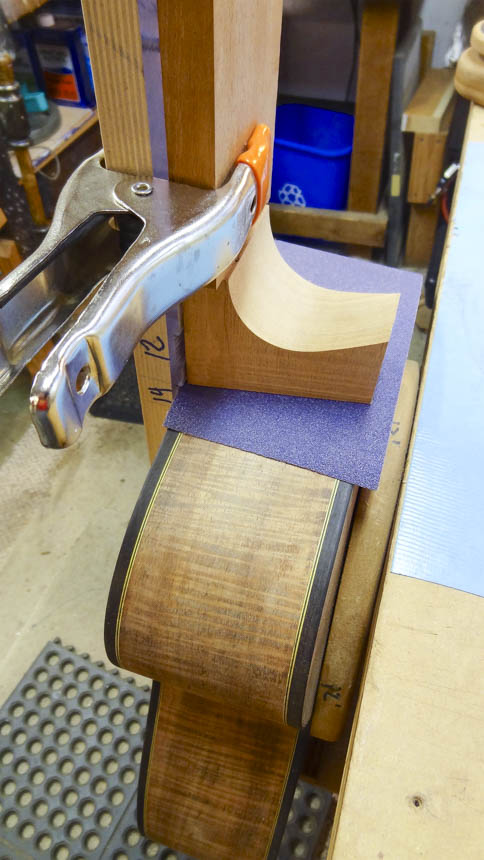
Back to working on the neck. In its current condition it consists of the head stock, the neck, and the heel. The neck angle is determined by using an adjustable bevel gauge set against the body while it rests–top side down–on a flat surface. This angle is transferred to the side of the heel at the position where the neck will join the body, in this case the 14th fret. The heel is cut just proud of this line and cleaned up with a vertical sander.
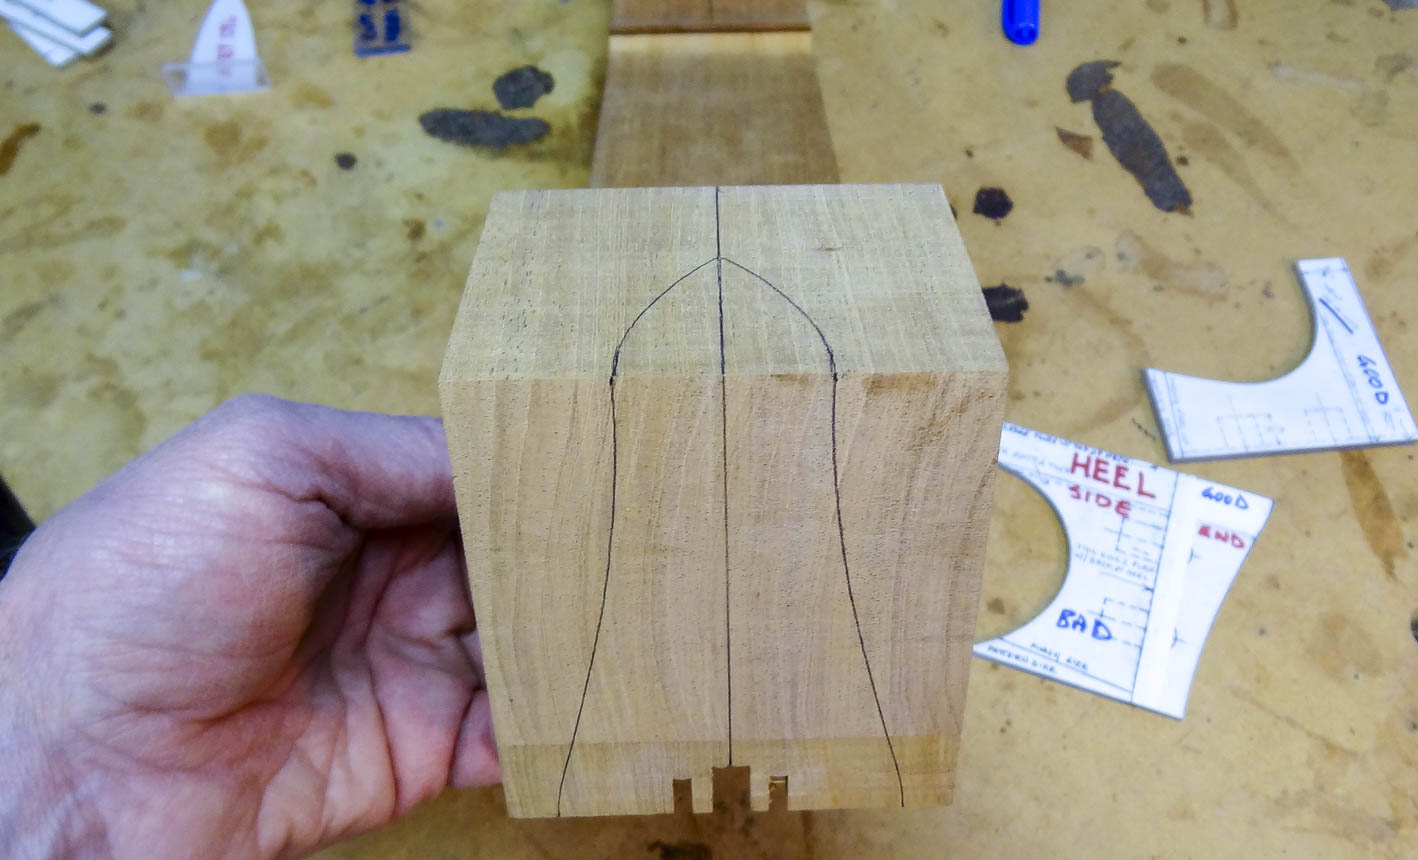
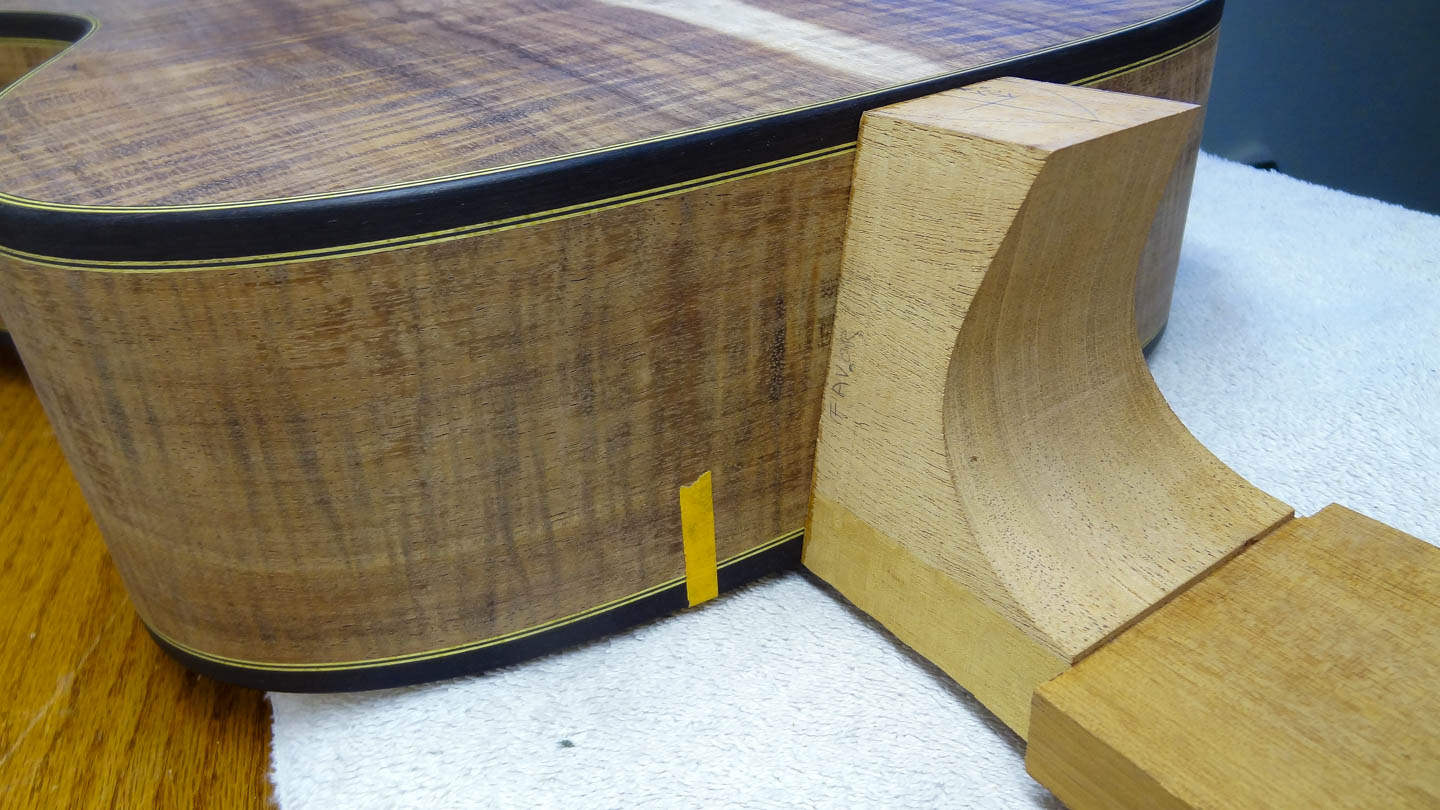
The finished shape of the heel is defined using three patterns which are drawn on their respective surfaces: side view, end view and bottom view. The side view is cut to shape, but the end and bottom views are only guides for now, and will be use when hand shaping the heel later on.
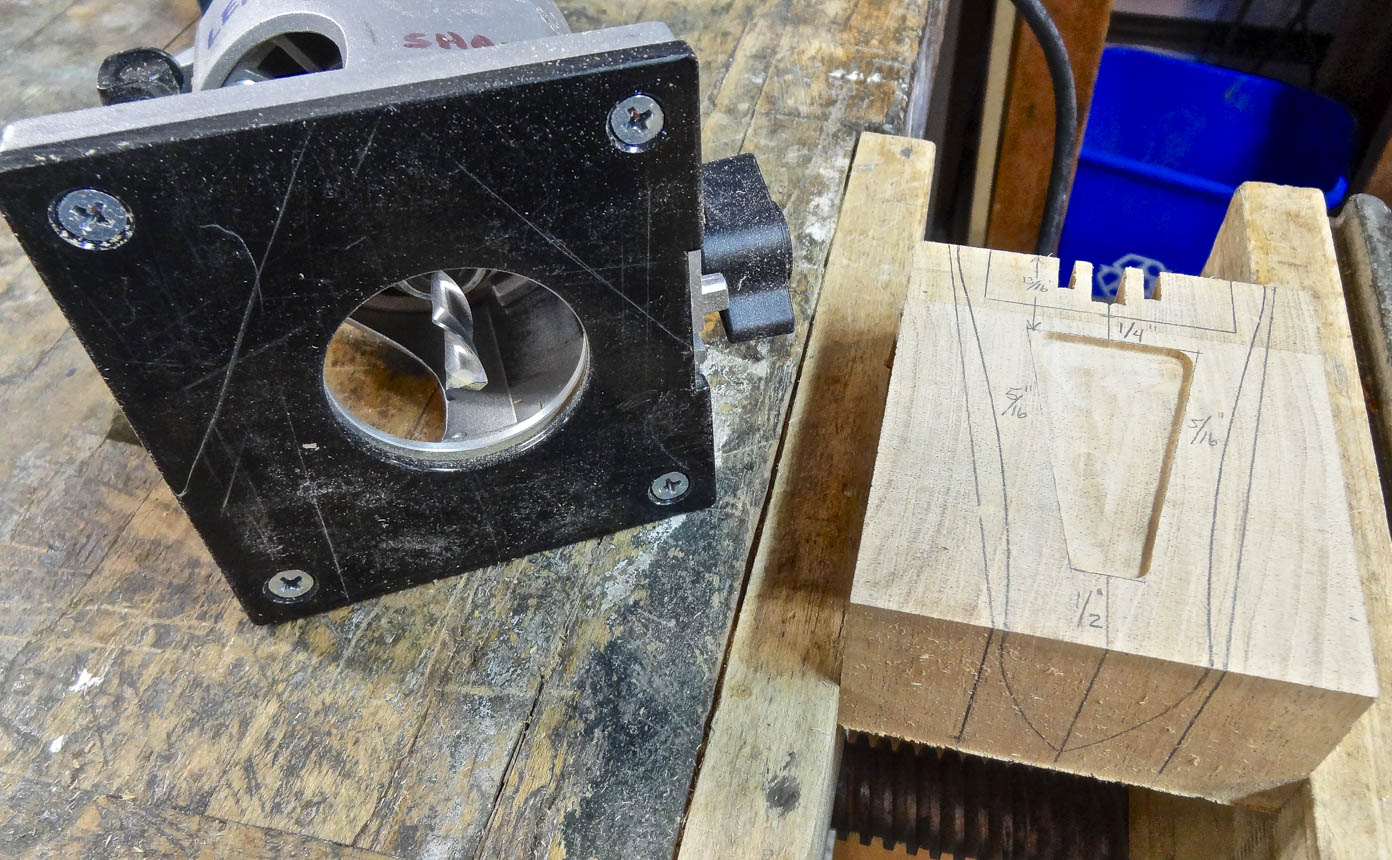
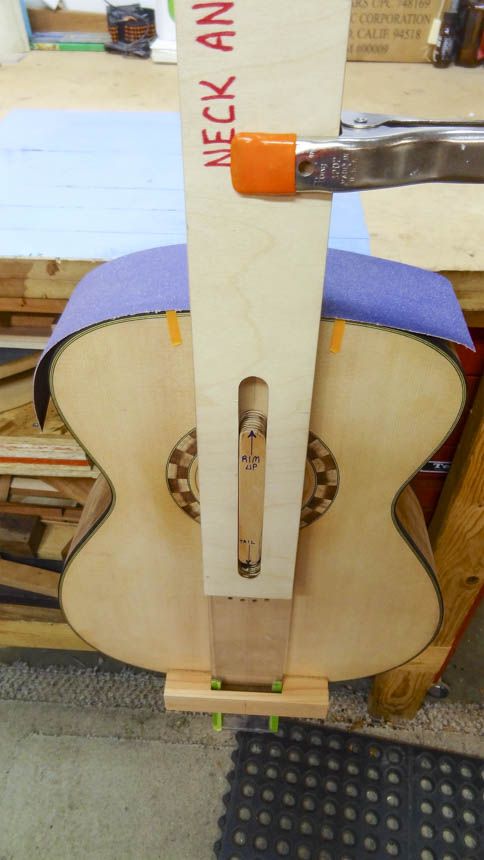
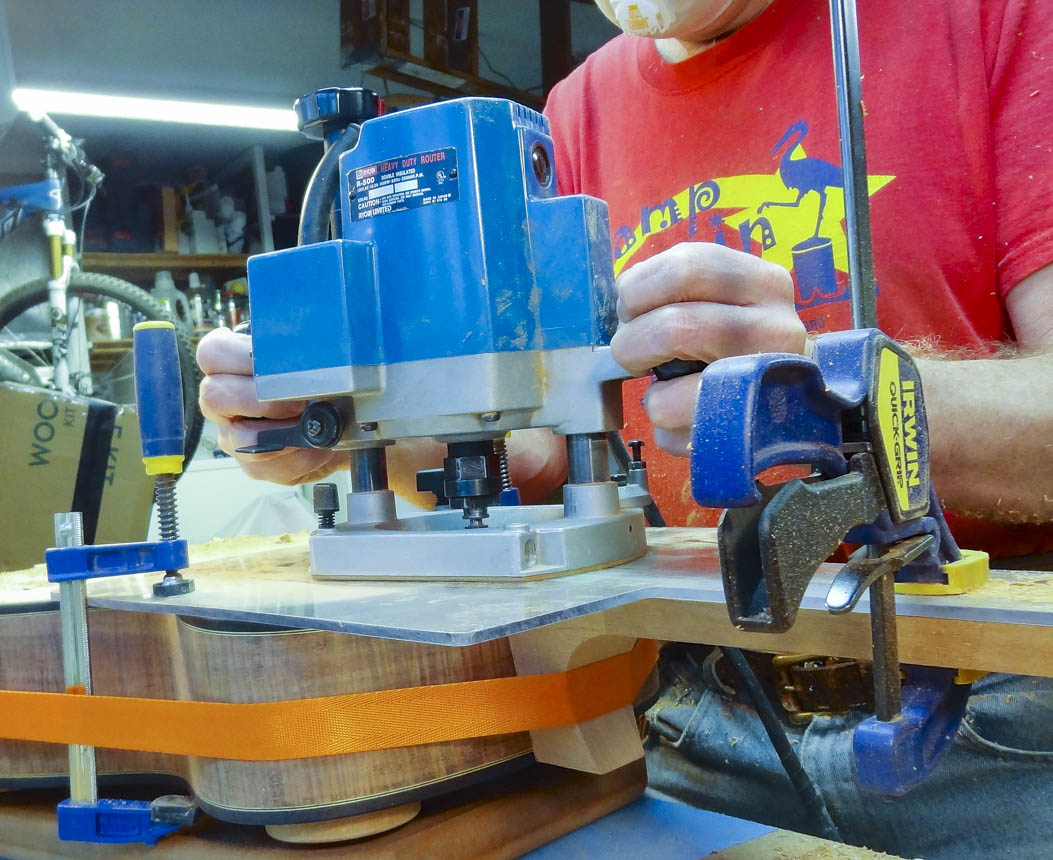
To make the next sanding step easier, a recess on the back of the heel is routed out to reduce its surface area and amount of wood to be sanded away. The rough taper of the heel is cut, leaving just enough wood outside the end guide lines for finish shaping. An elaborate set of jigs is used to dial in the all important neck angle. It consists of a long carrier the neck is clamped to, and two guides that register the carrier to the centerline of the body. One guide is on the tail end of the body, and the other is in the sound hole. The carrier slides up and down along the guides.
The top surface of the neck needs to be in the same plane as the area on the body between the top of the rim and the sound hole. The fret board will extend from the neck and lay flat on that portion of the body. By holding the carrier tightly against that flat area of the body, and placing a piece of sanding belt between the body and the back of the heel, I can sand the back of the heel to exactly match where it butts to the body, making a perfect joint between the two components. This is called flossing. Because I already cut the heel at the proper angle, the amount of sanding is minimal, and the heel perfectly matches the slight curvature of the rim.
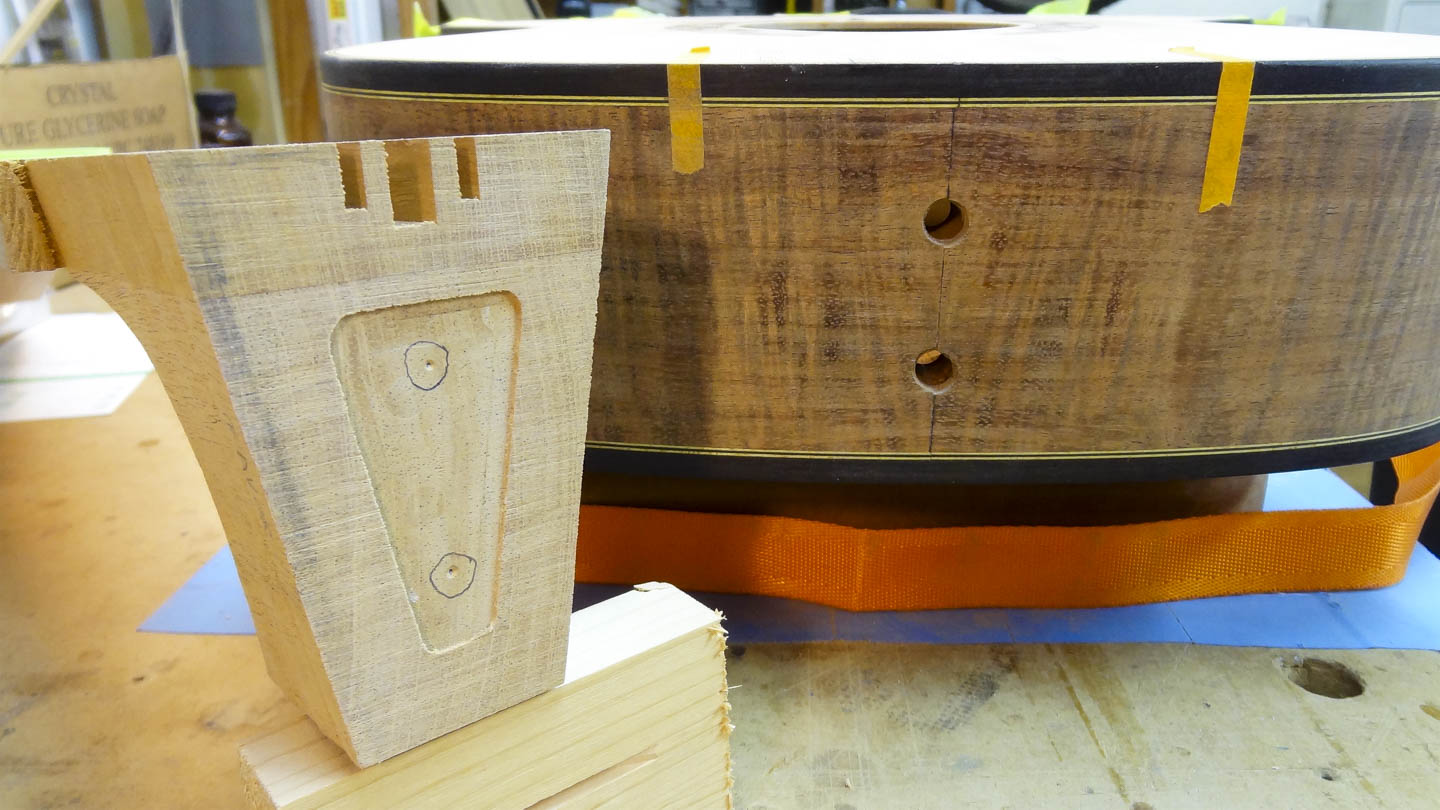
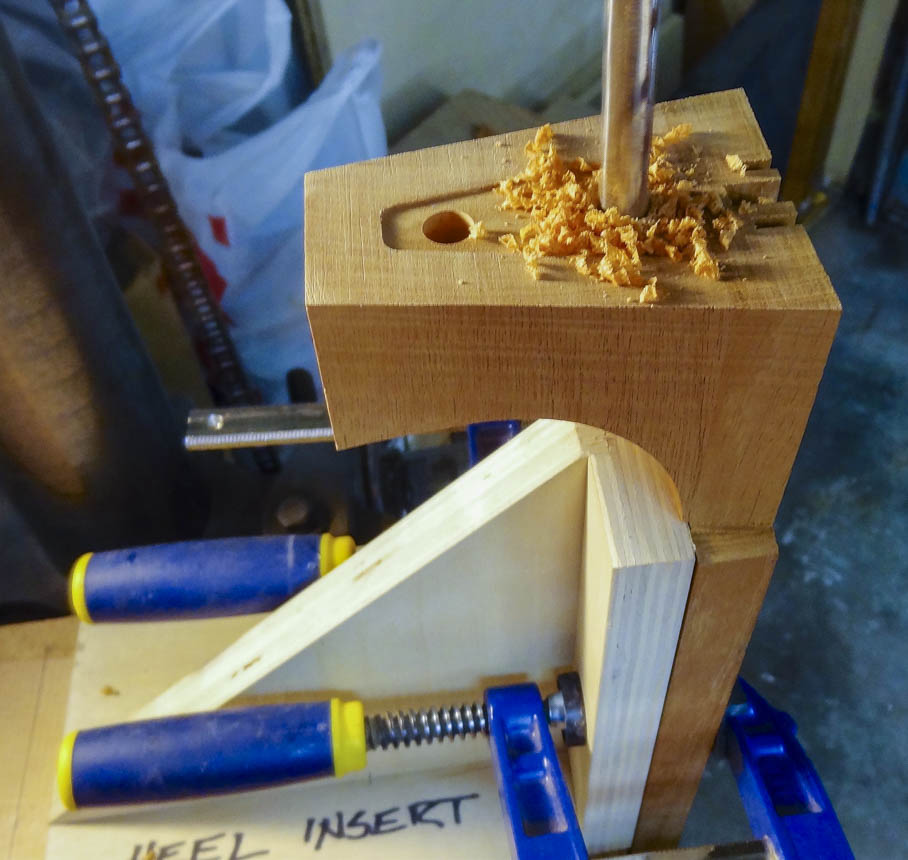
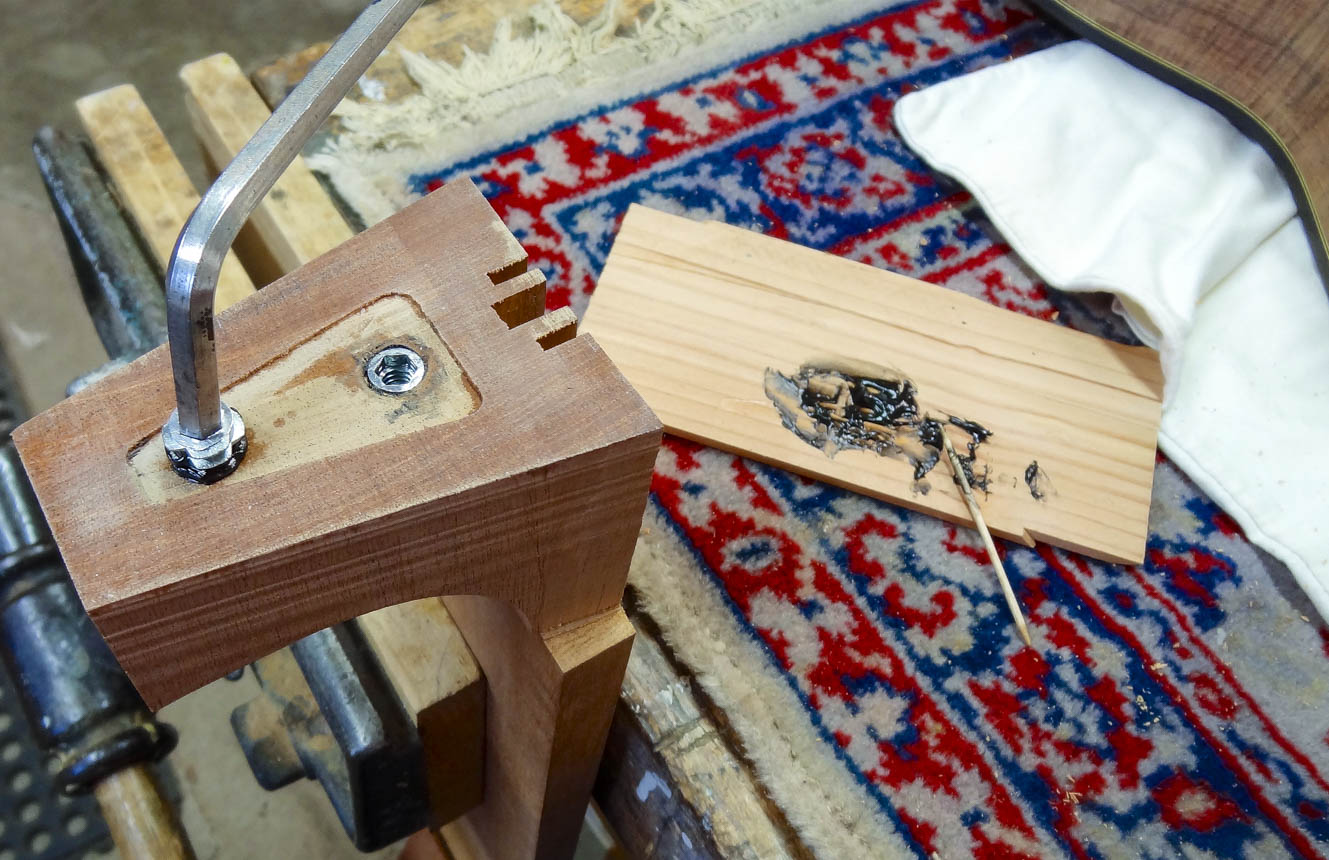
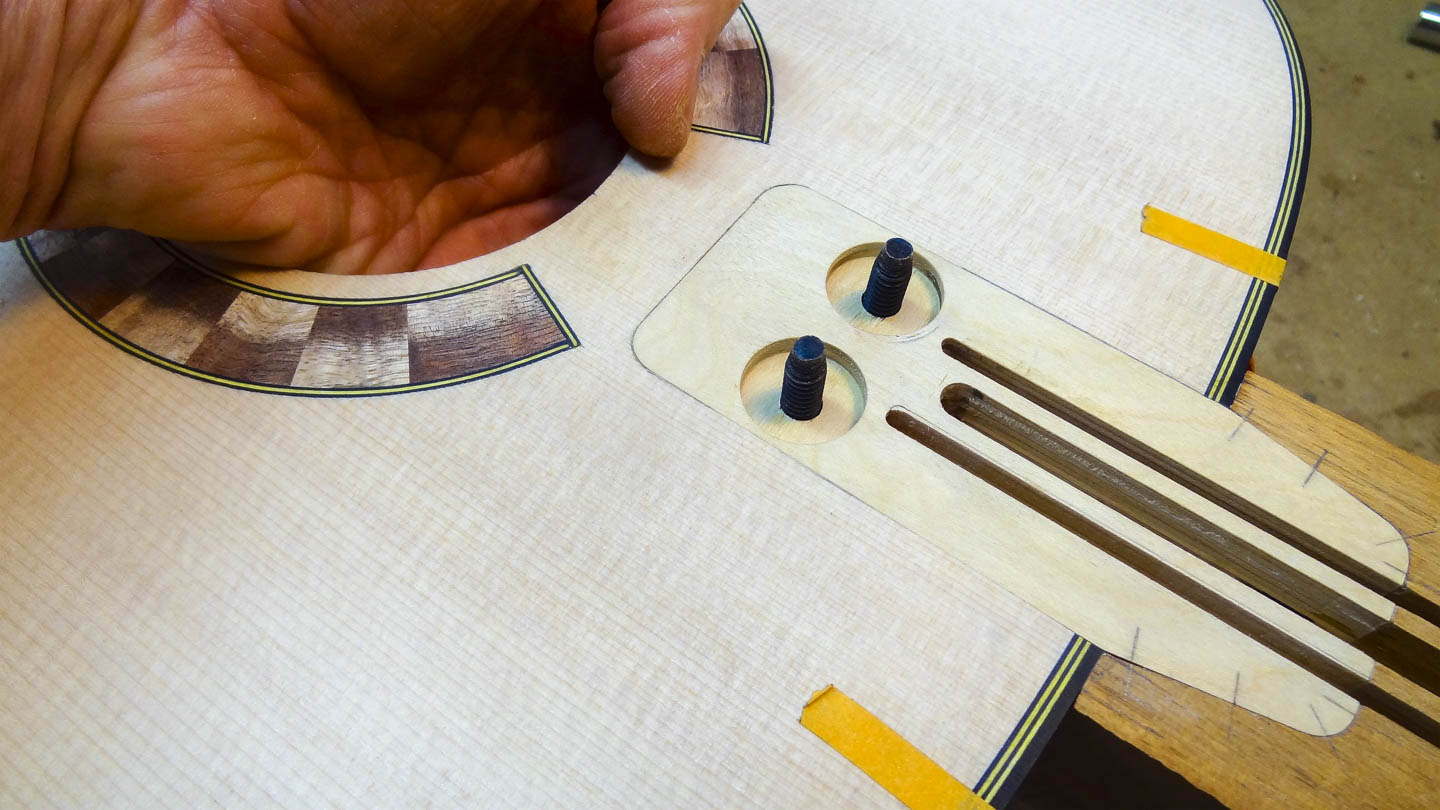
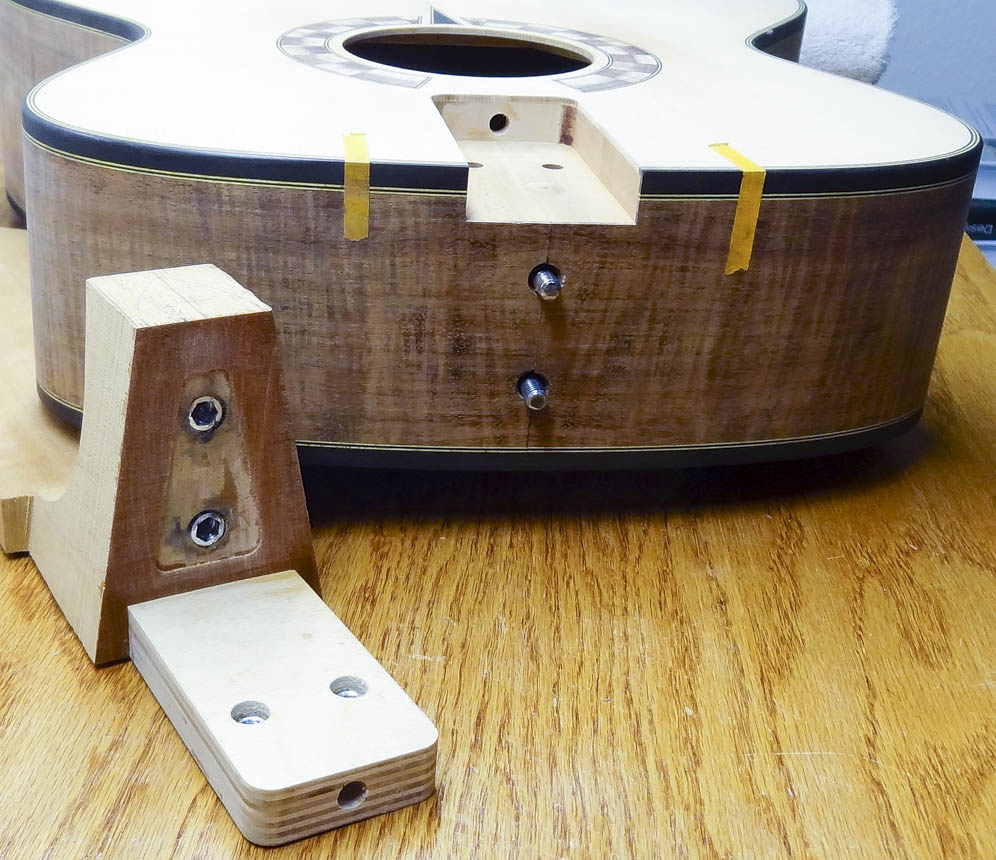
The neck will be attached with four bolts driven from inside the body, two horizontal and two vertical. For the first two bolts, the neck is positioned very accurately on the body, and temporarily held in place with a band clamp. The position of the bolt holes through the body are transferred to the heel, and holes are drilled into the back of the heel with the drill press. Threaded inserts that the bolts will screw into are epoxied into these holes.
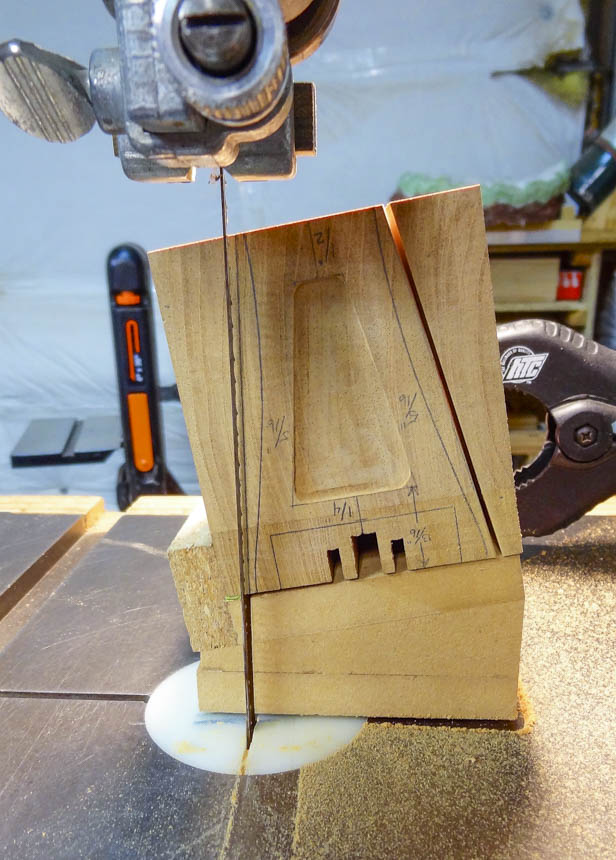
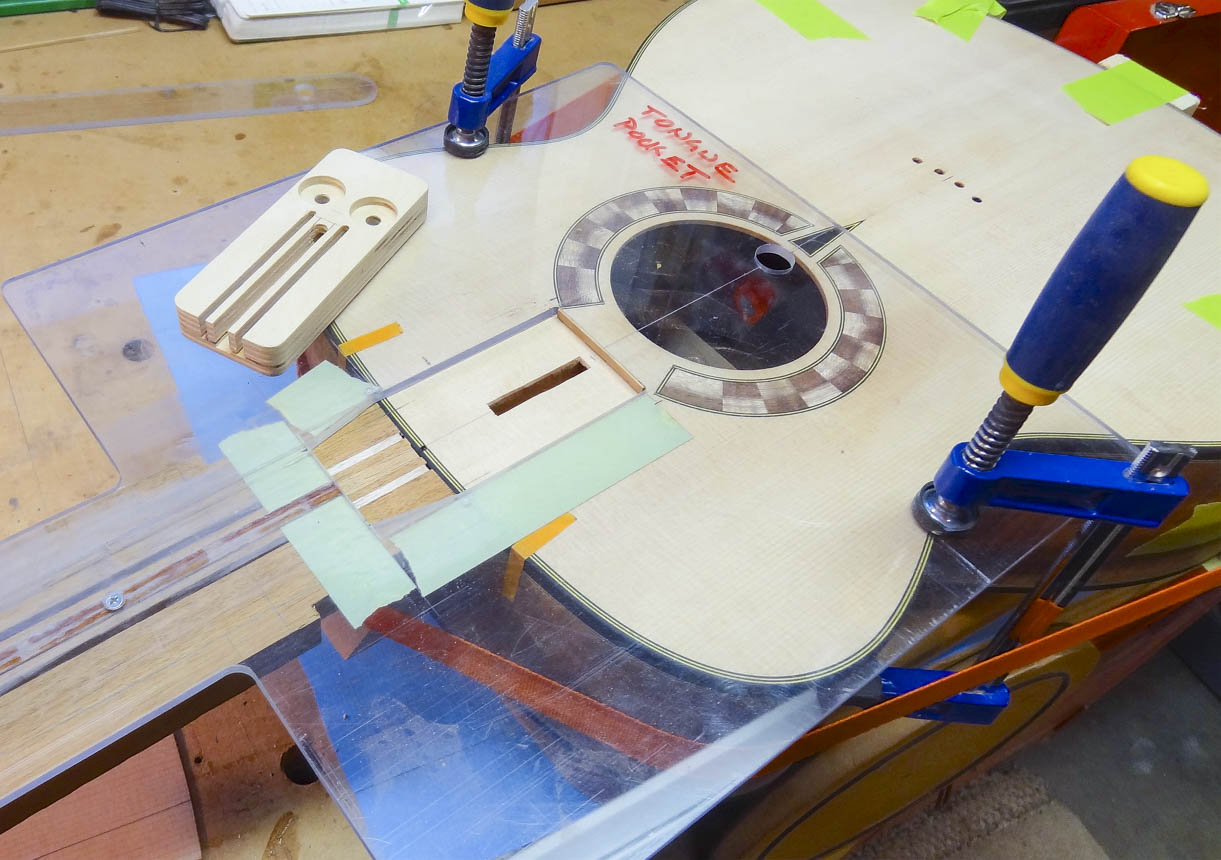
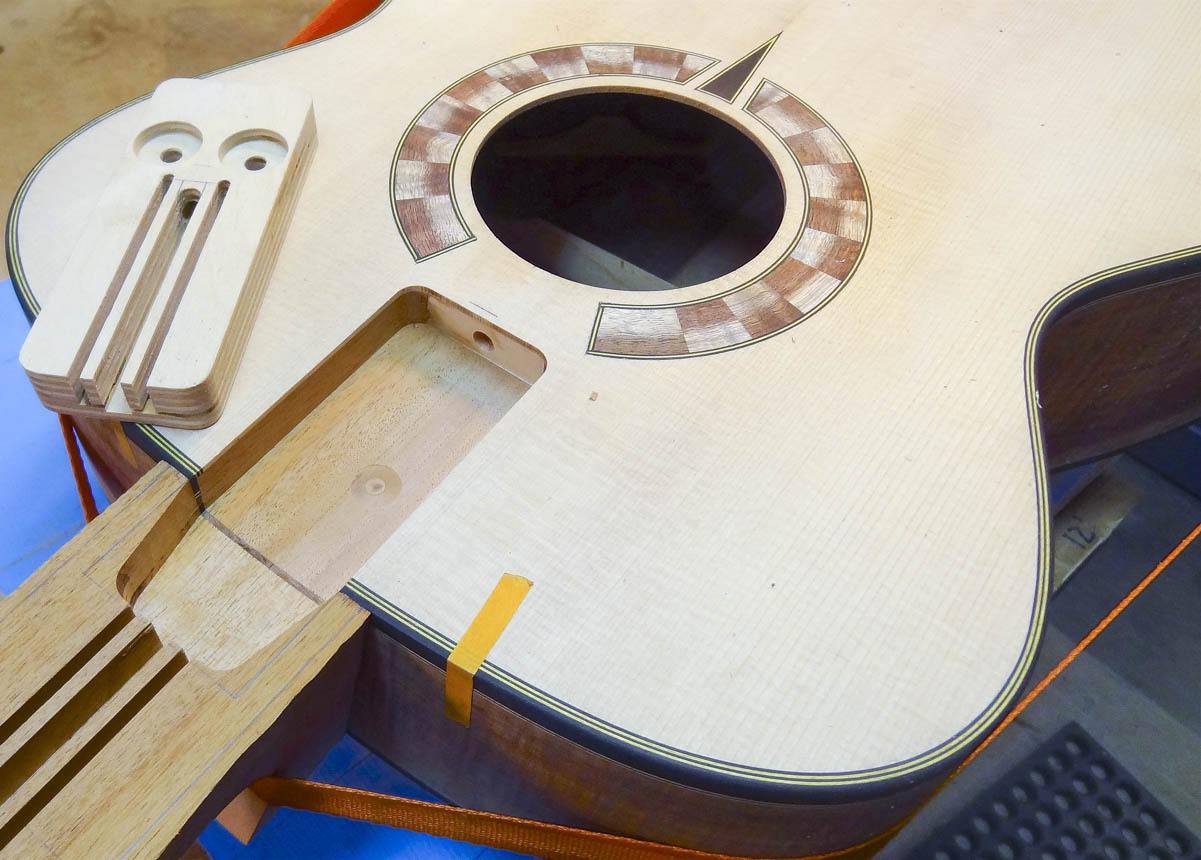
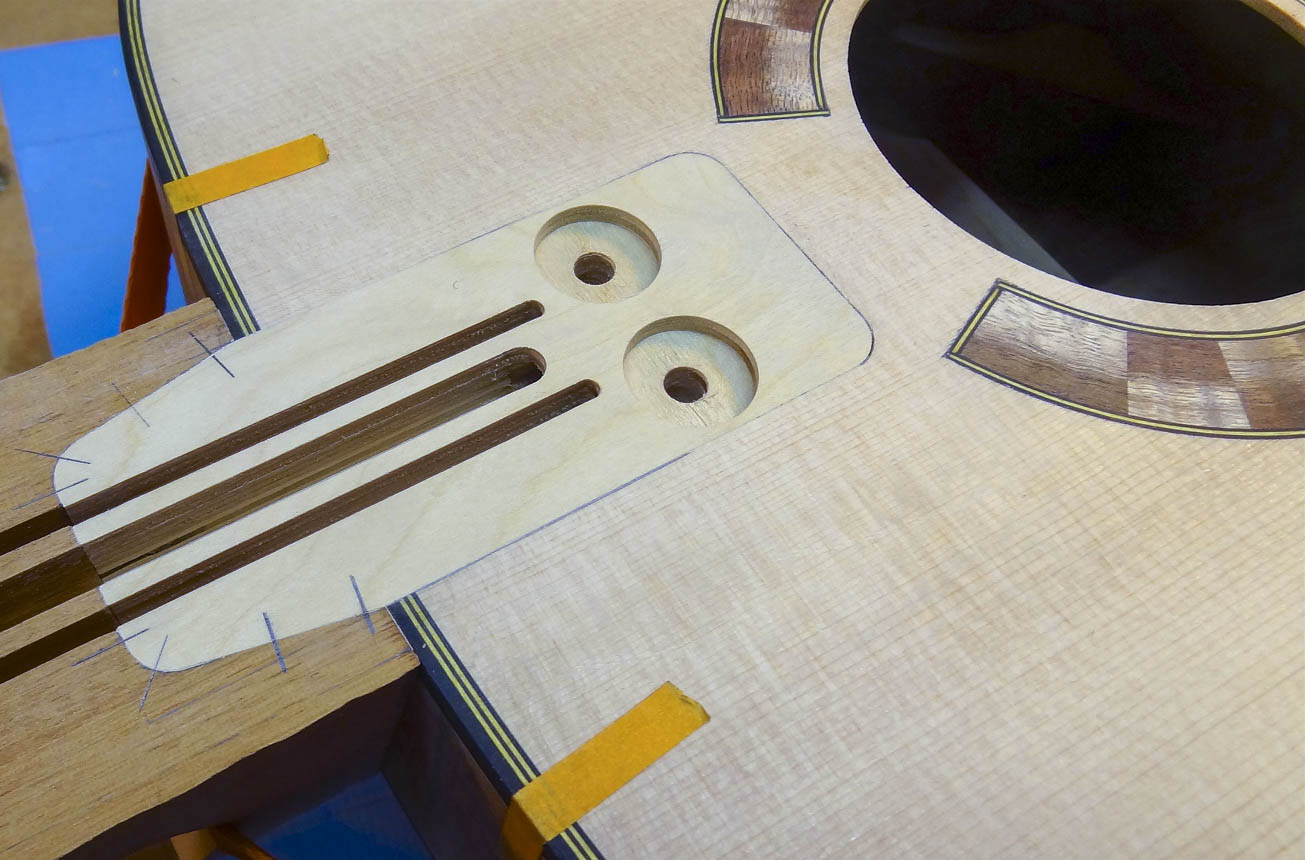
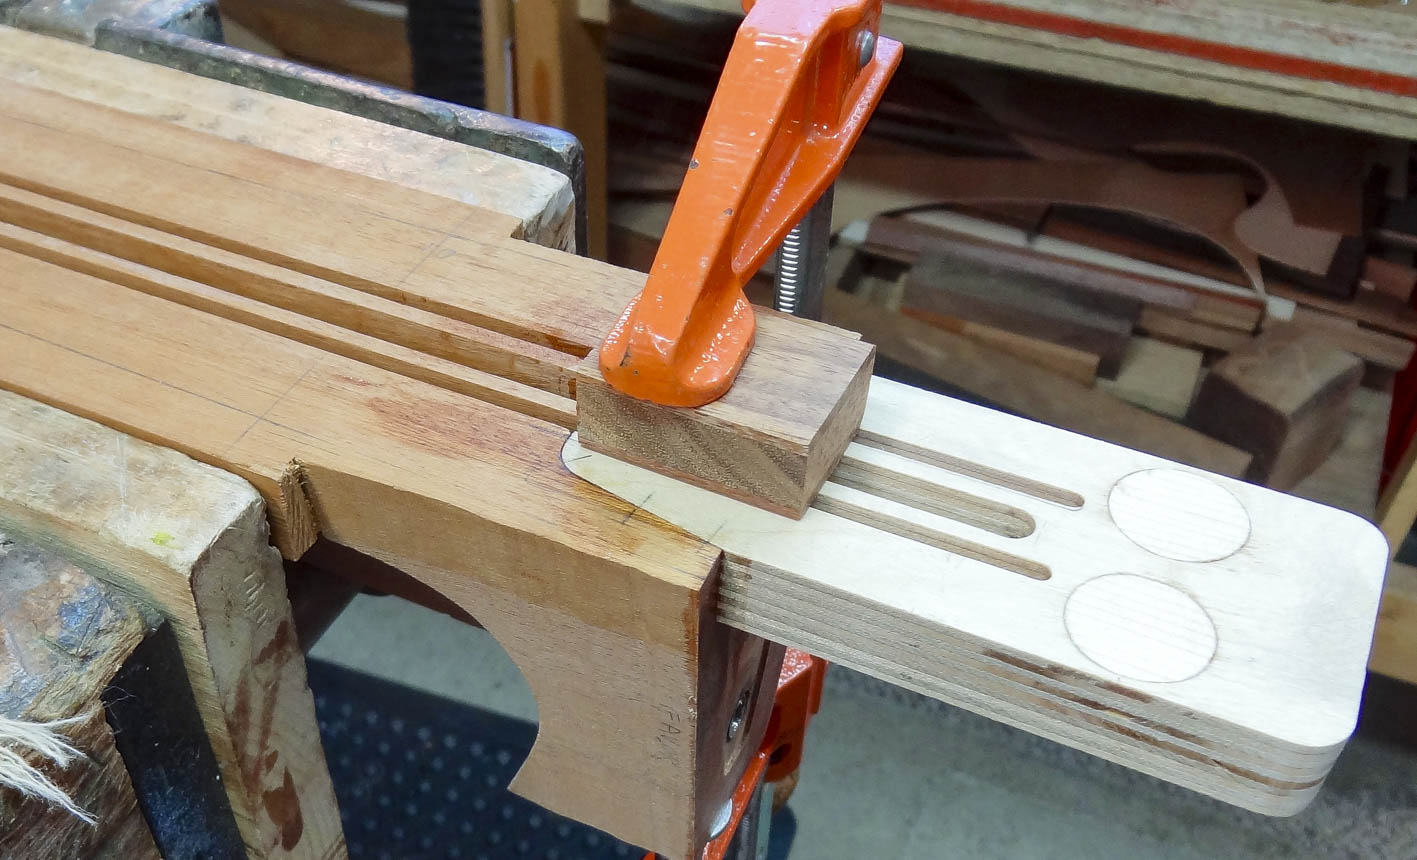
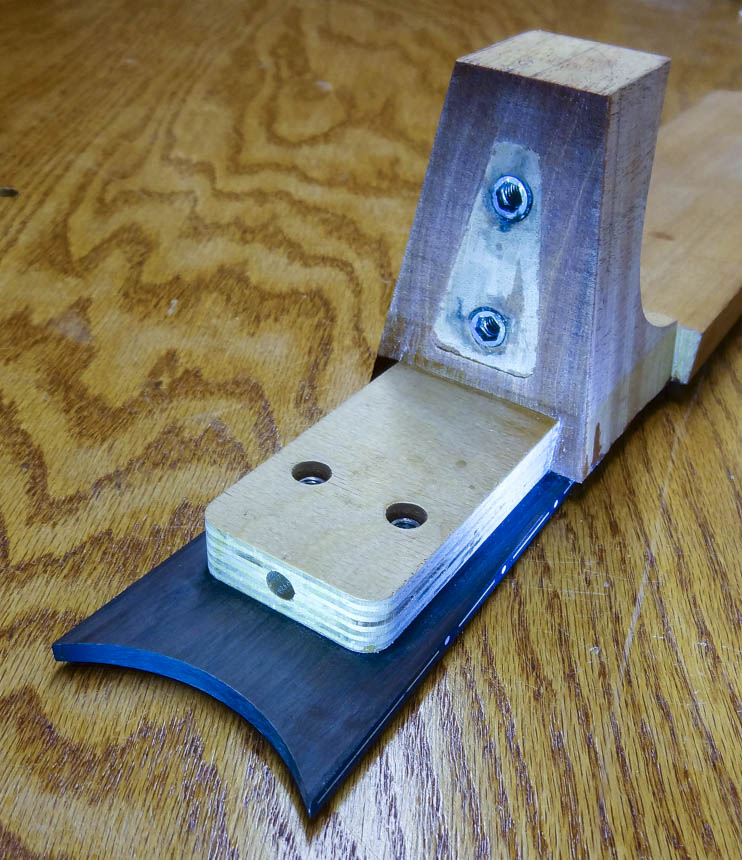
With the neck bolted and band clamped to the body, a pocket is routed out to fit a hold down “tongue” that will eventually be glued to, and become part of the neck. The tongue is a component I make in batches because it’s highly complex with channels for carbon fiber beams and the truss rod, as well as a hole to access the truss rod adjustment from inside the body. The tongue is fairly close to the size of the new pocket, but still needs some fine tuning so it fits tightly and is level with the top surface surrounding it.
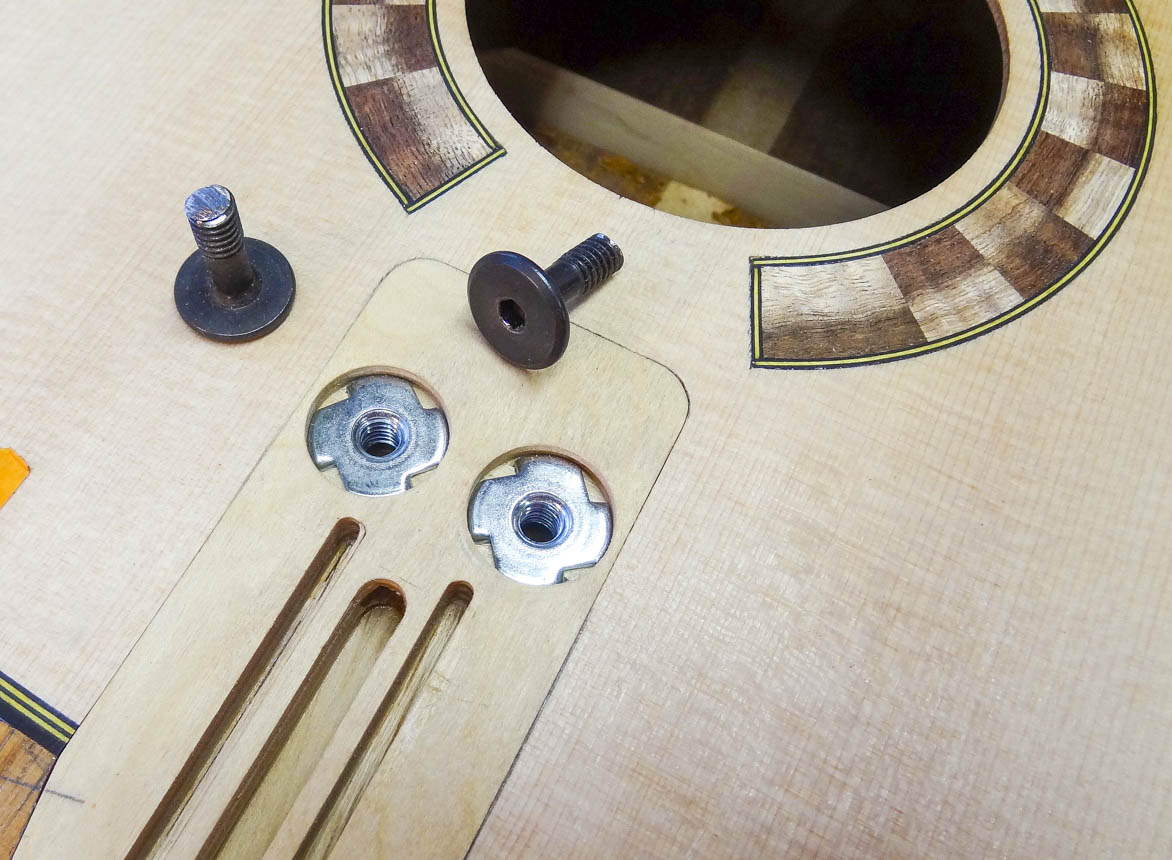
Holes are drilled in the body for the second two vertical bolts using the existing holes in the tongue as a guide. The bolts come up through the body and screw into T-nuts recessed into the tongue. The T-nuts are covered with a patch, and the tongue is epoxied to the neck. The advantage of having a bolt on neck is in case the guitar ever needs a neck angle reset down the road. This task is so much easier than if the neck was glued to the body.
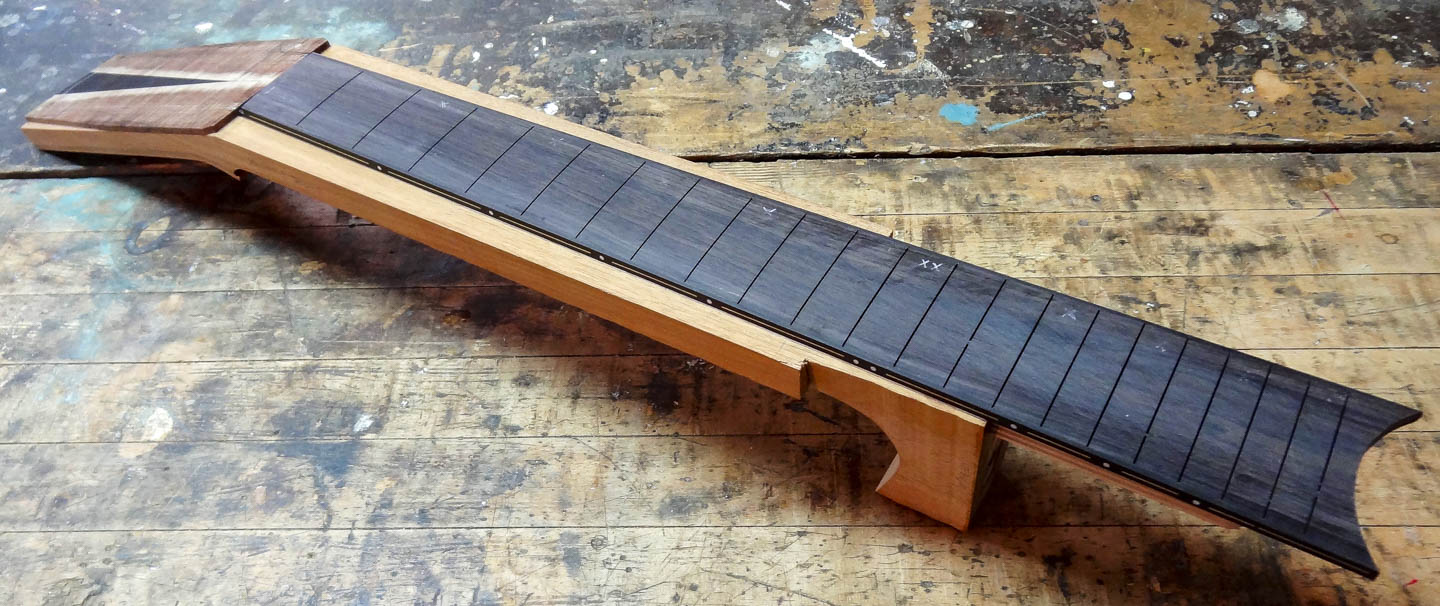
THE FRETBOARD
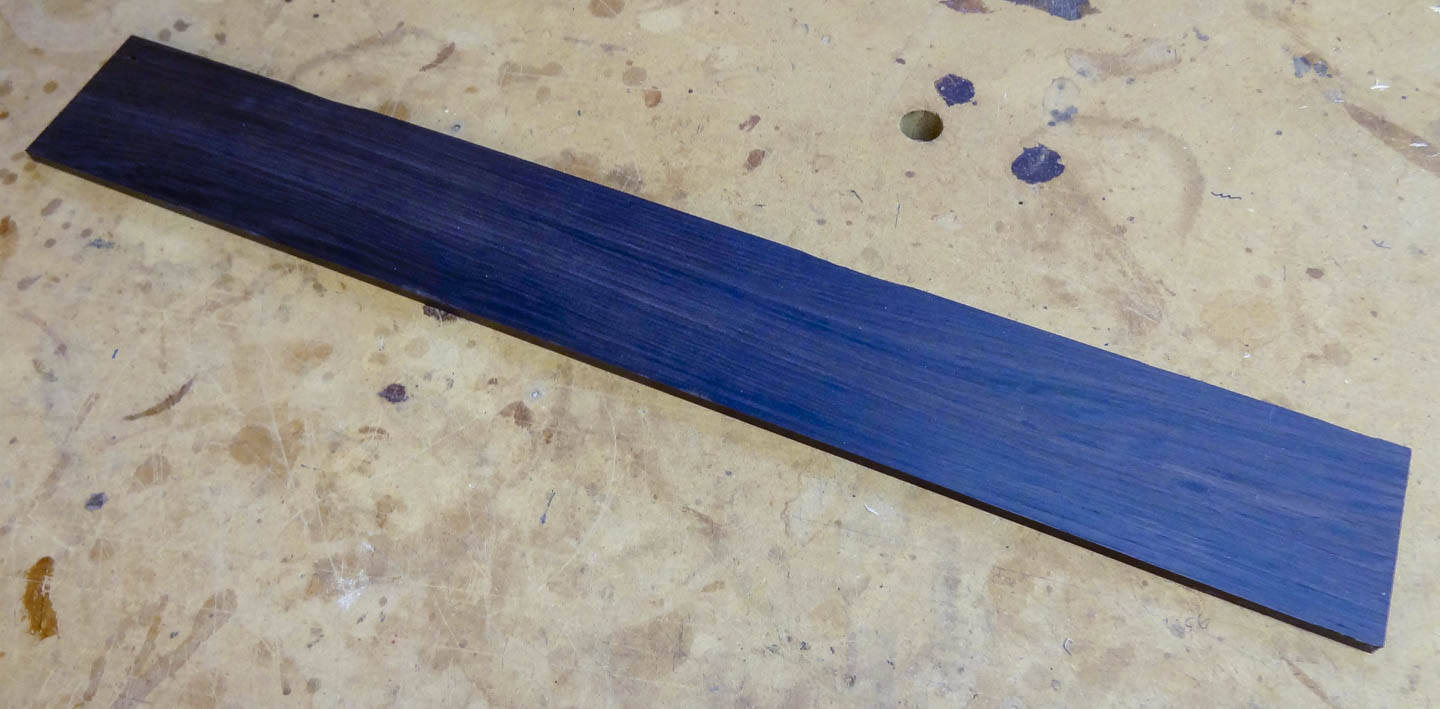
The beautiful piece of African Blackwood I have for the fretboard is too narrow to also get the edge binding from, like I usually do. It’s nice to have the binding match the fretboard in color and grain pattern so it looks like one piece of wood, but it won’t work in this case. A work-around is to use ebony binding as a substitute since it’s nearly the same color as the Blackwood, and the body also has ebony binding. I mill the fretboard blank so the edges are parallel, one end is square to the sides and it’s the right thickness.
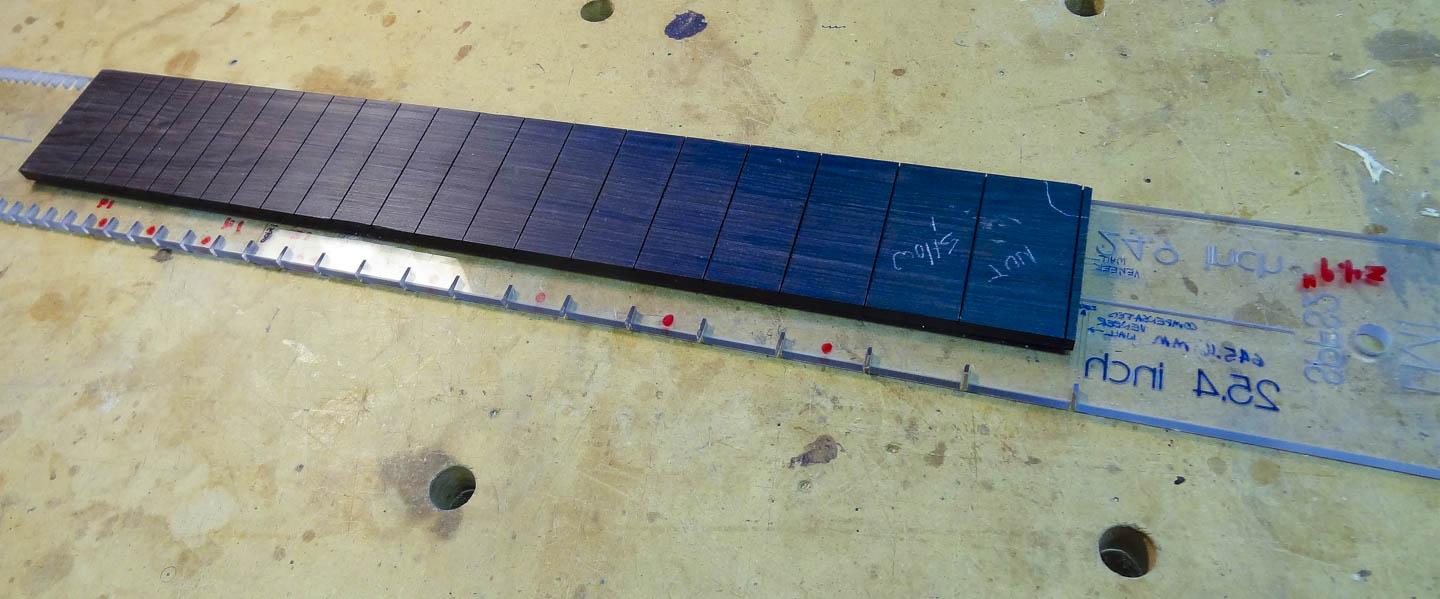
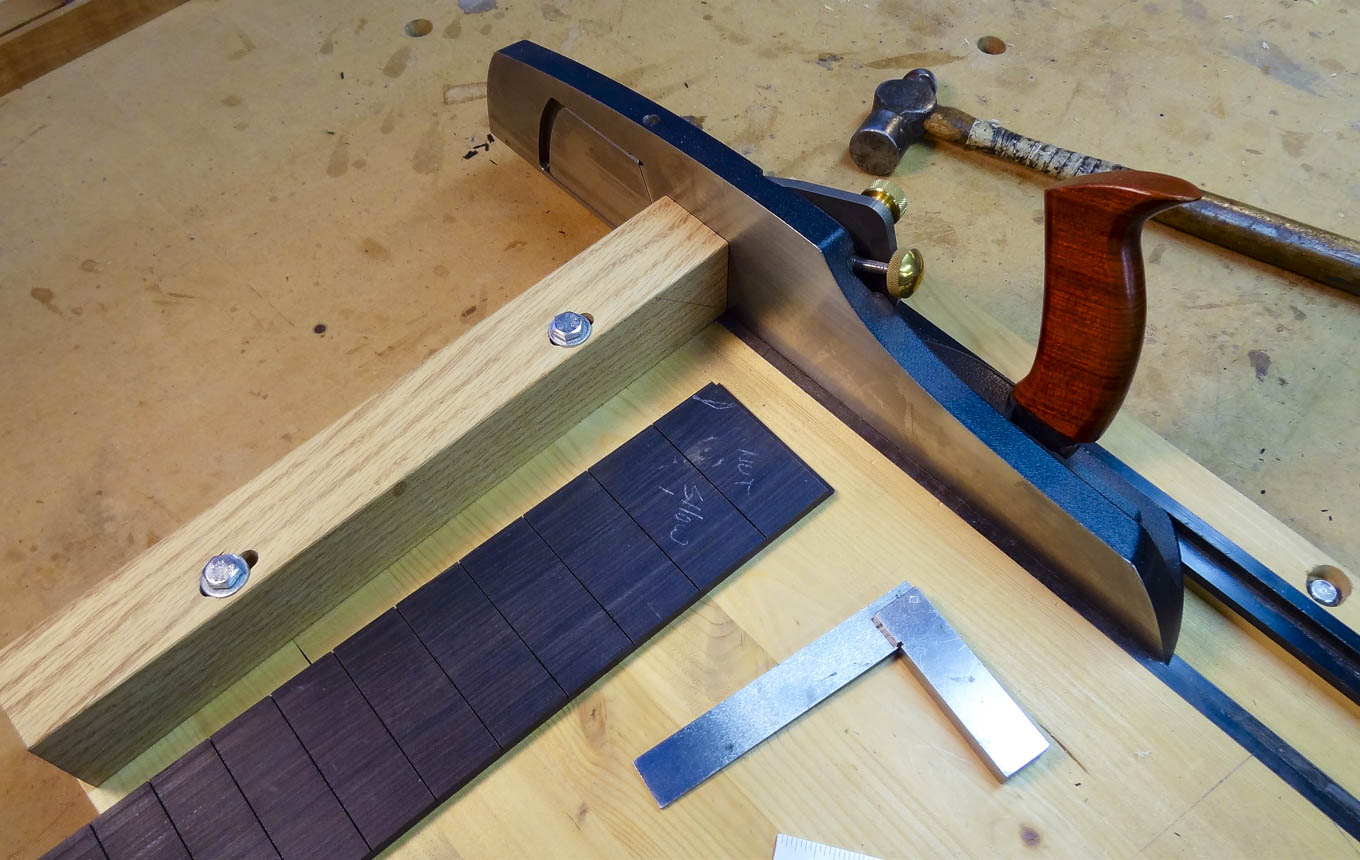
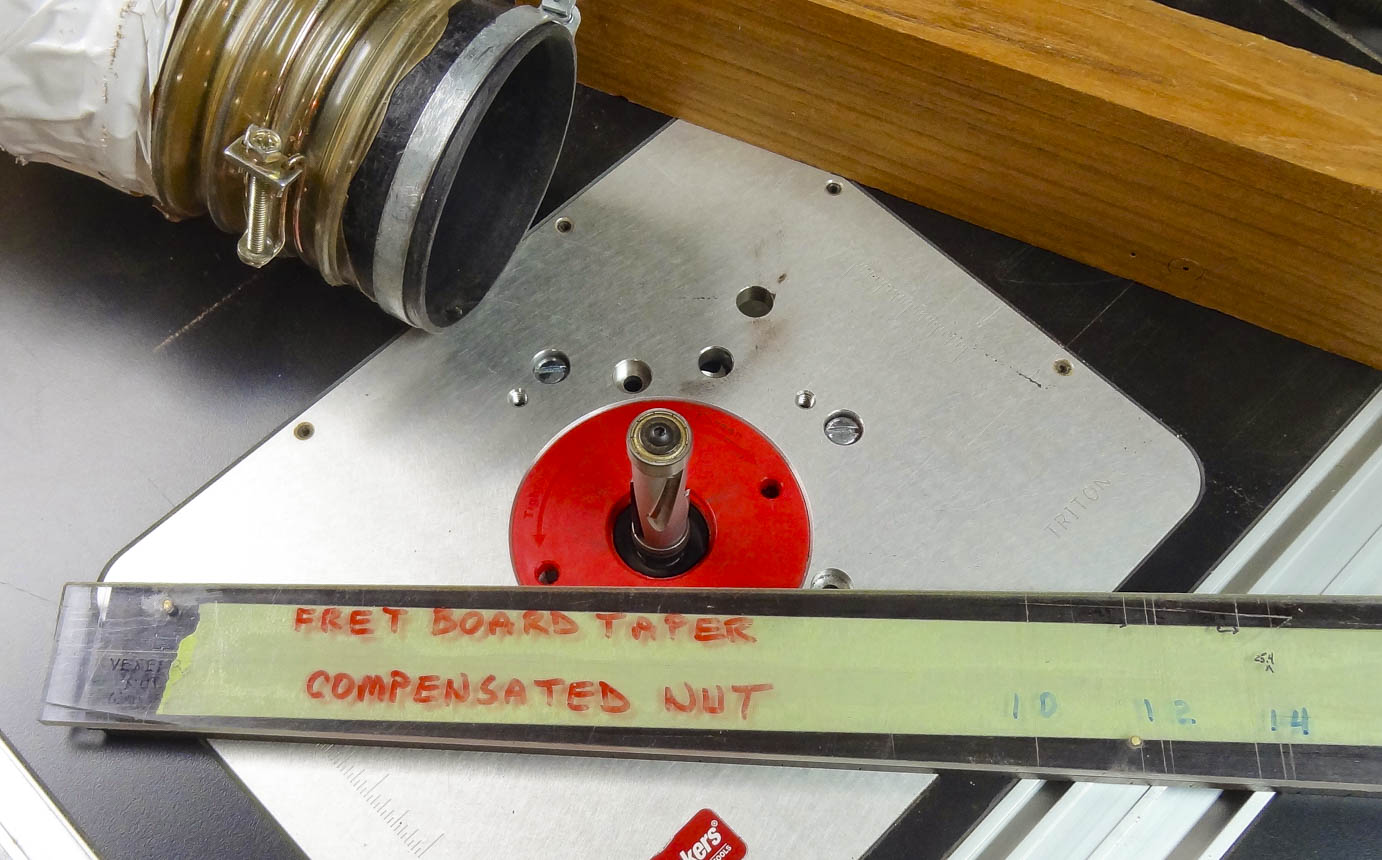
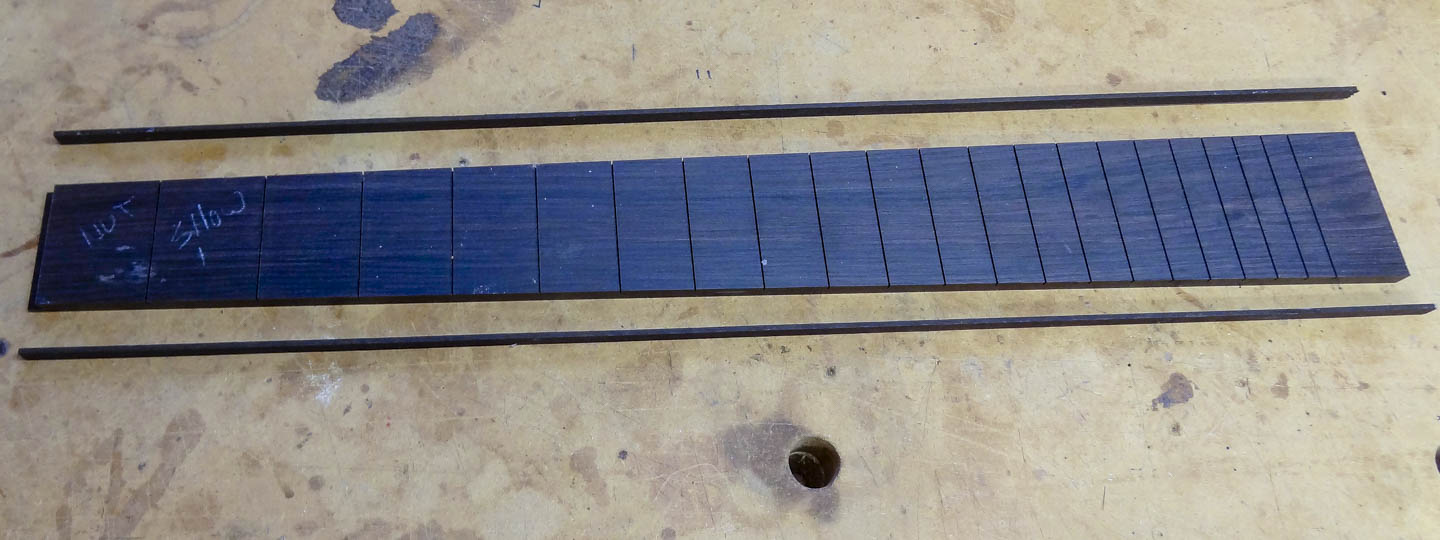
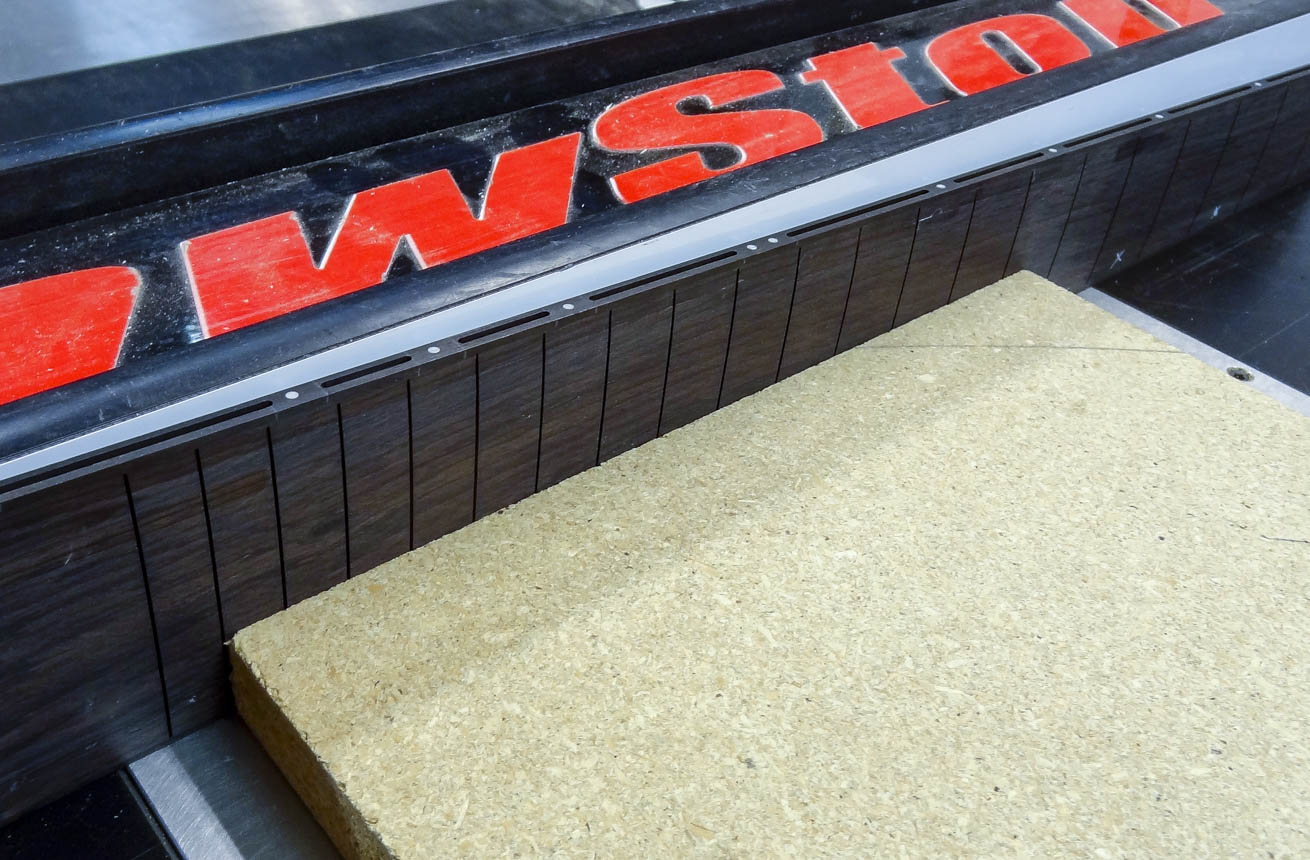
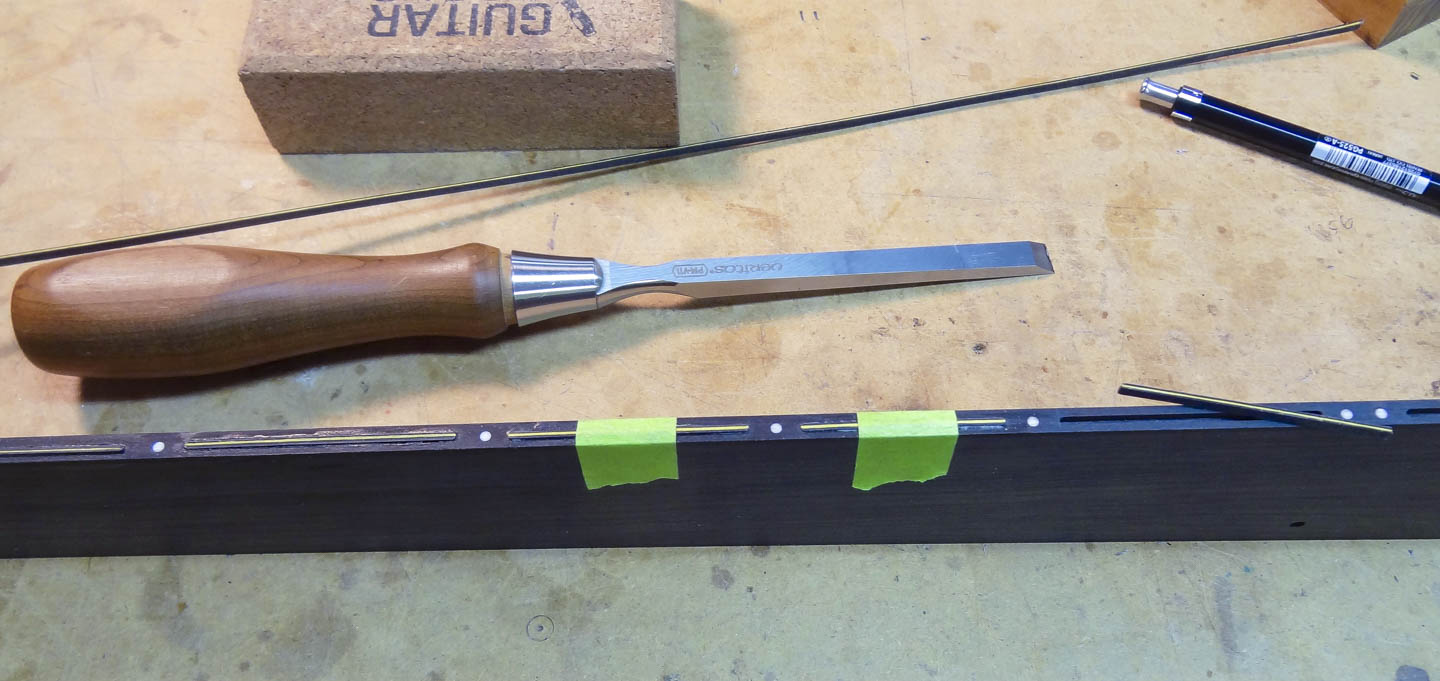
The fret slots are cut using a commercial template for the scale length preferred for this guitar (24.9”). I use a jig on my table saw with a thin kerf blade to cut the slots. The template’s index slots register to a pin on the sliding sled, and I move from index to index and run the fretboard across the blade.
Some pre-planning for using a compensated nut has to take place at this point. The nut end of the fretboard needs to be shorted a precise amount from the normal zero fret position, making the distance between the normal nut and the first fret shorter. This is so I can later machine the finished nut for each individual string to optimize the overall intonation, or how well it plays in tune. I do this using the router table and shooting board, and leave a ledge for the nut to sit on.
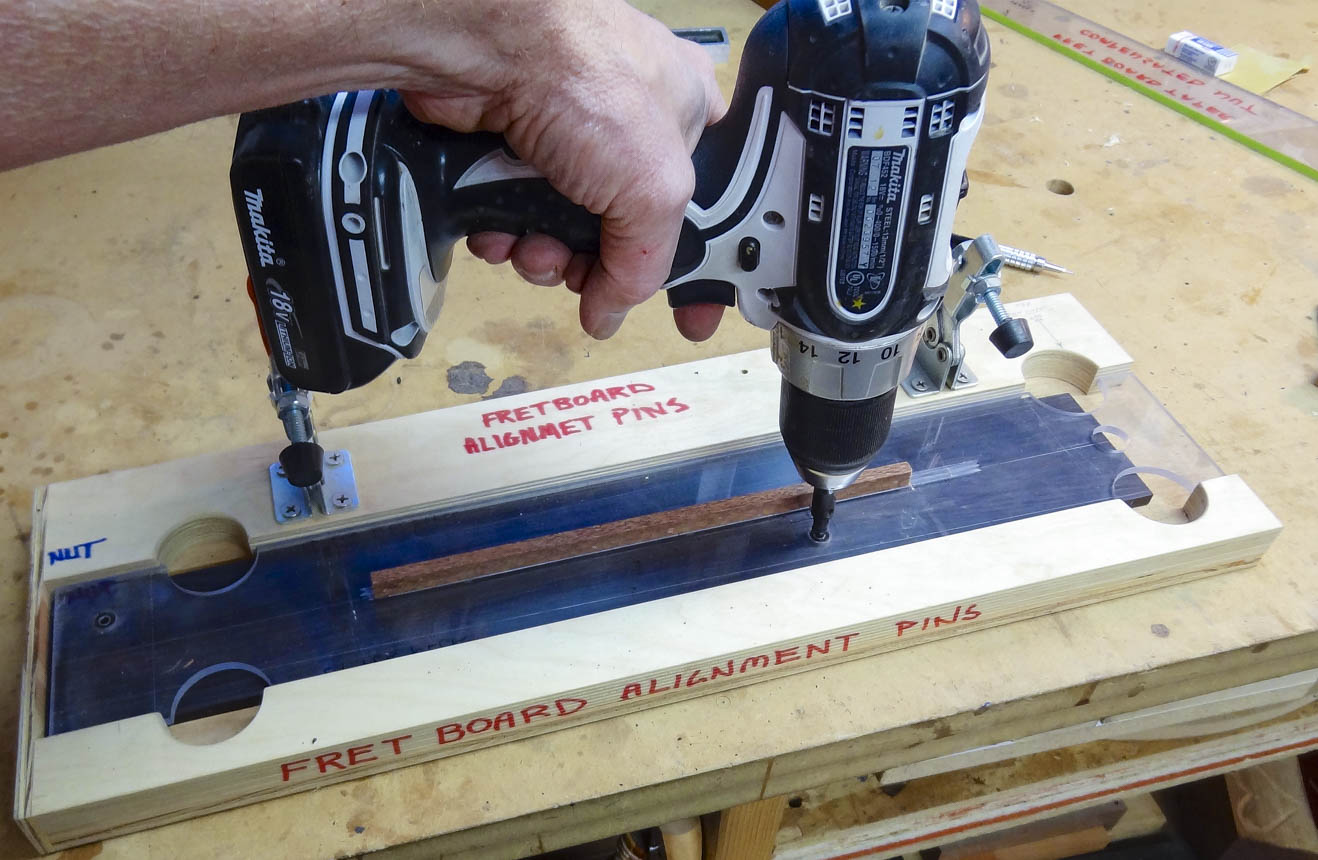
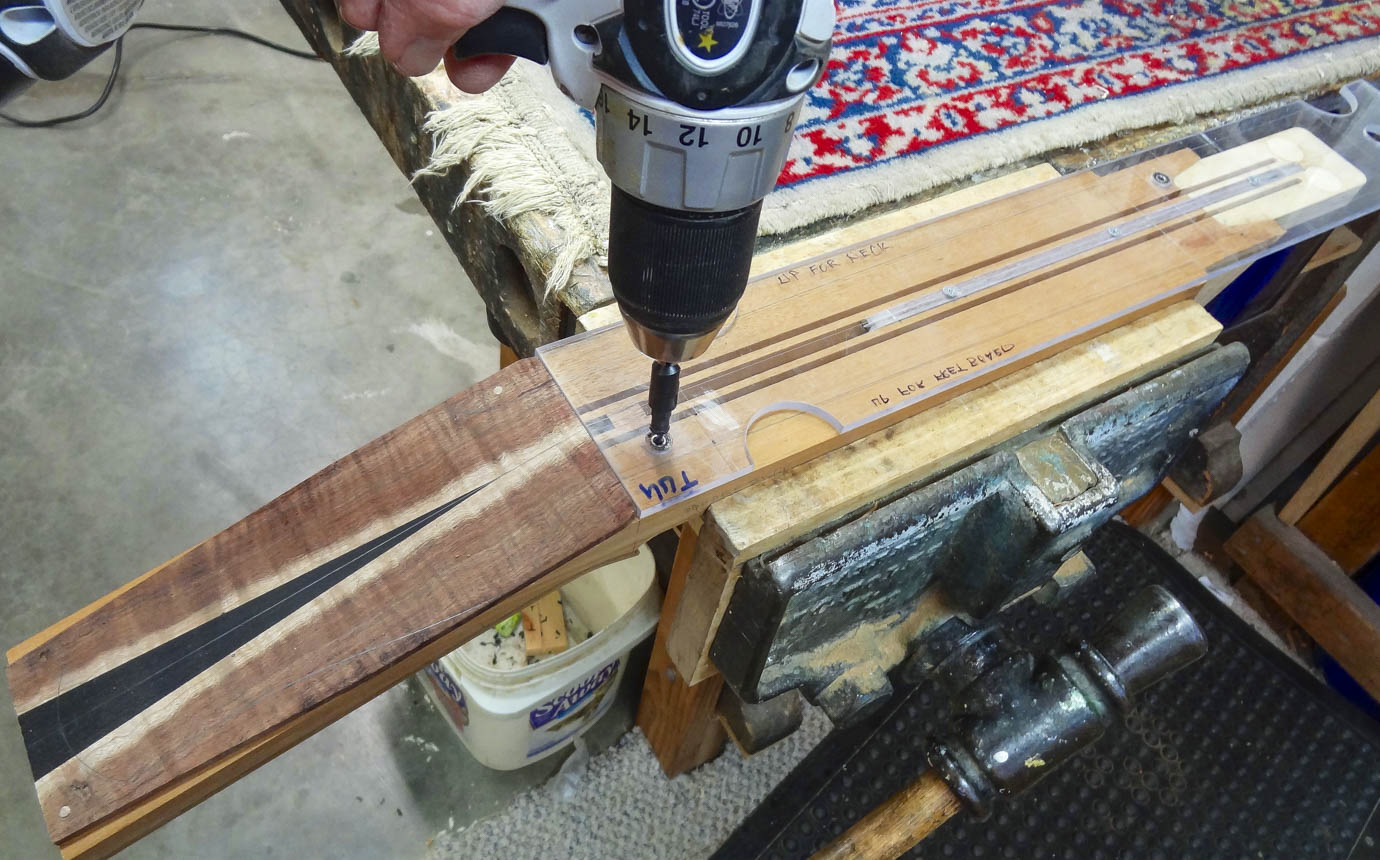
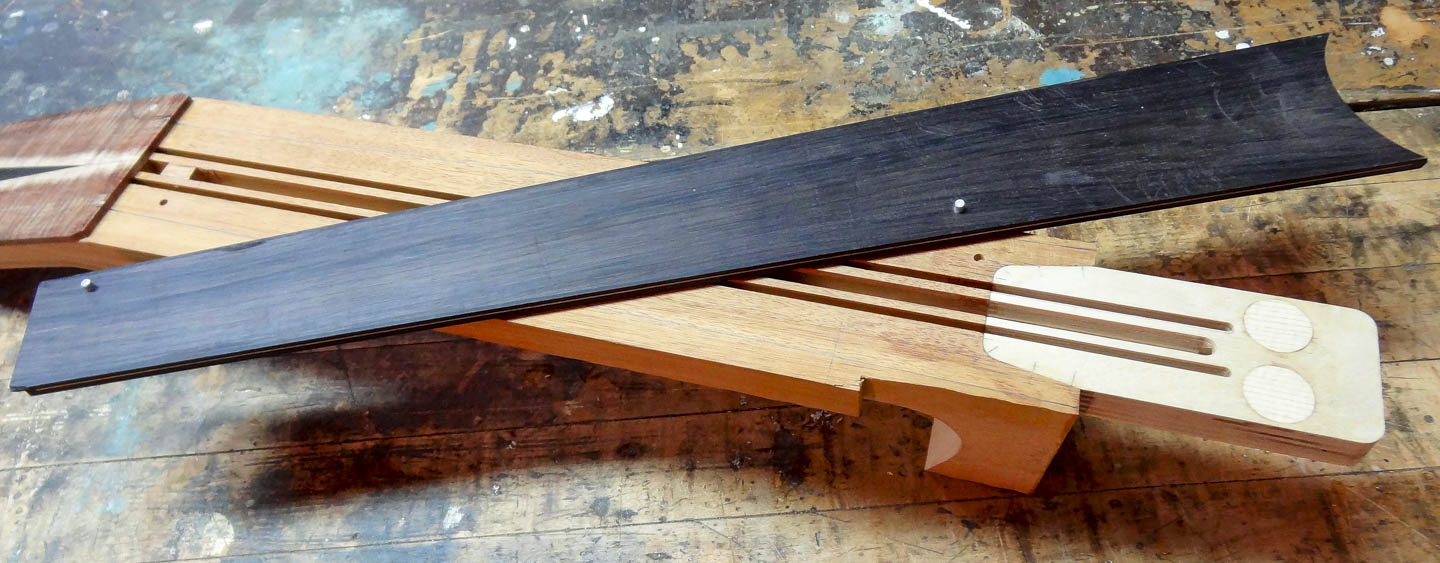
To locate the fretboard on the neck I use two indexing pins. A special jig with drilling guides aligns with the centerline of the blank, and I drill the holes in the back of the fretboard. The same jig is then turned over and it indexes to the truss rod channel in the neck, and two more holes are drilled that exactly match the holes in the fretboard. Two steel pins sit in the holes and perfectly align the fretboard to the neck. This indexing system is used with other steps to finish the fretboard.
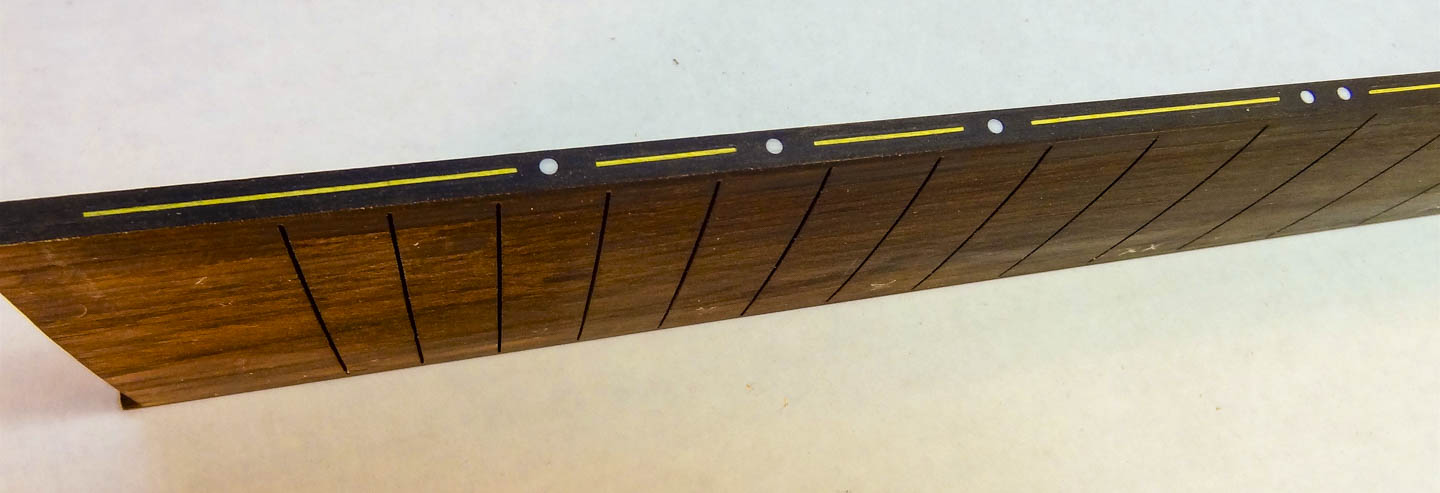
The fretboard is milled to a tapered shape using a template—which also uses the indexing system—and a router with a guide bearing that follows the template and cuts the taper. If I wasn’t using binding along the edge of the fretboard, I could stop here. In this case, however, I use a jointer to remove material along both edges. The amount of material removed is equal to the thickness of the binding. The binding is then glued to the edges of the fretboard, which returns it to the original tapered shape. Edge binding is nice because it hides the fret slots on the edges of the fretboard and gives it a very clean look and feel.
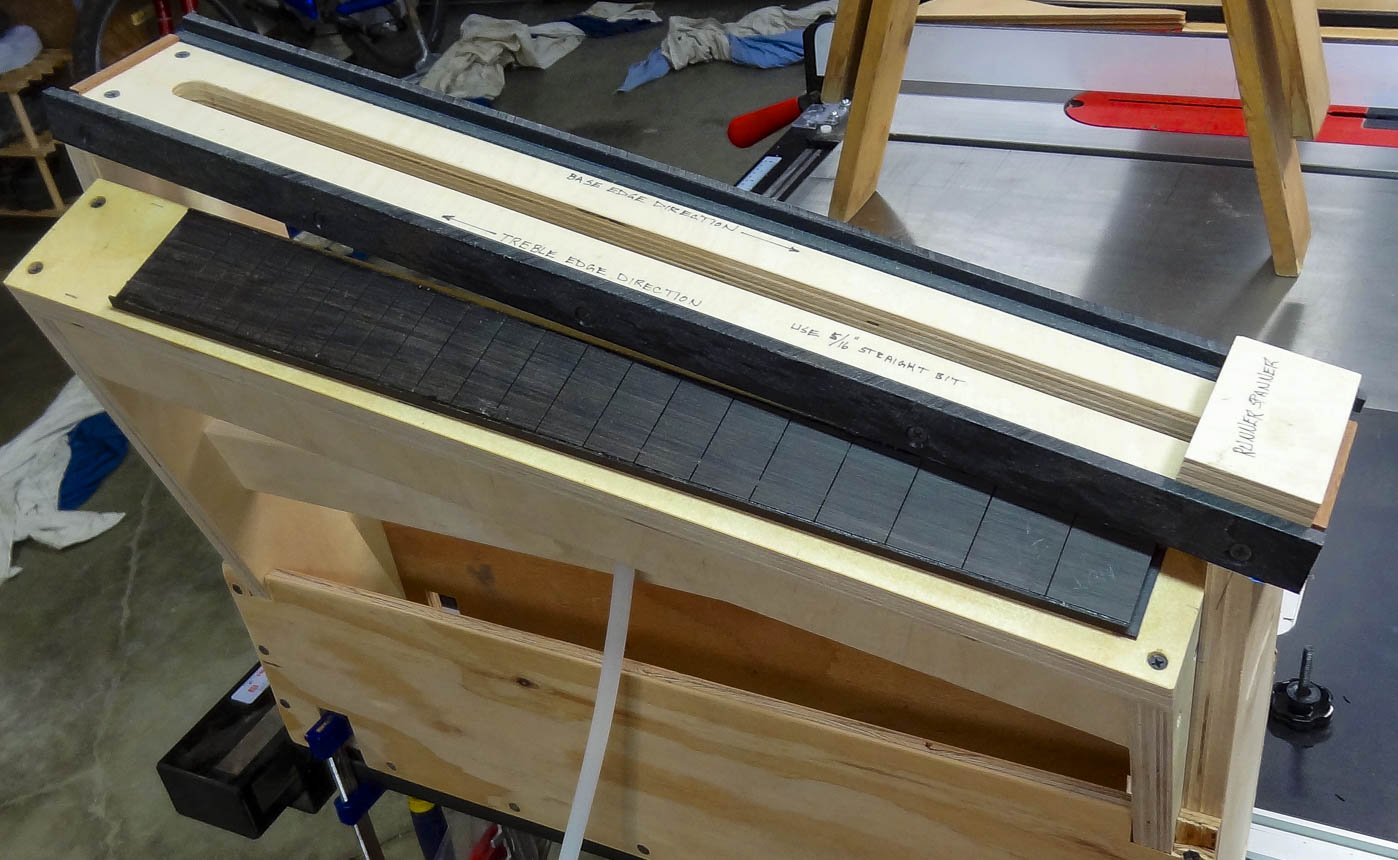
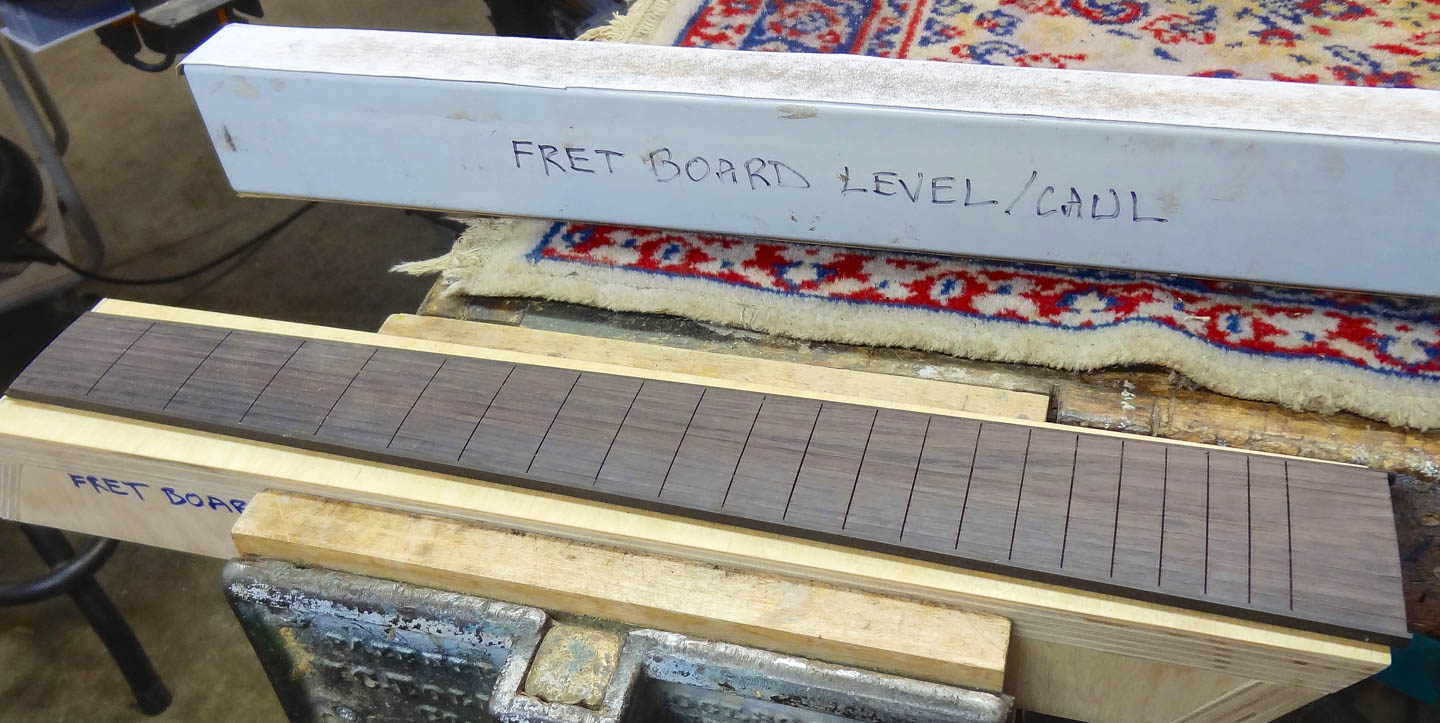
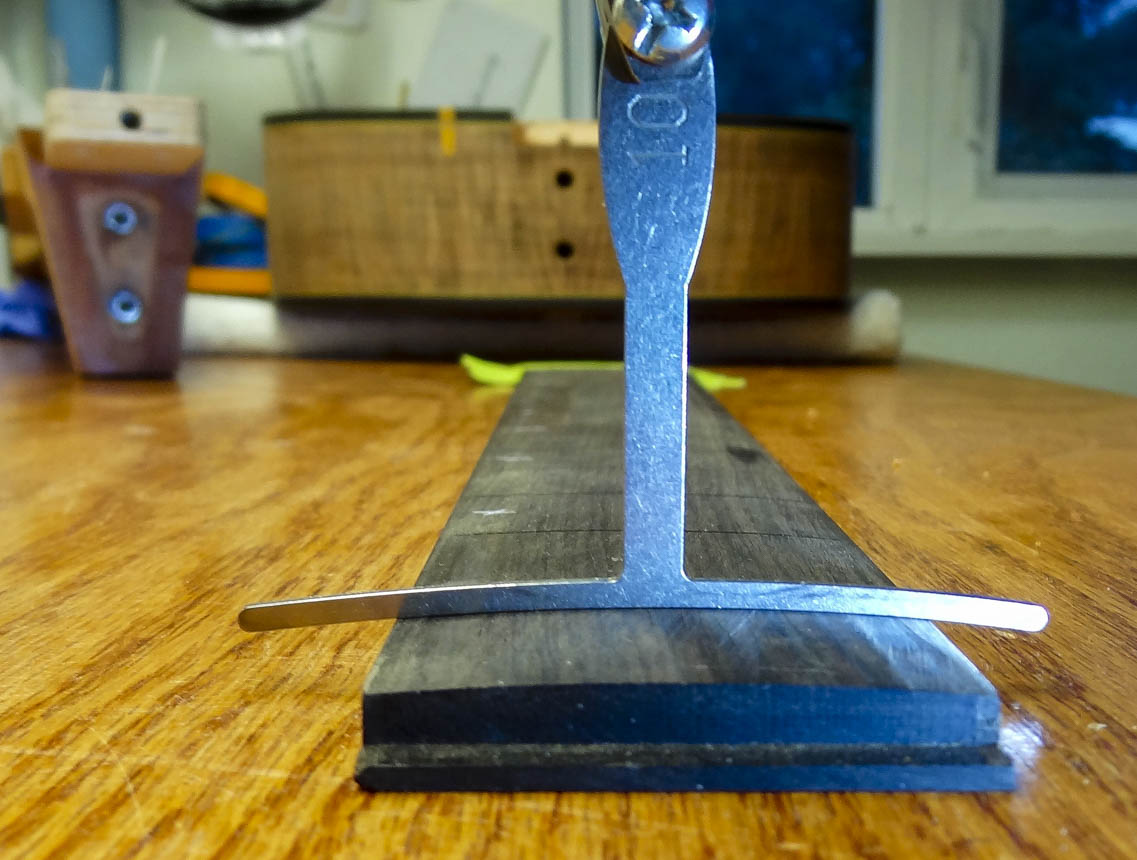
I use a compound radius for my fretboards. It’s 10” at the nut, and gradually transitions to 14” at the sound hole end. This offers better play-ability compared to fretboards with a uniform radius along the whole length. The fretboard is indexed to a swinging arm of the radius routing jig and it’s held down with vacuum pressure. The router moves back and forth on a fixed track, and by moving the swing-arm incrementally from one extreme to the other, each pass removes a bit of wood leaving the compound radius. I clean up the routed surface with a dead-flat steel sanding beam, but I will get it perfect later on with the neck attached to the body and just before shaping the neck.
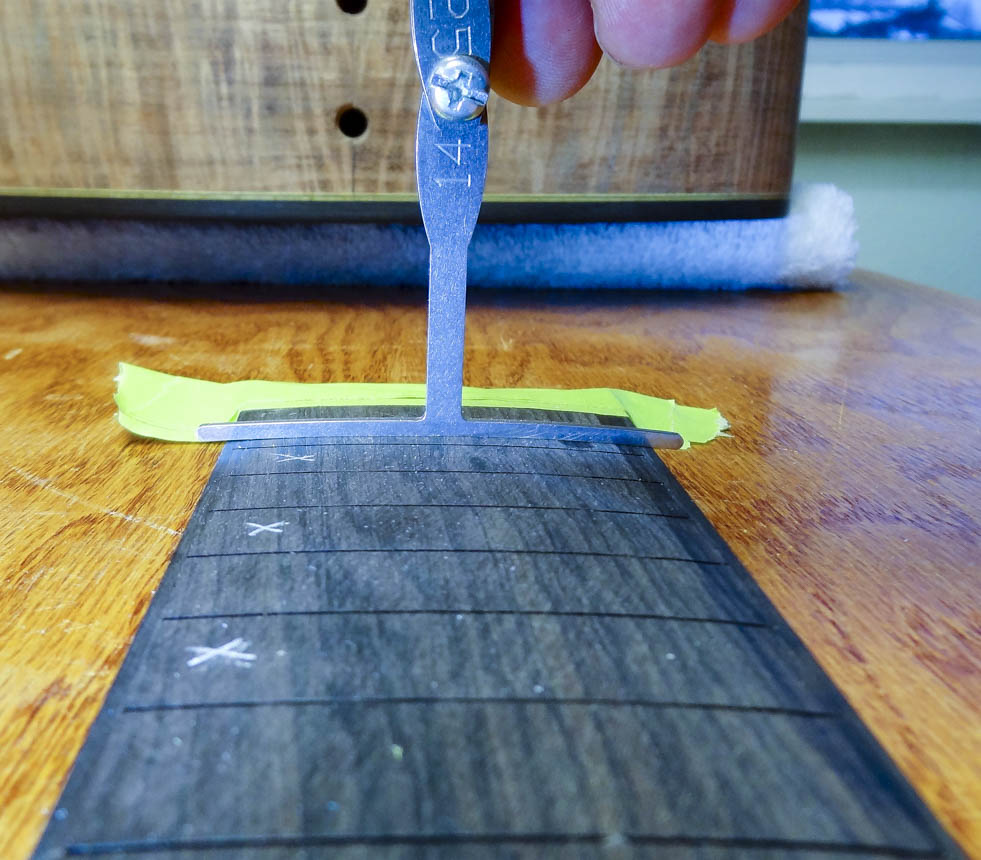
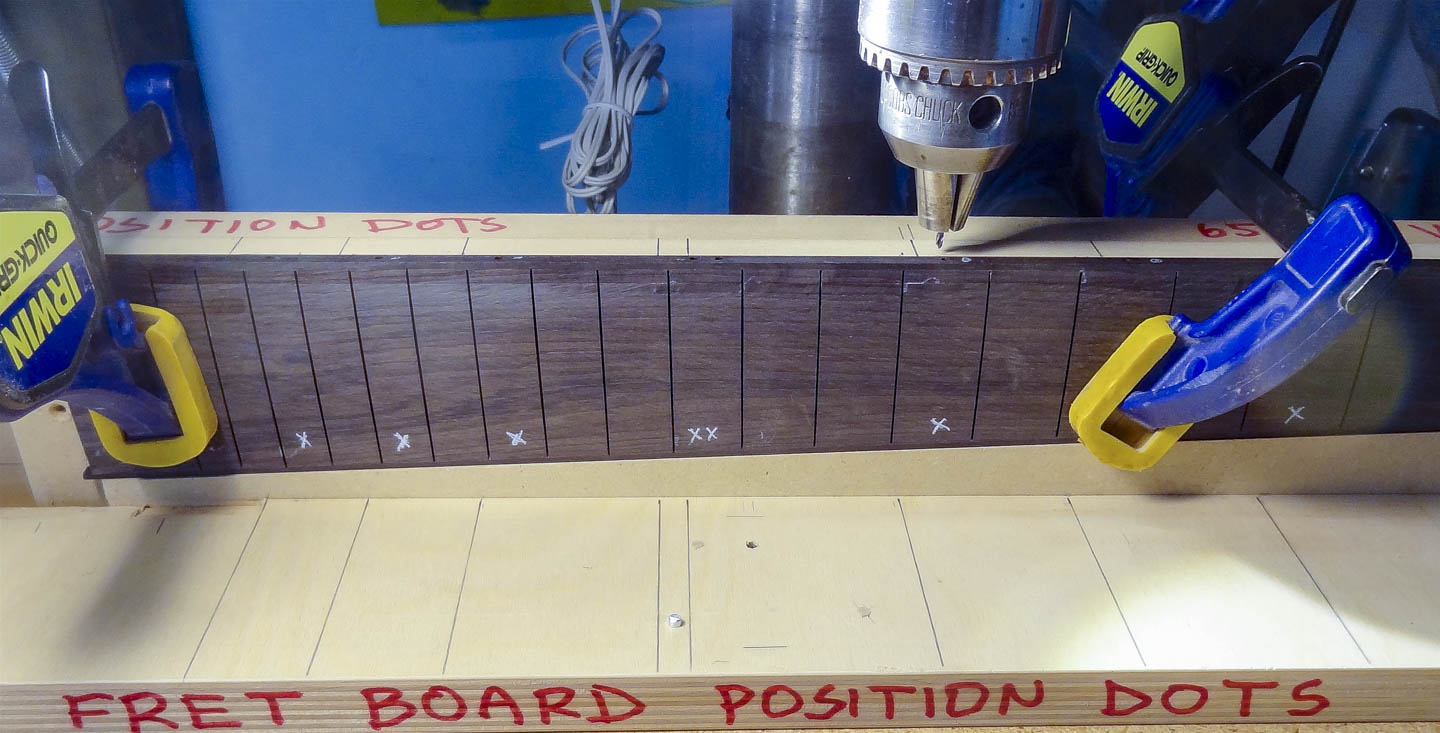
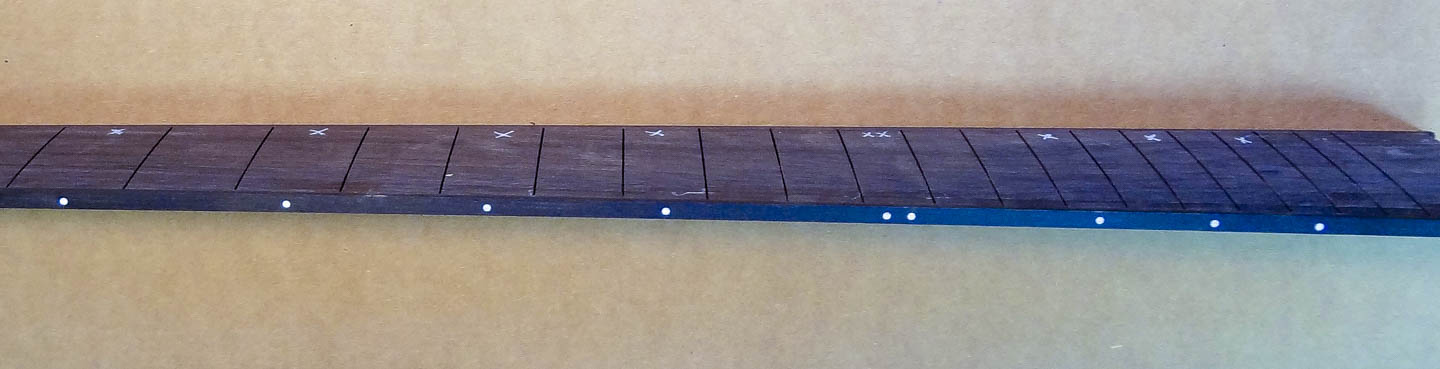
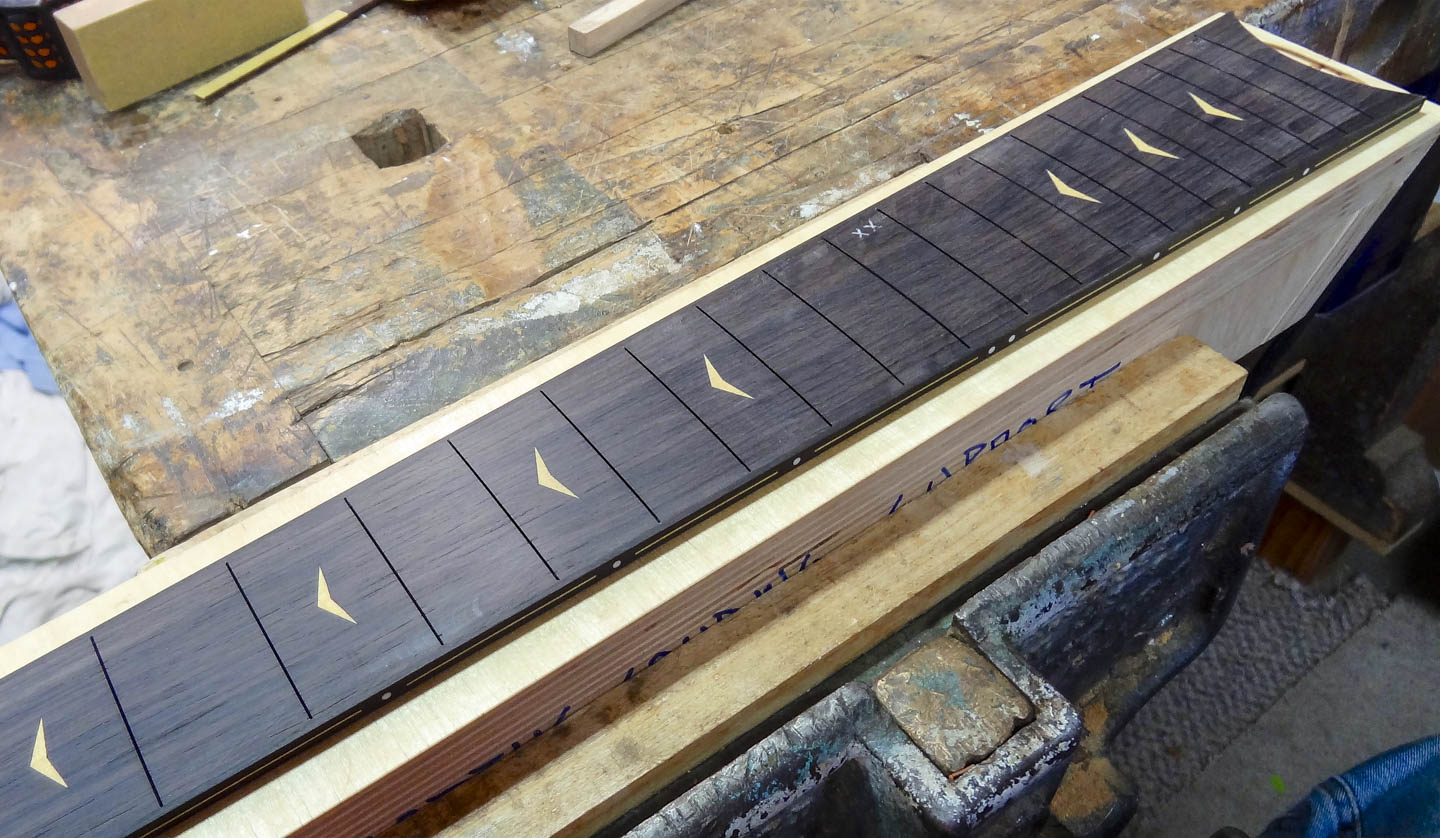
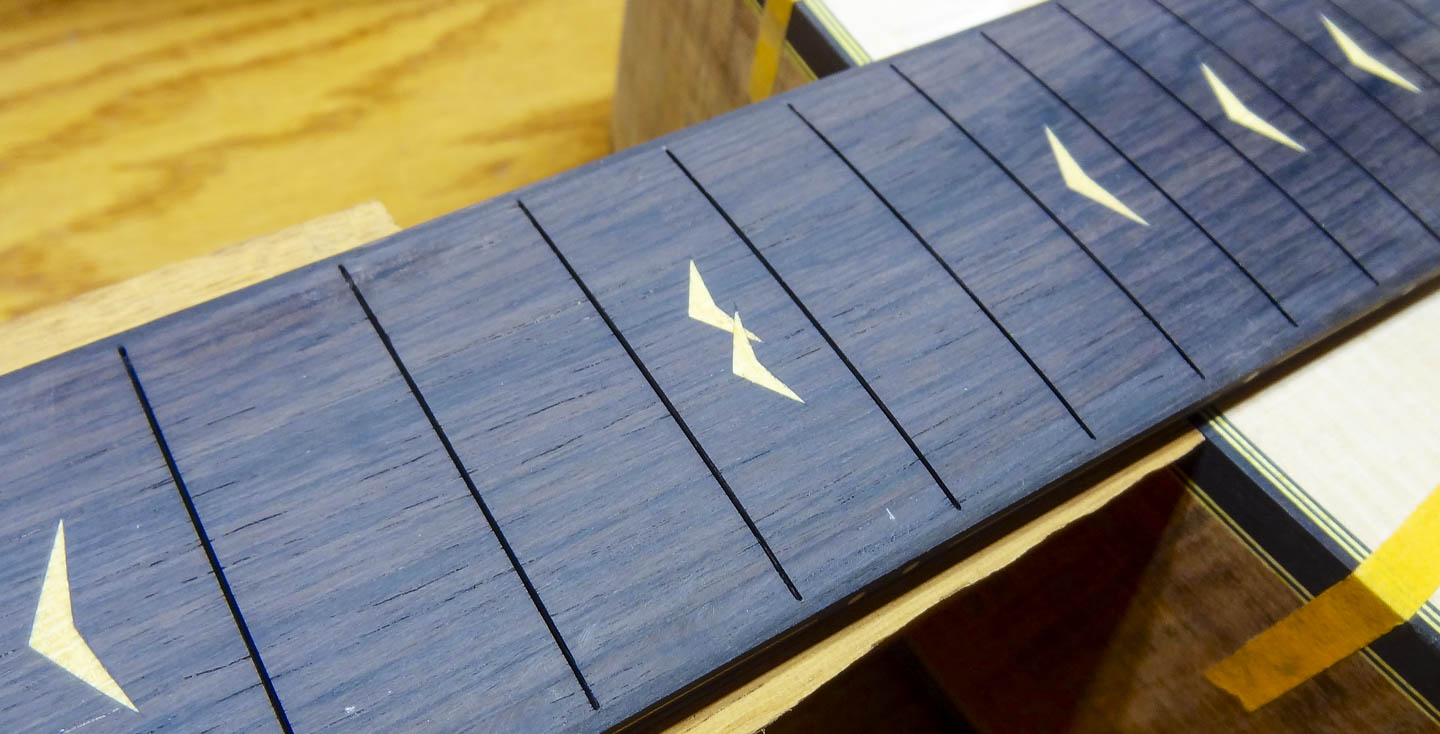
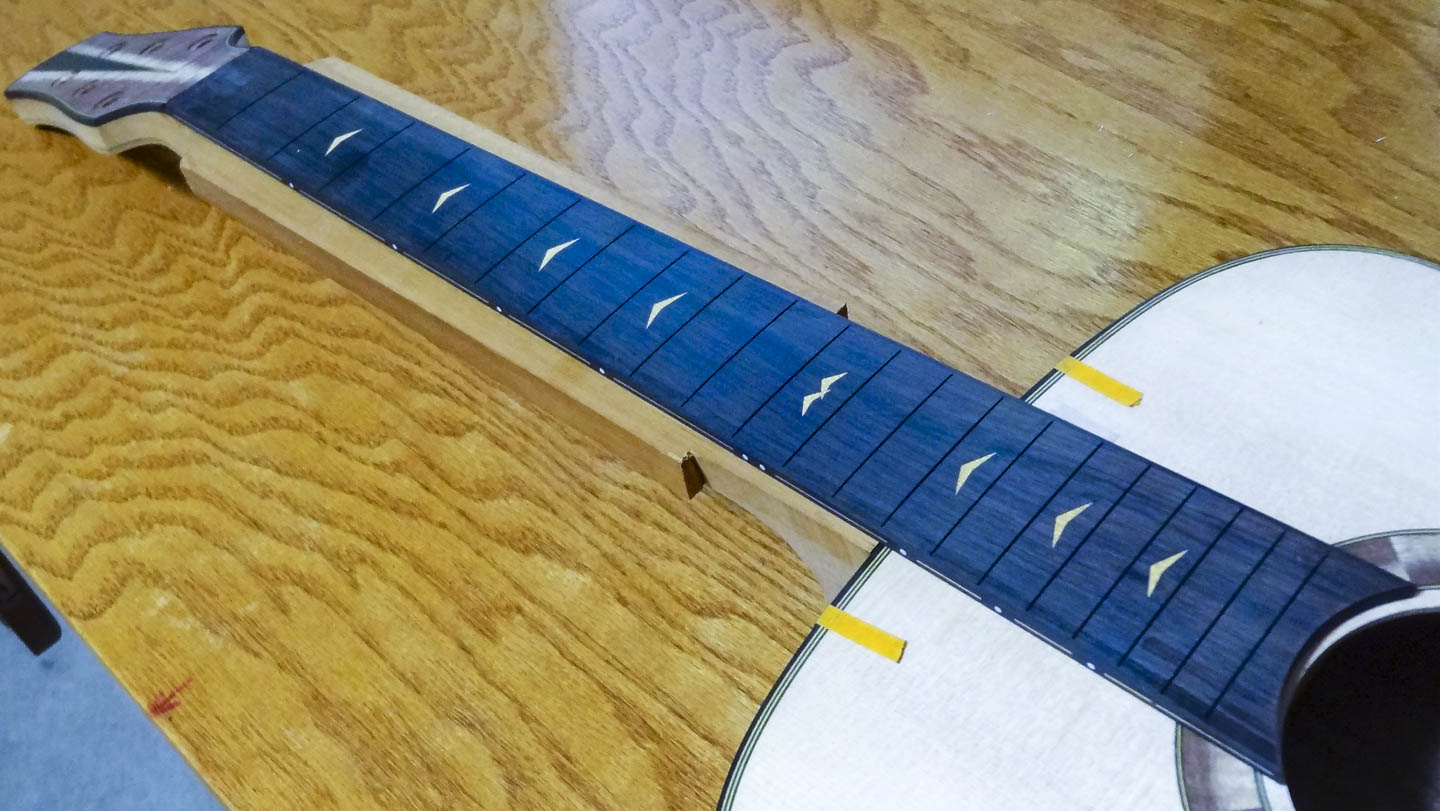
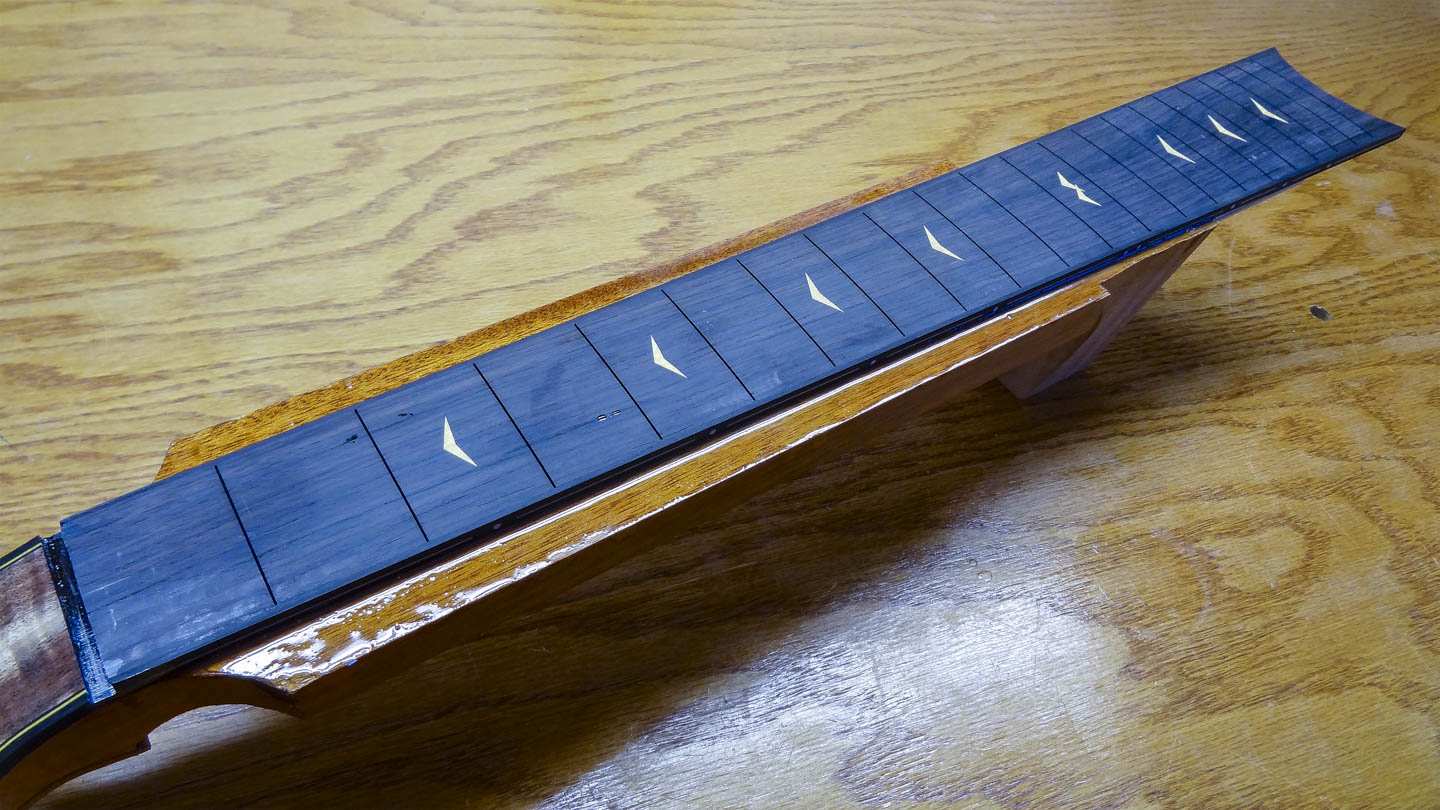
Small, white side position markers are added by drilling holes at the correct positions on the bass edge and then gluing them in and sanding them flush. This guitar has an additional Master Grade purfling stripe along both edges of the fretboard. The treble side is continuous from one end to the other, but the bass side stripe stops and starts between the side position dots. Both are done by routing a channel on the router table and then gluing the purfling in and sanding it flush.
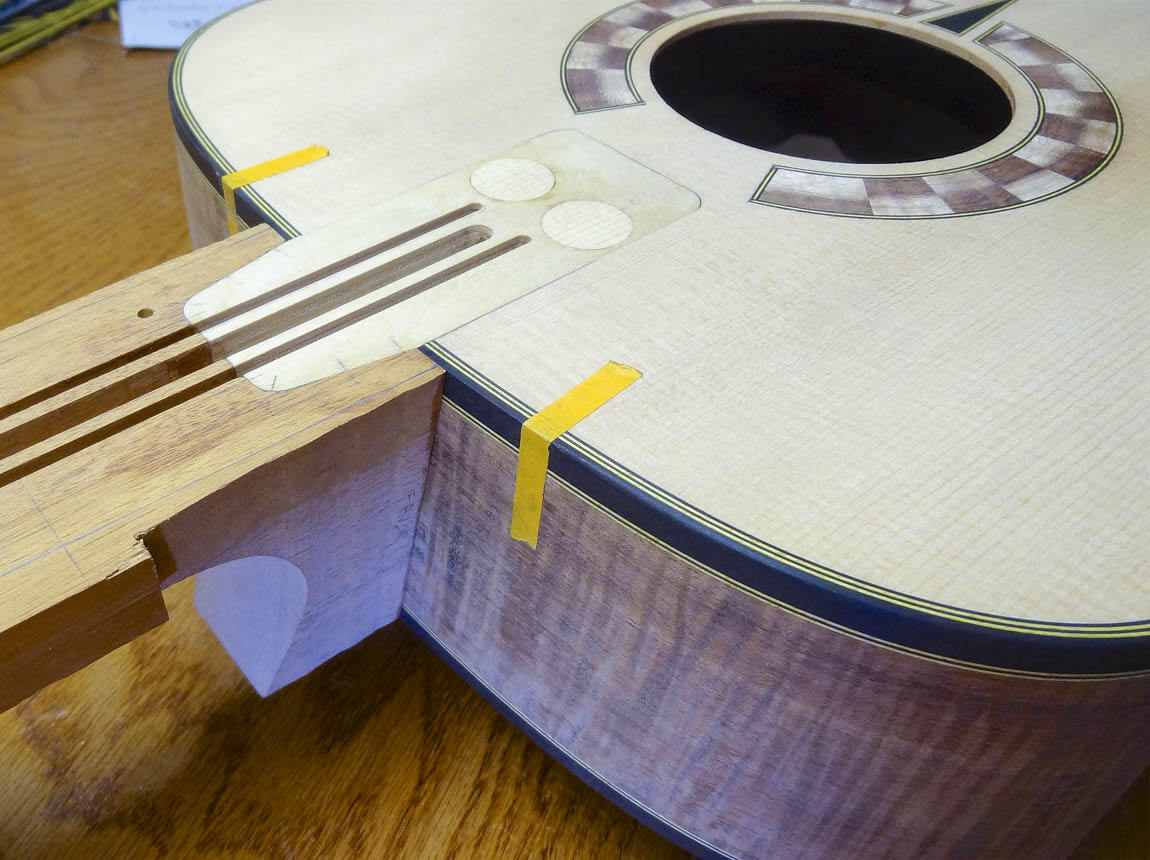
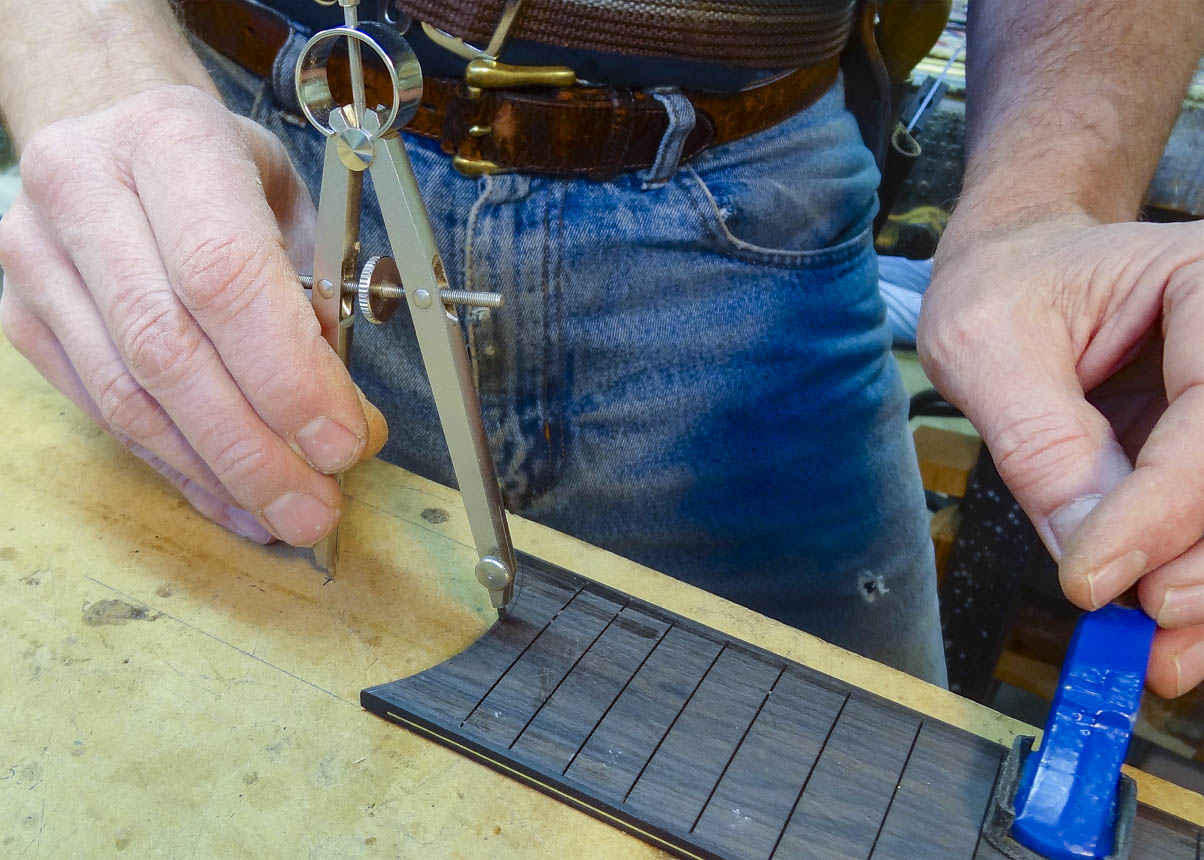
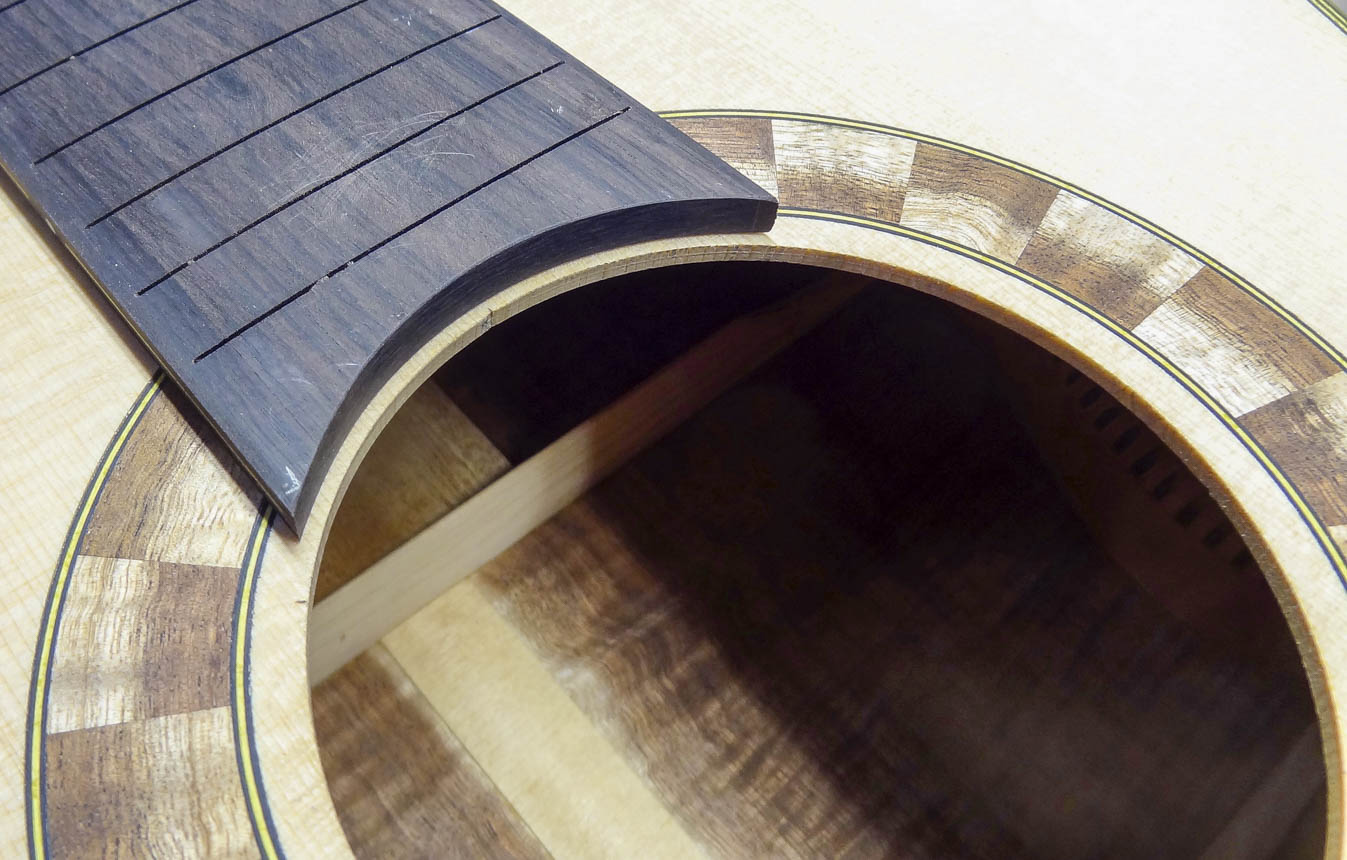
I place the fretboard on the neck and use the sound hole in the body as a guide to shape the end. I cut it close to the line, refine the radius with a compass and finish it off on the spindle sander. This leaves the end of the fretboard inset from the sound hole just a little to give a nice reveal.
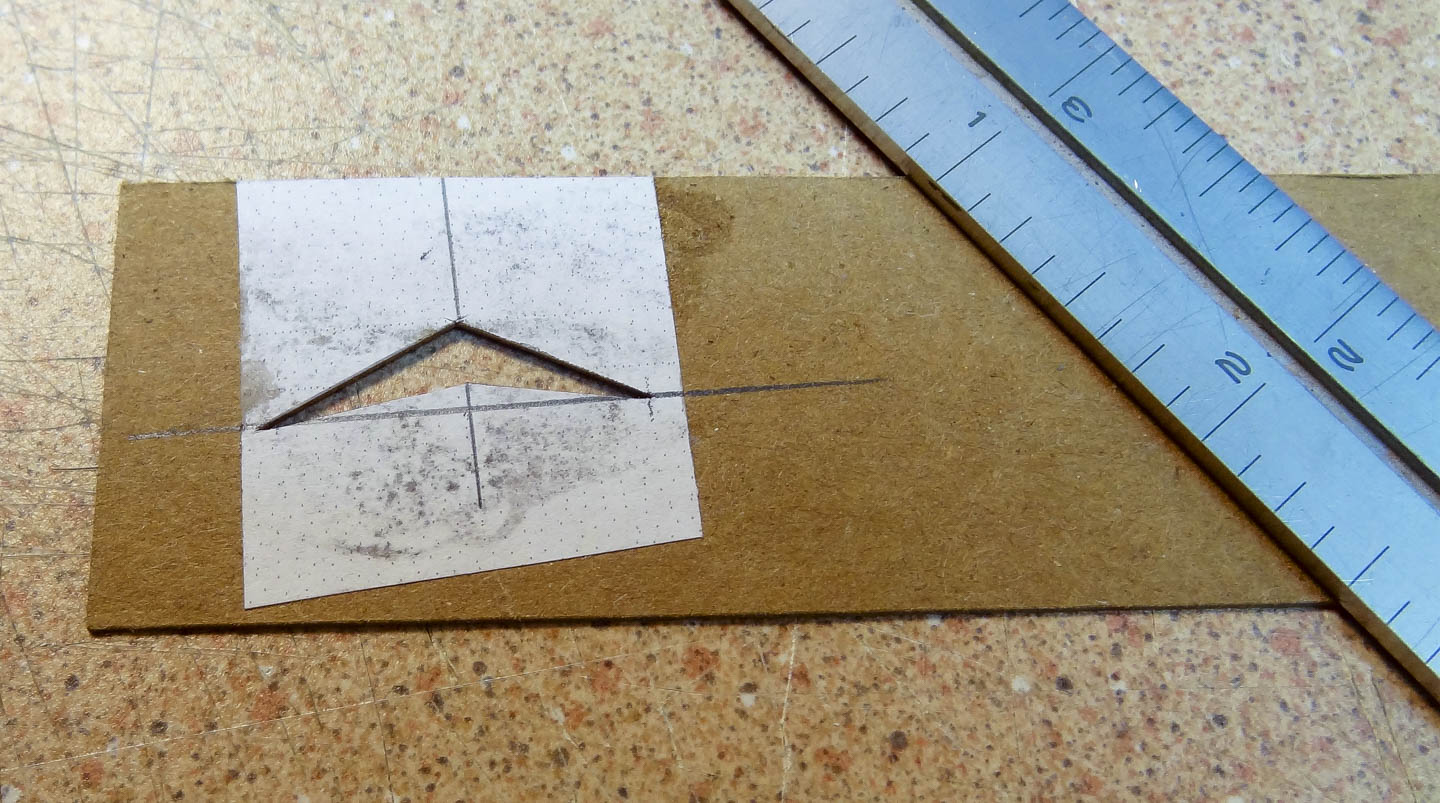
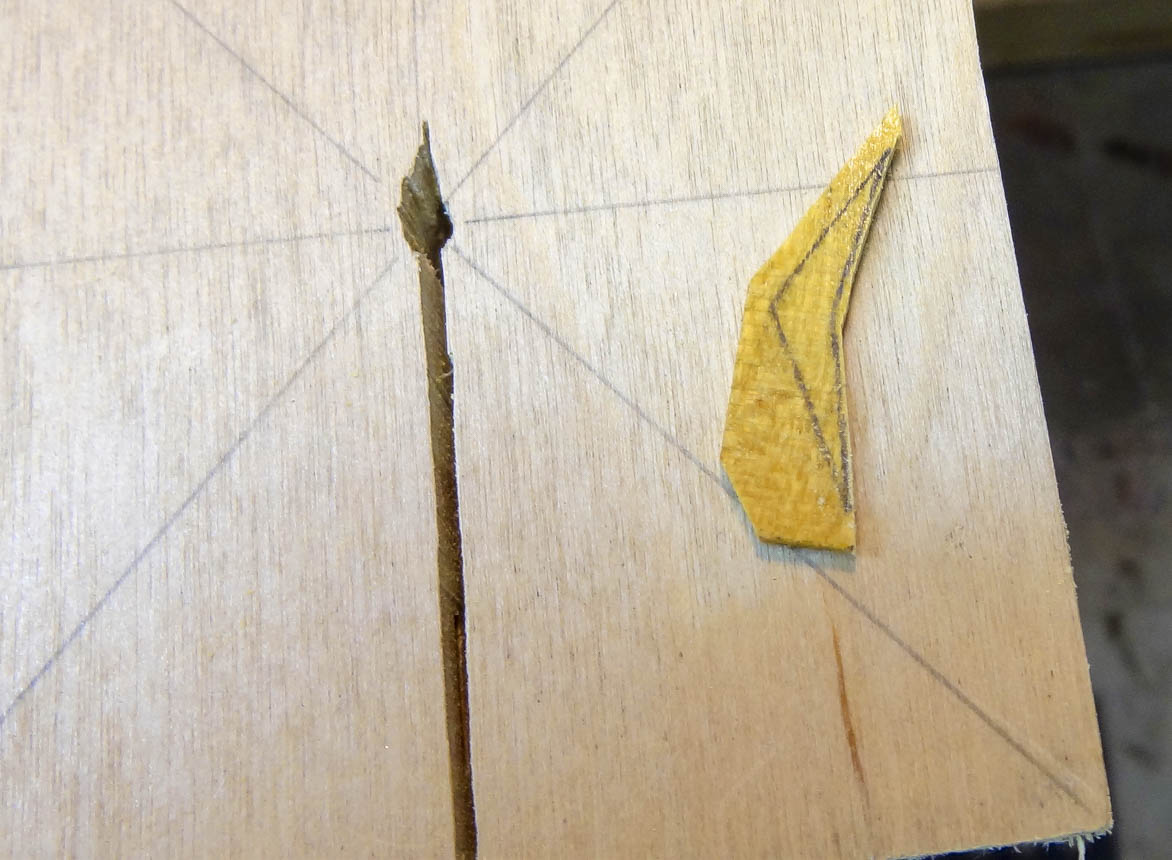
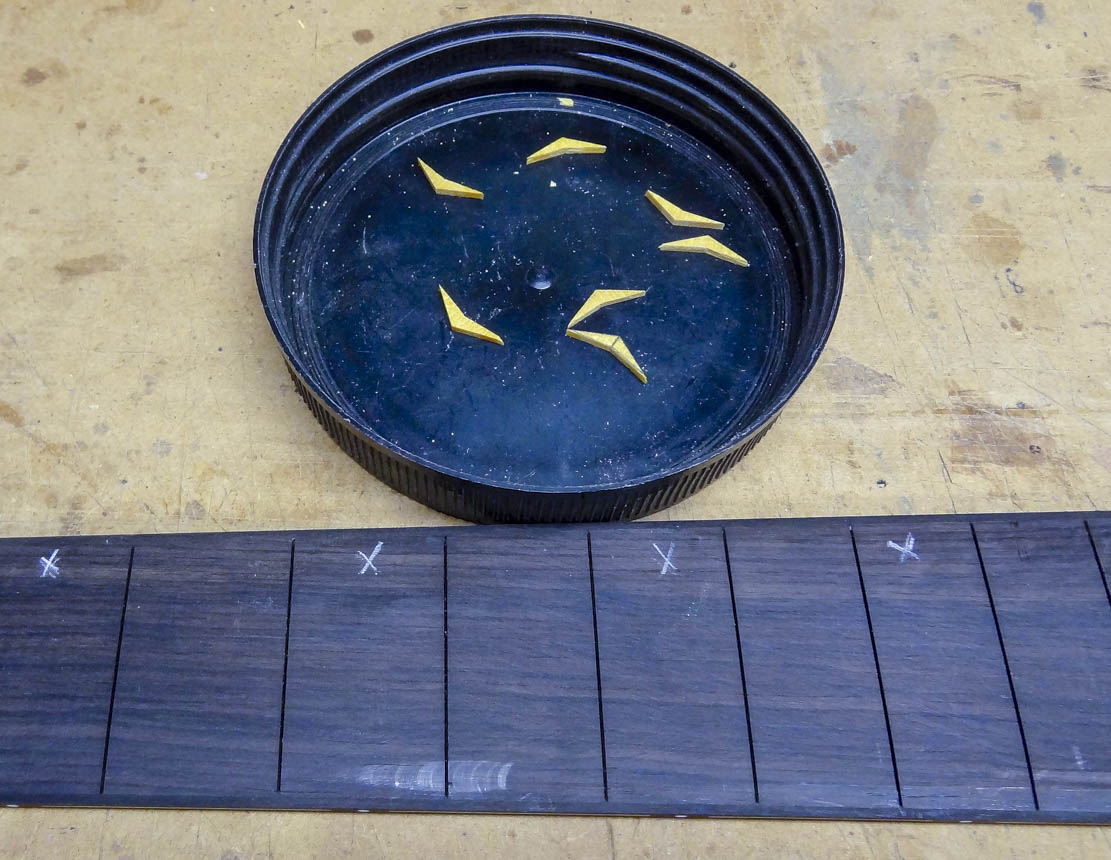
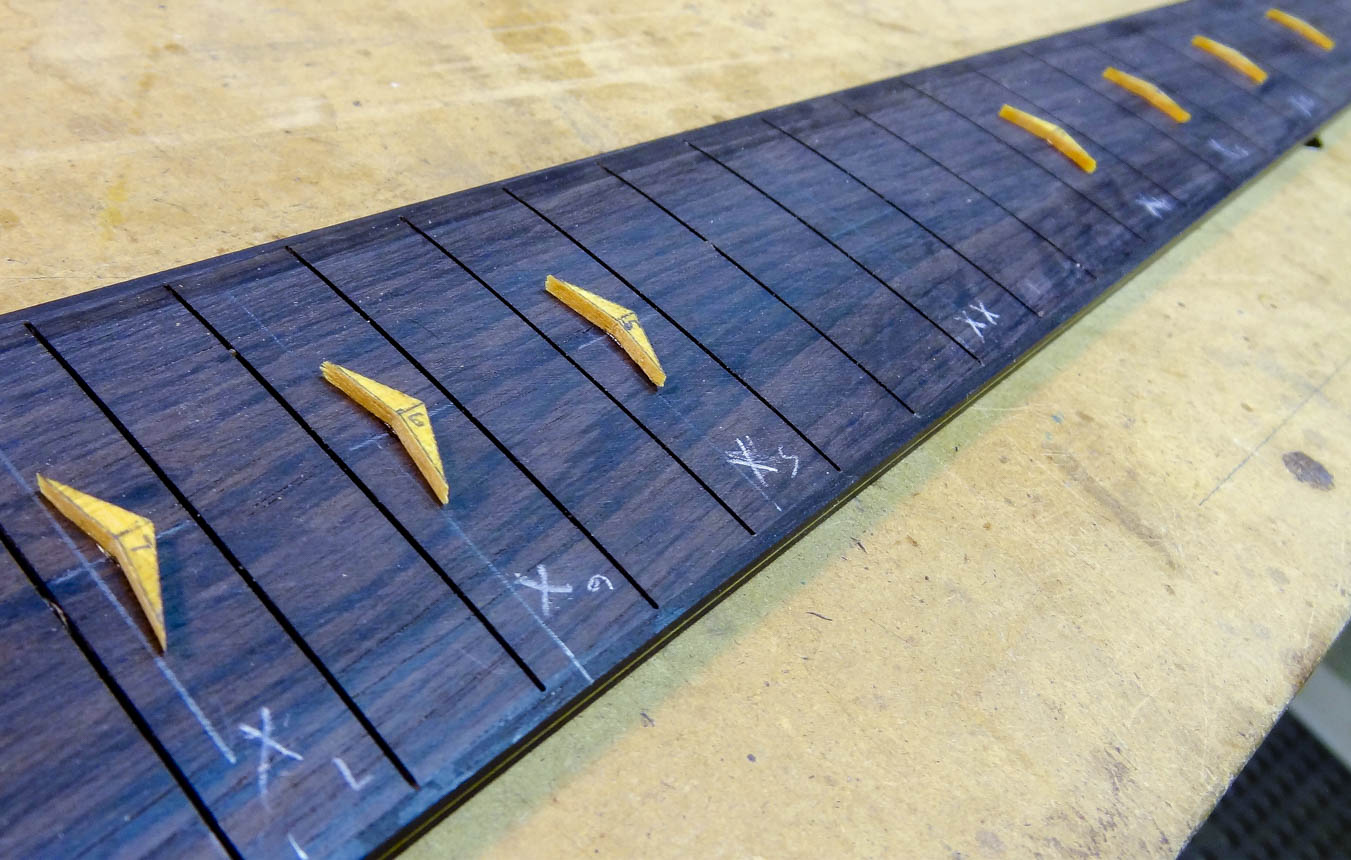
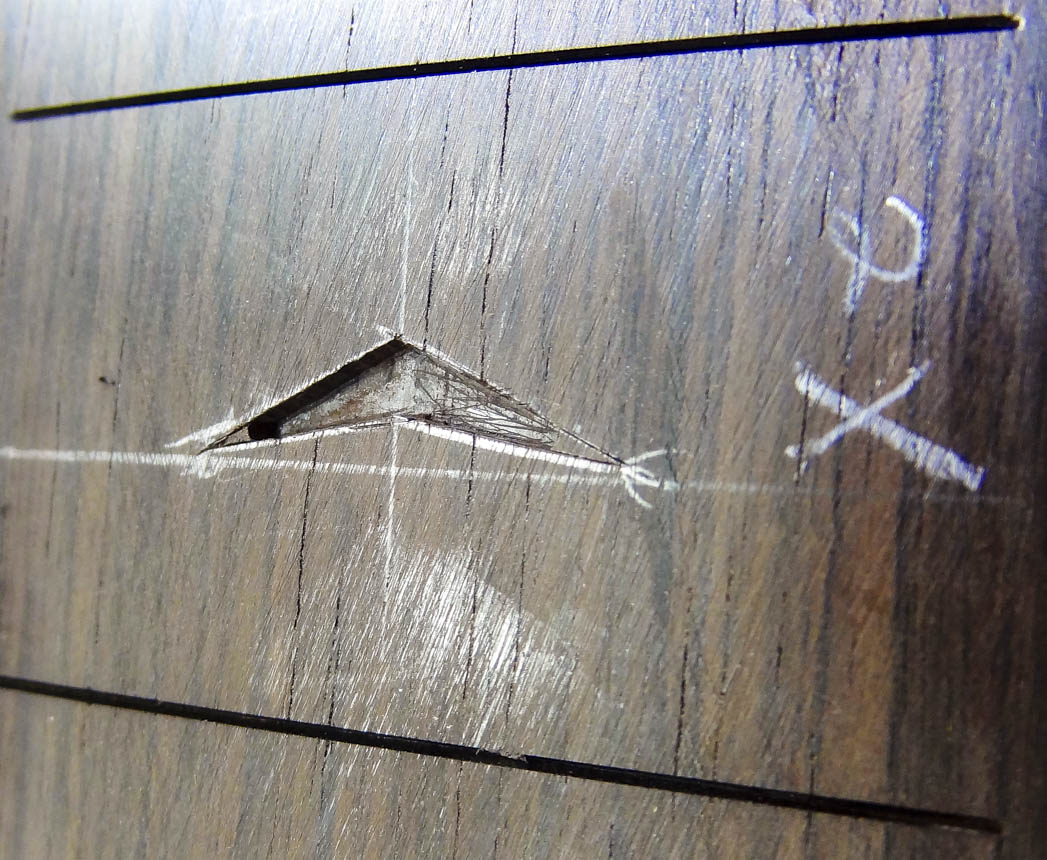
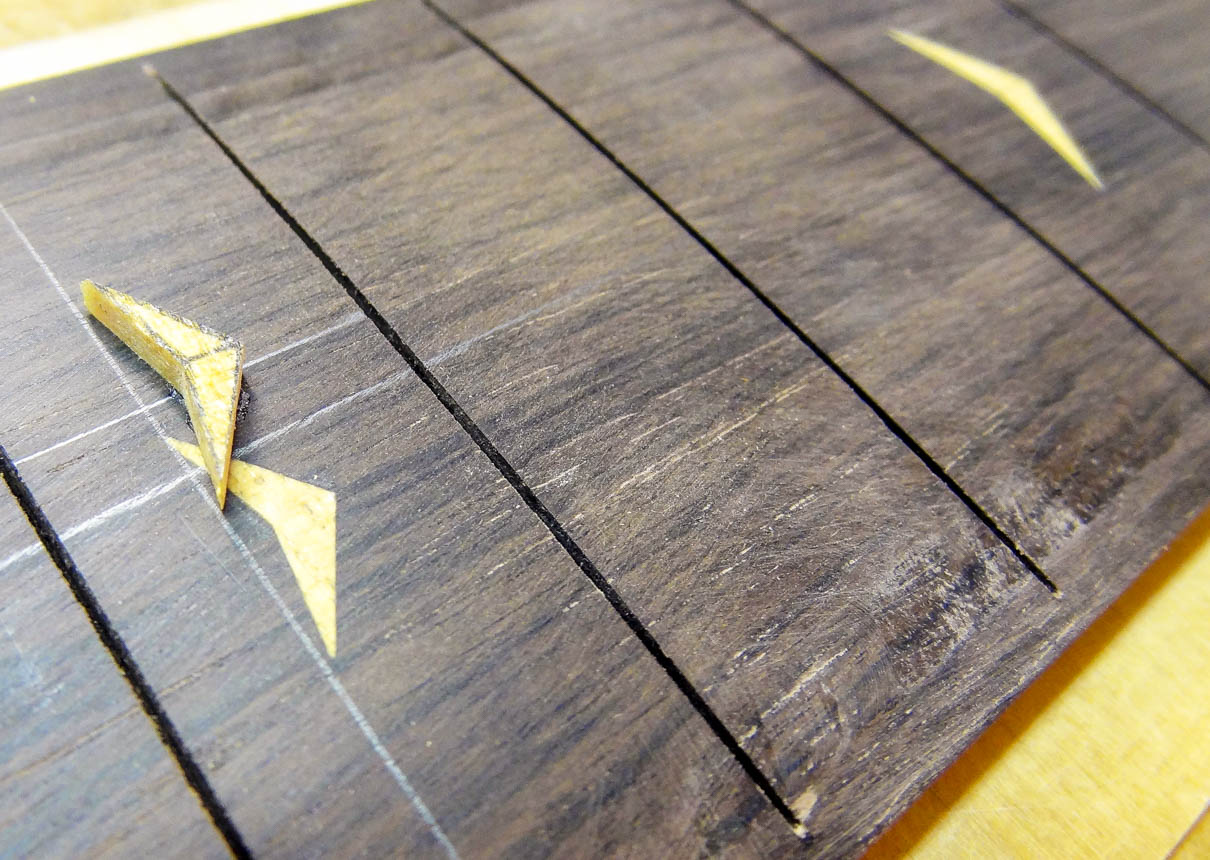
For the position markers on the fretboard face, I’m doing a Master Grade inlay of chevron shapes instead of the normal mother of pearl dots. I have some great Satinwood with a yellow hue that will compliment the yellow purfling lines on the other parts of the guitar. I cut them out with a fret saw and refine them with a chisel and sand paper. I spot glue them in position and scribe their outline on the fretboard then use a tiny router bit to cut the recesses, finishing the sharp corners by hand with an Exacto blade. I glue them in and sand them level with the surface.
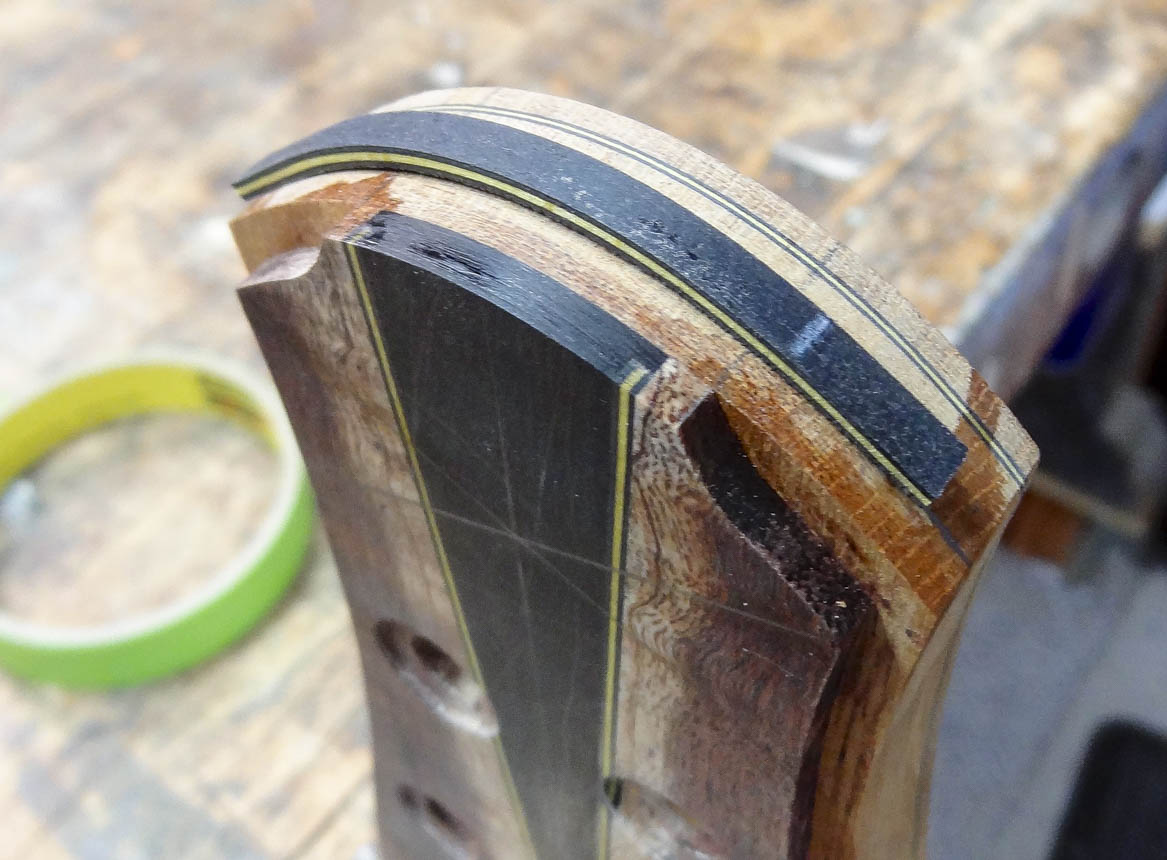
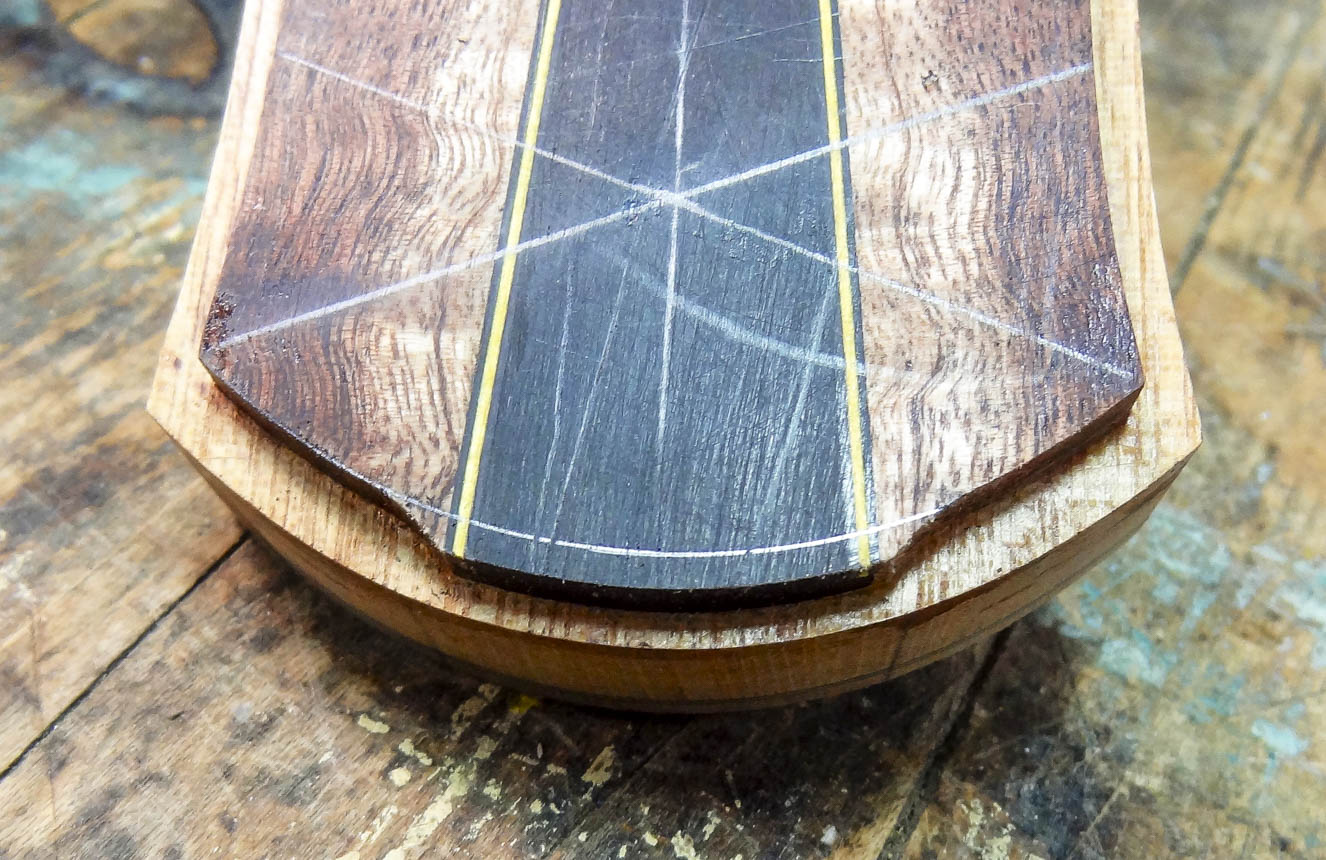
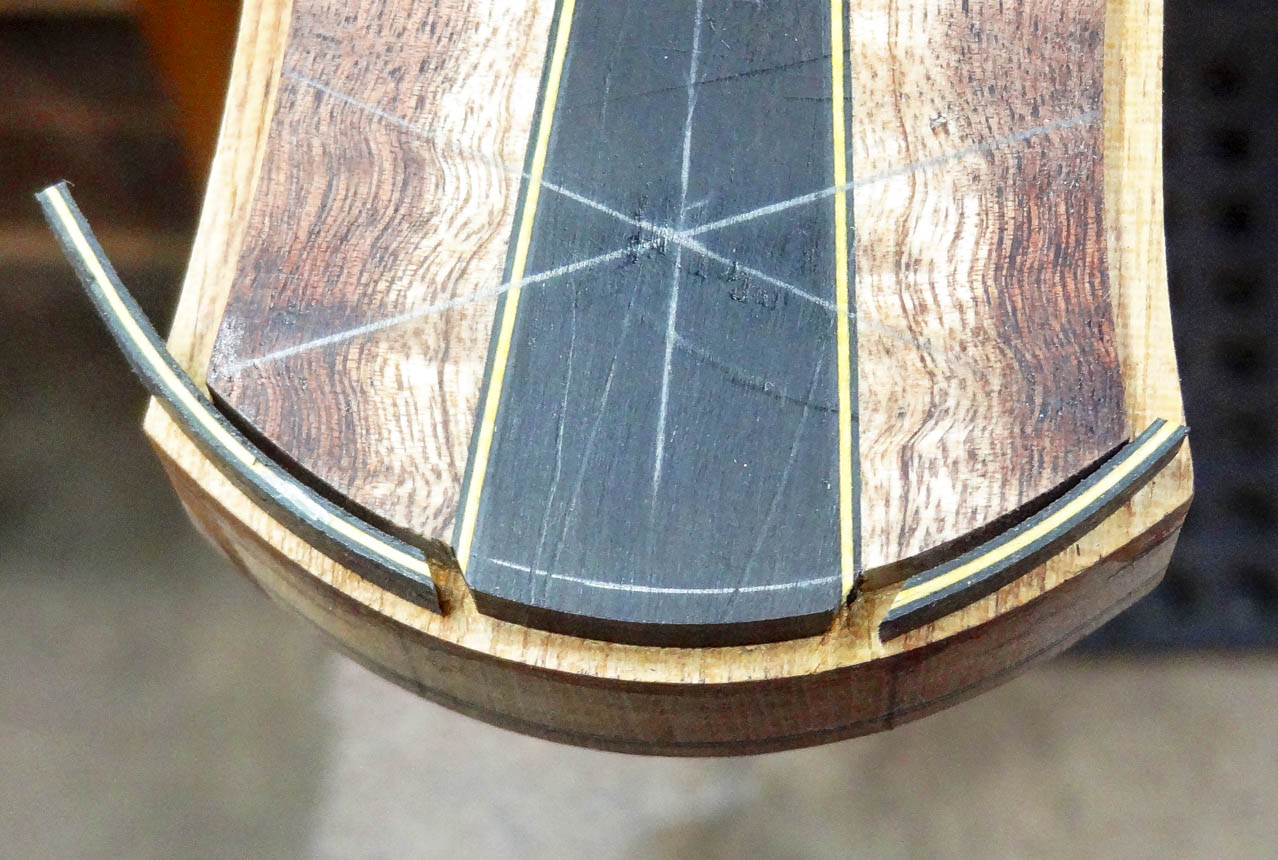
HEADSTOCK SHAPE, TUNER HOLES, BINDING & PURFLING
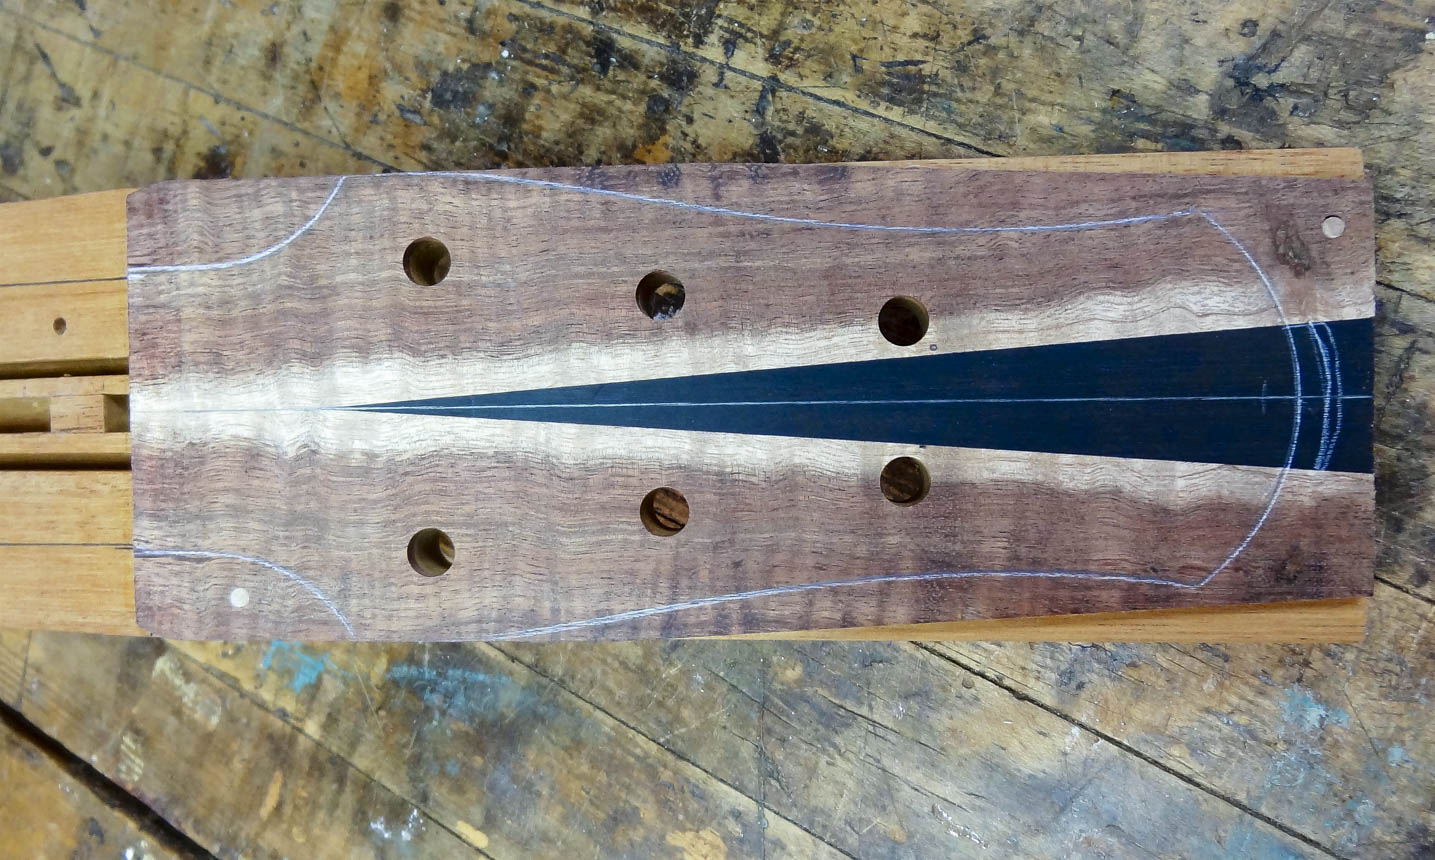
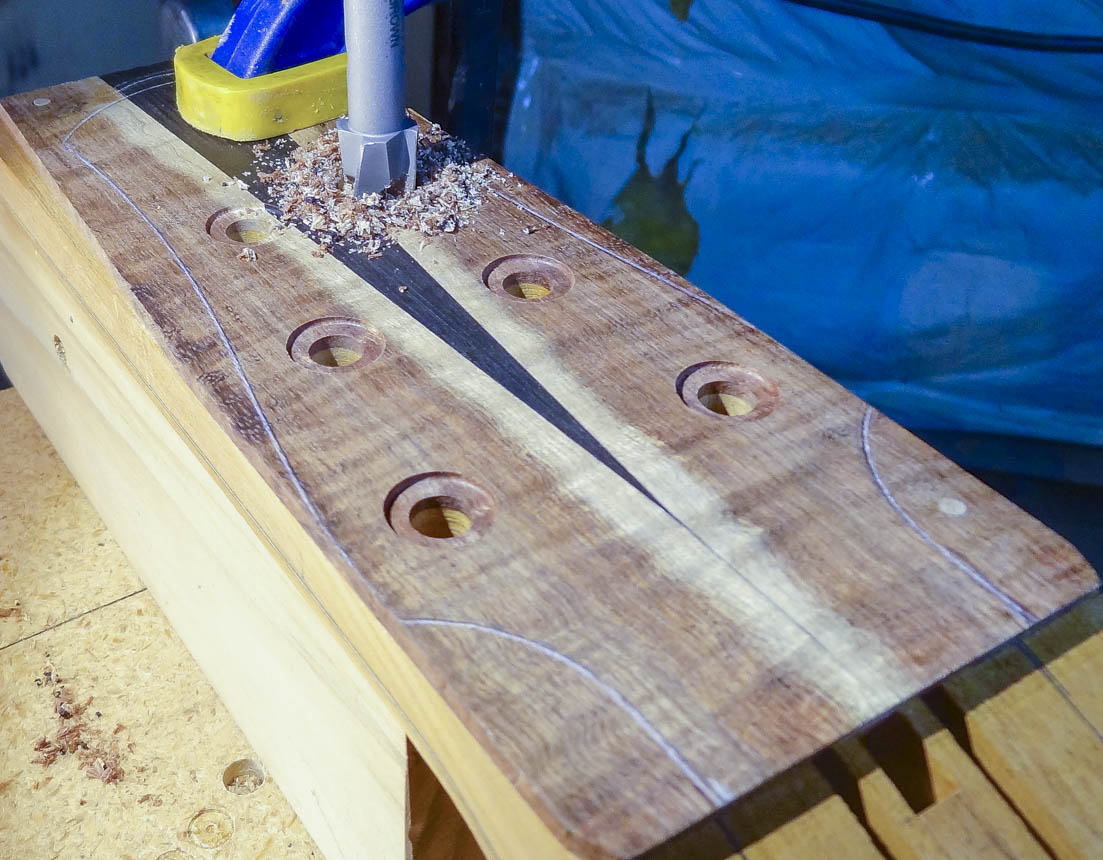
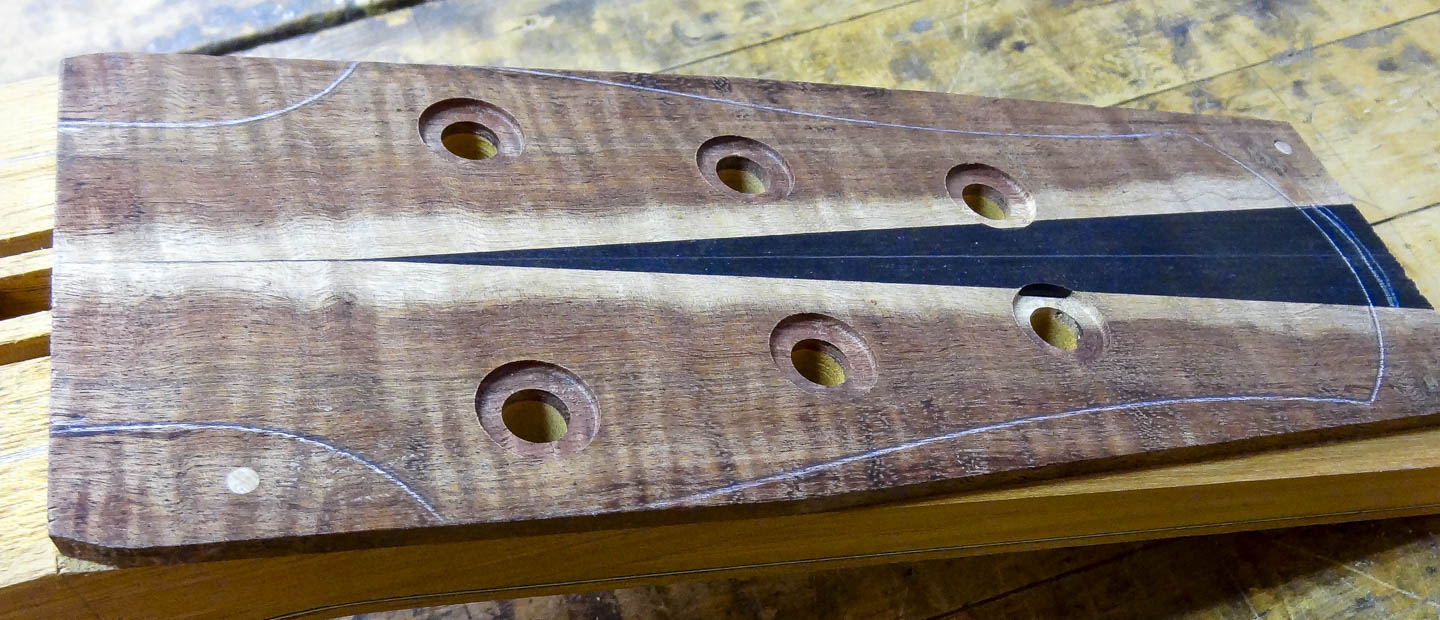
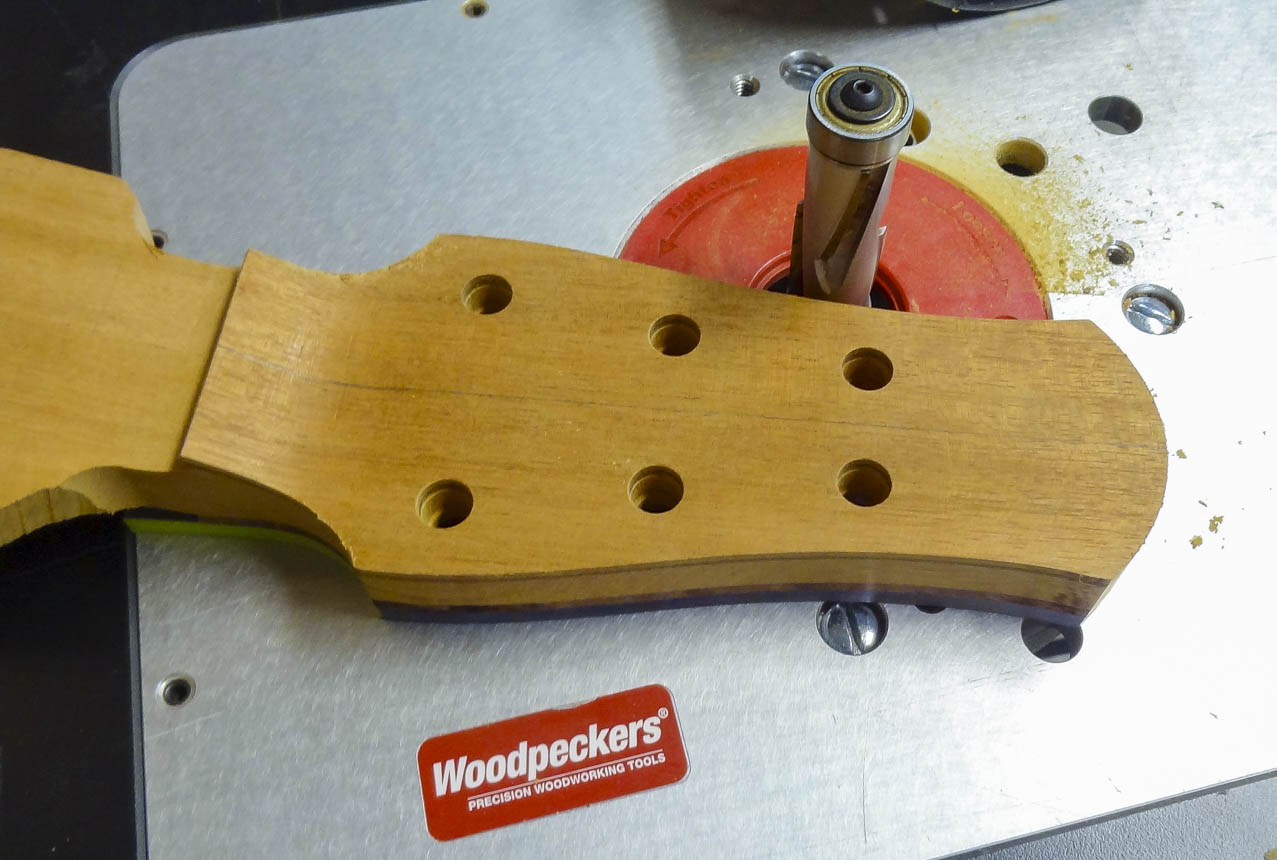
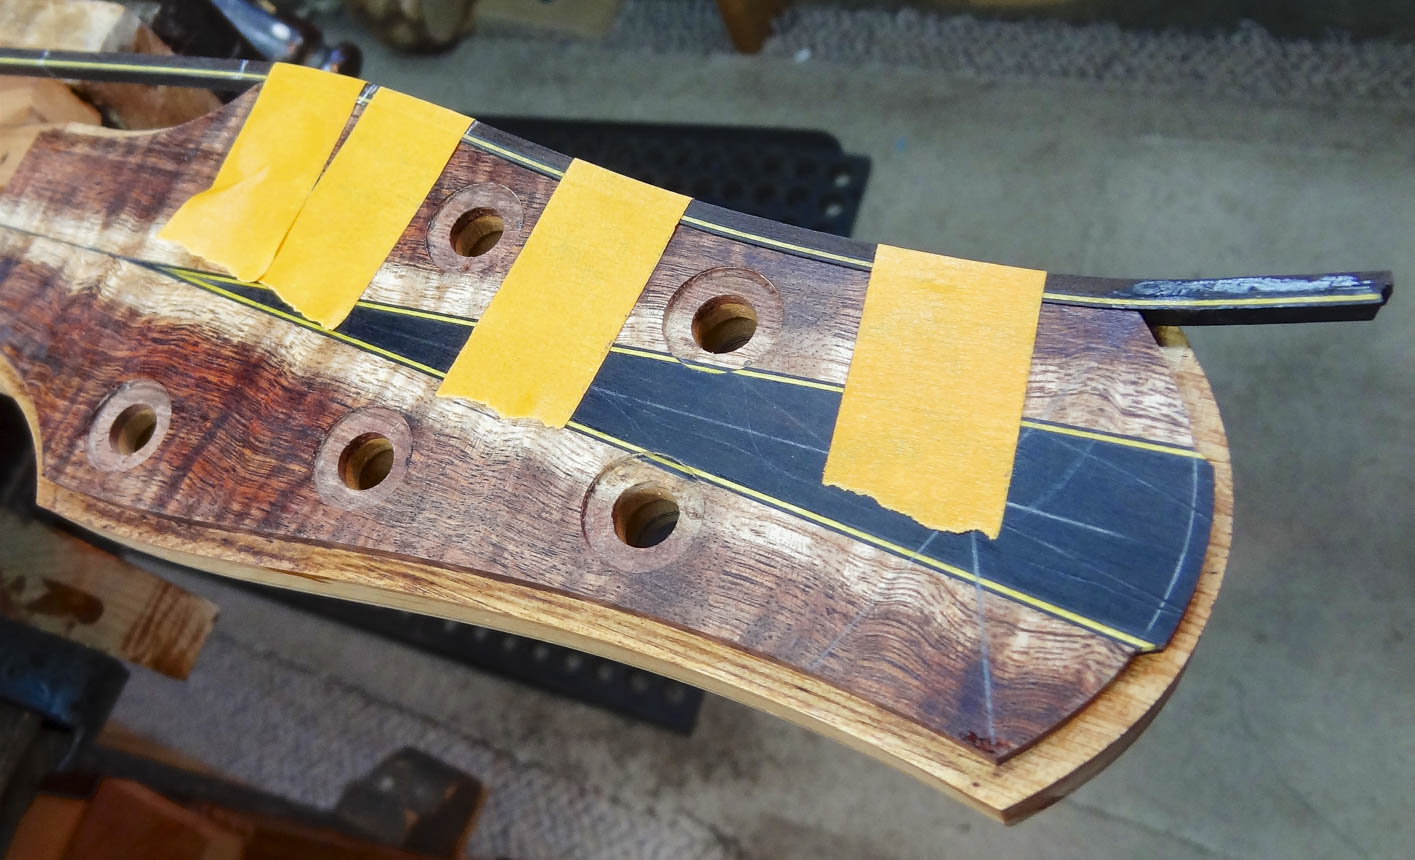
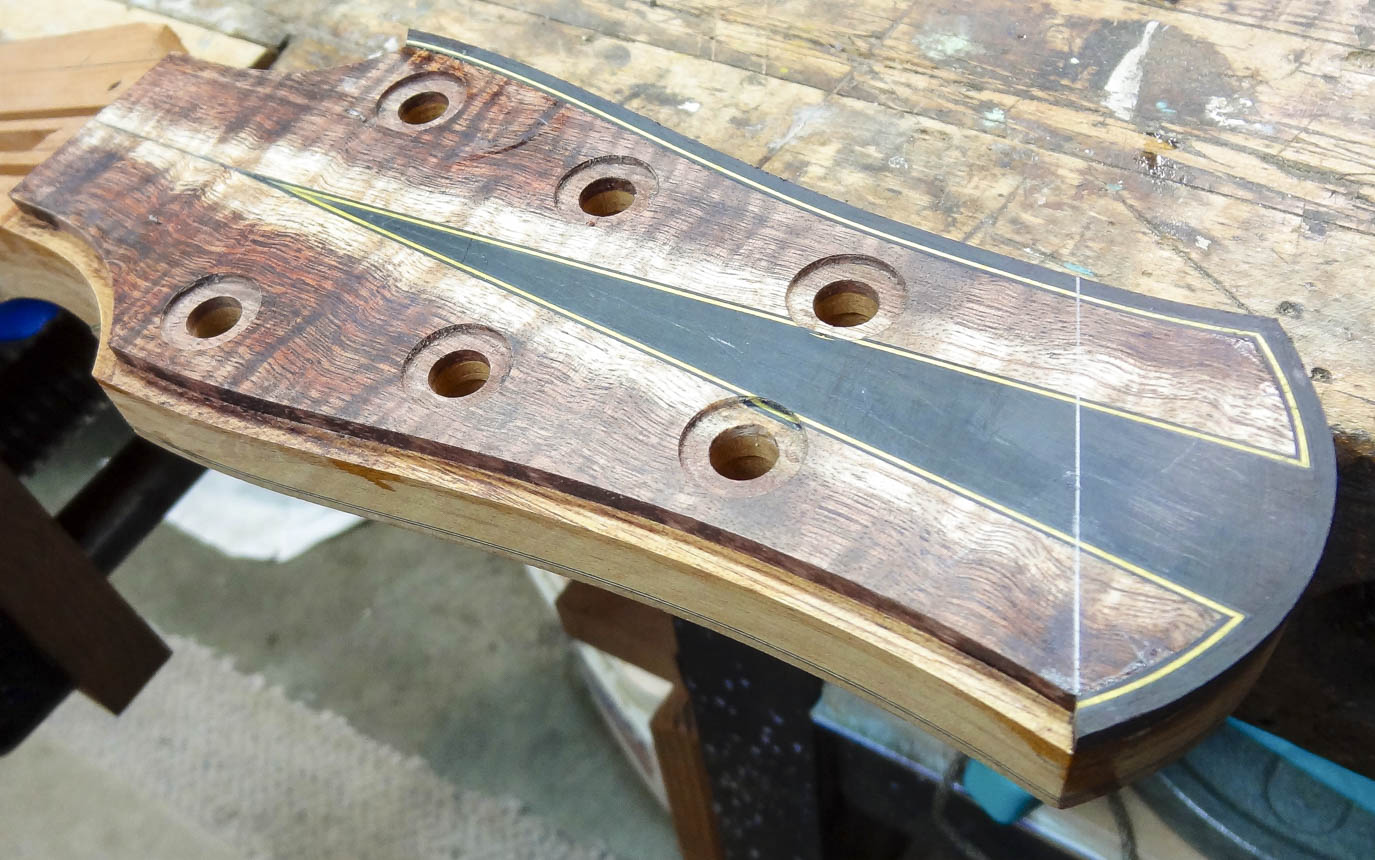
My headstock template indexes to the truss rod channel and serves three functions: It defines the overall shape, it’s used as a guide to rout that shape, and it locates the six tuning machines.
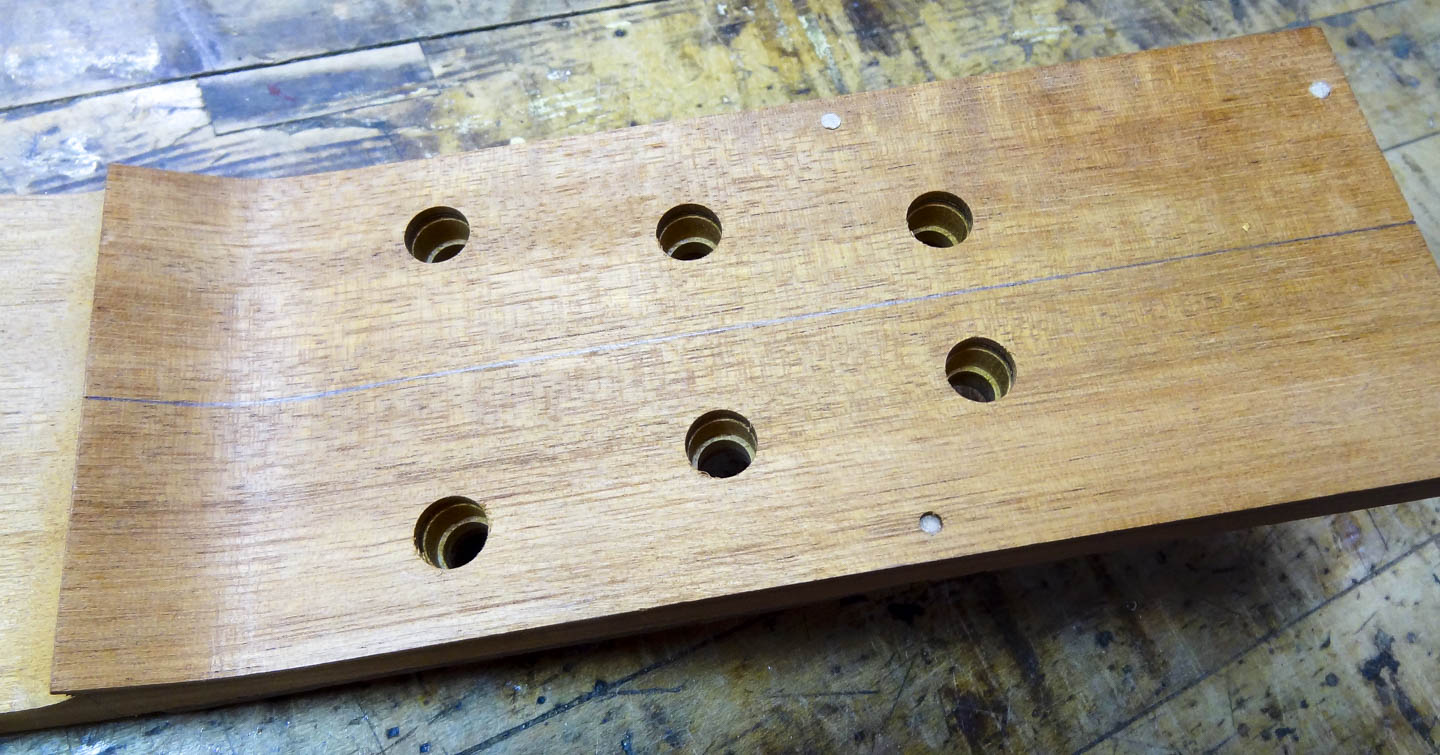
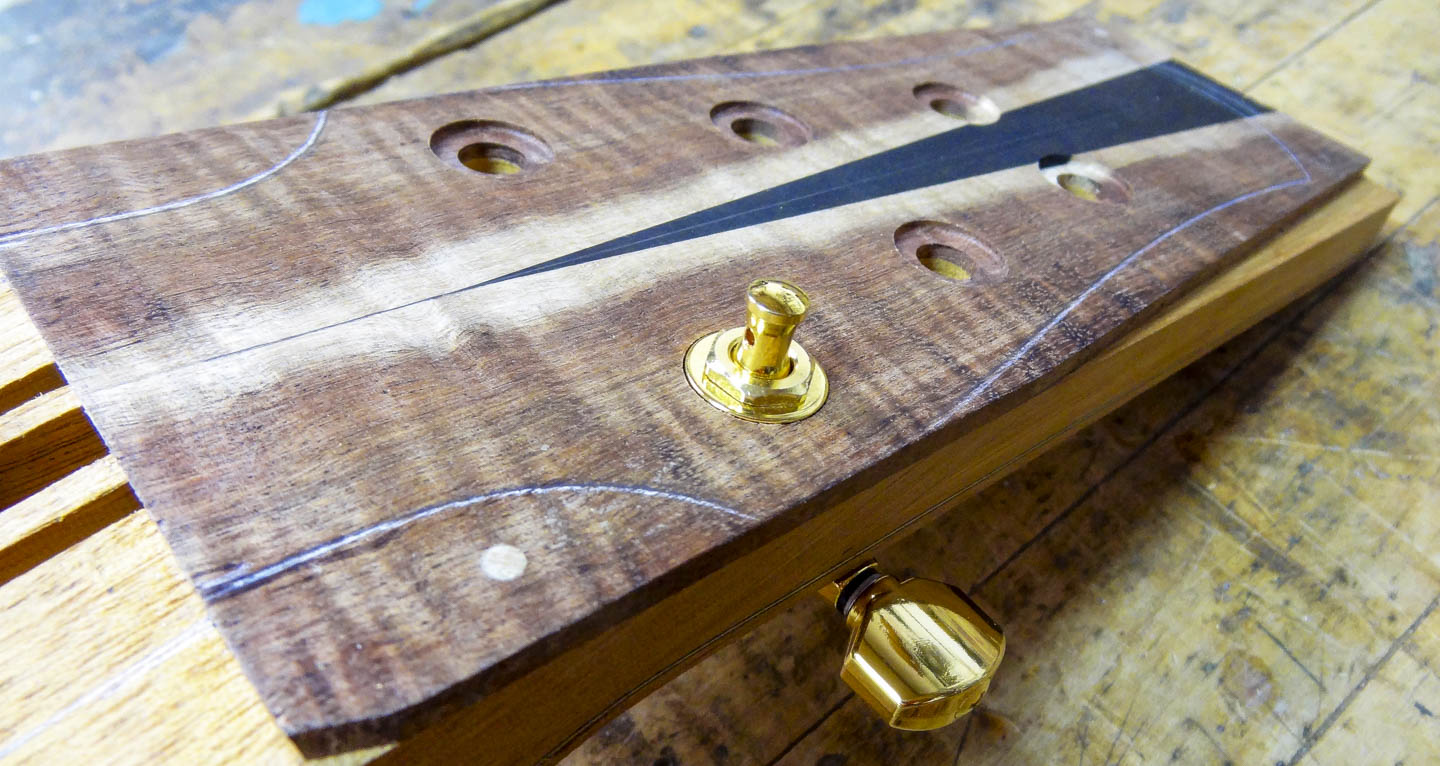
For each tuning machine, a hole is drilled completely through the headstock and is the same diameter as the threaded barrel part of the tuner. This hole is also a pilot for three different counter bores. The first is on top of the head-plate and creates a counter-sink that recesses the washer used when attaching the tuning machine. I like the refined look of a counter-sunk washer, and it also prevents the lacquer finish from cracking when tightening the tuners to the headstock. The second two counter-sinks come in from the back of the head stock, and create a stepped hole with two different diameters to accommodate the slightly tapered body of the tuner. The stepped hole isn’t absolutely necessary, but considering the extreme tension of the guitar strings, it creates a very snug fit for the tuners to eliminate any amount of loosey-goosey movement.
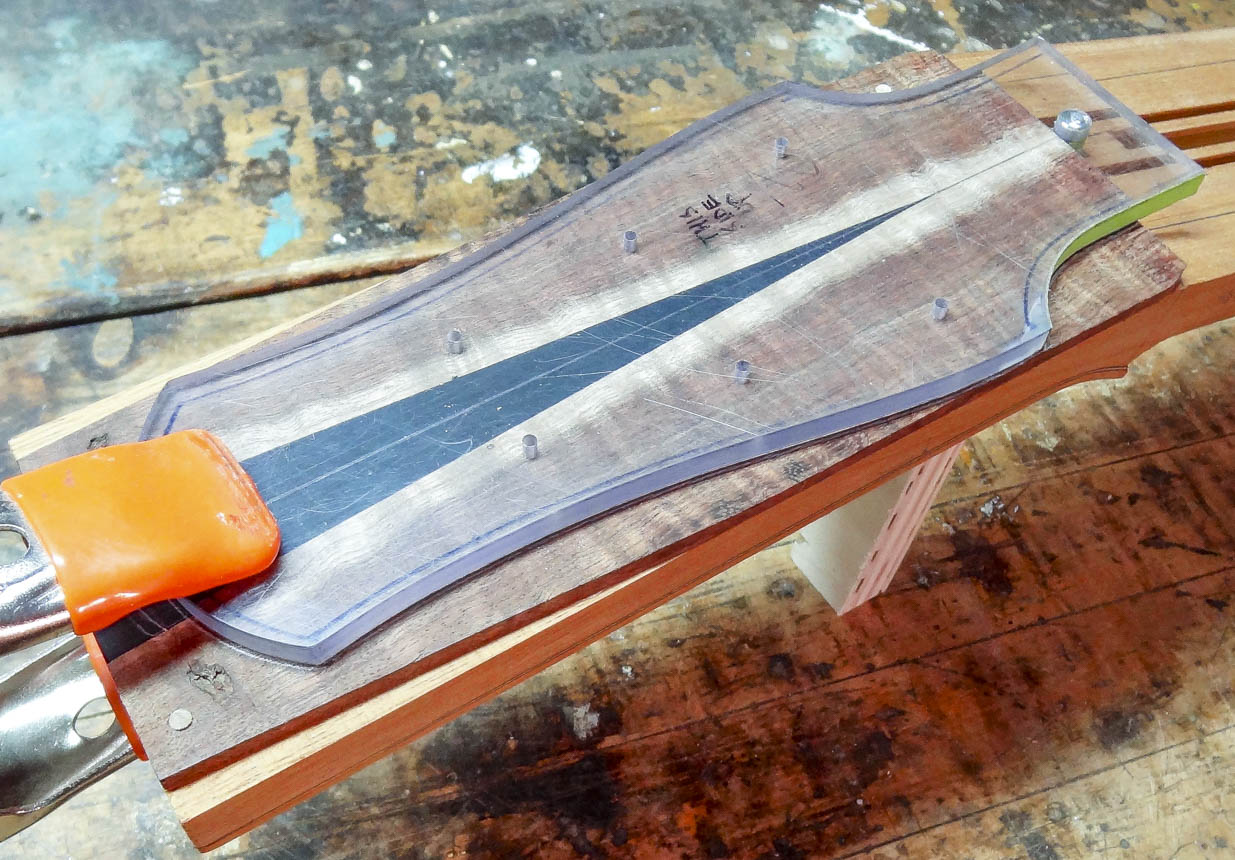
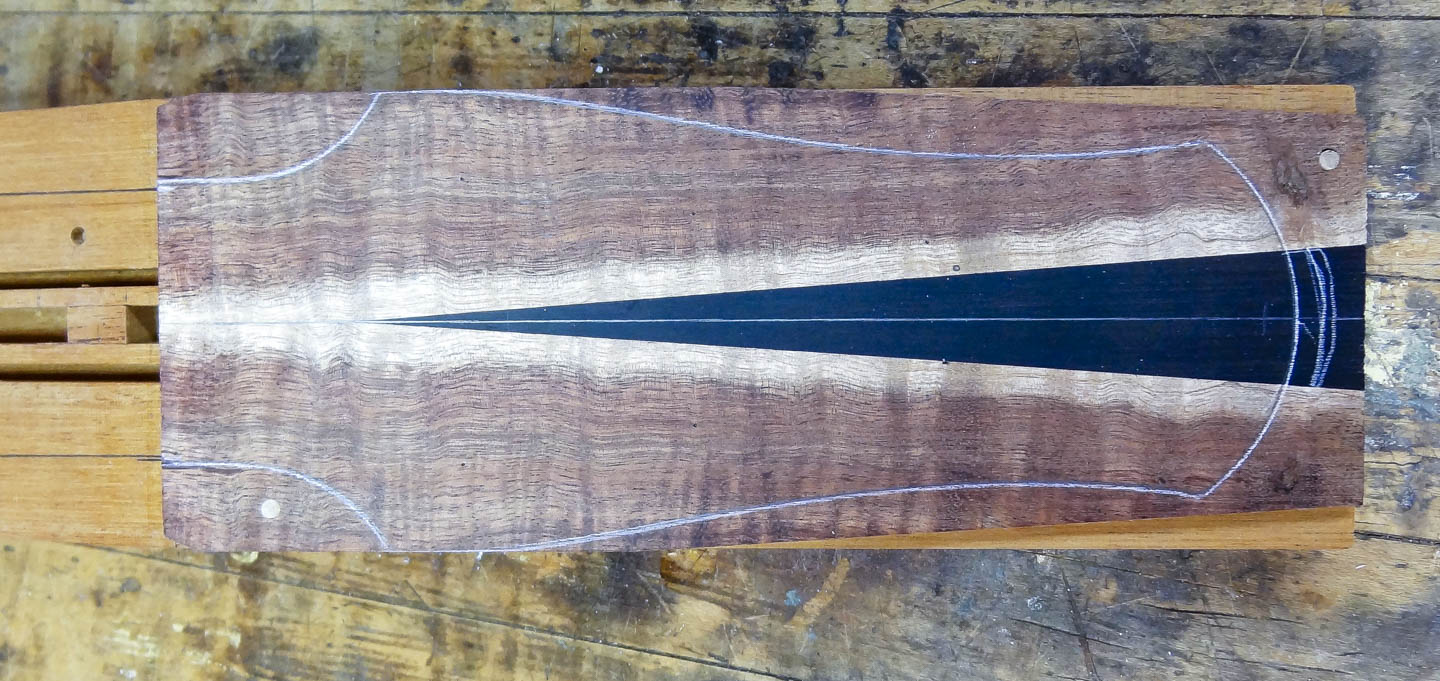
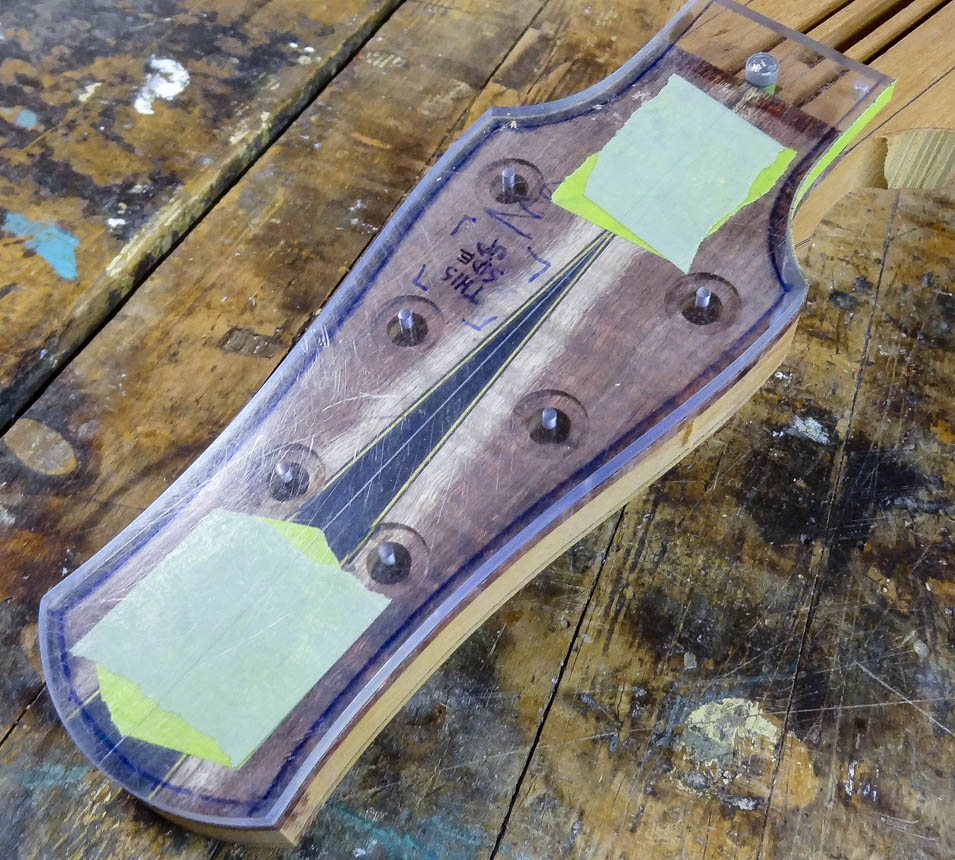
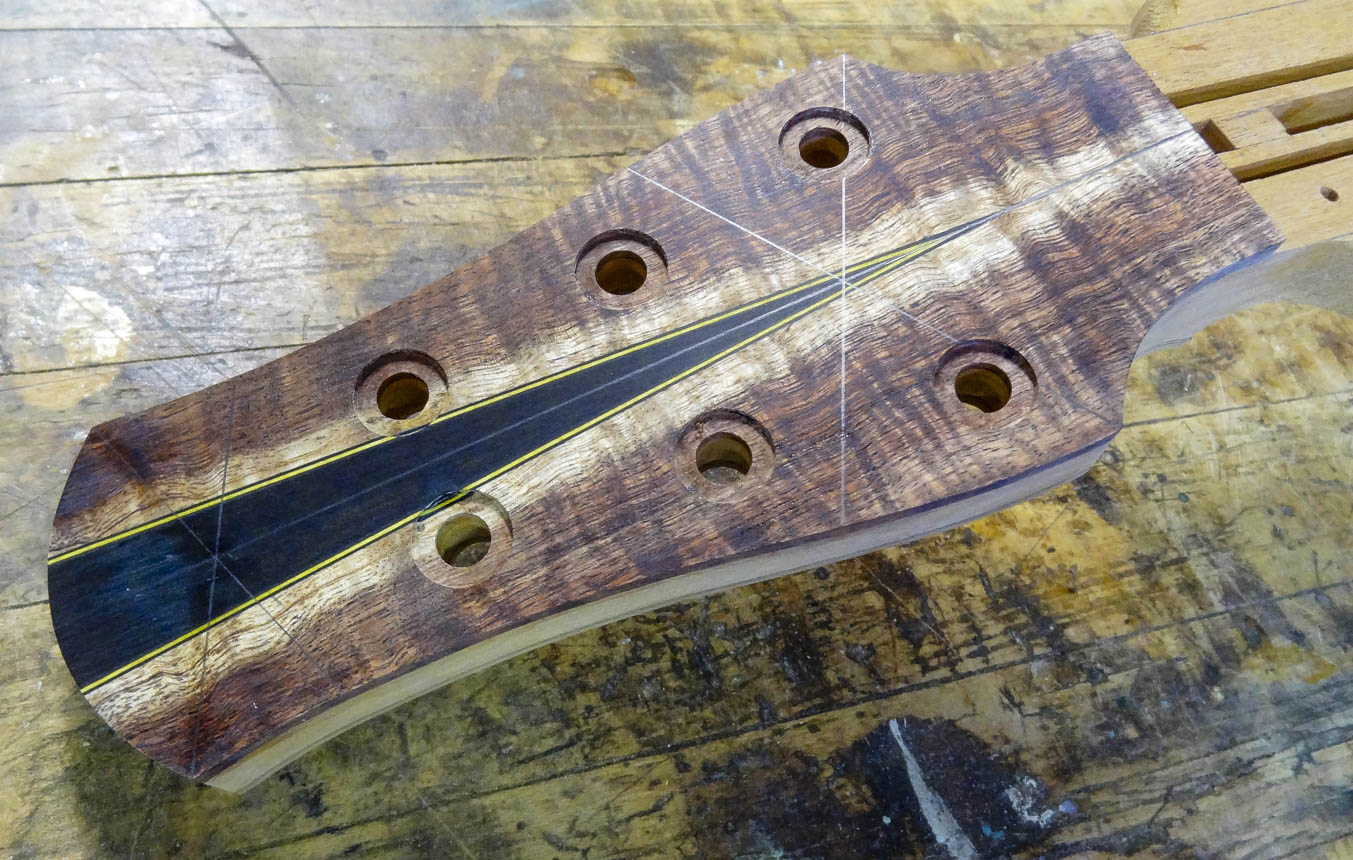
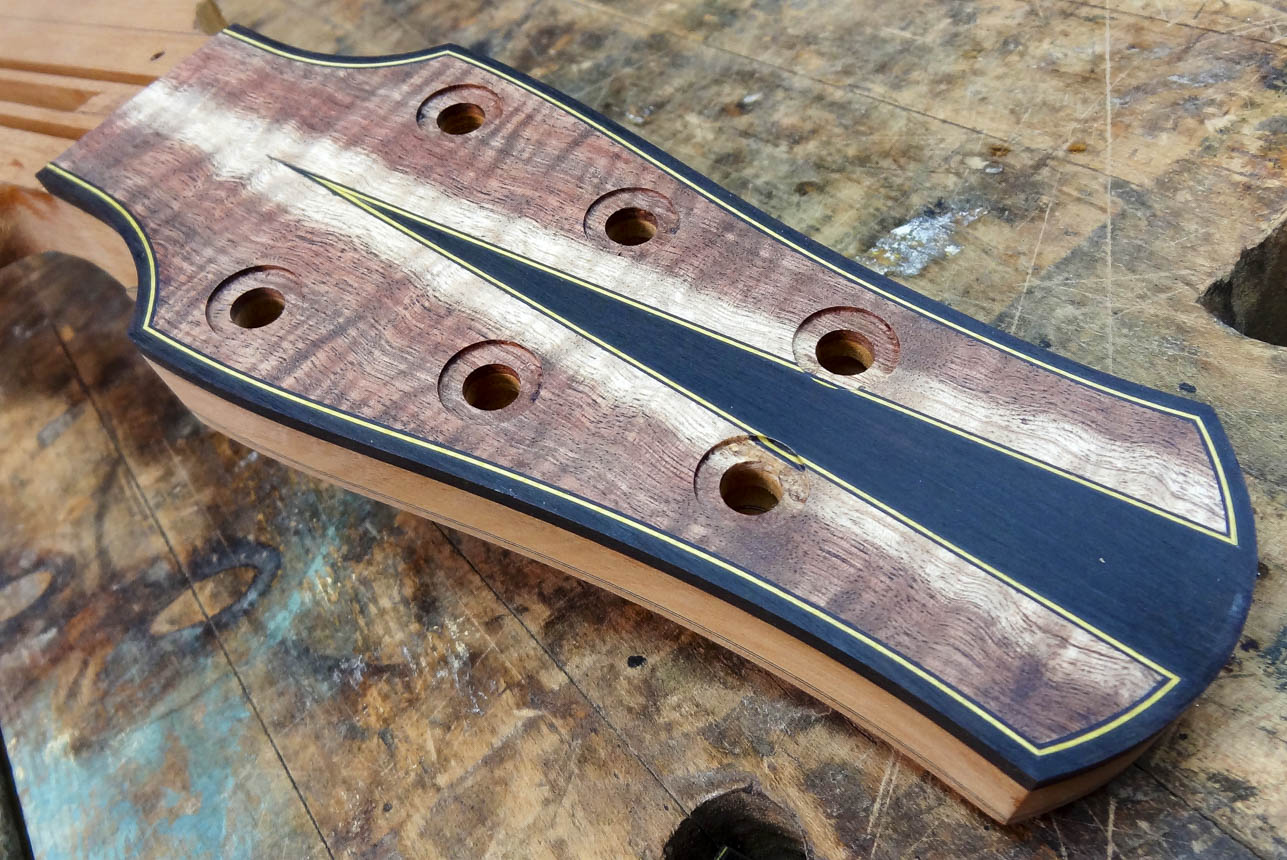
It’s nice to have a plan when the building begins, but I decided to change things up a little. The ebony wedge shape on the headplate was begging for a yellow purfling accent, so a channel is routed and the purfling is inlayed. No photos of this in action, but you can see the result.
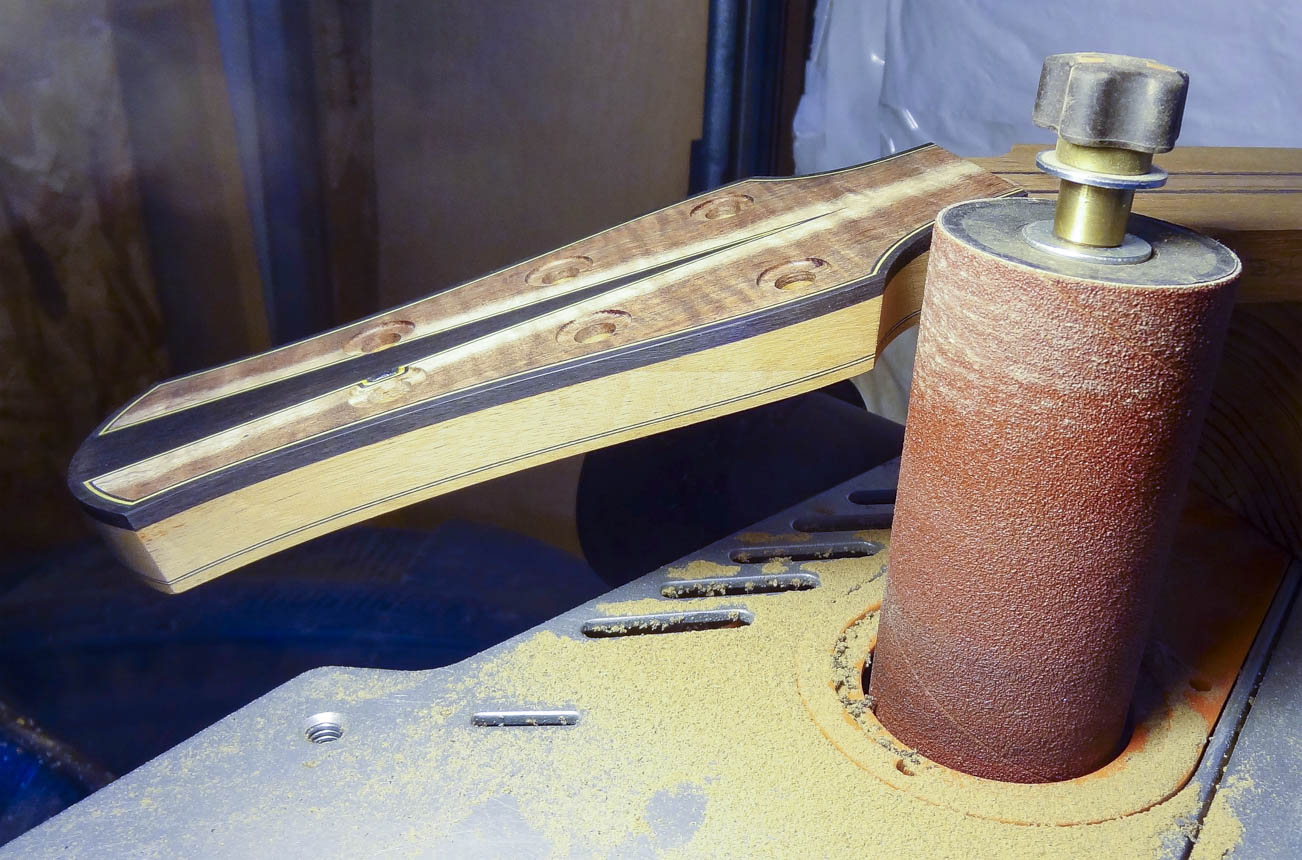
To shape the headstock, it’s first trimmed close to final shape with a bandsaw, and then routed to shape with a router table and bearing guided bit using the template as a guide. The guide is taped in position on the centerline, and care is taken while routing all of the “points” around the perimeter to prevent the wood from splintering, called blow-out.
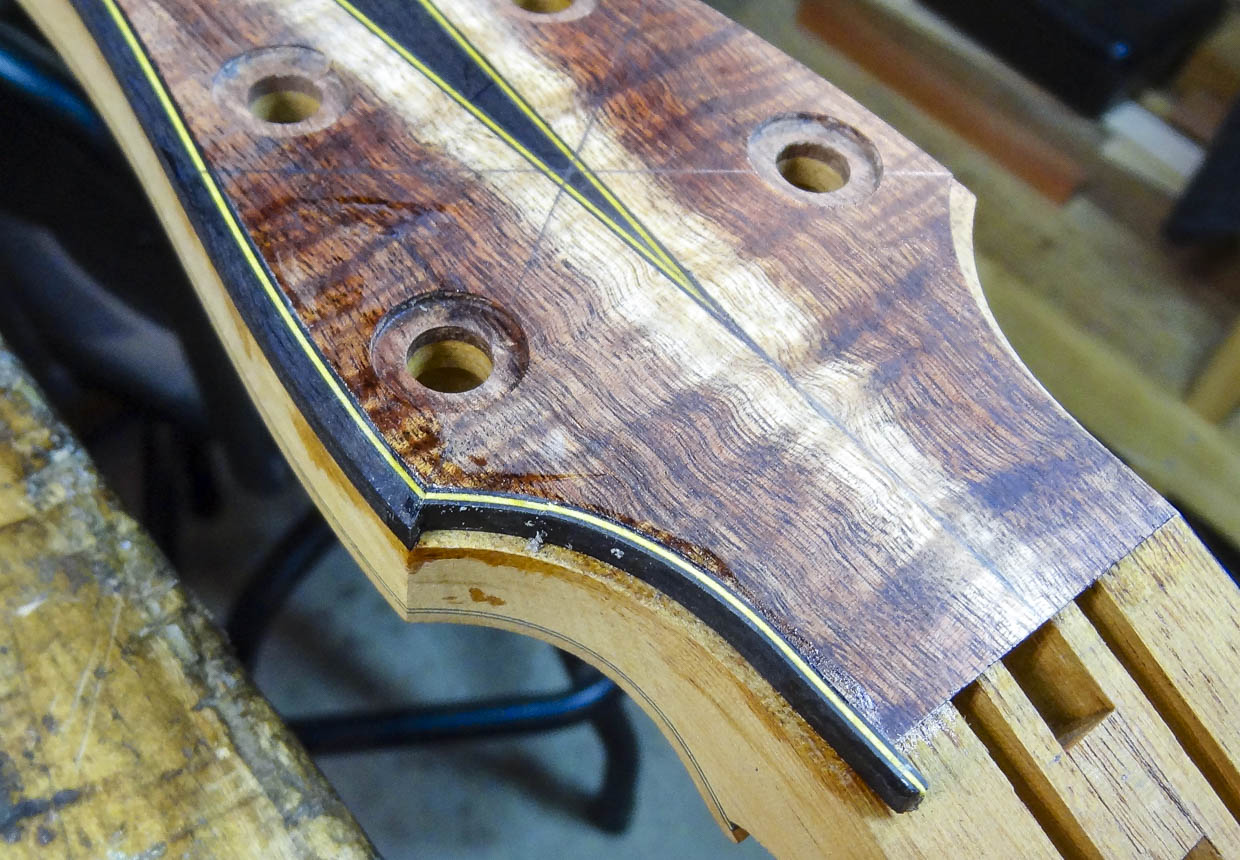
Binding and Purfling
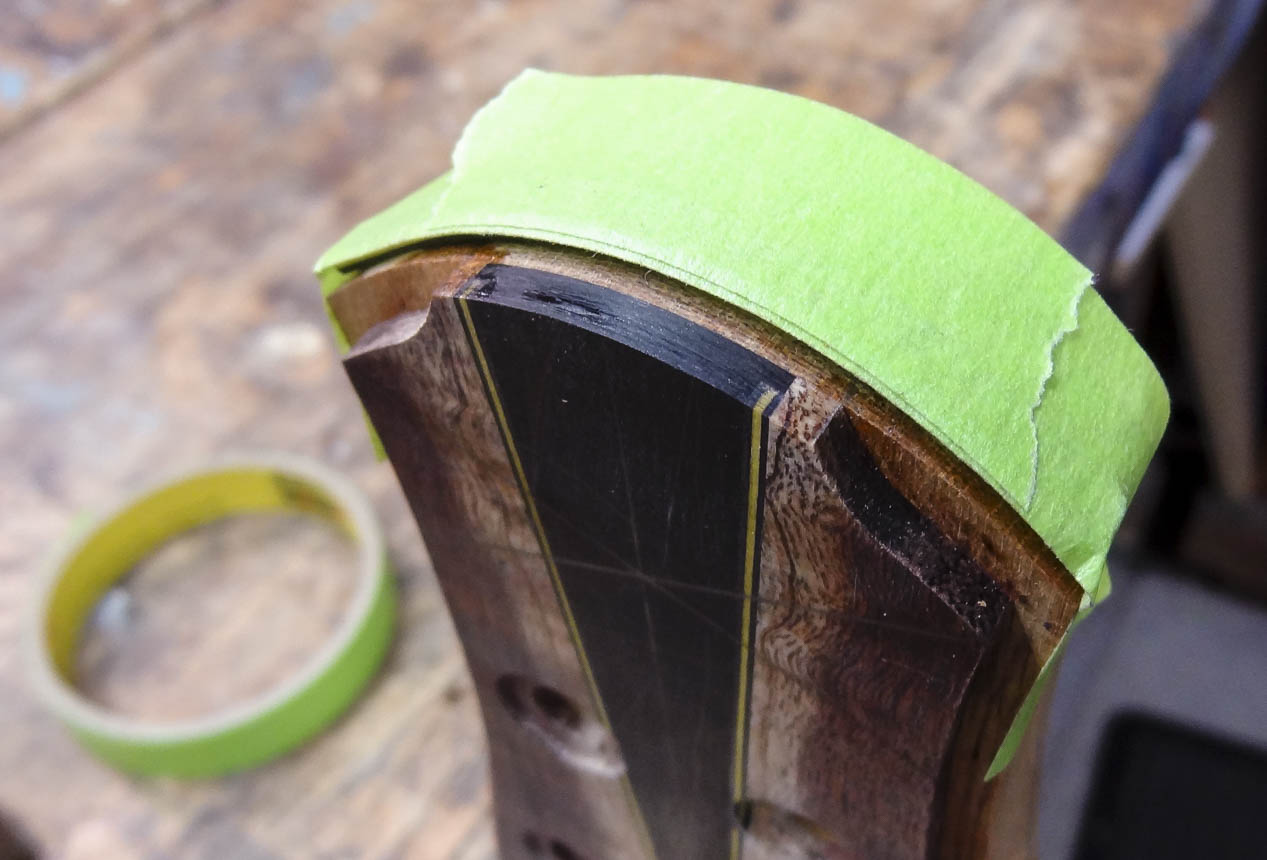
Diagonal guidelines are drawn on the face of the headplate, which makes cutting the binding & purfling miters much easier and more accurate. Cyanoacrylate glue (super glue or CA glue) is flooded around all the edges to lock the wood fibers together and help prevent more wood blow-out. The curly koa wood is very susceptible to this, and it’s done on the mahogany as an added precaution.
A router bit with a guide bearing sized for the combined thickness of the binding & purfling is used to rout the channel for the head stock binding/purfling. Unlike on the body, the binding and purfling on the headstock are the same width, so a single channel is milled to accommodate them both at the same time. Because the new purfling lines I added along the ebony wedge will be mitered to meet the periphery purfling lines, the channel at the very top of the head stock is only as deep as the outer binding without the purfling. This is done by taping a piece of the purfling to the top of the head stock and having the router bearing ride on it. This cut leaves the area near the miter intact, but some hand-work is needed to extend the purfling channel all the way to the miter point. This is similar to how the end graft miters on the body were accomplished.
For the long sides of the head stock with gentle curves, I glue the binding & purfling together as a unit, bend it on a hot pipe, and fit each length to the channel. For the sharper radii of the other sections of the head stock, laminated pieces tend to come unglued as I bend them on the hot pipe. For this reason I don’t glue the two parts together, and do the purfling first, followed by the binding for those areas.
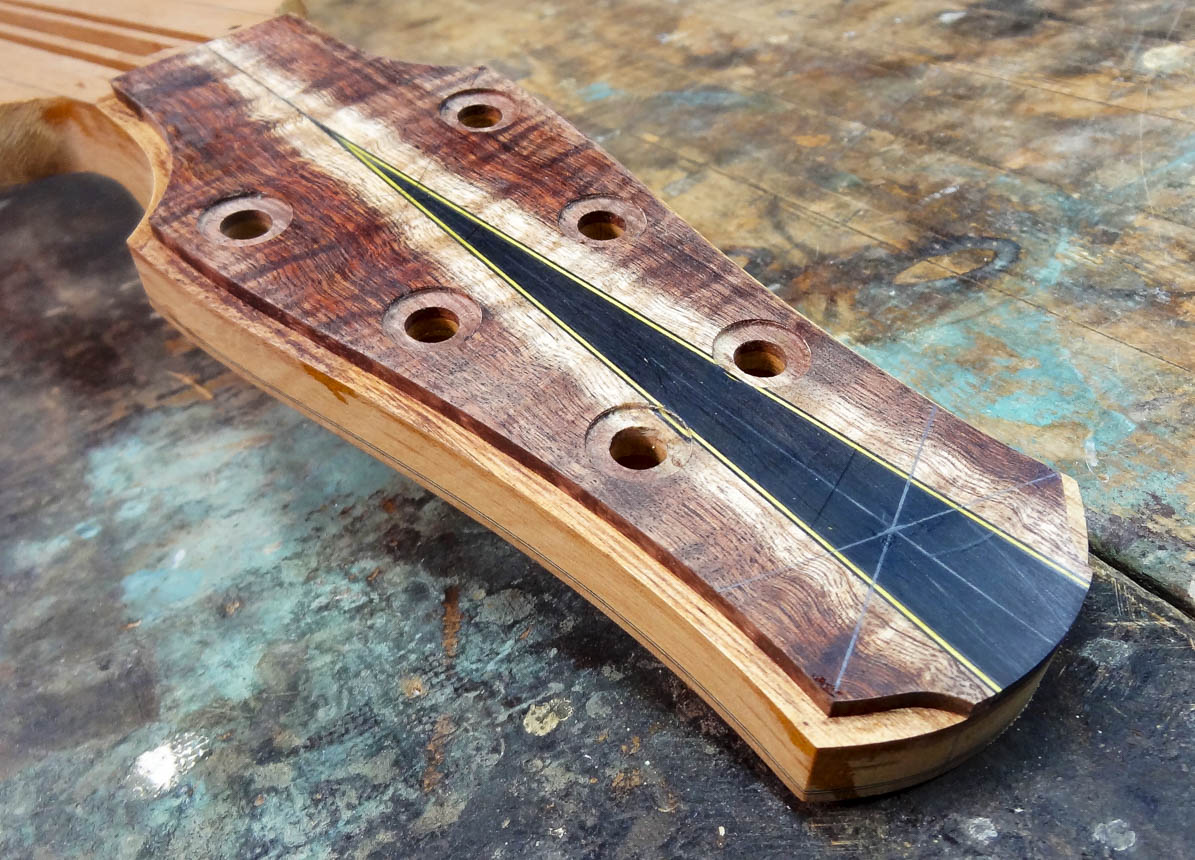
After trimming the top edge’s binding channel and putting a miter on the purfling, I fit and glue in the curved purfling to meet at the miter. With both top purfling sections done this way, the binding is then added. I work around the head stock one section at a time, taking time to get all the miters perfect.
After everything is glued in, the binding is all leveled flushed to the head-plate and sides with a scraper and sand paper. The last thing to do is re-angle the side of the head stock between where it merges with the neck and the widest point of the head stock using a spindle sander.
GLUING THE FRETBOARD TO THE NECK
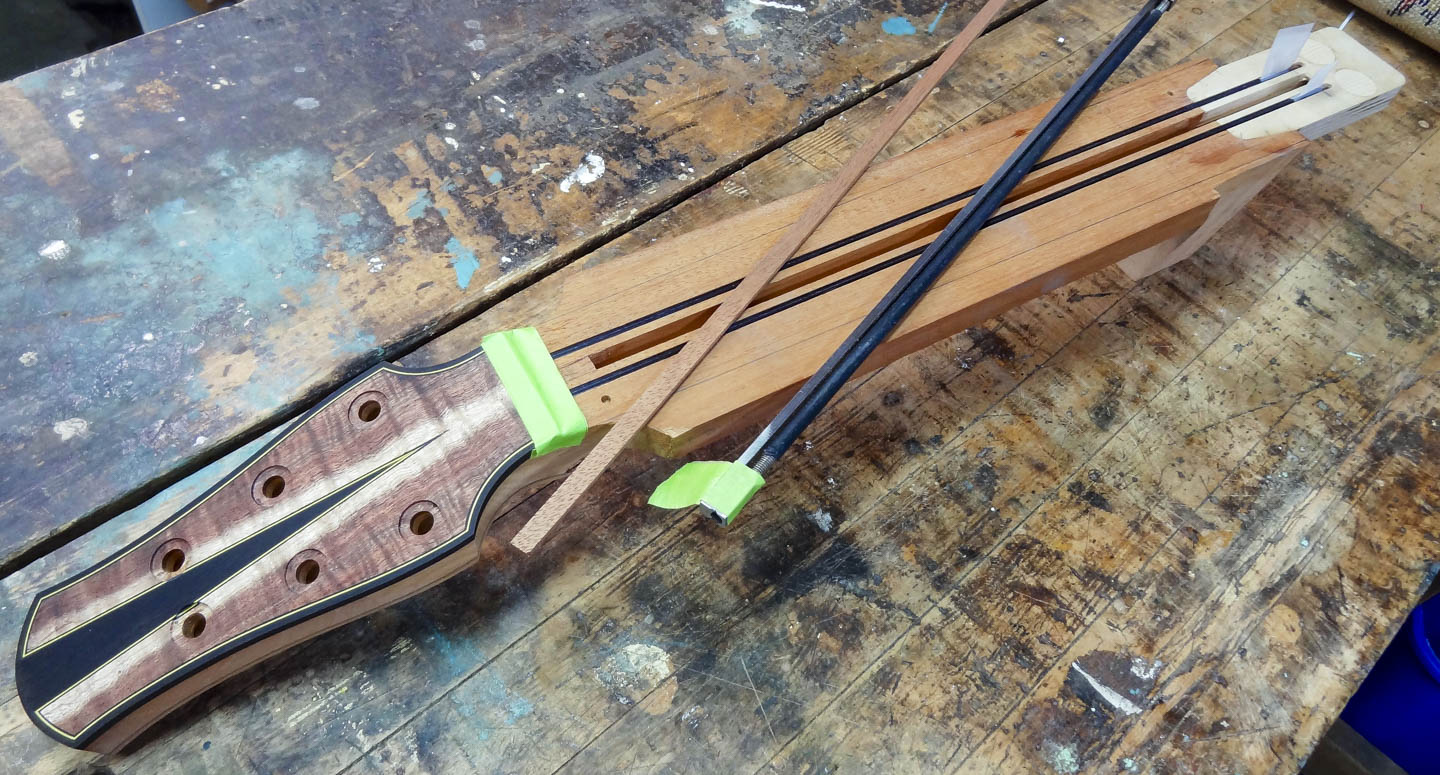
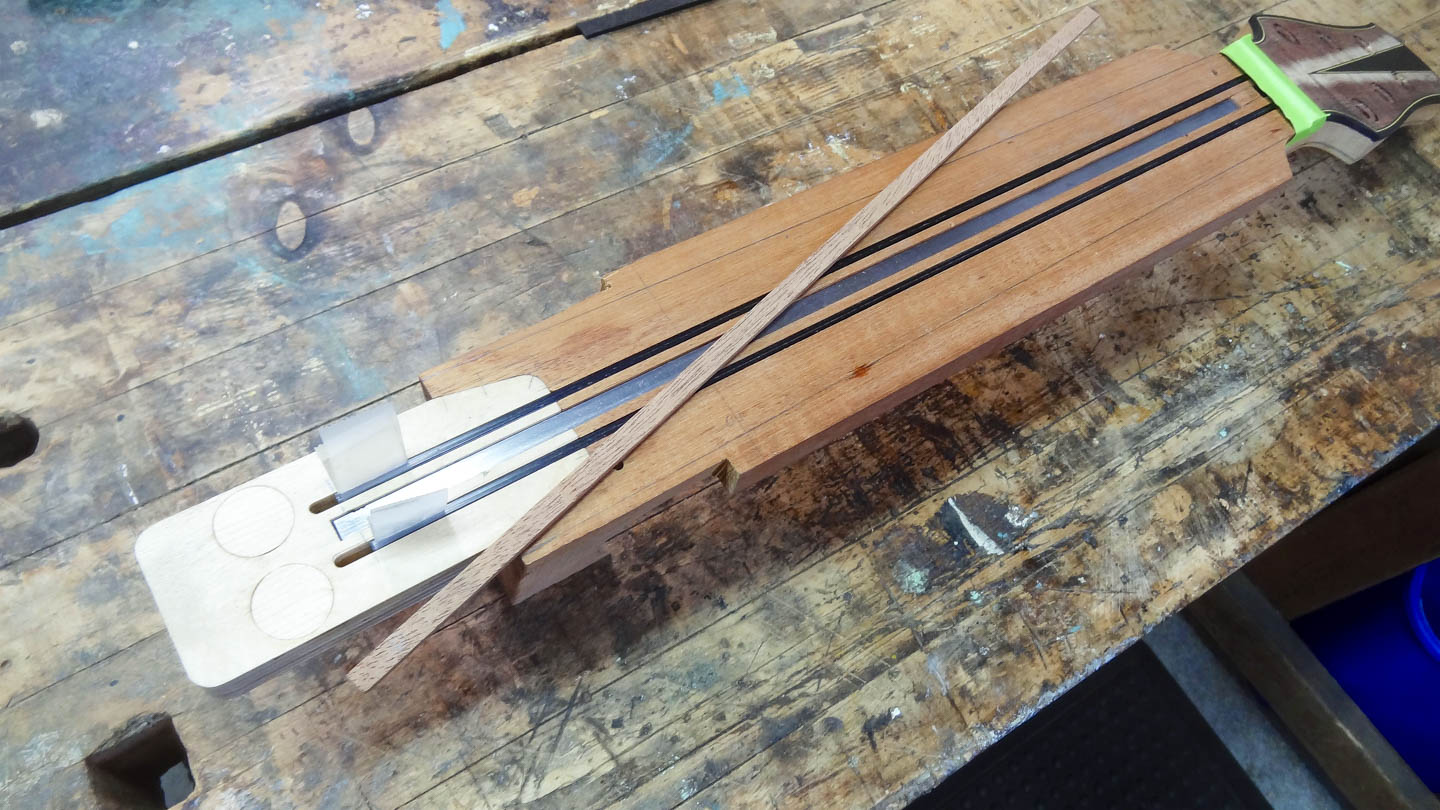
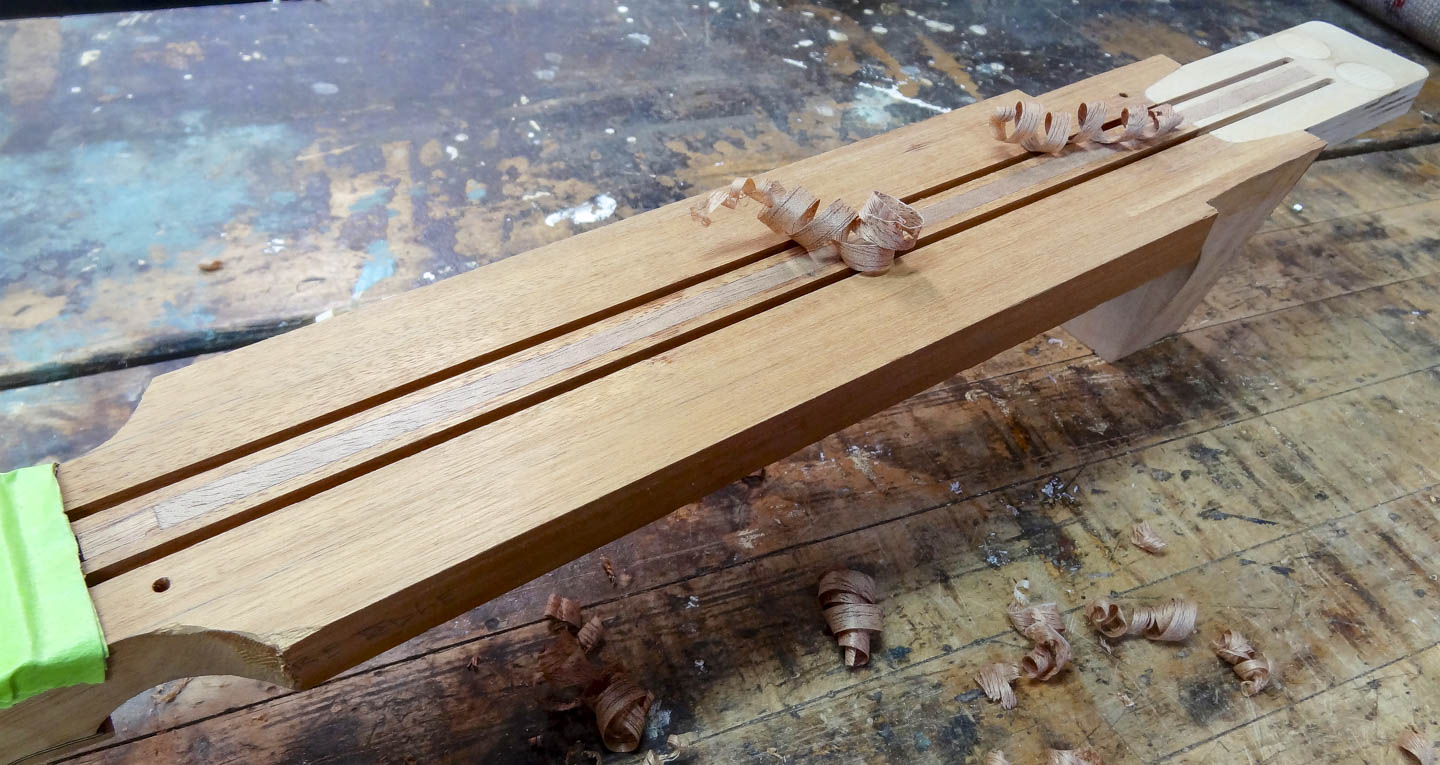
Before gluing the fretboard to the neck, the truss rod has to be fitted into its channel. A tight fit from end to end is the goal so its bending action is positively transferred to the neck. The end at the head stock is already completed, but the channel in the tongue is rounded from the router bit that milled it. I use the truss rod to determine the overall length of the channel and square up the round end with a chisel.
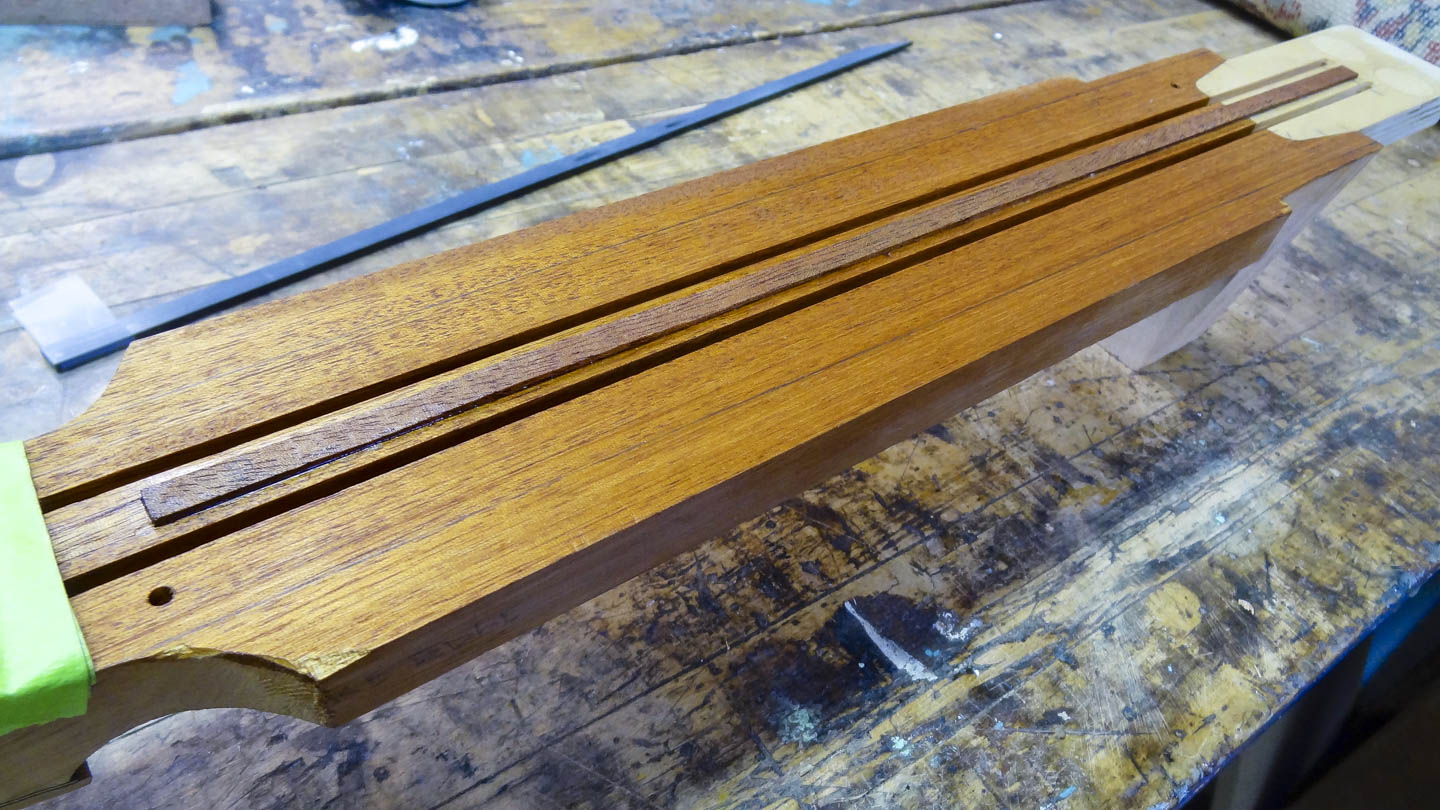
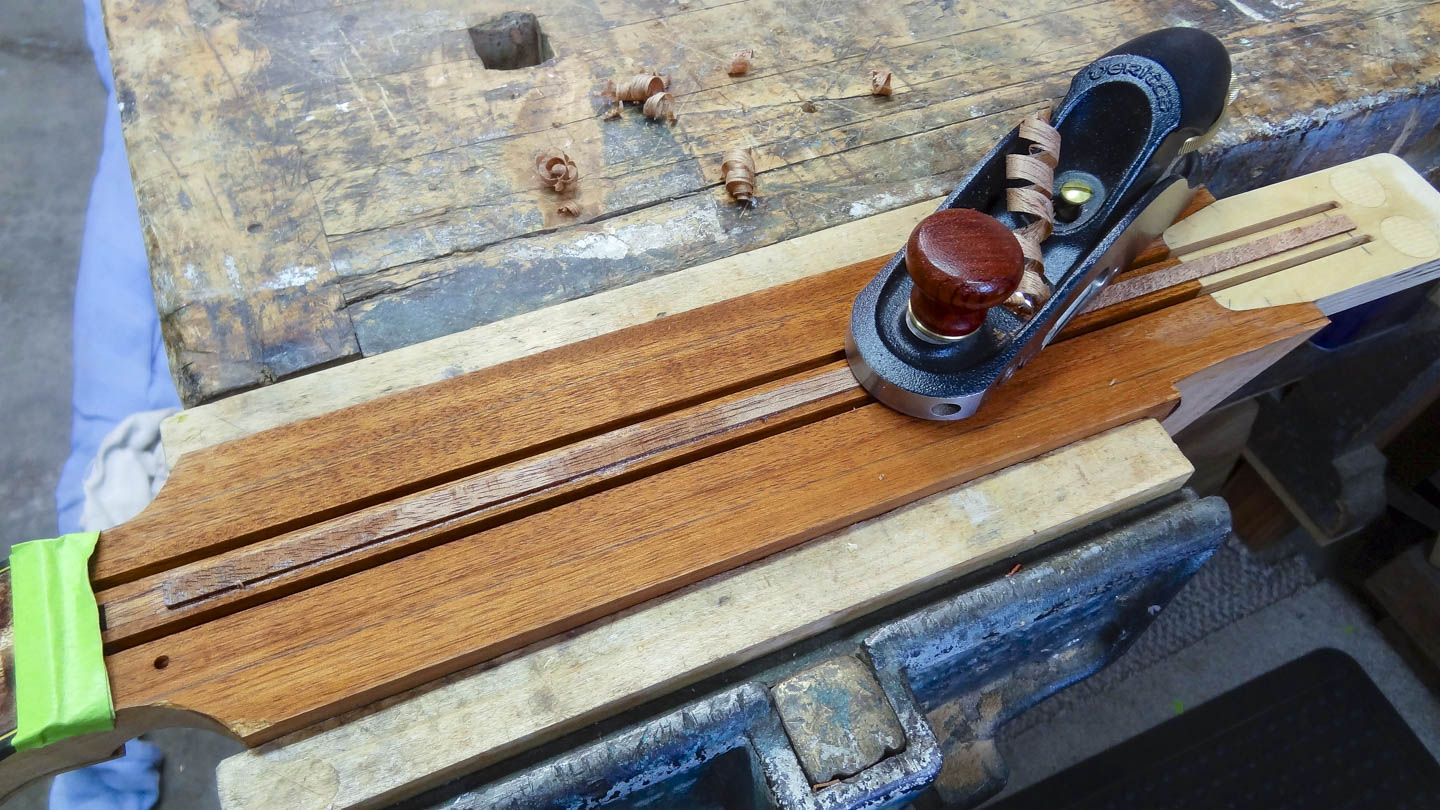
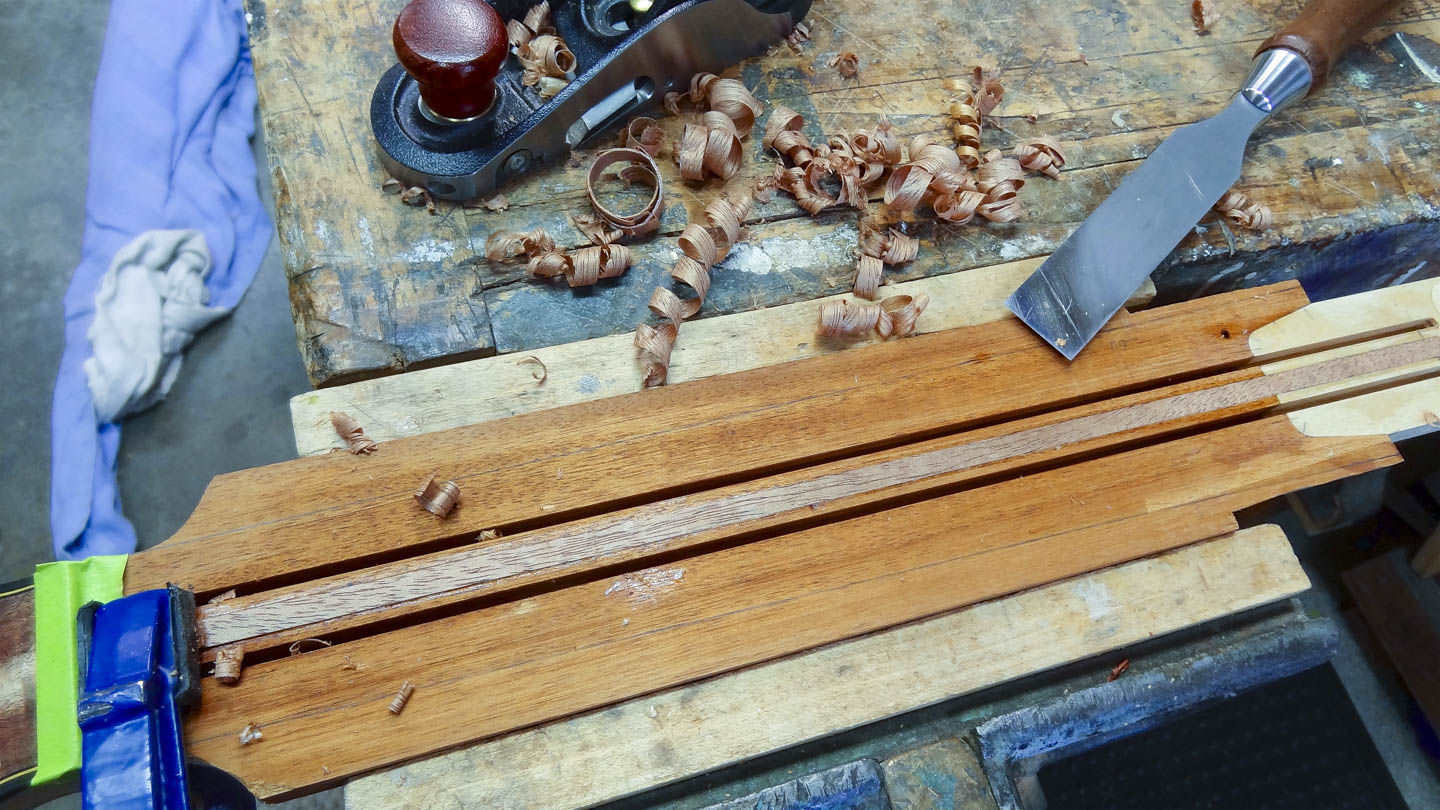
The truss rod needs to be encased within the channel. When it’s fully seated, it sits about 1/16” below the top surface of the neck which allows me to glue in a cap-strip over the top and seal it in. The cap-strip is milled from left over neck material when it was cut from the blank to form the overall thickness and taper. Before setting the truss rod in the channel for the final time, I put some dabs of silicon in the neck to prevent it from rattling when it’s not under tension. I run a bead of thick CA glue down the top of the truss rod, press in the cap-strip and then run thin CA glue all the way around the edges. The cap-strip sits a little proud of the neck and I use a block plane, scraper and sanding block to level it.
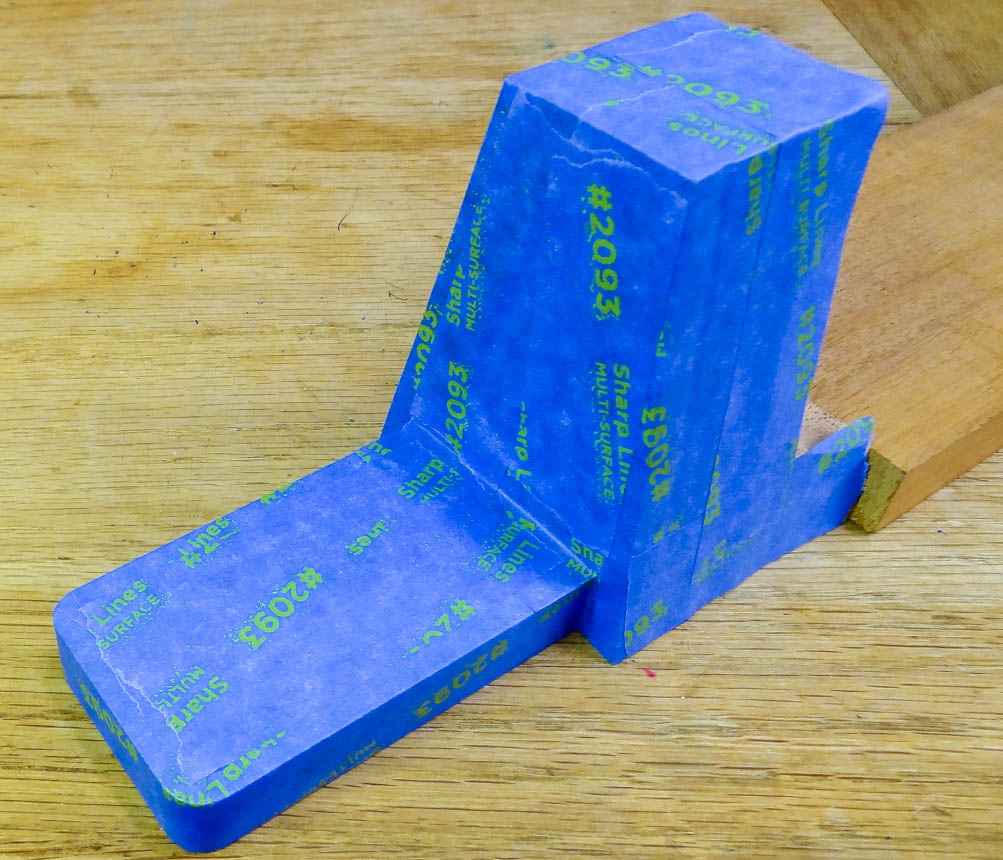
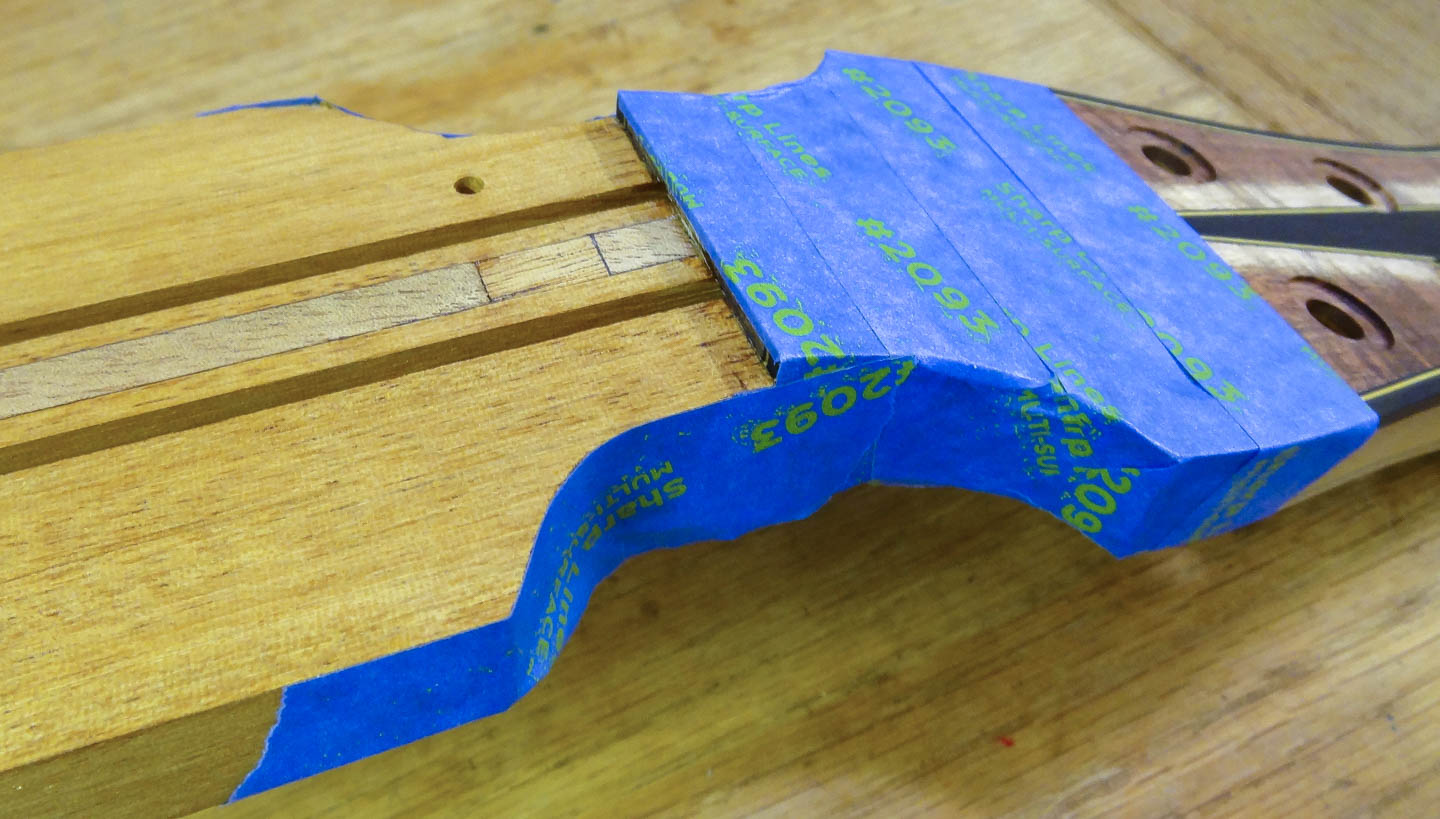
I mask off the heel, tongue and nut areas to prevent glue from going where I don’t want it to.
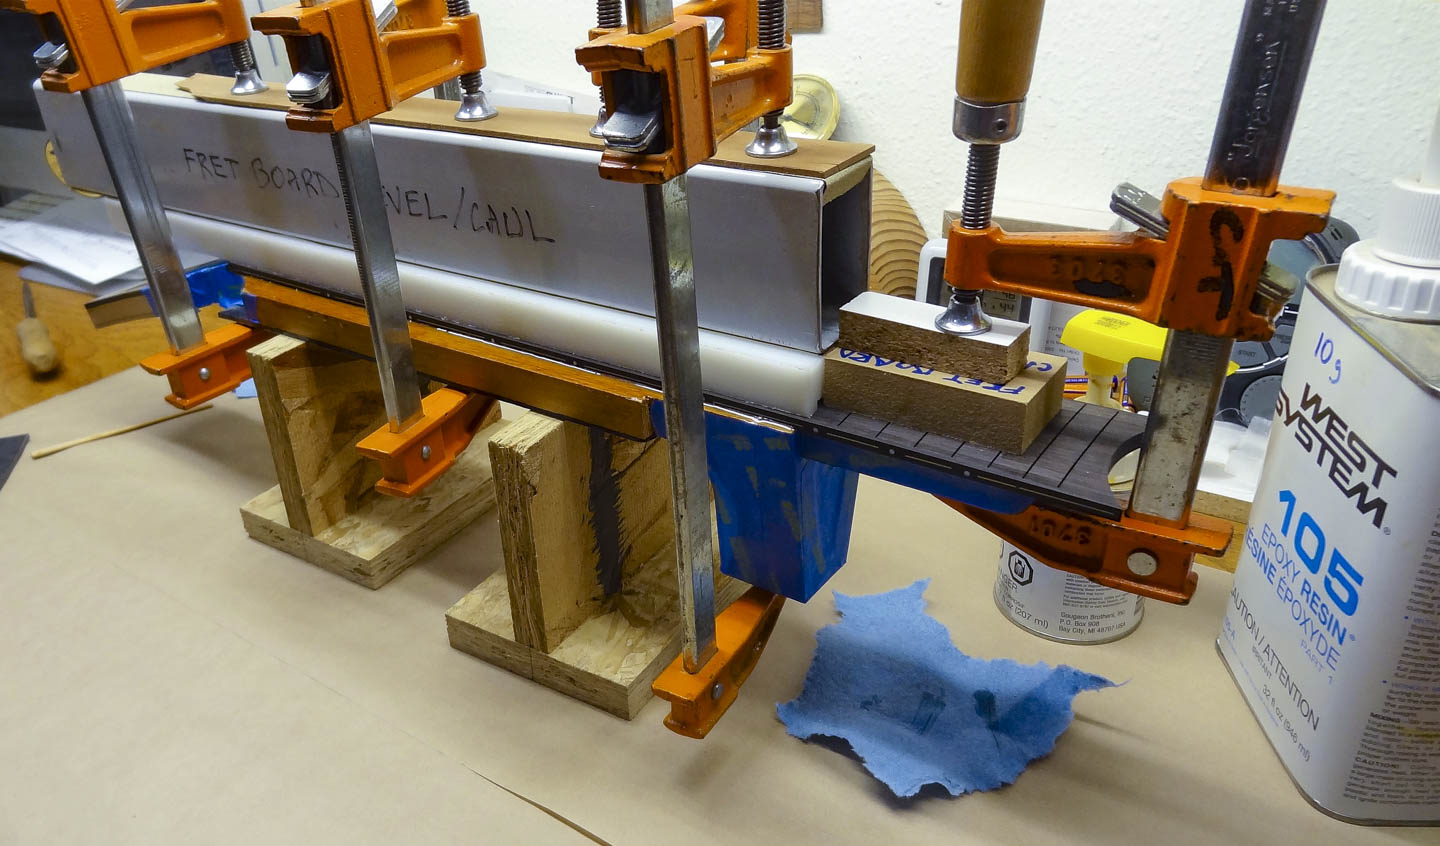
Wood and water do not get along. Wood exposed to moisture will result in some sort of warping movement like swelling, twisting, cupping or bowing. I use epoxy to glue the fretboard to the neck because I spent a lot effort to get both perfectly flat and warp-free. It doesn’t make any sense to now introduce a water based yellow or hide glue to attach the fretboard. I lightly sand the neck and fretboard to get fresh glueing surfaces, and wipe down the fretboard with mineral spirits because the African Blackwood has a lot of natural oily resins that could compromise the glue bond.
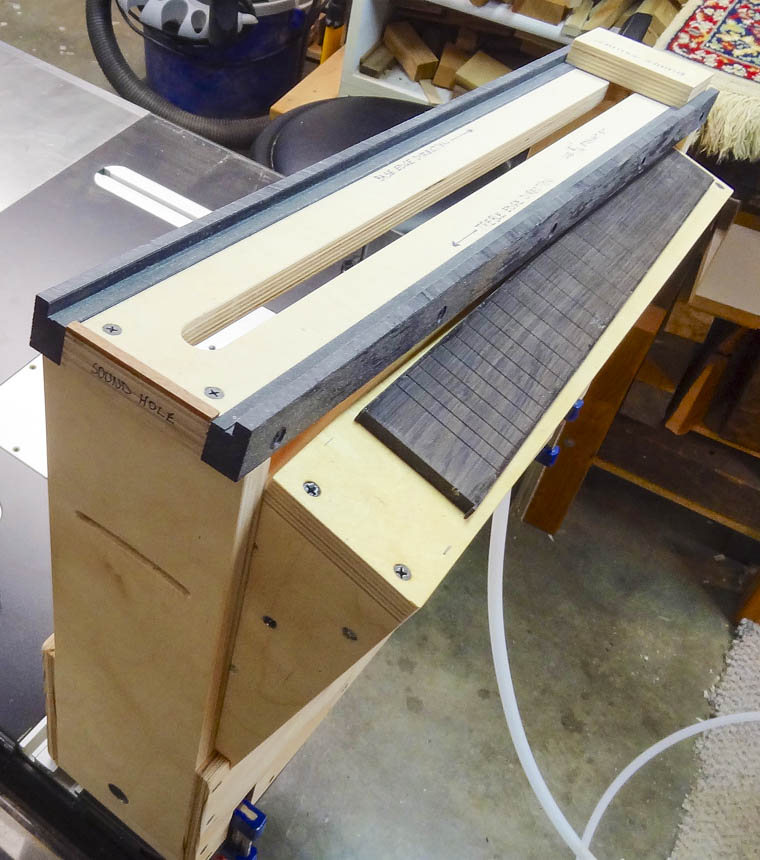
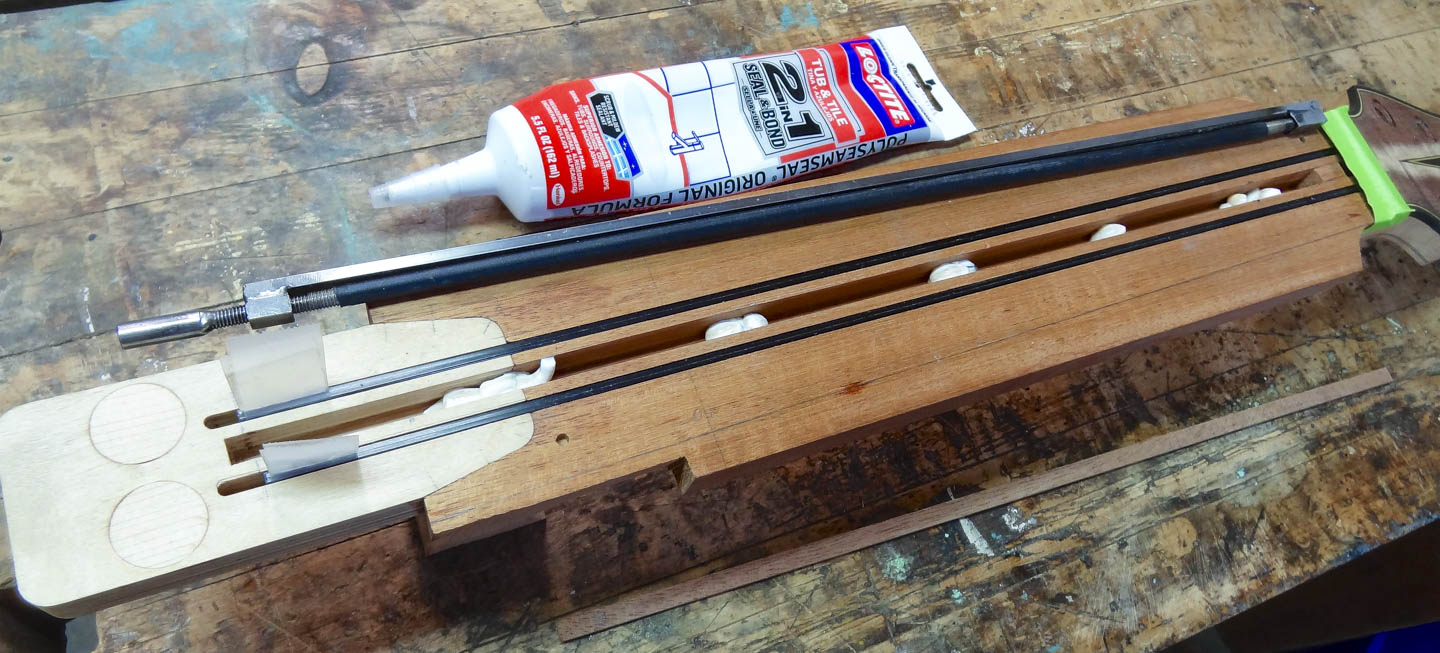
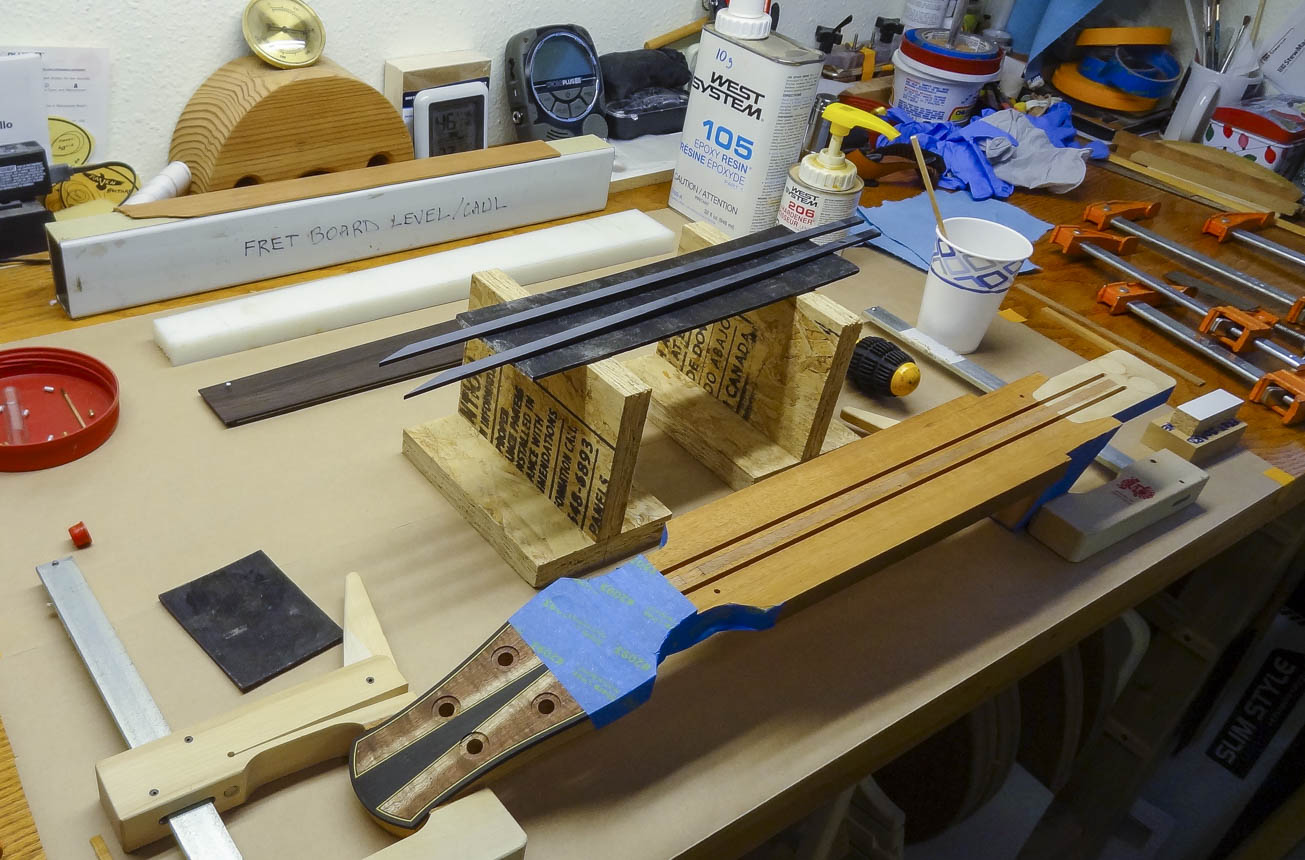
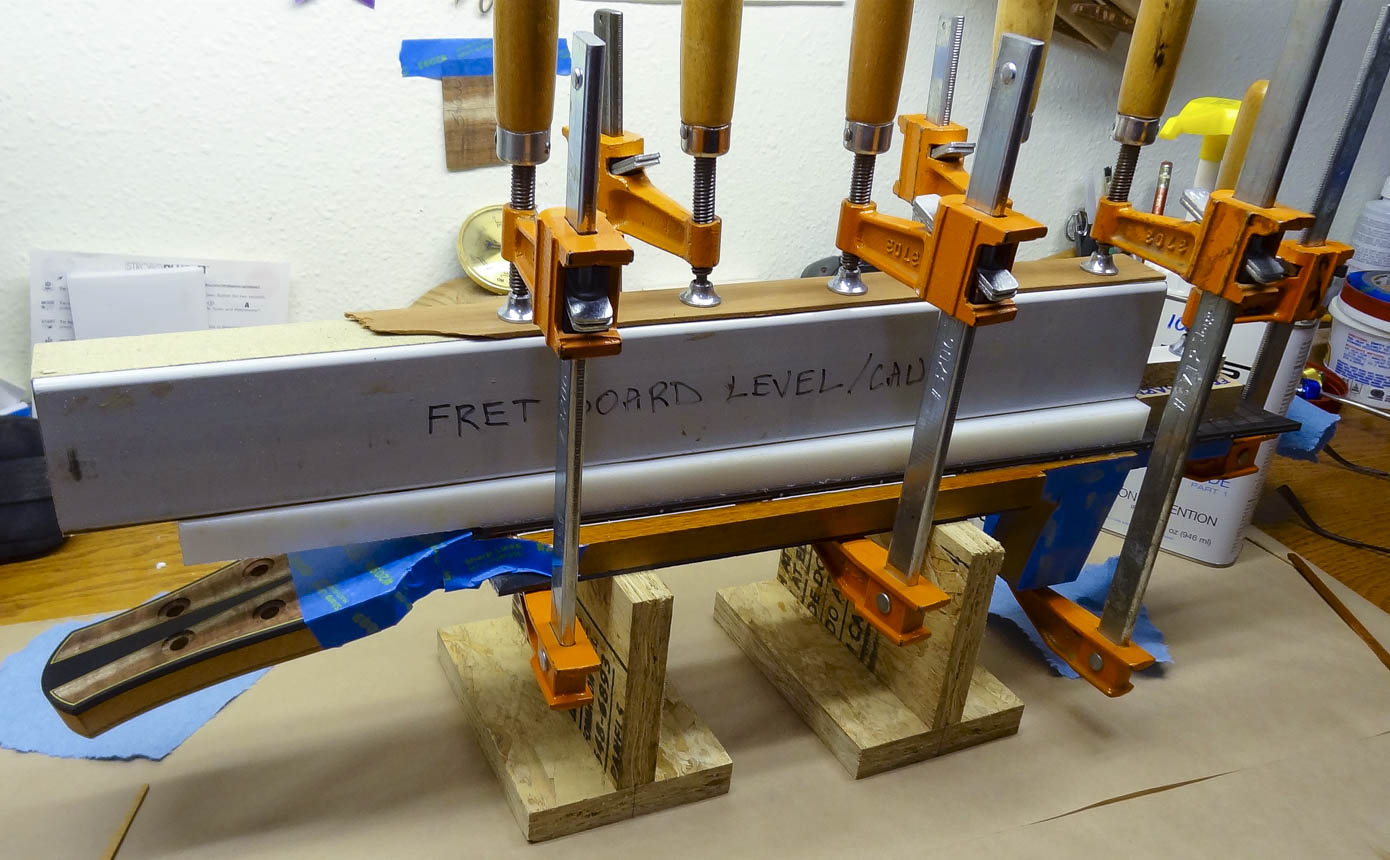
I get everything I need well organized before the glue up. A bead of glue is run down each carbon fiber channel, the angled end of the beams are inserted under the head-plate and pressed down into the channels. The glue squeezes out the opposite end of the channel and I spread it around the top of the neck. The index pins are in the fretboard and I set it in place on the neck. An intermediate clamping caul sits on top of the fretboard. This caul distributes the clamping pressure along the long edges of the fretboard. My flat sanding beam is placed on the clamping caul and clamps are added along the full length of the fretboard. Glue squeeze-out isn’t a problem along the edges of the fretboard, but I take time to get it off from around the tongue and bottom of the fretboard that will eventually lay on top of the body.
HOW I BUILD GUITARS
MATERIALS
NECK & HEADSTOCK
HEADSTOCK: HEADPLATE & VOLUTE
SIDE BENDING
THE RIM
KERFED LINING
CUTTING THE RIM TO WIDTH
SIDE BRACES
TOP & BACK PLATES
ROSETTE
BRACING THE TOP
BRACING THE BACK
THE BOX
BINDING & PURFLING
This Page
FITTING THE NECK TO THE BODY
THE FRETBOARD
HEADSTOCK SHAPE, TUNER HOLES, BINDING & PURFLING
GLUING THE FRETBOARD TO THE NECK
SHAPING THE NECK
SHAPING THE HEEL
SHAPING THE VOLUTE
THE BRIDGE
FRET JOB
THE FINISH
ODDS & ENDS
SET UP & FINAL DETAILS